The tools already in your shop pick the project for you.
A jigsaw and a drill handle most of what follows, whether that means garden markers cut from a single strip of wood or an easy picnic table that needs a full weekend and level ground for the legs.
Pallet slats and yard branches keep the cost close to zero for the planter and the woven branch raised bed, while the workshop workbench calls for sturdier lumber and solid fasteners.
Match the build to the saws you own and the hours you have, and the rest sorts itself out.
1. DIY Laptop Stand
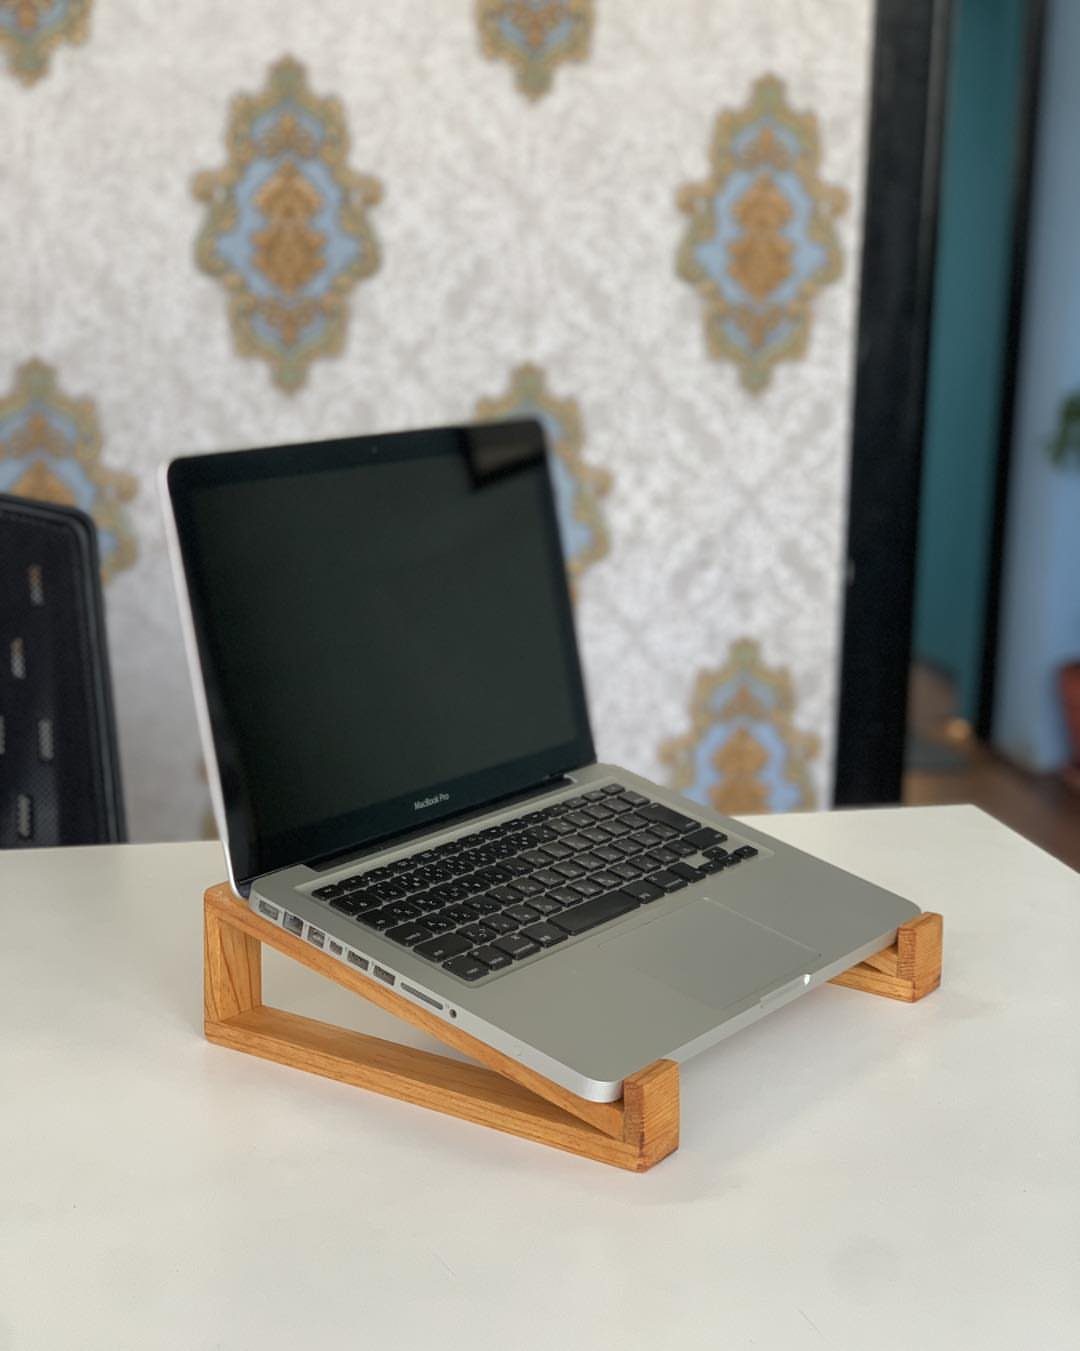
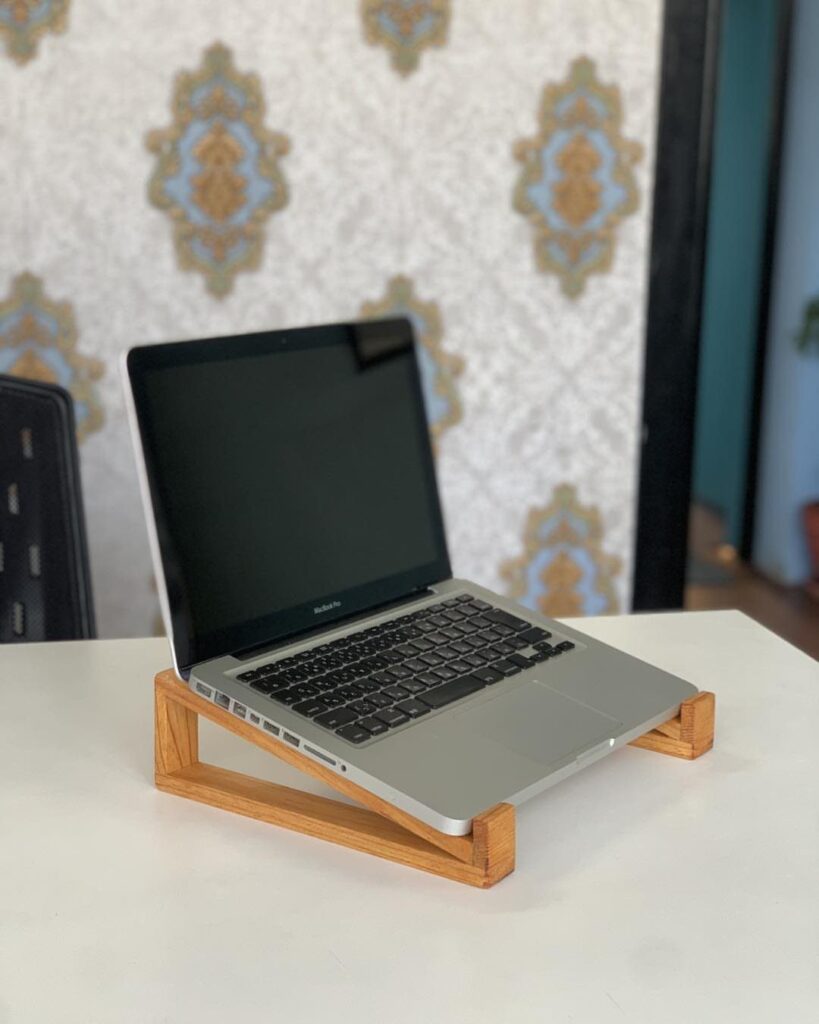
A laptop stand earns its place on the desk by lifting the screen closer to eye level, which is the whole reason to build one. The light-brown wood in this version keeps the look warm against a white desk.
A slanted, open design also leaves room under the laptop for a notebook or a charger. Sand every edge smooth, since your wrists will rest near them all day.
For an afternoon build, one board and a few cuts are plenty.
2. DIY Wooden Plant Hanger
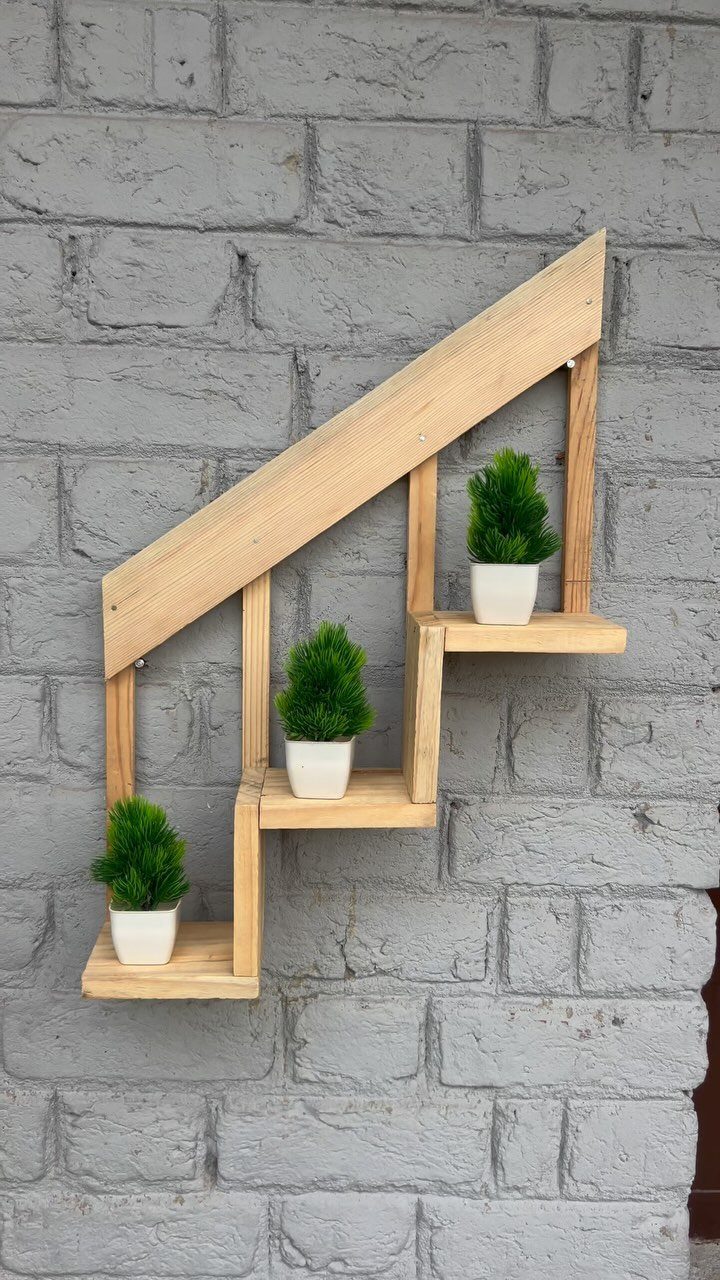
Plant hangers don’t have to dangle from a hook. A stepped wall shelf like this one gives three small pots their own tread, and the staircase shape keeps each plant from crowding the next.
Mounting it on brick means masonry anchors and a drill with the right bit, so plan for that before you cut any wood. Small pots suit it best; save the heavy ones for the floor.
3. Wooden Cutting Board Stand
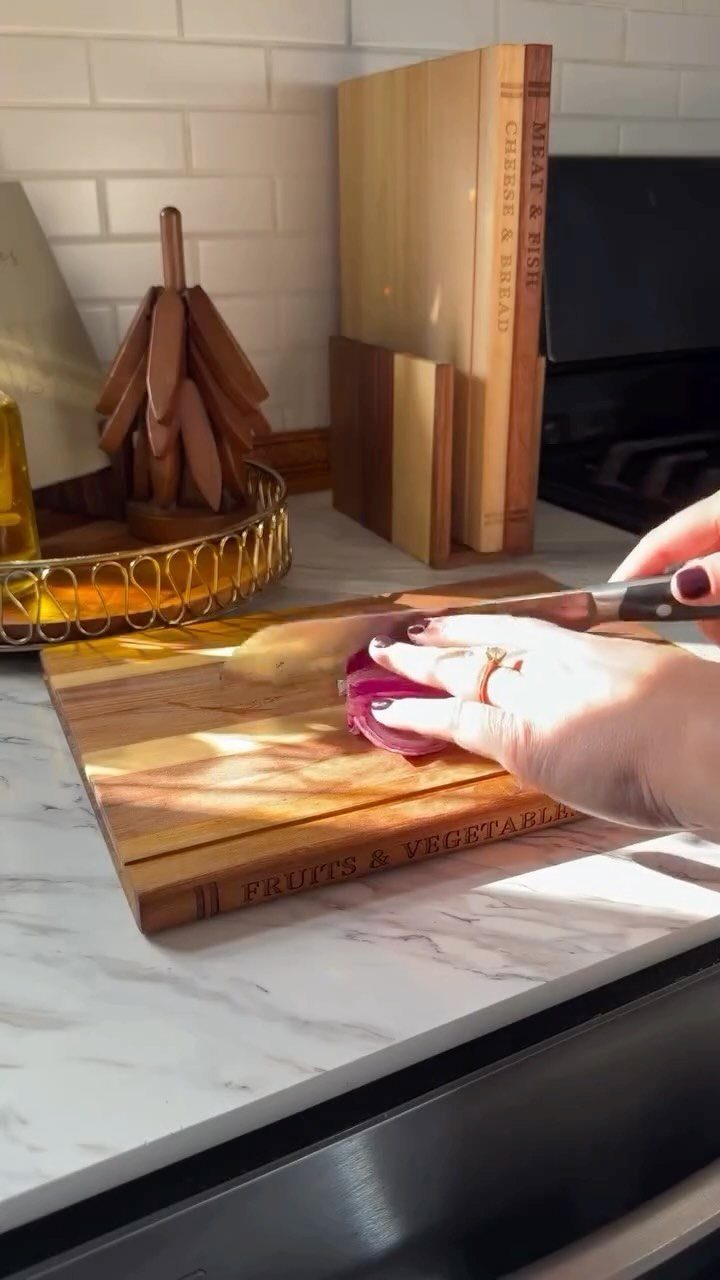
Cutting boards stacked in a drawer get lost, and the one you want is always at the bottom.
A wooden stand holds them upright so each board is easy to grab, and labeling them "Fruits & Vegetables" or "Meat" keeps your prep sorted.
Cut slots wide enough for your thickest board, then sand the inside edges so nothing snags.
I like leaving the stand on the counter. It looks tidy, and the boards dry out standing up.
4. DIY Spice Rack
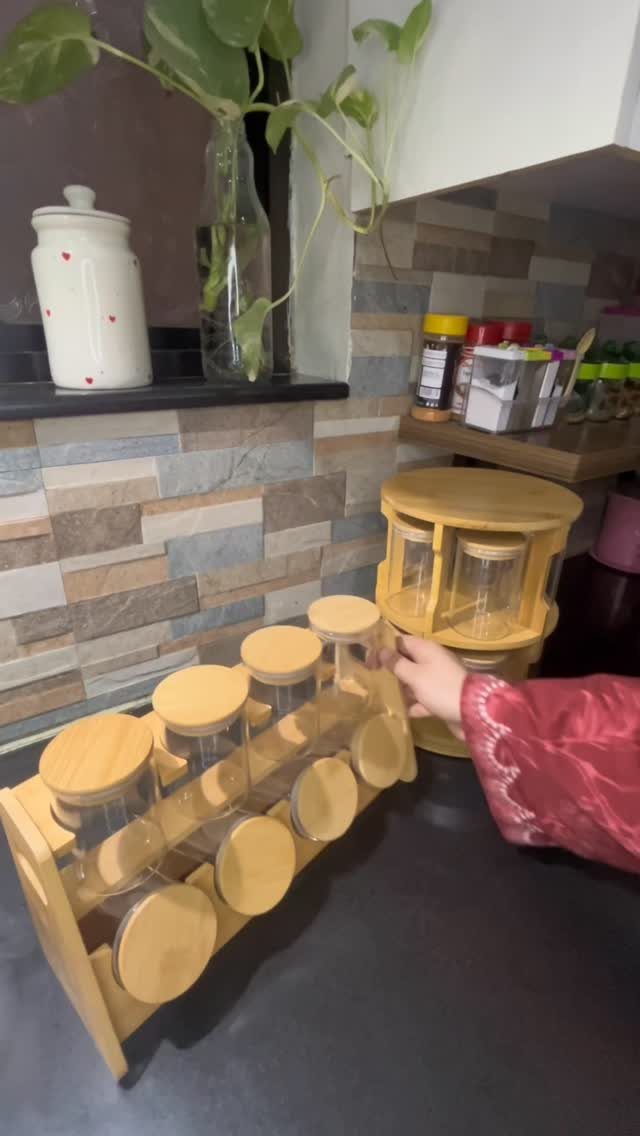
A wooden spice rack puts glass jars in a single visible line, so you stop buying a third jar of cumin. This one sits on the counter, which makes it quick to reach while you cook.
Matching jars with flat lids keep a spice rack looking tidy and make the labels easy to read, and light-colored jar tops stand out nicely against dark wood. A small lip on each shelf keeps them from sliding off.
5. DIY Dog Bowl Stand
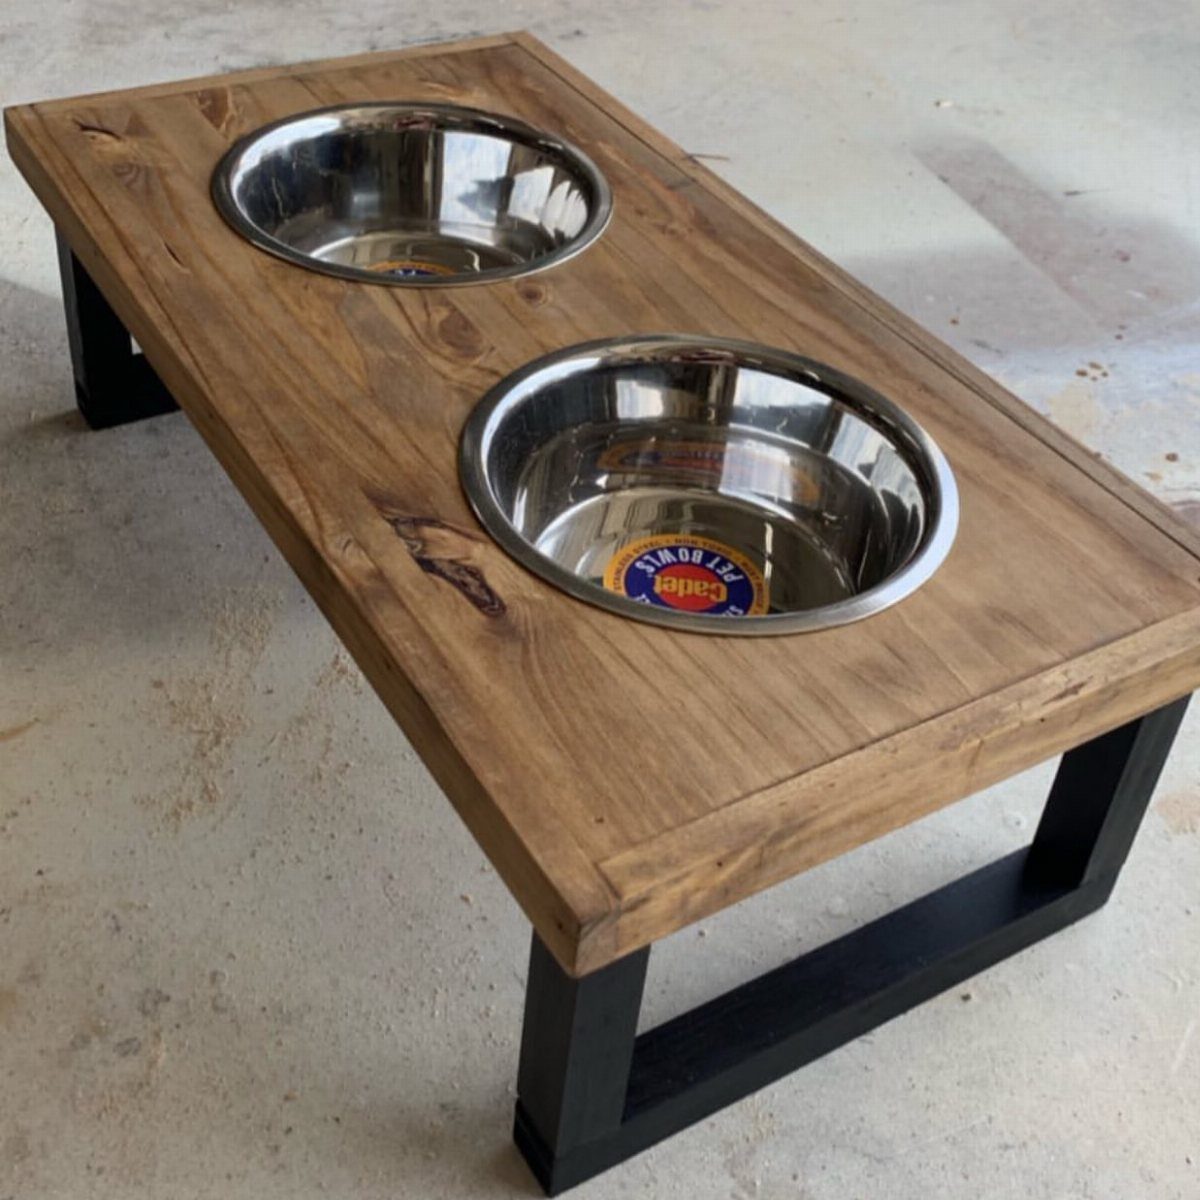
Raised bowls save a dog from bending down to eat, and this build pairs a wooden plank with black metal legs for a clean, modern look.
Stainless steel bowls sit in holes cut into the plank, so trace the bowl’s rim, cut just inside the line with a jigsaw, and let the lip hold the bowl in place.
Trace each bowl’s rim onto the wood, then cut the openings slightly smaller so the rims rest on top. A jigsaw handles it.
Sand the plank well and seal it, since bowls will get splashed. Choose leg height to match your dog’s size.
6. Wooden Pallet Planter
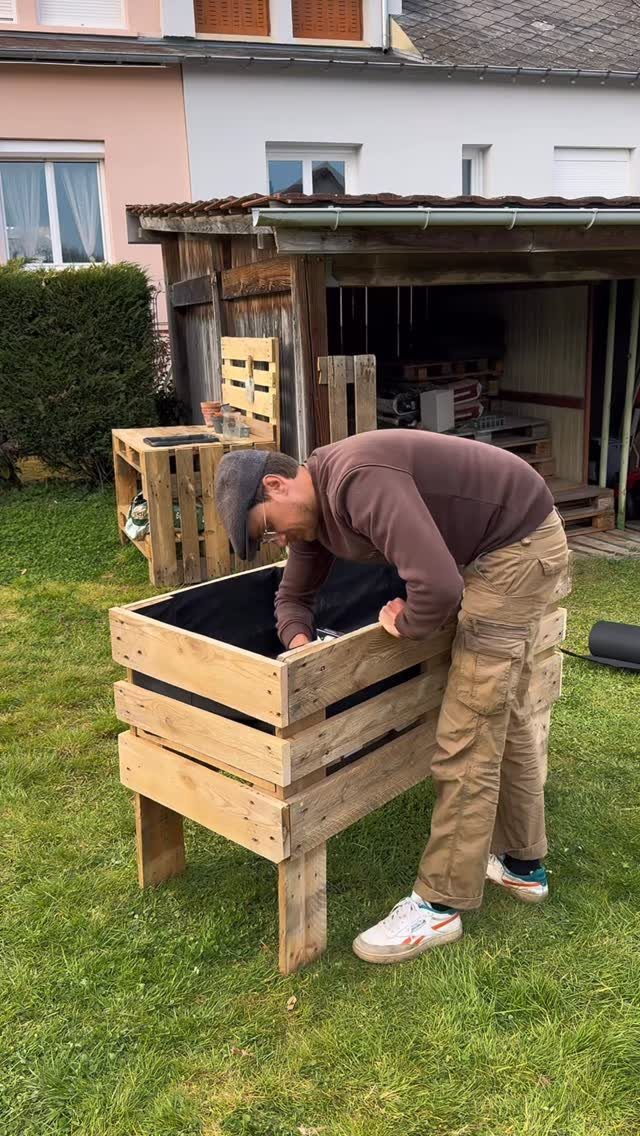
Pallets are free or close to it, which makes a planter box one of the cheapest builds you can take on. Slats pulled from a pallet and screwed into a square frame give you a large bed for a backyard.
Pry the boards off carefully, since old nails split the wood. Sand rough spots before you assemble.
A big planter gets heavy once filled with soil, so set it where you want it before you plant. I’d build it in place and skip the moving.
7. DIY Step Stool
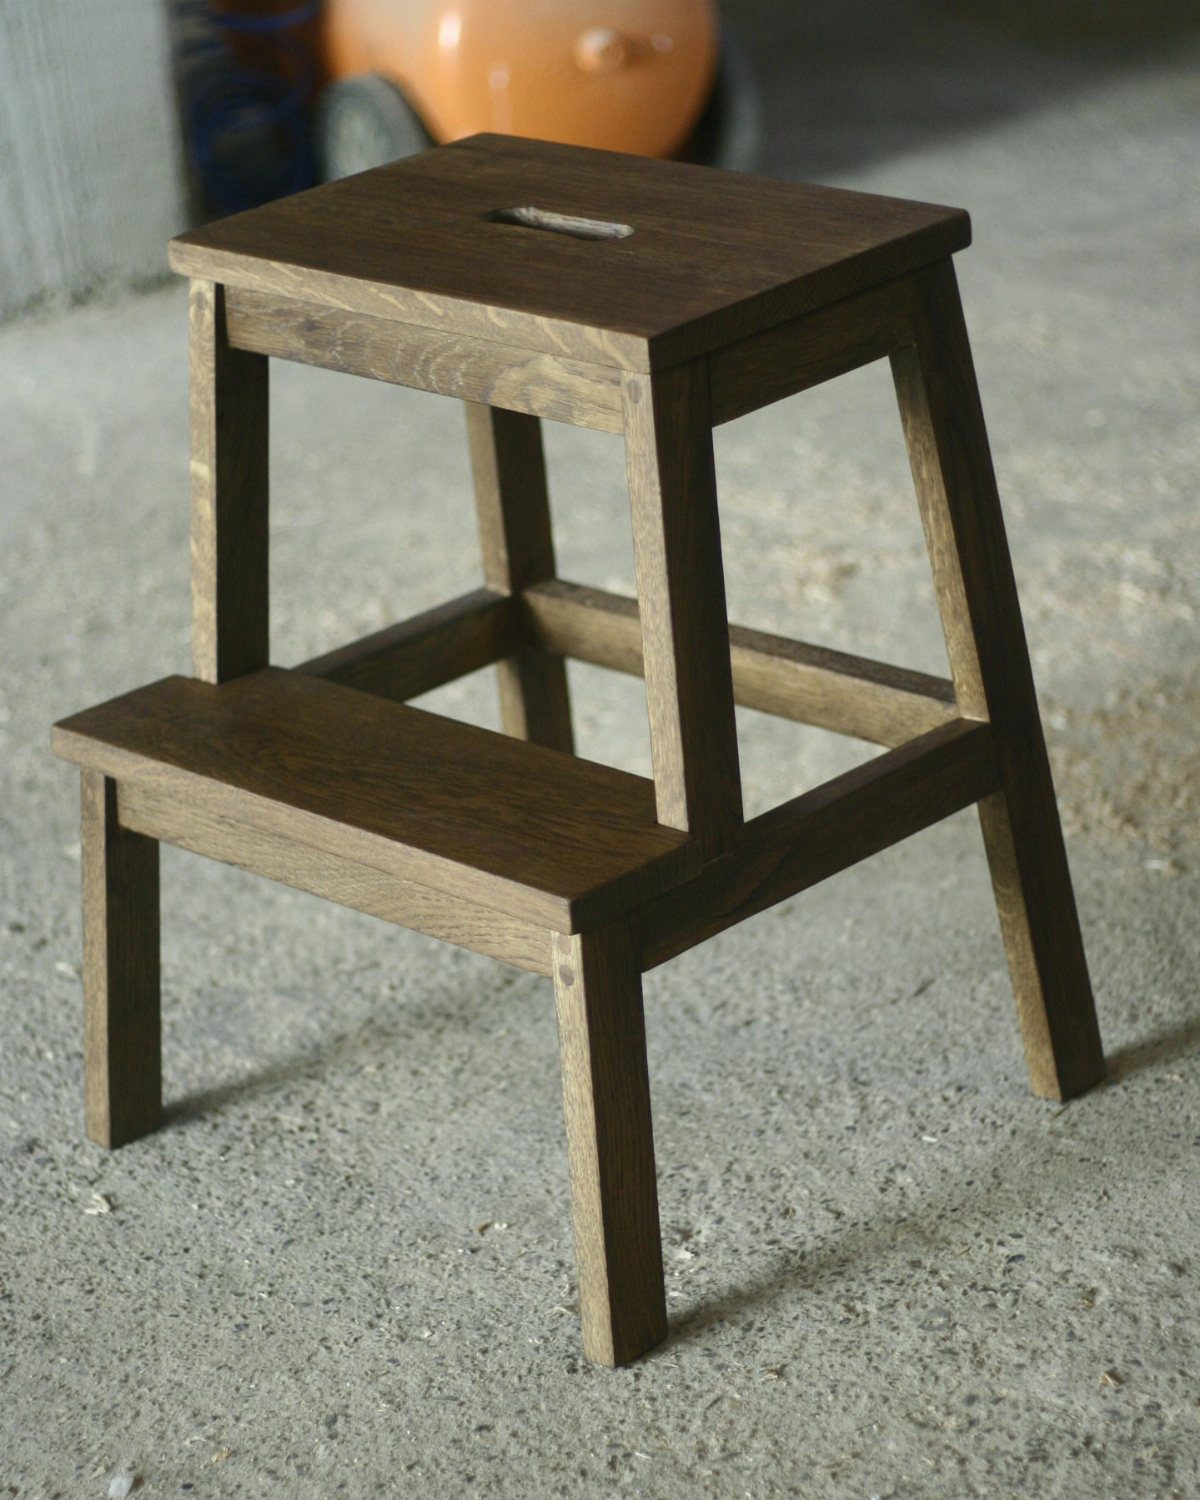
A two-step stool with a handle cutout is a build a kid can actually use: the handle makes it easy to carry from the bathroom sink to the kitchen counter.
Dark brown stain hides scuffs from small shoes better than a pale finish would.
Cut the handle opening with a jigsaw, then sand the inside curve until it feels smooth under your fingers. Round every step edge too, since kids tend to climb in a hurry.
Skip a wide, tall design. 2 low steps are plenty.
8. Wood Picture Frames
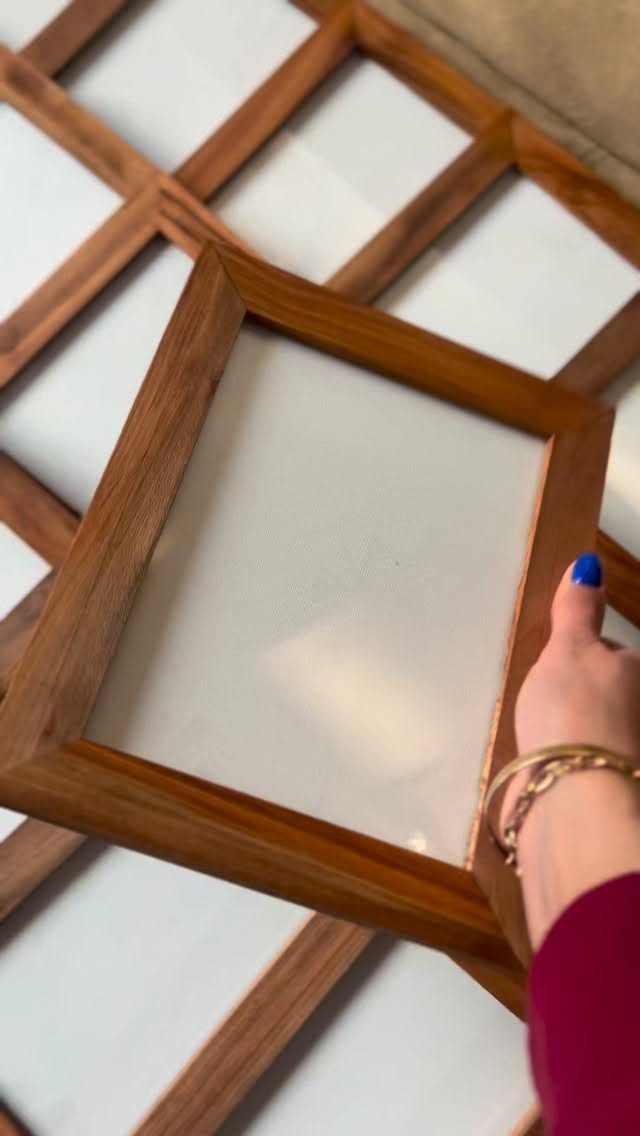
Scrap wood is the best reason to make frames yourself, because a frame only needs short offcuts.
Cut every side to the same length so the corners meet cleanly, and sand before you glue. Mixing wood tones across a set looks deliberate, not mismatched.
Use the offcuts you already have before buying anything new.
9. Wood Wall Art
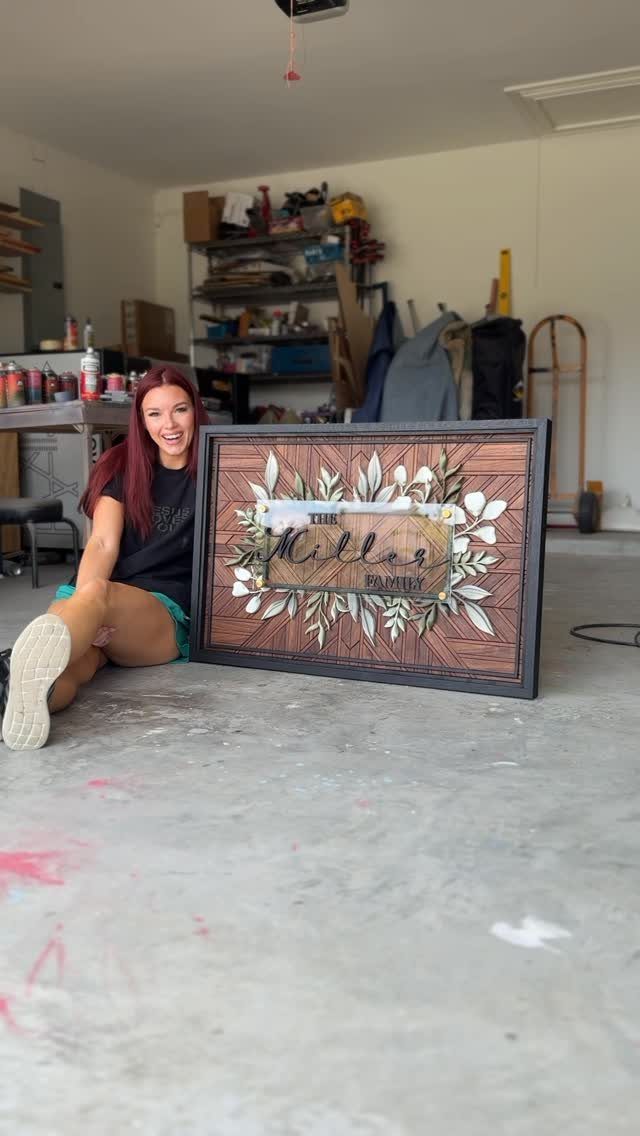
Carved floral details and a lettered family name turn a plain wood panel into a piece that belongs over a mantel or entry wall. A large rectangle gives the lettering room to breathe.
Plan the layout on paper first. Names are unforgiving, and a crooked letter is hard to hide once it is cut or burned in.
I’d choose a smooth hardwood board for the carved flowers, since crisp lines depend on a clean surface. Sand it well, then add a finish to bring out the grain.
10. DIY Candle Centerpiece
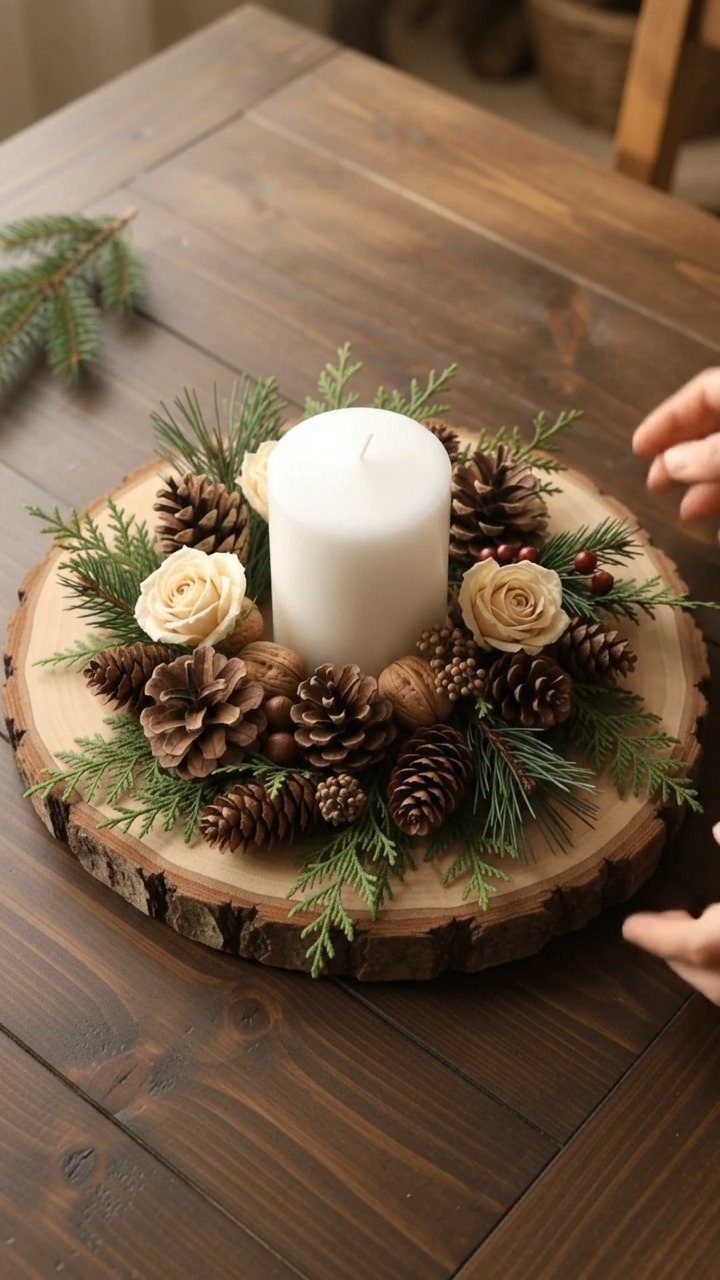
A wood slice makes a rustic base for a pillar candle, and the pinecones and greenery tucked around it fill the rest. It works on a dining table or an entry console with no extra fuss.
Sand the slice flat so the candle stands straight. Arrange the pinecones, roses and evergreen sprigs in a ring, and glue the pieces that tend to shift.
Keep dried or faux greenery a safe distance from the flame, and never leave a lit candle unattended. Battery candles are the safer swap.
11. Easy Picnic Table
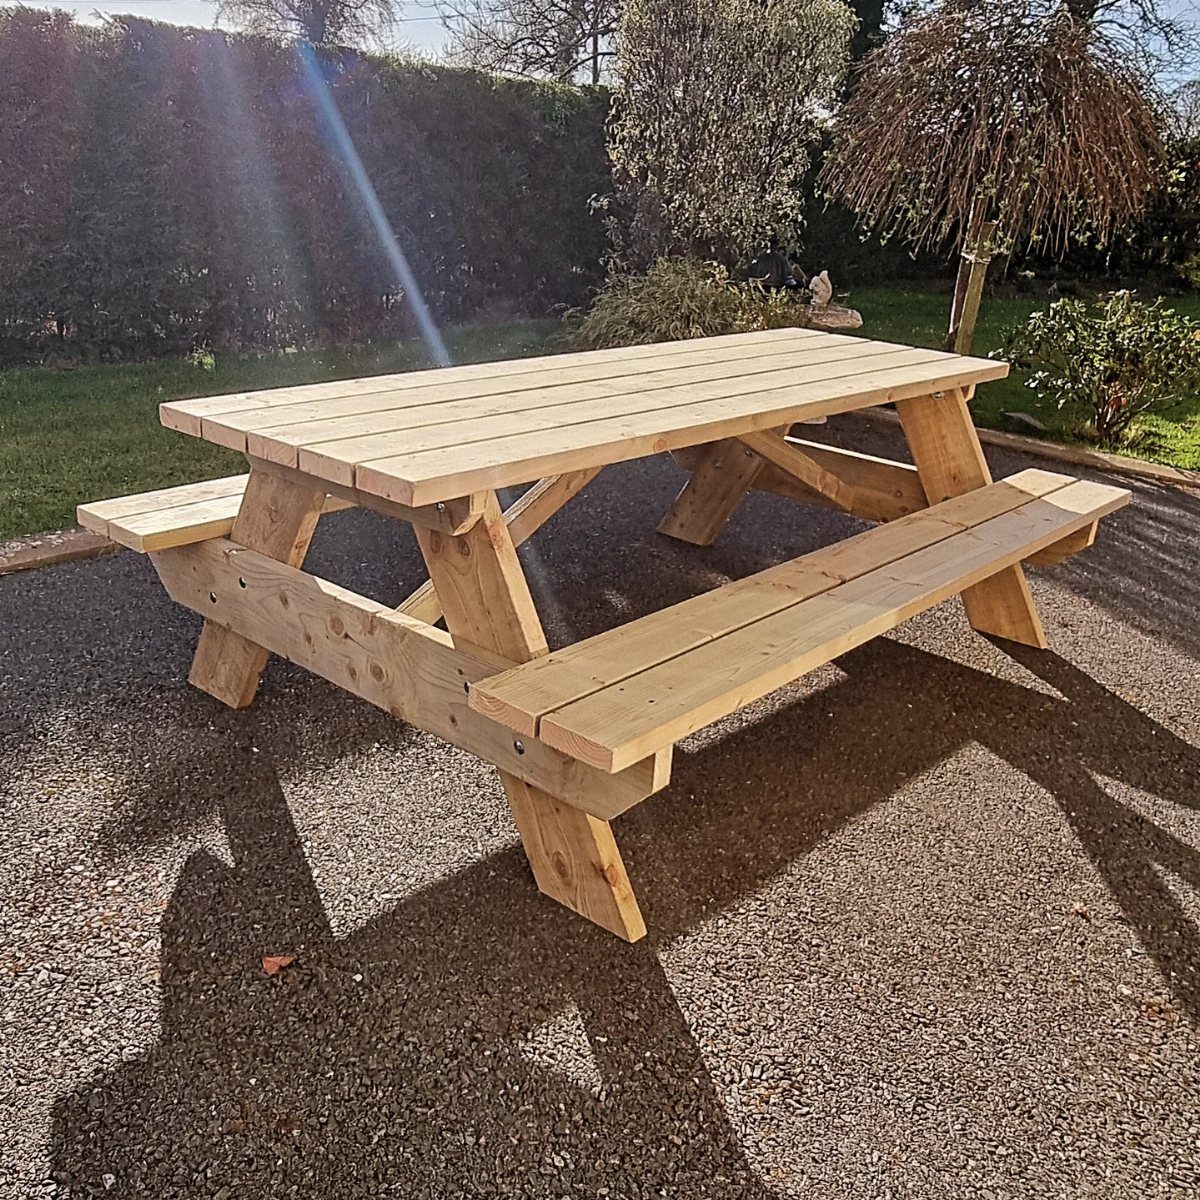
Attached benches make this picnic table sturdy and simple: one piece of furniture, nothing to slide around. Set on a gravel patio beside a hedge, it makes a quiet spot for outdoor meals.
Pick a light wood and seal it, since a table that lives outside needs a weatherproof finish. Sand the bench edges so no one gets a splinter through summer shorts.
This is a bigger project than most on this list, so give it a full weekend and a level spot for the legs.
12. Wood Pumpkins
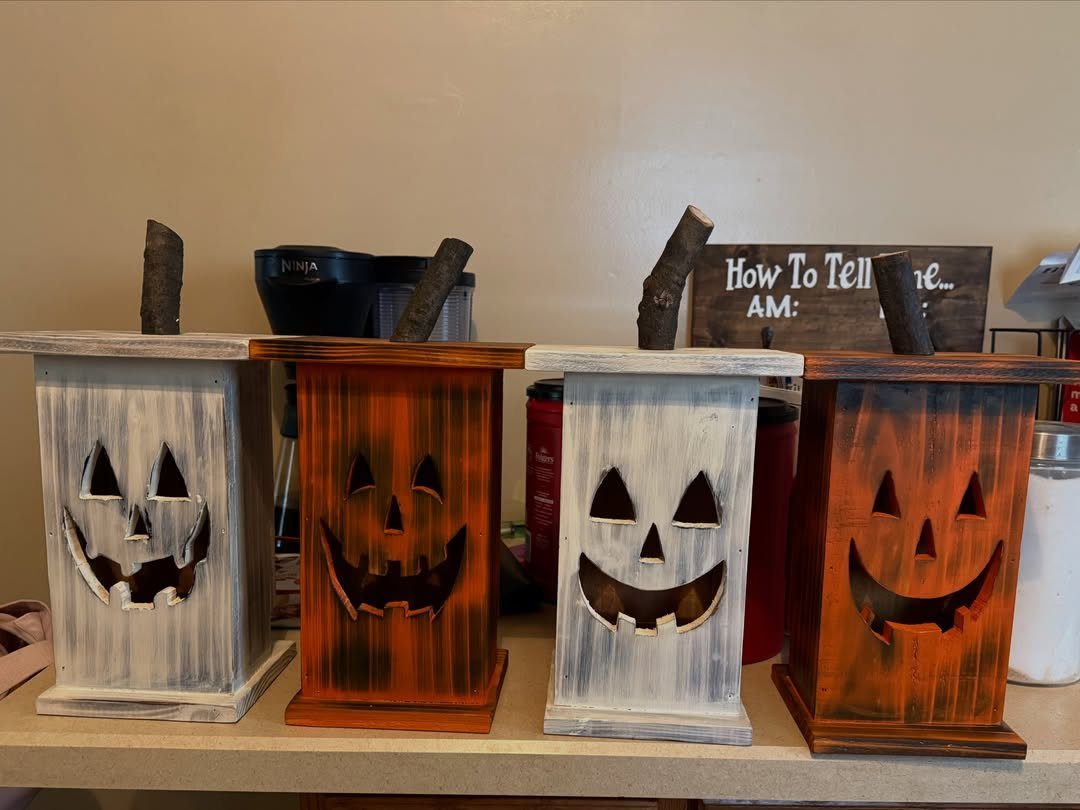
Plywood scraps become jack-o’-lantern boxes with a little cutting and some stain. Mixing white and orange finishes gives a set of four more personality than one lone pumpkin.
Cut the faces with a jigsaw, then stain the pieces before you assemble them. Twig stems glued on top finish the look, and they cost nothing if you grab them from the yard.
These sit well on a kitchen counter or mantel. I like a group of several, in slightly different sizes.
13. DIY Wooden Plant Stand
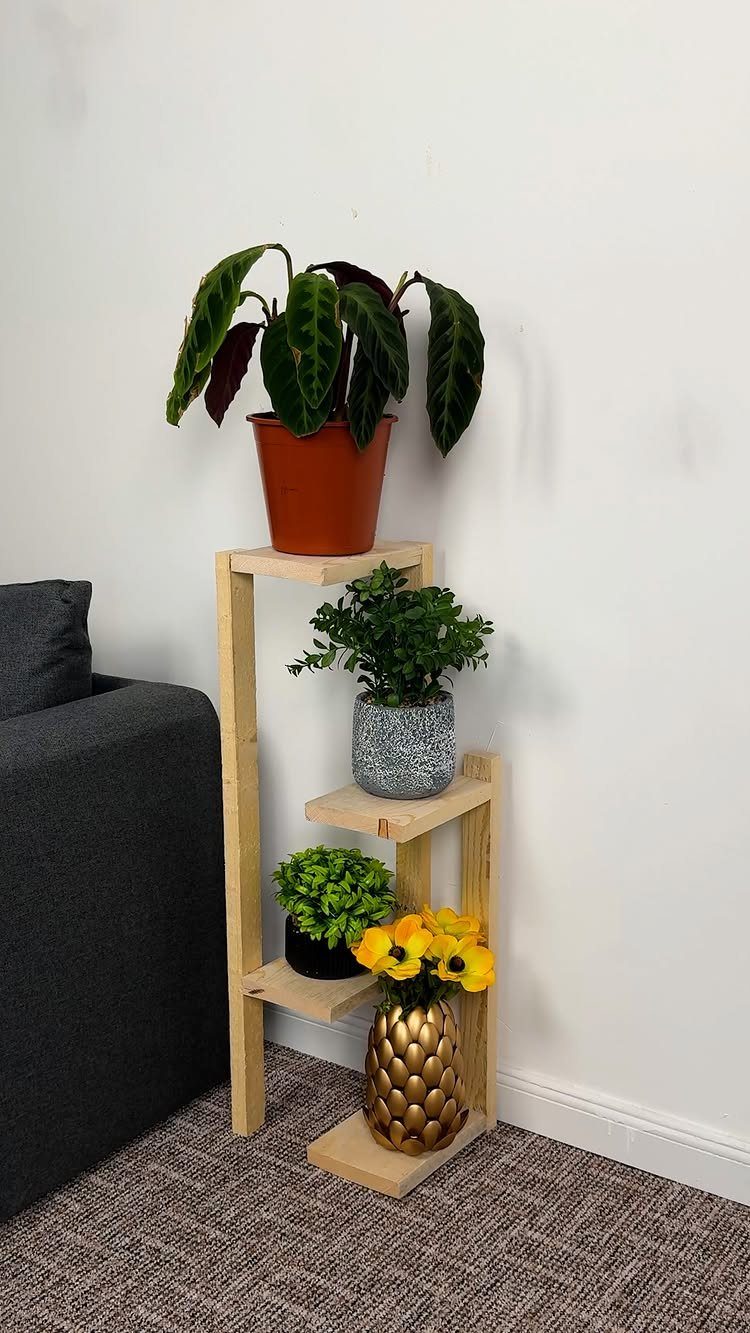
Three tiers let one stand hold three plants at different heights, so the leafy ones can spill down while the small ones sit up top.
Pale wood like pine or birch stays quiet next to a white wall, so the plants get all the attention.
Sand each shelf smooth and seal the wood, since watering will leave drips. A saucer under each pot protects the finish.
I’d keep the tiers evenly spaced so nothing crowds the plant below.
14. Wall Clock
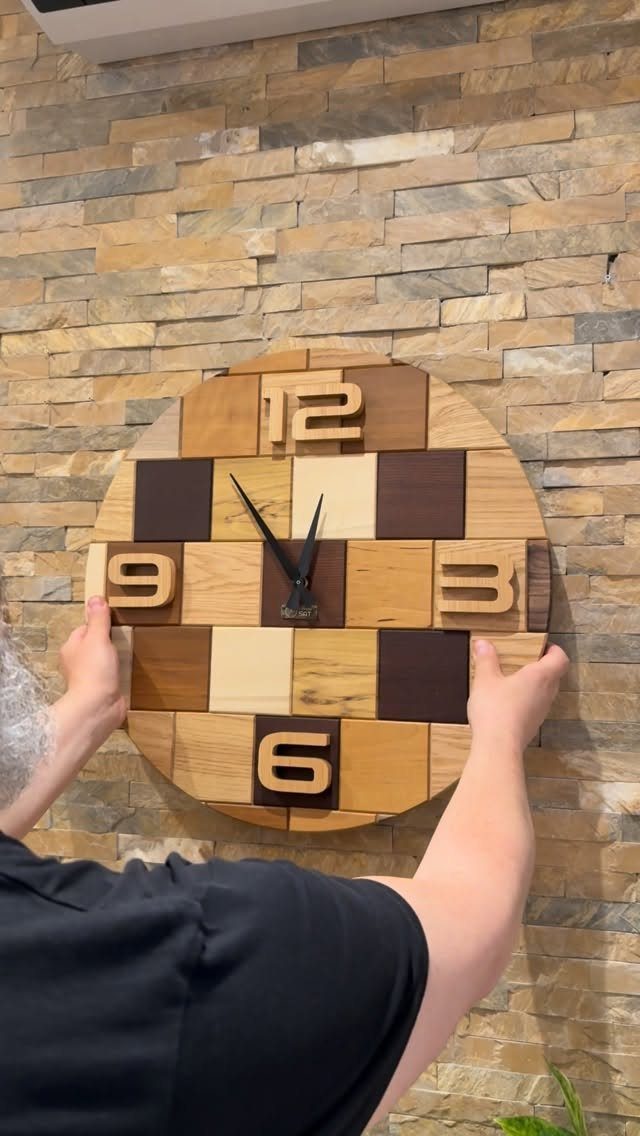
A clock face made of mixed-tone wood blocks turns scrap pieces into a mosaic. Carving only the 12, 3, 6 and 9 keeps the dial readable without crowding it.
Cut the squares to one size so the grid stays tidy, and sand them level before gluing. Light and dark pieces scattered at random look better than a planned pattern, I think.
Plan the center hole for the clock movement before the blocks are glued down.
15. DIY Wooden Towel Ladder
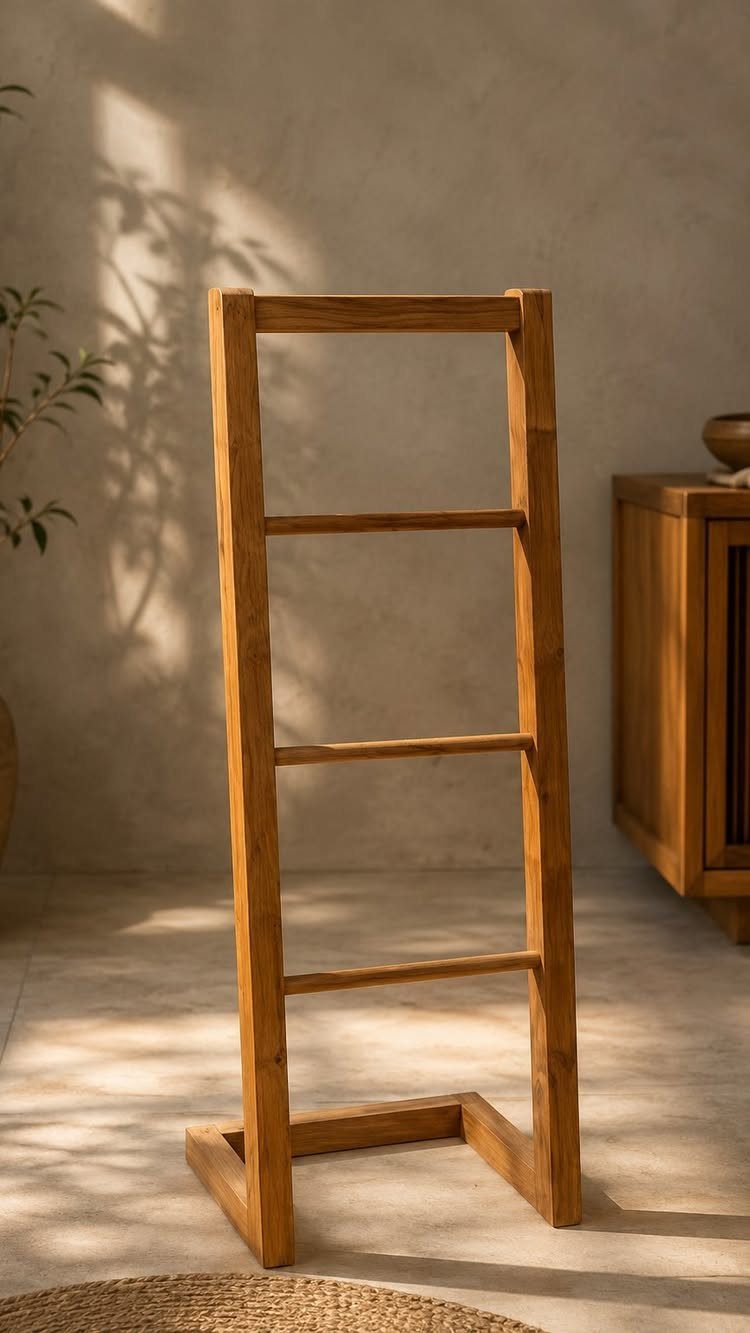
A towel ladder leans against the wall, so there is nothing to mount and no holes in the drywall. That makes it a good pick for renters and for anyone who rearranges a bathroom often.
Two long side rails with evenly spaced rungs are the whole build. Sand the rungs round so towels slide on without snagging.
Seal the wood well, since damp towels will sit on it daily.
16. DIY Wooden Garden Bench
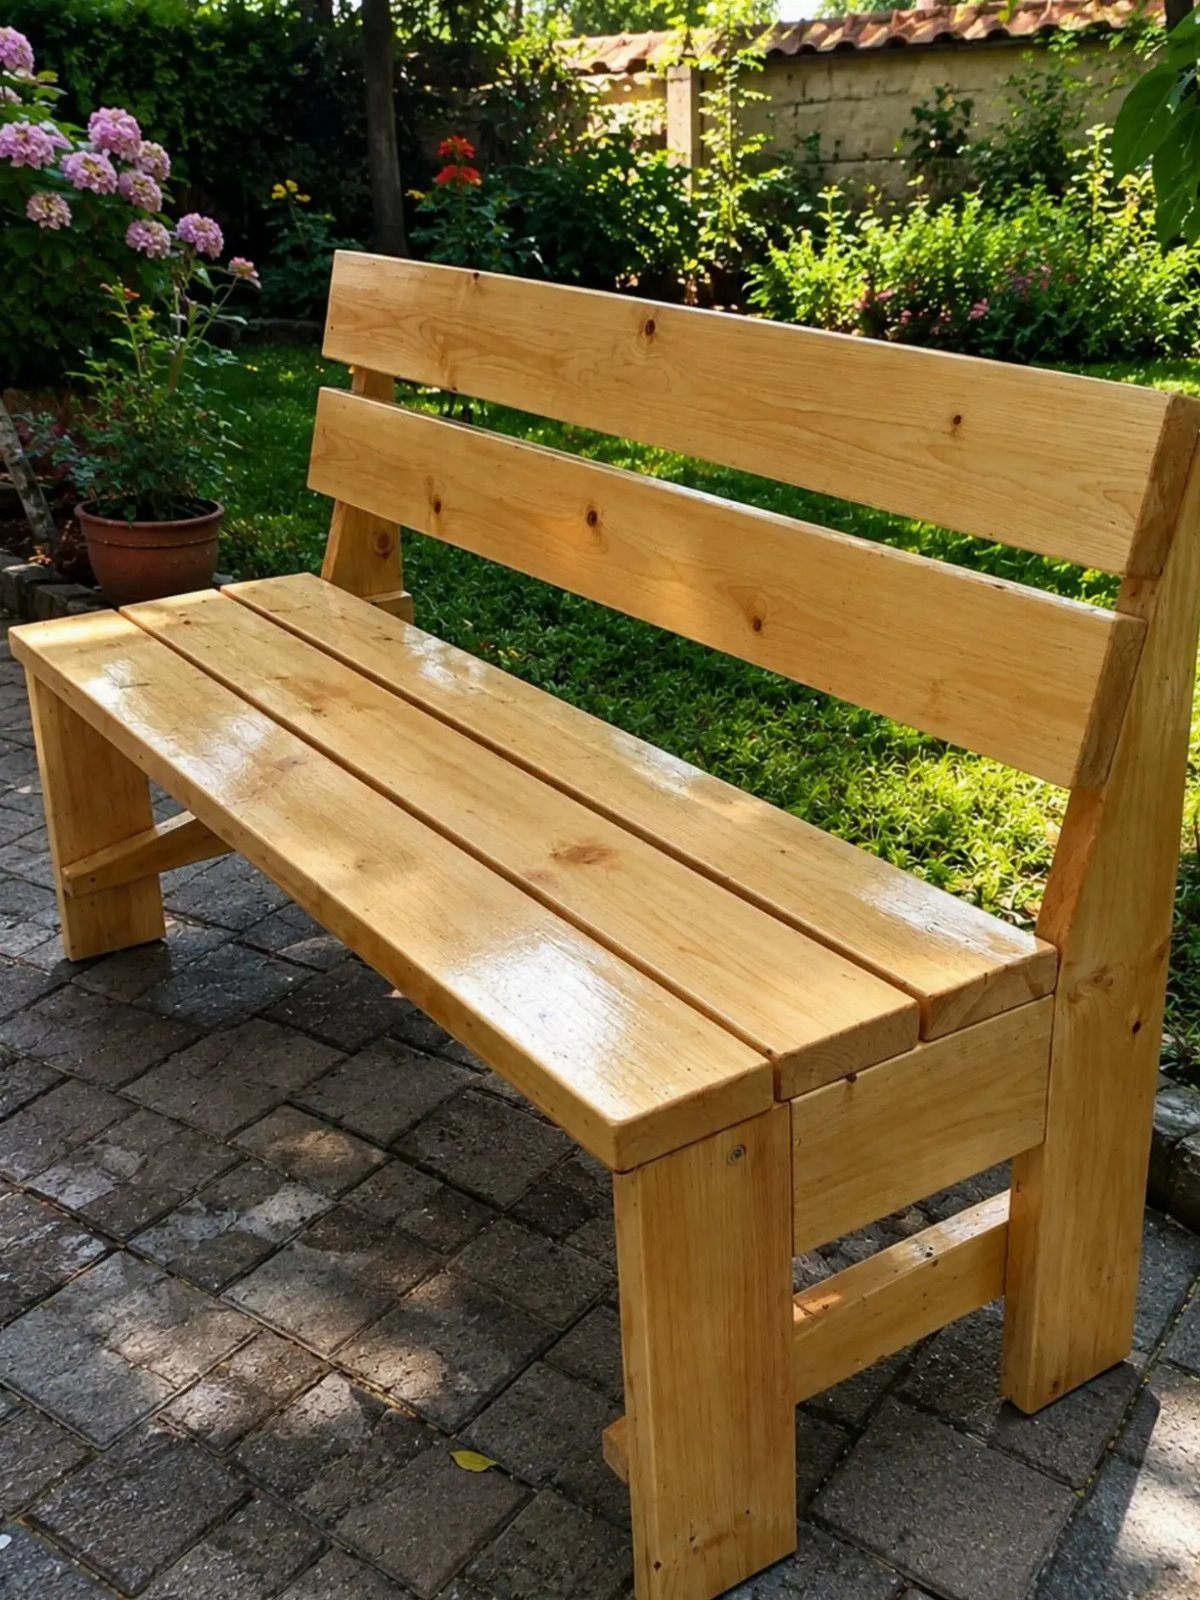
A light wood bench goes well with greenery, and it asks little of the builder: a seat, legs and a couple of braces. Pick a wood you can seal for the weather, because a garden bench lives outside.
Set it on a flat patch, like the stone patio here, so it doesn’t rock.
Give it a weekend if you’re new to building furniture.
17. Coffee Cup Holder
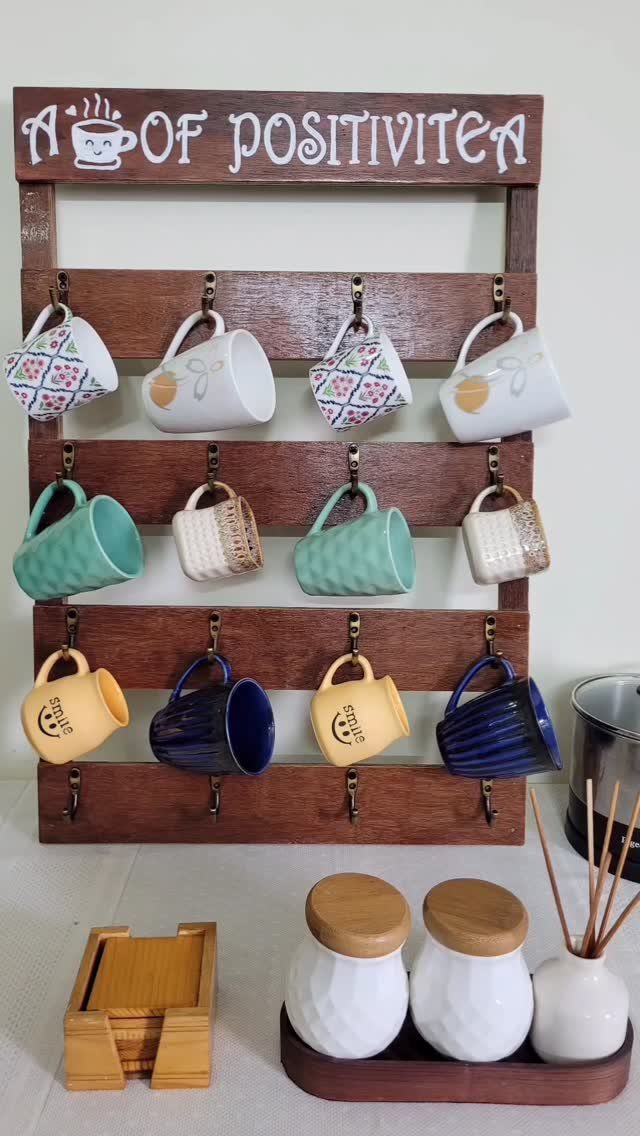
Pallet boards make a rustic mug rack that frees up cabinet space. Slats become the backing, and rows of hooks hold the mugs by their handles.
A painted or stenciled phrase across the top, like "A CUP OF POSITIVITY," gives the rack some personality. Plan the lettering on paper first, since a crooked line stands out on a plain board.
Sand the pallet wood well before painting, and pick a wall spot near the coffee maker.
18. DIY Wooden Lanterns
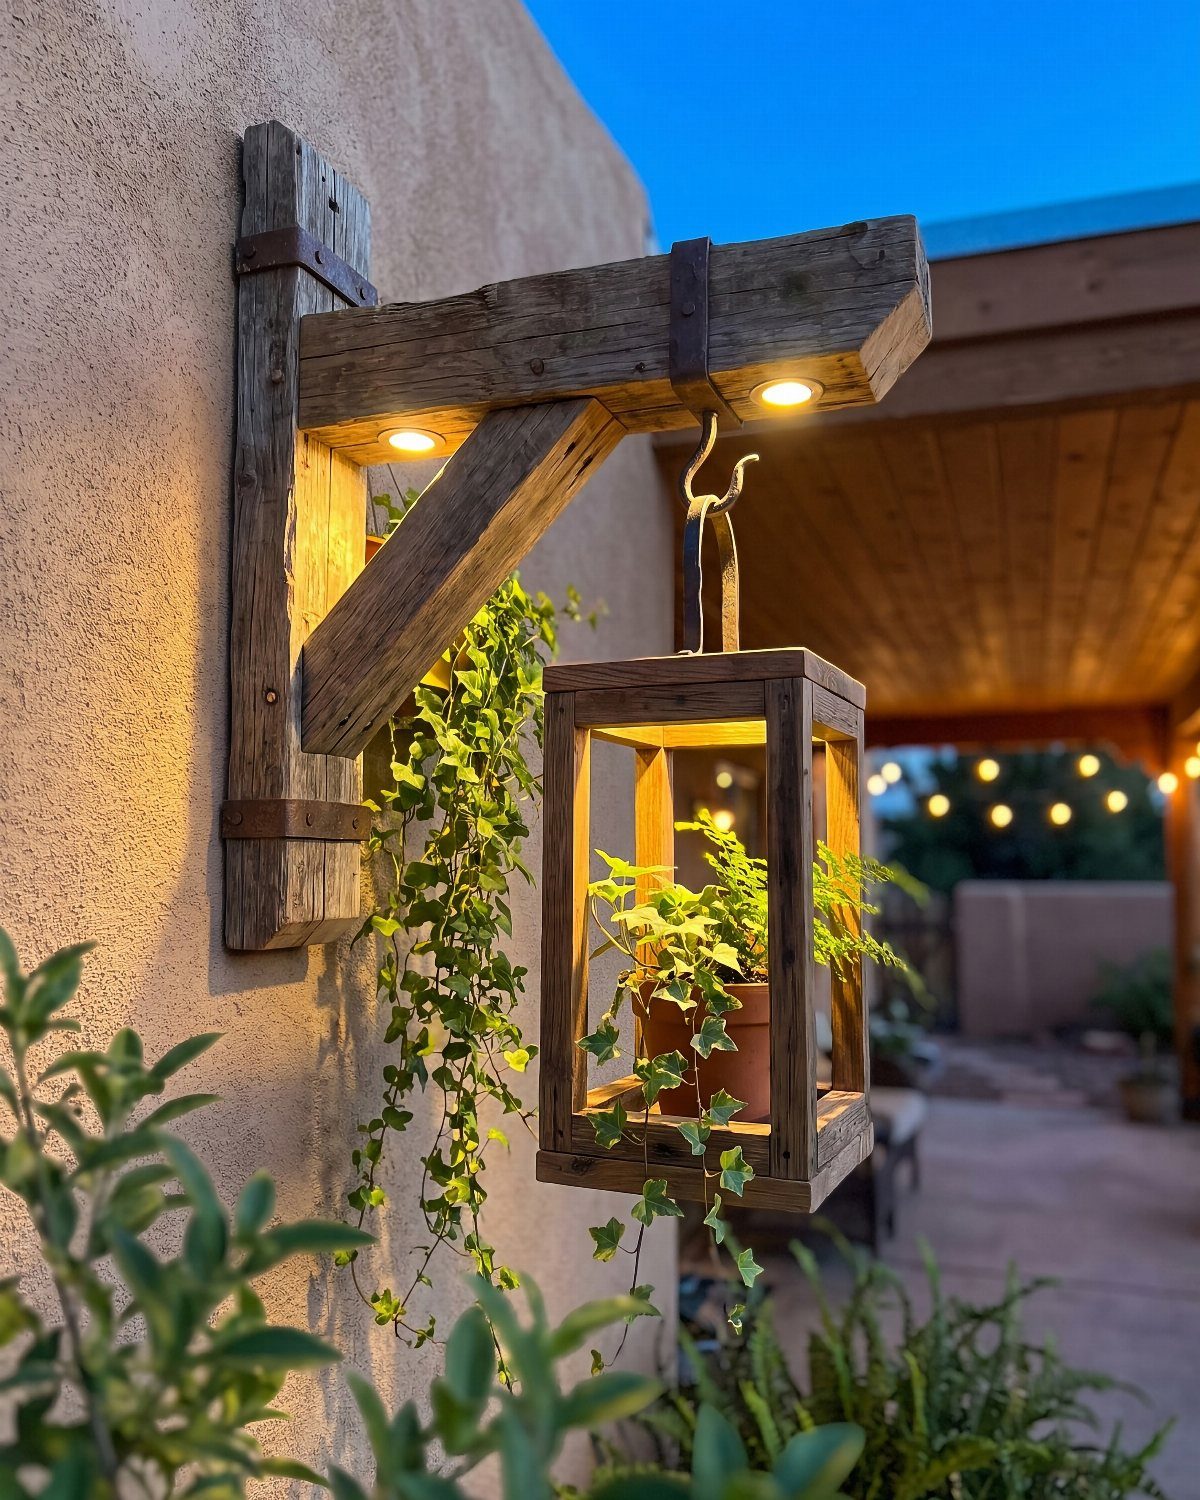
A wooden lantern can hold a potted plant instead of a candle, which makes it safer outdoors and easier to keep going.
A rustic wall bracket holds the lantern, and built-in lights give it a warm glow once the sun goes down.
Build the bracket from sturdy boards, and anchor it into a stud or masonry rather than just the stucco surface. Seal all the wood, because outdoor weather is hard on it.
I’d go with a plant over a candle every time.
19. DIY Wooden Doormat
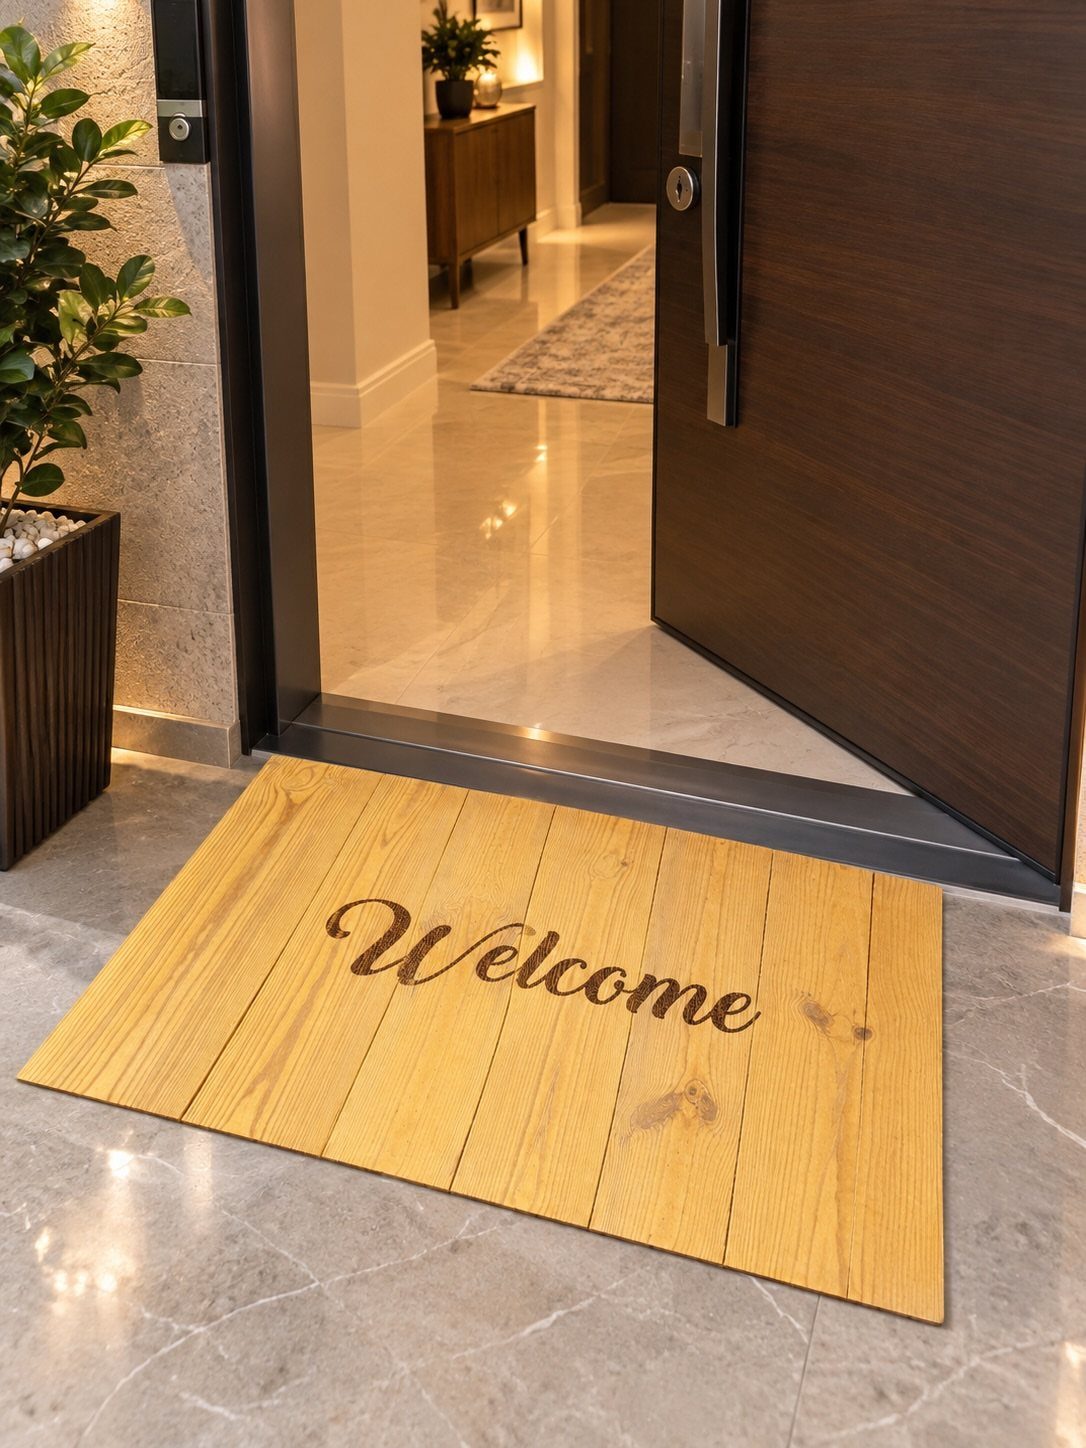
A wooden doormat with "Welcome" in cursive reads as a gift to your own front step. Engraved letters give a flat board a finished look, and a script style suits a modern entry with a dark door.
Sketch the word on paper first and trace it onto the wood, since cursive leaves little room for a wobbly line. Sand the surface smooth before you engrave.
Seal the board, because it will sit by the door. I’d keep it on a covered entry rather than out in the rain.
20. DIY Dog Bed
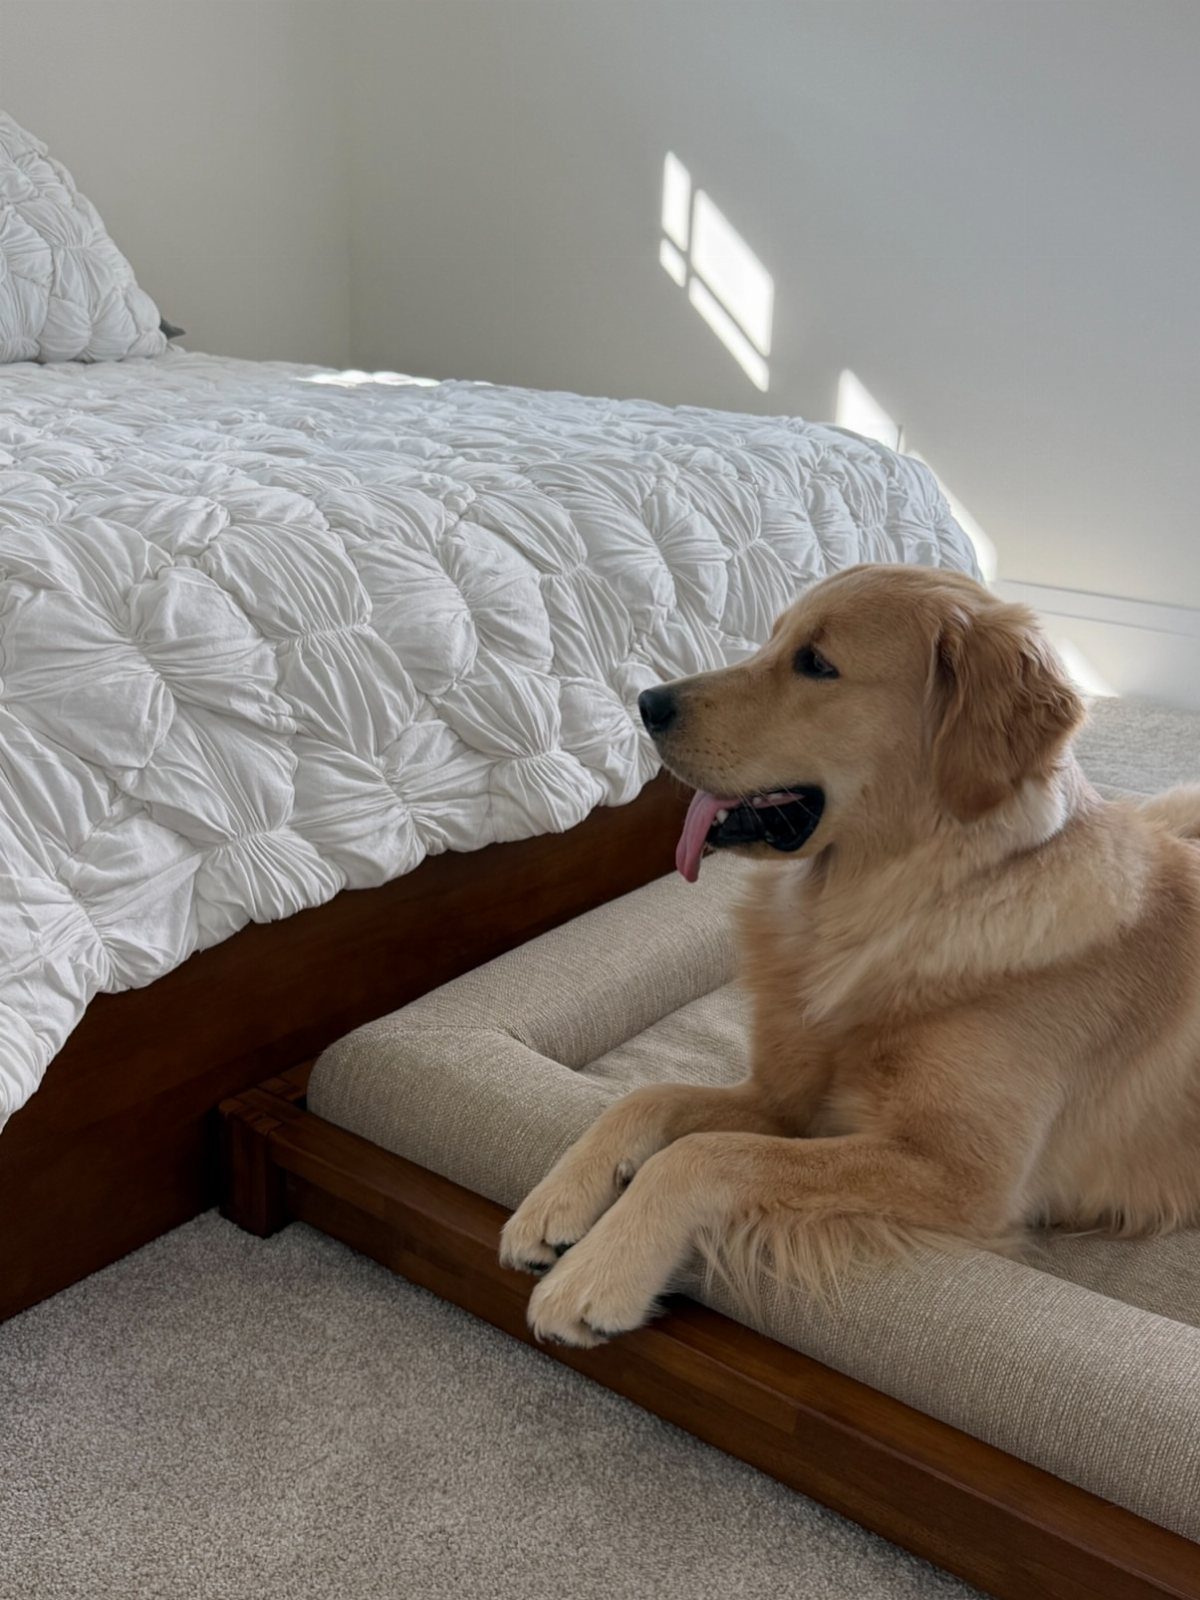
A wooden frame with a cushion on top is a dog bed that can sit in a bedroom without looking like pet gear.
The beige cushion in this version blends with neutral bedding, and the frame keeps the cushion in place.
Size the frame to your dog: measure your dog stretched out, then add some room so the bed isn’t cramped. A big breed like a golden retriever needs a long, sturdy frame.
A dog rubs against its bed all day, so ease every corner and edge with sandpaper until nothing catches fur or skin. A washable cushion cover makes life easier.
21. DIY Wooden Serving Tray
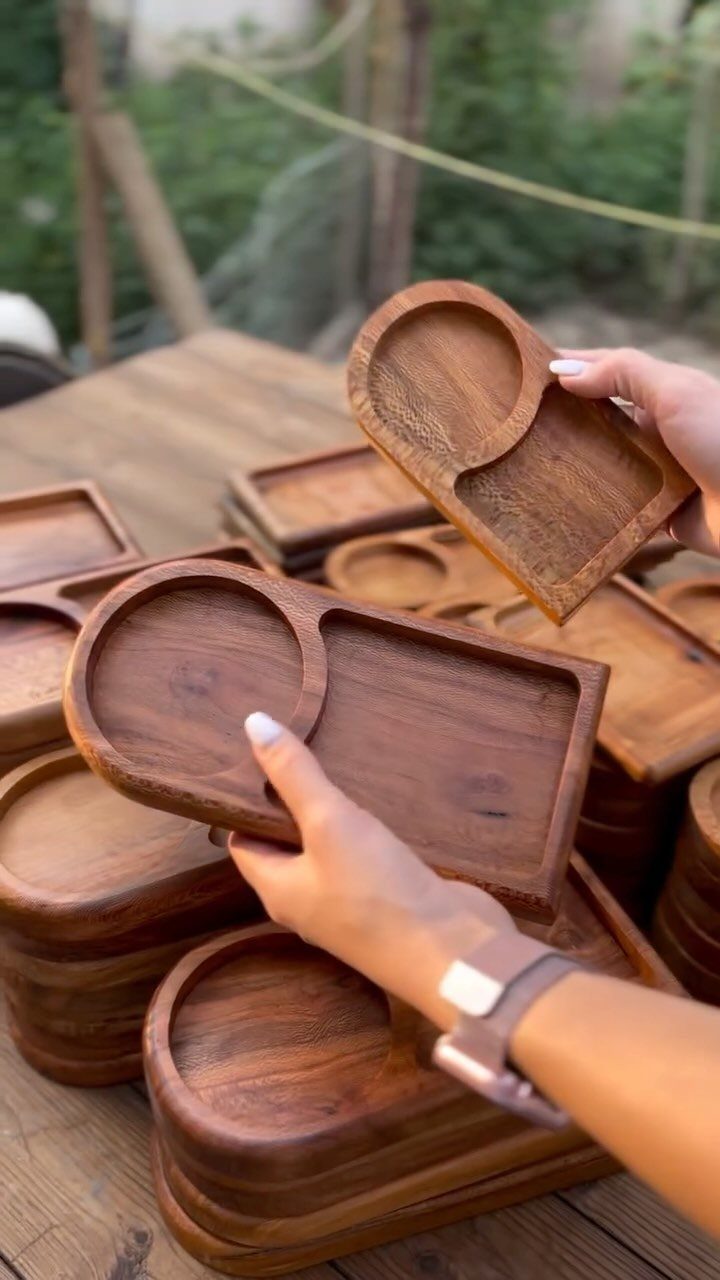
Pairing a round well with a rectangular section gives a small tray 2 jobs: a cup or bowl goes in the circle, and snacks rest in the rectangle.
Because the shape is so compact, one tray per person works well for a party.
A jigsaw handles the outline, and a sanding block or a wrapped dowel works the tight inside curves smooth. Making several in a row goes quickly once your pattern is traced.
Rustic wood suits the look. Sand the rim well, since hands will be holding it.
22. DIY Wooden Garden Markers
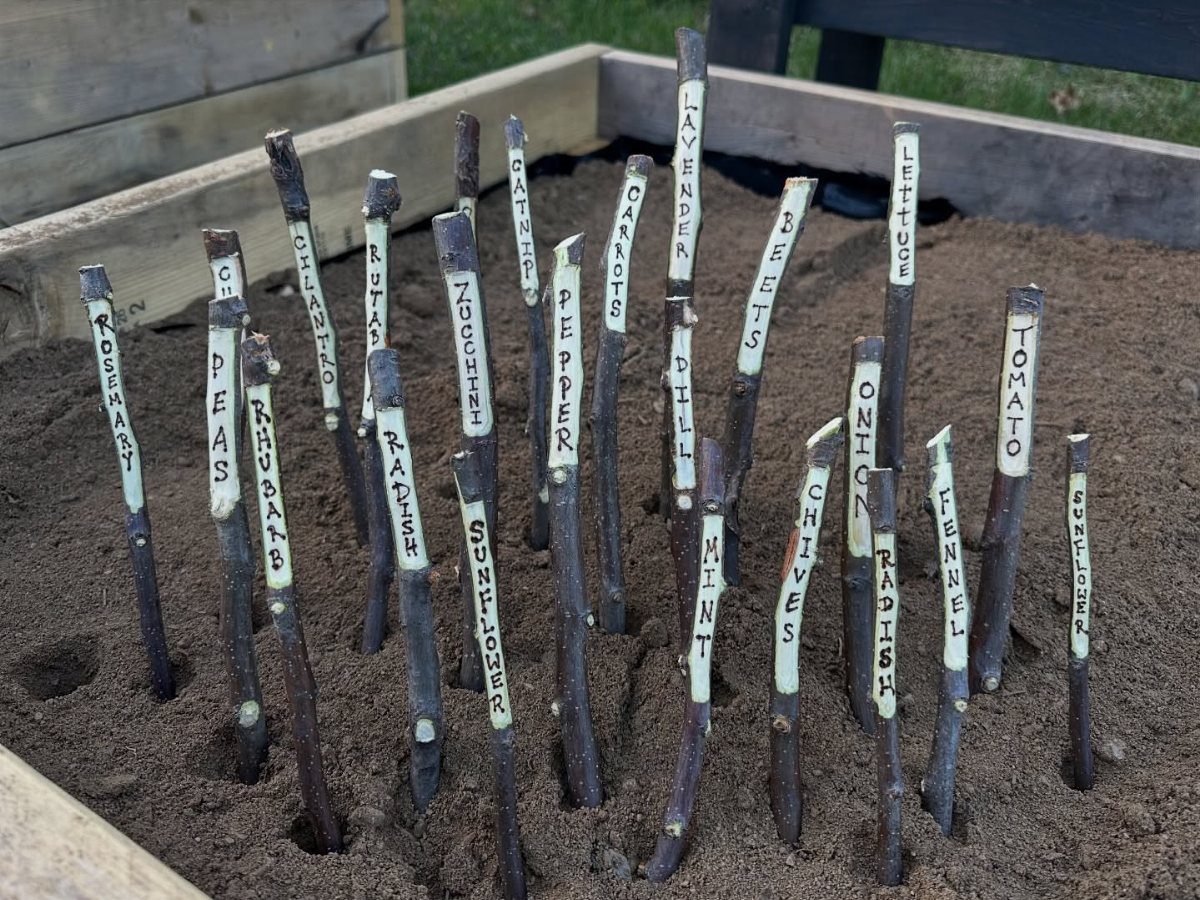
Plant markers cost the least of anything here, since a stick of wood and a white label are nearly all they take. Rosemary, peas and tomato look alike as seedlings, so a label saves you from guessing.
Write names with a waterproof marker, or paint a white patch on each stick and letter over it. Point the bottom end so it pushes into soil easily.
Keep the lettering large enough to read while standing. A bed full of them looks tidy and rustic.
23. DIY Wooden Key Holder
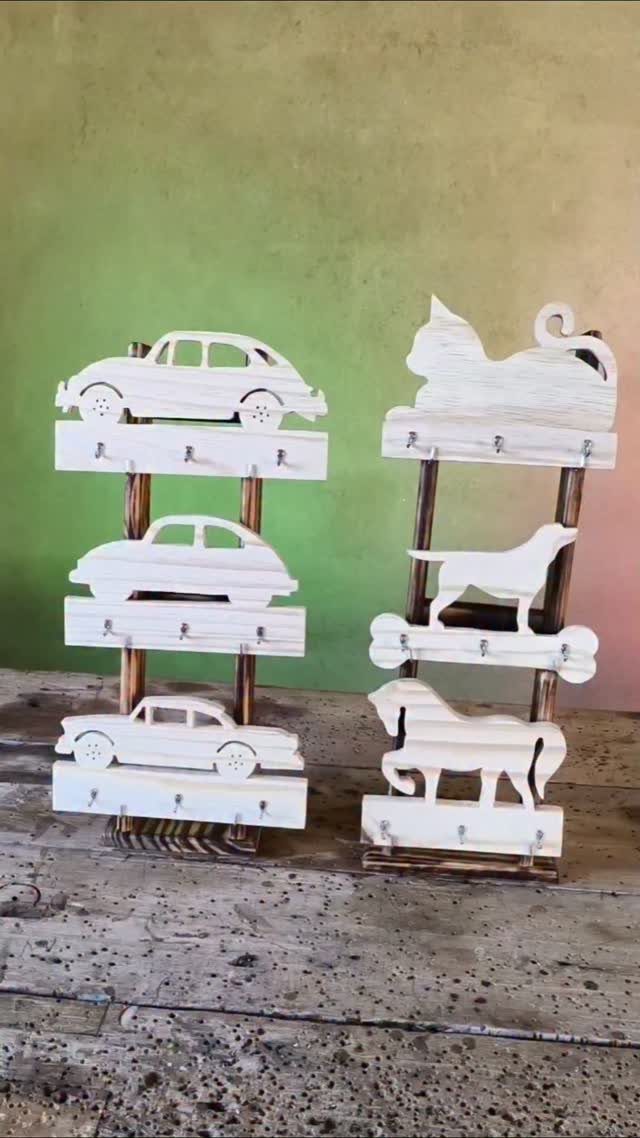
Silhouettes of a car and animals turn a simple board with hooks into a key holder that suits an entry wall or a kid’s room. White shapes stand out well against dark wood, and metal hooks hold keys.
Trace the outline onto the board and cut it with a jigsaw, or paint the shape on. Sand the edges, then screw the hooks into place.
Mount it by the door at a height you can reach easily. Make a set of three if you like a grouped look.
24. DIY Wooden Birdhouse
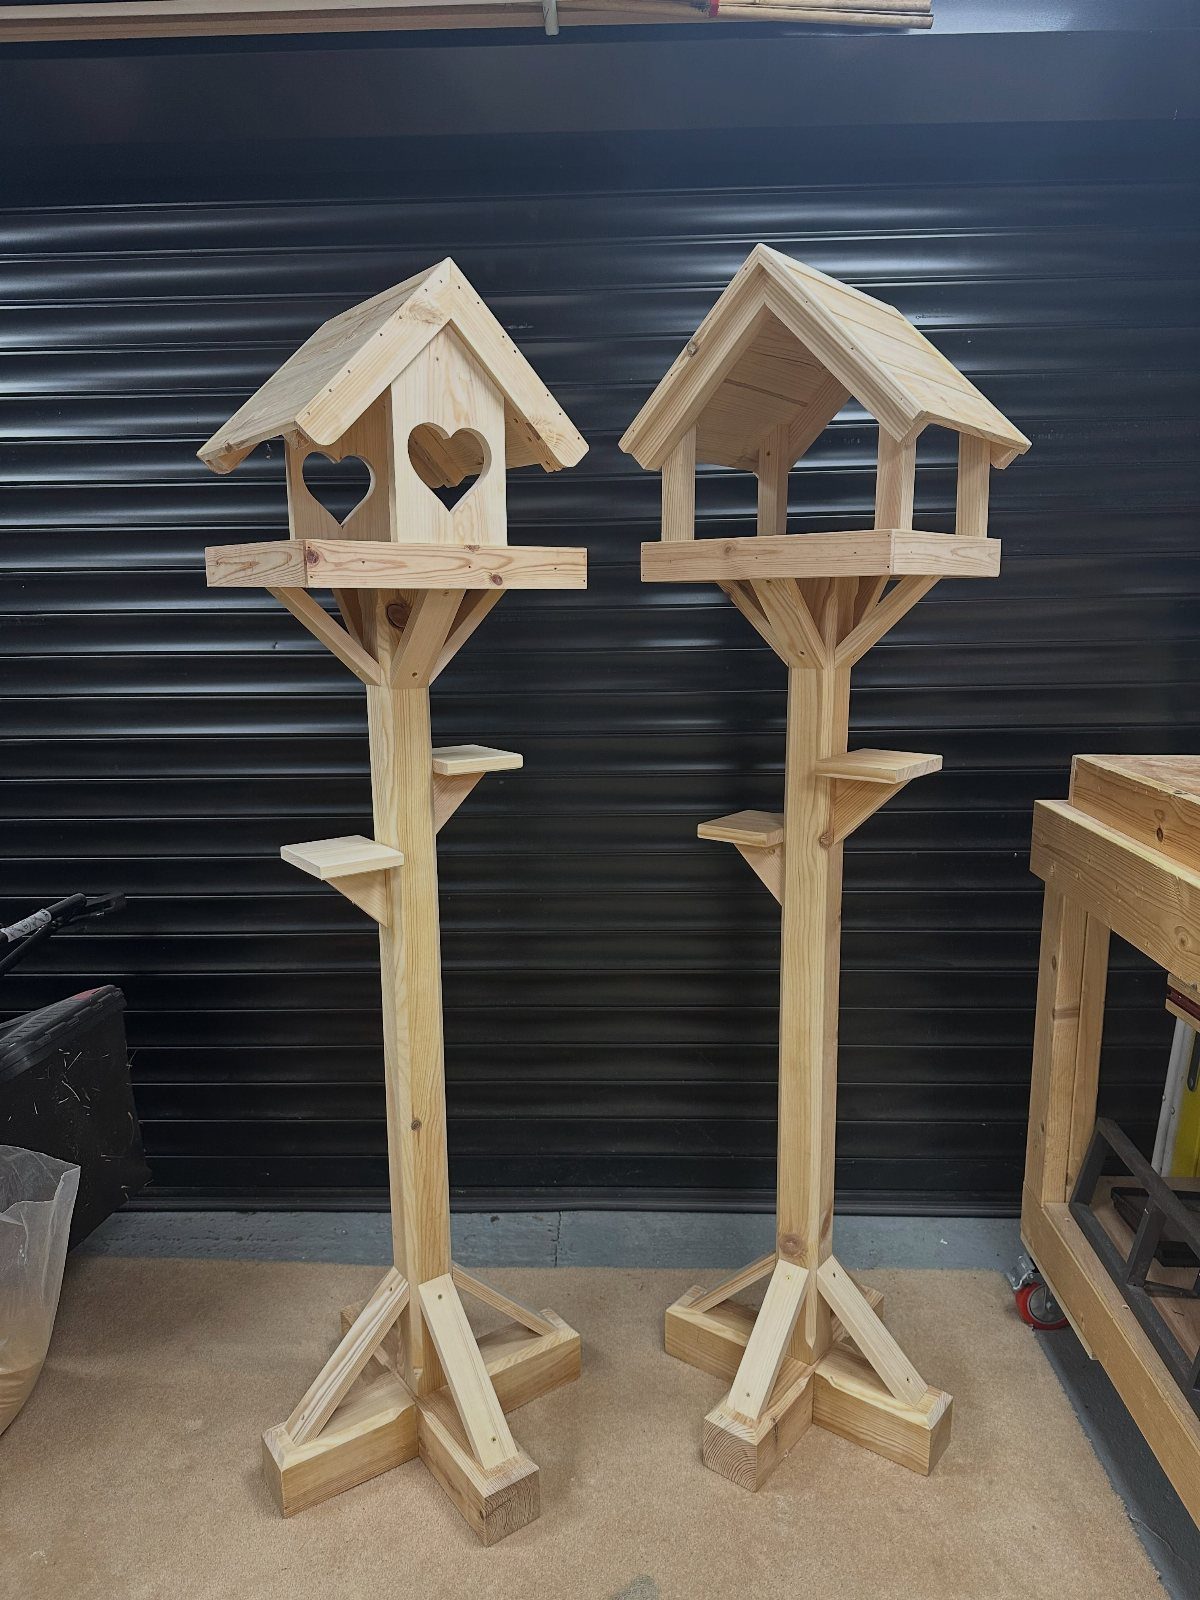
A birdhouse on a tall post with a heart-shaped entrance is the version I’d pick, because the shape is charming and the peaked roof sheds rain. A small platform below the opening gives birds a place to land.
Cut the heart with a jigsaw after drilling a starter hole inside the outline. Outdoor wood needs a sealer, and I would round the edges first so the finish does not chip along sharp corners.
Make two at once, as in this workshop setup. The second goes much faster than the first.
25. DIY Wooden Garden Trellis
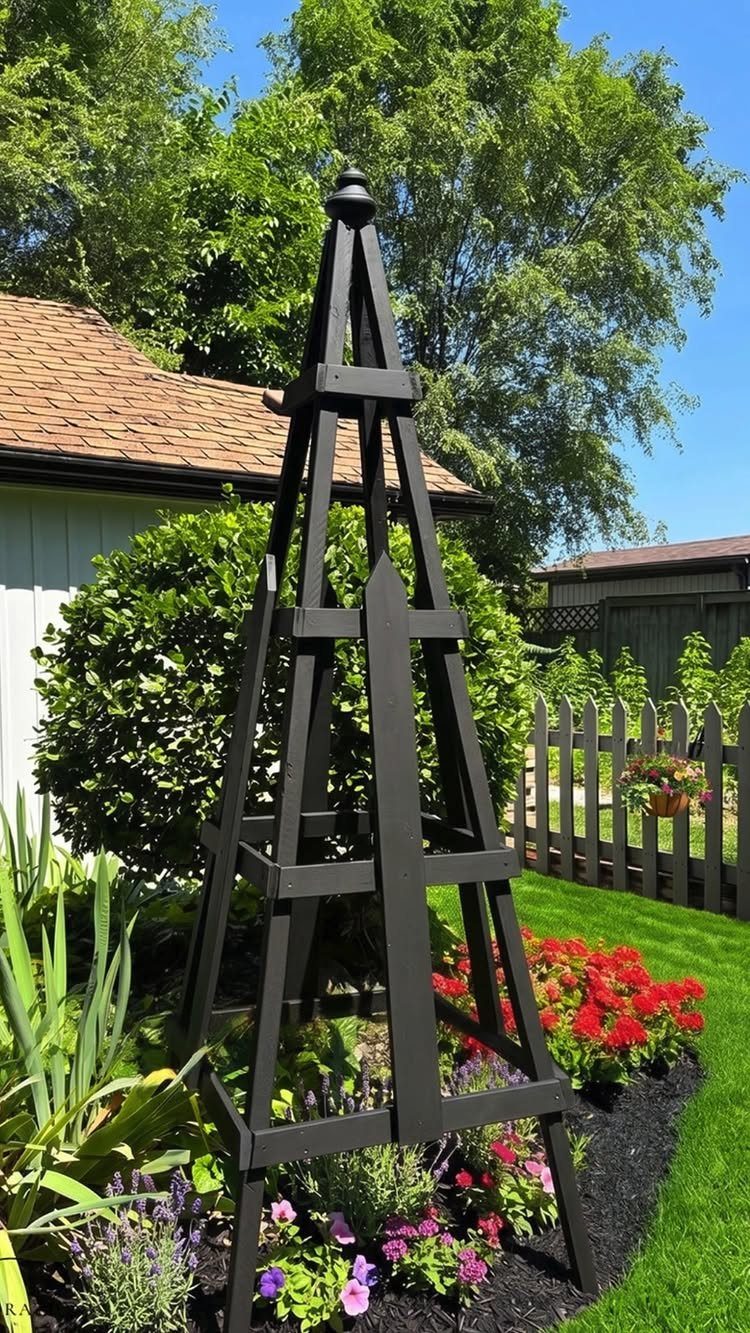
A pyramid-shaped trellis, narrow at the top and wide at the base, gives climbing plants a tall center to wrap around while the flowers below fill the bed.
Black paint makes the frame fade behind red and purple blooms, so the plants get the attention.
Sand the slats, then seal and paint every surface, since the frame stands in wet soil. Push the legs firmly into the ground so a full vine doesn’t tip it.
I’d place it in the middle of a bed, where it reads from every side.
26. Wooden Christmas Tree Cutout
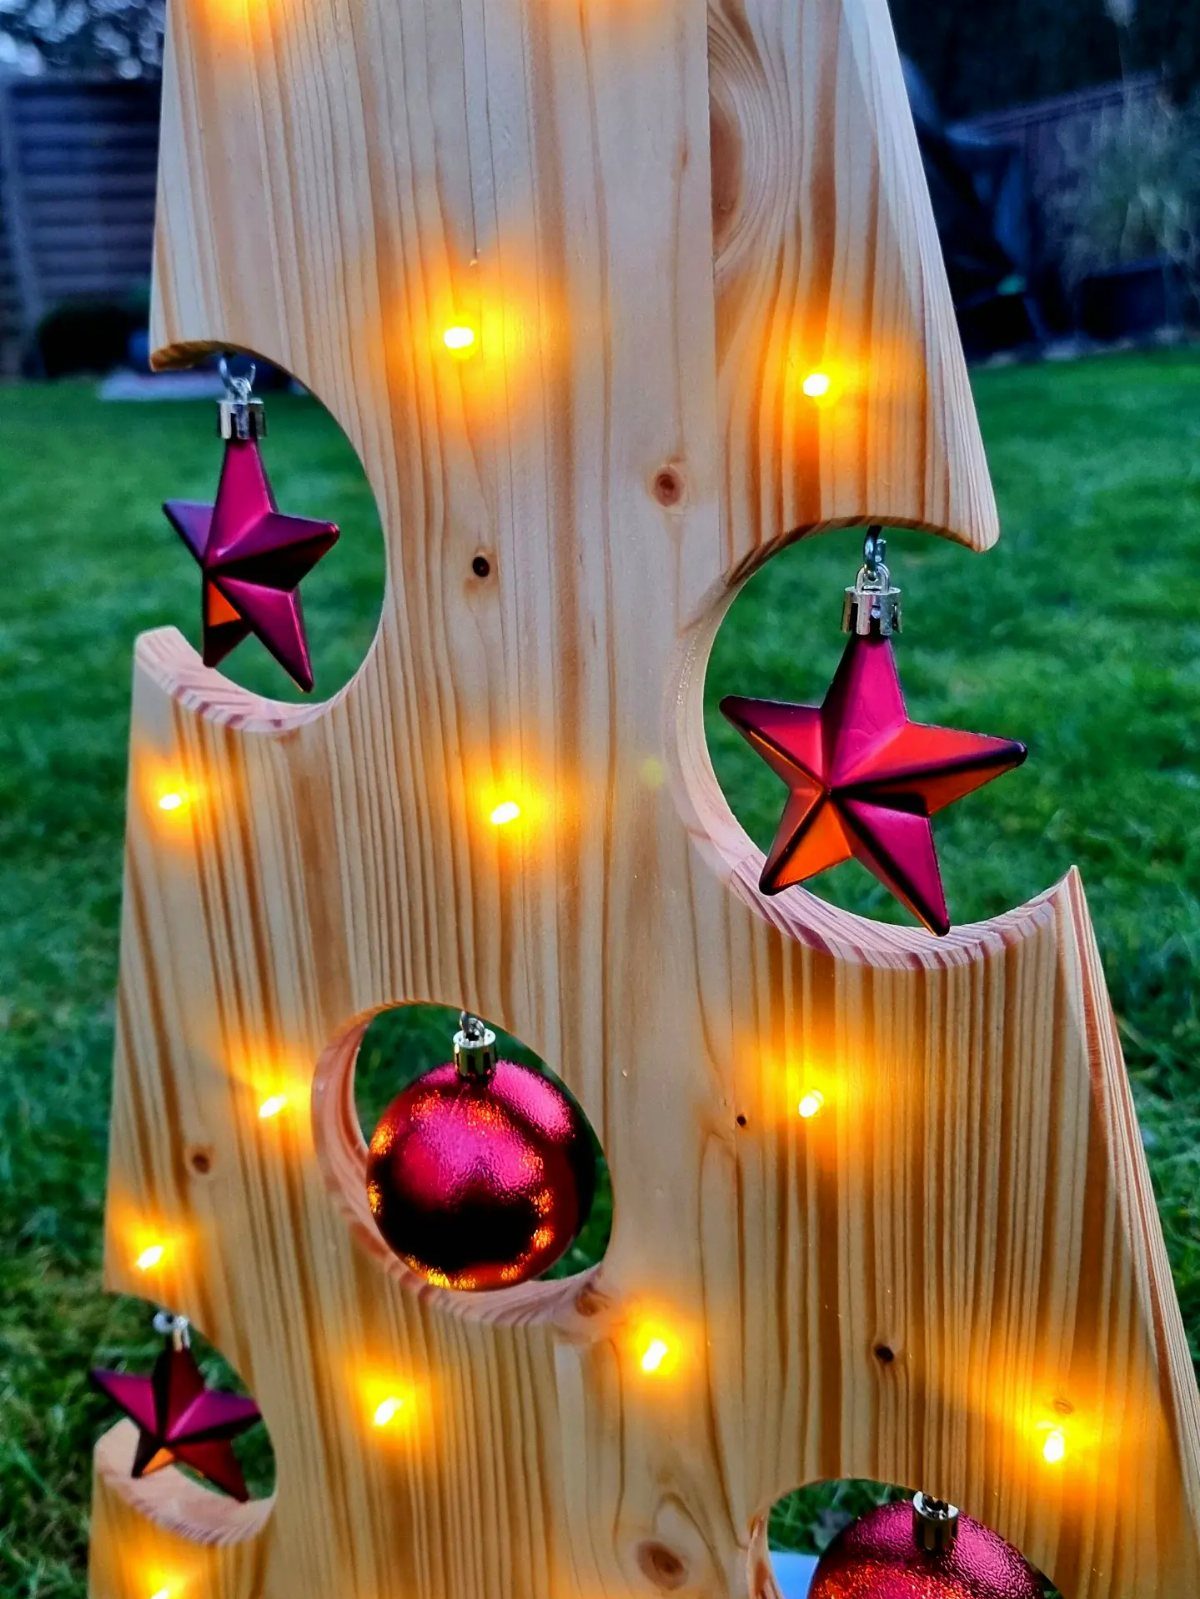
A flat, light wood tree cutout works as a Christmas tree you can leave on the lawn, with no needles to sweep. Red stars and balls pop against pale wood, and yellow fairy lights add a glow after dark.
Cut the outline with a jigsaw and sand the edges so no one snags a sleeve. Wet grass will wick moisture into bare plywood within a season, so brush on 2 coats of exterior sealer and paint the cut edges too.
Add the lights last, and use a string made for outdoors. I’d hang the ornaments from small screw eyes so they stay put.
27. Woven Branch Raised Garden Bed
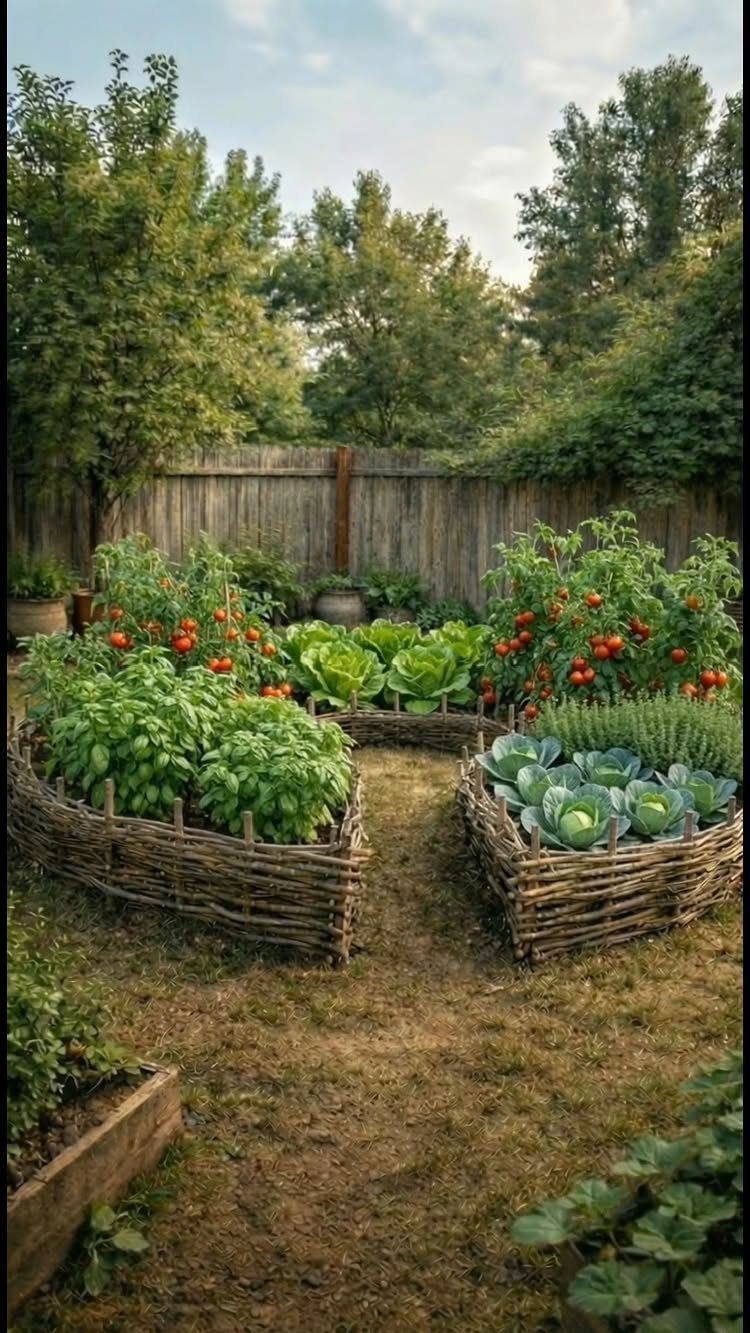
Woven branches make a raised bed with no lumber to buy: flexible branches wind between upright stakes to form the walls, and the soil goes inside. A bed like this holds tomatoes, basil and cabbage without trouble.
Drive the stakes in first, then weave tightly and press each row down as you go. Loose weaving lets soil bulge out.
Branches from the yard cost nothing, which makes this one of the cheapest raised beds you can build. Expect the walls to weather, so I’d think of them as a rustic, short-term choice.
28. Workshop Tool Storage Workbench
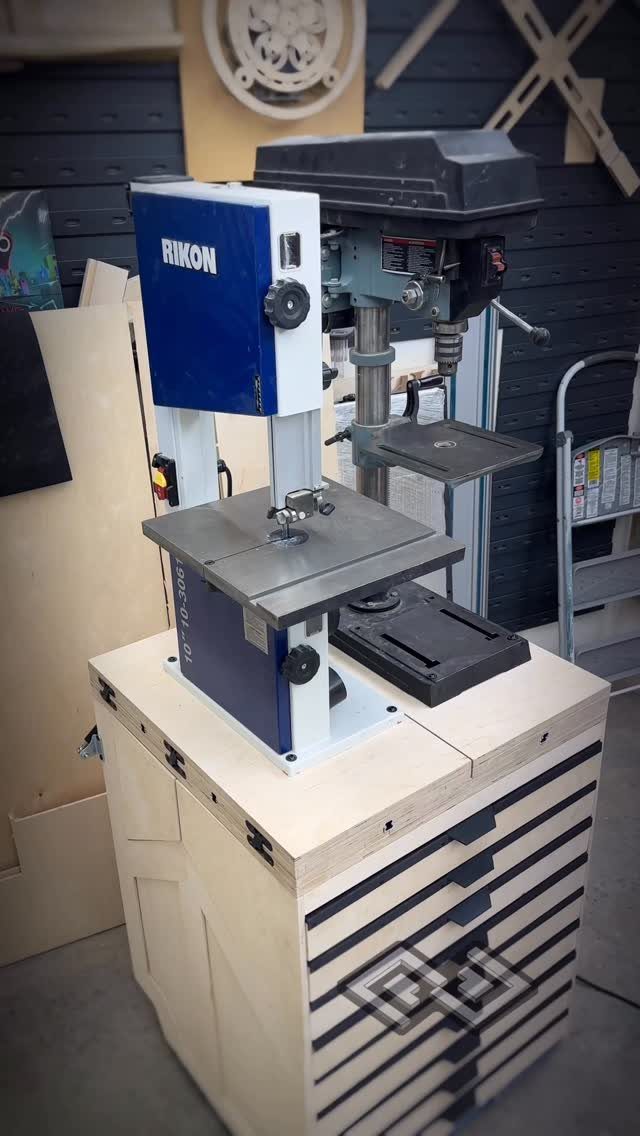
A workbench with drawers beneath and a bandsaw and drill press on top puts the heavy tools and their accessories in one spot. Drawers keep bits, blades and clamps within reach, so nothing hides in a box across the shop.
Build the frame from sturdy lumber, since 2 machines add serious weight. Mount each tool with bolts through the top rather than just setting it down.
Plan drawer sizes around what you actually own before cutting anything. A striped front is optional, but it makes a plain cabinet fun to look at.
With $120 in lumber and two days, you can build this sturdy stowaway bench. Many knockdown workbenches suffer from unfortunate compromises.
29. Countertop Mini Towel Rack
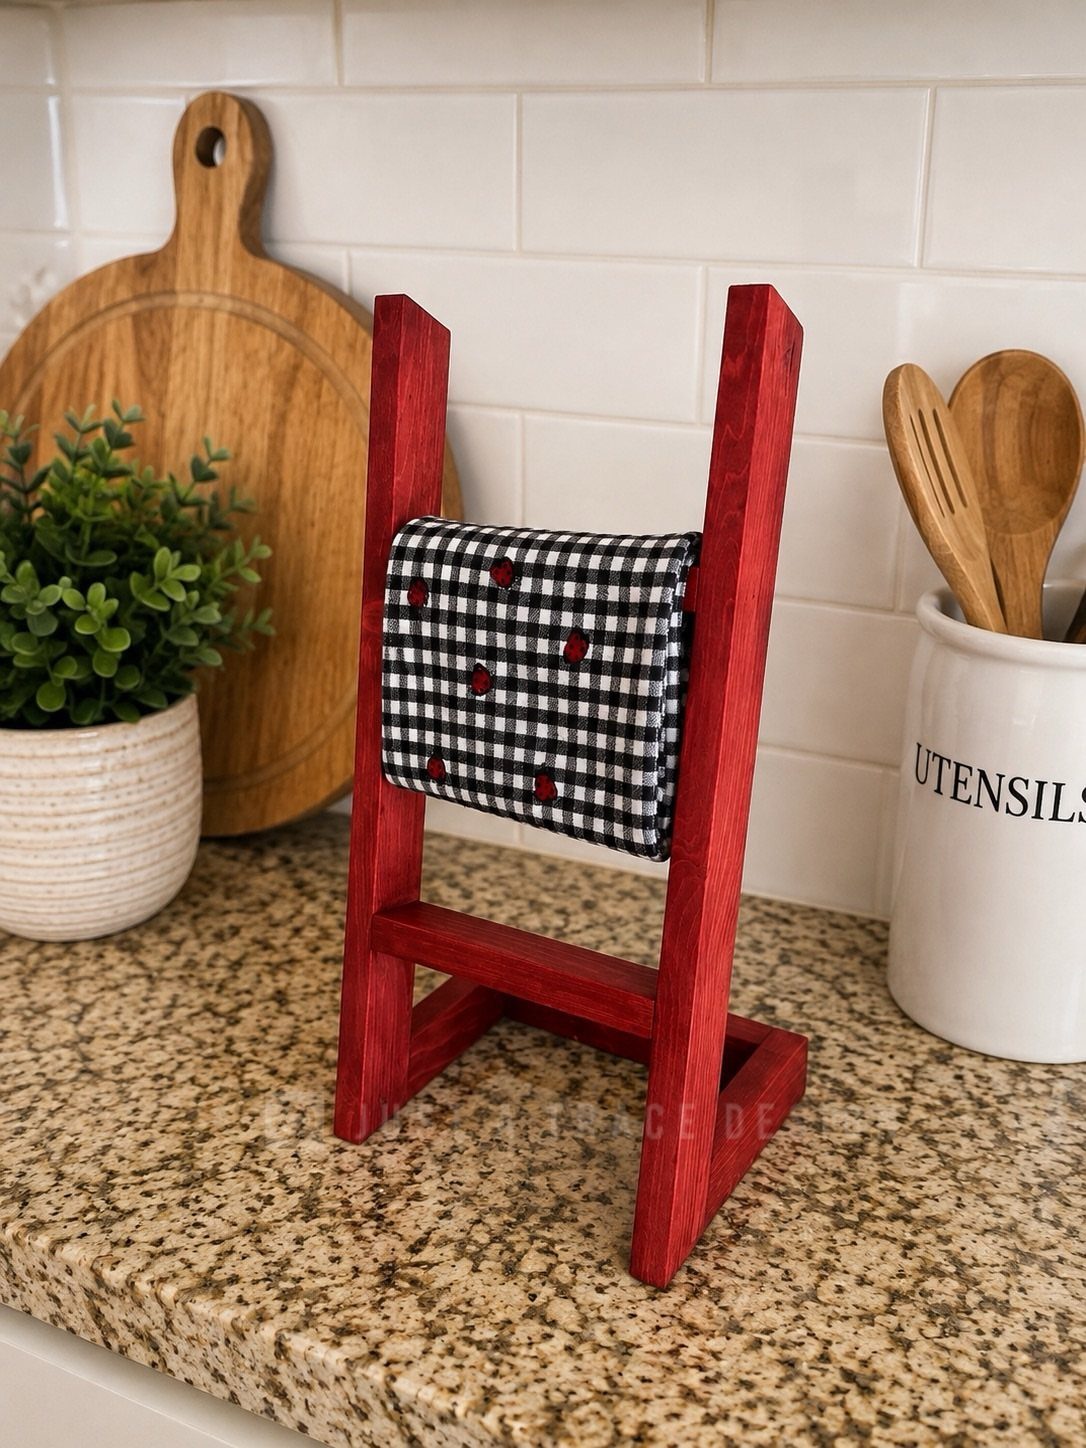
A small red rack on a kitchen counter keeps a hand towel off the oven door and within reach. It stands on its own, so there is no drilling and no wall needed.
Build two end pieces and one or two bars between them, then sand all the edges. Paint it red, and add a clear coat, since wet hands and splashes will reach it daily.
Keep it narrow enough to leave counter space. I’d pick a checkered towel to match the cheerful color.
Tips for Beginners
Start with a project that needs one board and a handful of straight cuts. A finished piece teaches more than a half-built ambitious one, and you will want something on the shelf to show for the afternoon.
Scrap wood is the right practice material. Mistakes cost nothing, so you can test a cut, a stain or a sanding grit on a spare piece before it touches the real thing.
Raise the difficulty one step at a time. If you just made a straight-cut box, try adding a curved cut or a different joint on the next one, not both together.
For your first few builds, pick projects you can finish in a single sitting, like a cutting board or a simple planter box. That quick win is what gets you back into the shop the following weekend.
Materials to Use
Reclaimed wood, pallets and scrap wood keep a project cheap, and sometimes free. Every build leaves offcuts, so your pile grows on its own and gives you the next project’s lumber.
Check each piece before you commit. Look for nails, staples and cracks, and pull any hardware out before a blade or sander touches the board.
Pallet wood and reclaimed boards vary in thickness and condition, so sort them first and match pieces by size. Small projects forgive this variation best.
Wood of unknown origin should stay away from anything that touches food. Save it for decor, storage and outdoor pieces, and buy new lumber when a project needs consistent, clean stock.
Project Planning
Before cutting anything, check 3 limits: space, tools and time. A project that needs a table saw is a poor pick if you own a jigsaw and a drill.
Measure the spot where the piece will live, and measure your work area too. Large builds need room to lay out boards and clamp them, plus a place to let the finish dry.
Be honest about the hours you have. An afternoon fits a small, simple build; anything with a long drying time needs a second day.
Put the quick builds first. Finishing something fast builds momentum, and each small success makes the bigger project feel more doable.
Frequently Asked Questions
What are some easy woodworking projects?
A laptop stand, a picture frame, a set of garden markers, or a key holder with hooks are all good starting points.
Most projects here start with one board or a few offcuts and rely on simple cuts, so you can finish one in a single afternoon, though the key holder asks for a jigsaw to cut its curved shapes.
Start with one of these, since a finished piece teaches you more than an ambitious build that stalls halfway.
How can I use scrap wood?
Short offcuts suit picture frames, since a frame only needs small pieces. Mistakes on scrap cost nothing, which makes it good practice material for testing a cut before you use your good board.
What tools do I need for woodworking?
For most of the easy builds, a jigsaw, a sanding block or a few sheets of sandpaper, and a drill are all the tools you’ll reach for. The jigsaw cuts outlines, handle openings and curves, and sanding smooths every edge.
Some projects add a few extras: masonry anchors and the right bit for mounting on brick, or a waterproof marker for lettering. Start with what you have and add tools as a project calls for them.






