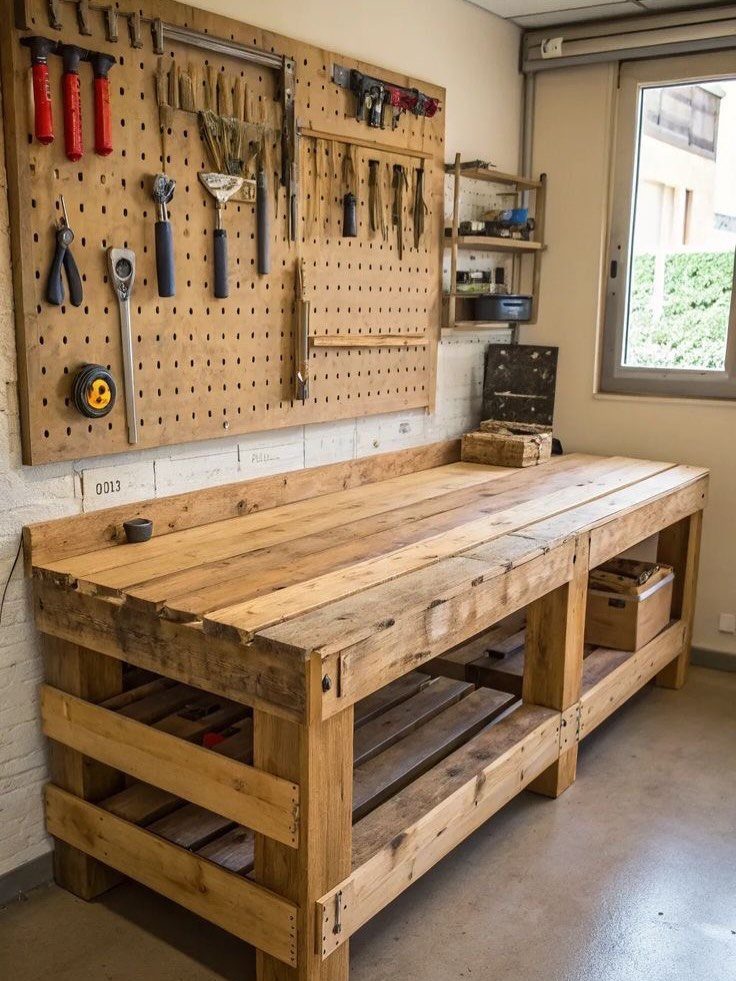
Ideas here run from a few dollars of pegboard clips and a plywood scrap for a French cleat wall to a cabinet, worktop and slatwall setup you build up piece by piece.
How your bench lives decides the layout: if it stays against one wall, hang storage above it, and if it has to roll out of the garage for the car, build a mobile workbench with locking casters.
1. Cabinetry, Worktops, and Slatwall Setup
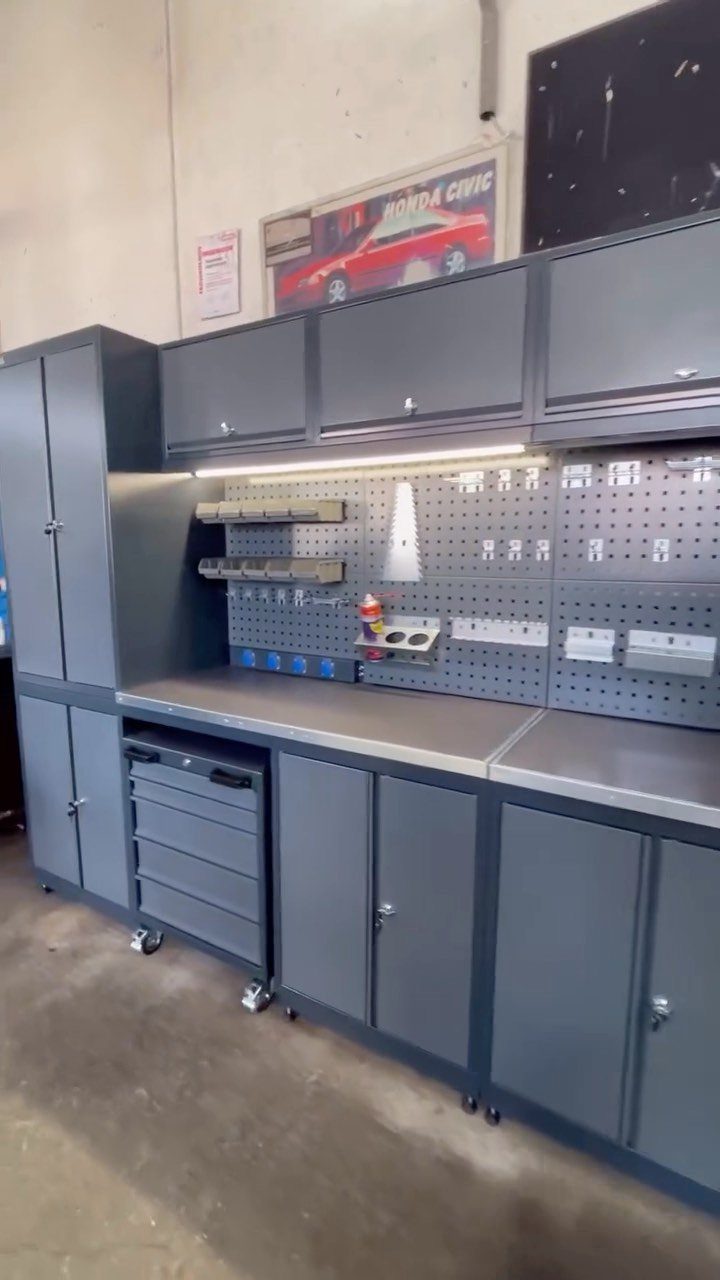
Modular cabinets let one wall grow with your tool collection. Upper cabinets hide the clutter, lower ones take the heavy gear, and the slatwall above the worktop keeps daily hand tools within reach.
Start with the worktop and one lower cabinet, then add pieces as the budget allows. That is the real advantage over a fixed bench: you can reconfigure it later.
Slatwall costs more than basic pegboard, so I would fill it slowly and only with tools you grab weekly.
2. Mobile Workbench
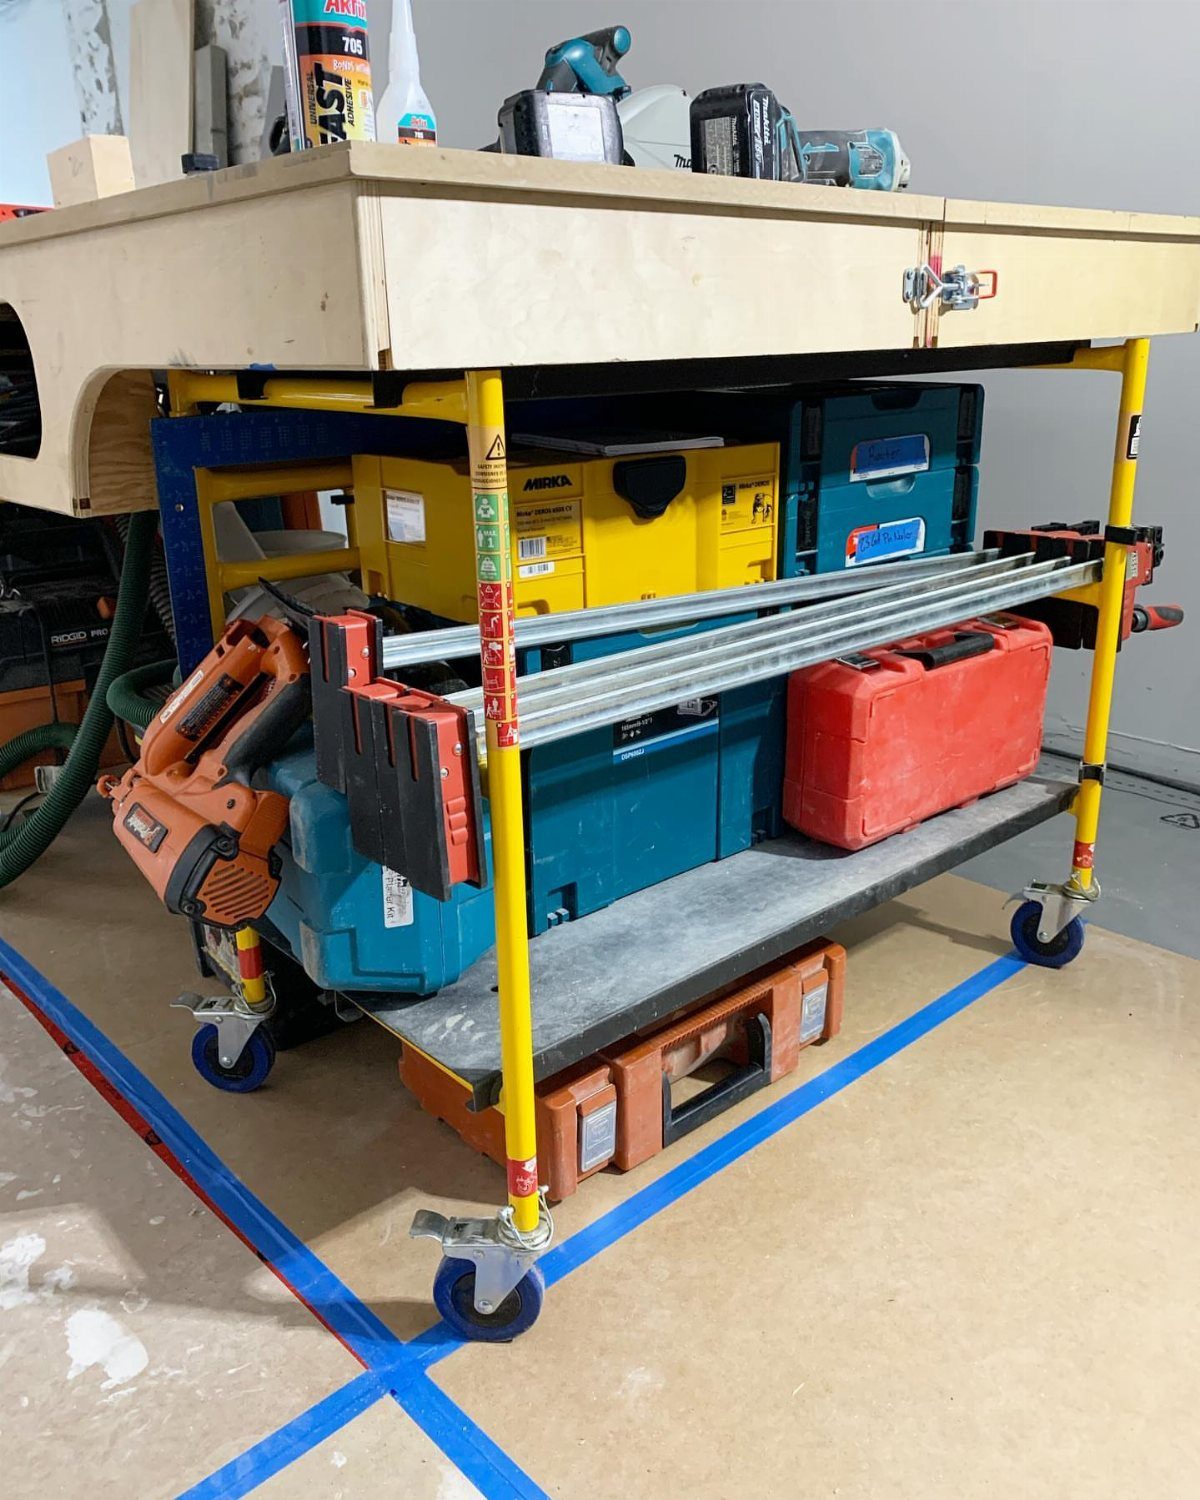
Casters turn a workbench into a tool that goes where the job is.
A solid wooden top with a frame on wheels lets you roll it to the garage door for cutting, then back against the wall when the car needs the space.
The open space under the top is a good home for power tools and storage cases, so the heavy items ride along with the bench.
Pick casters that lock. A bench that creeps while you work is more annoying than a fixed one.
3. Pegboard with Accessories
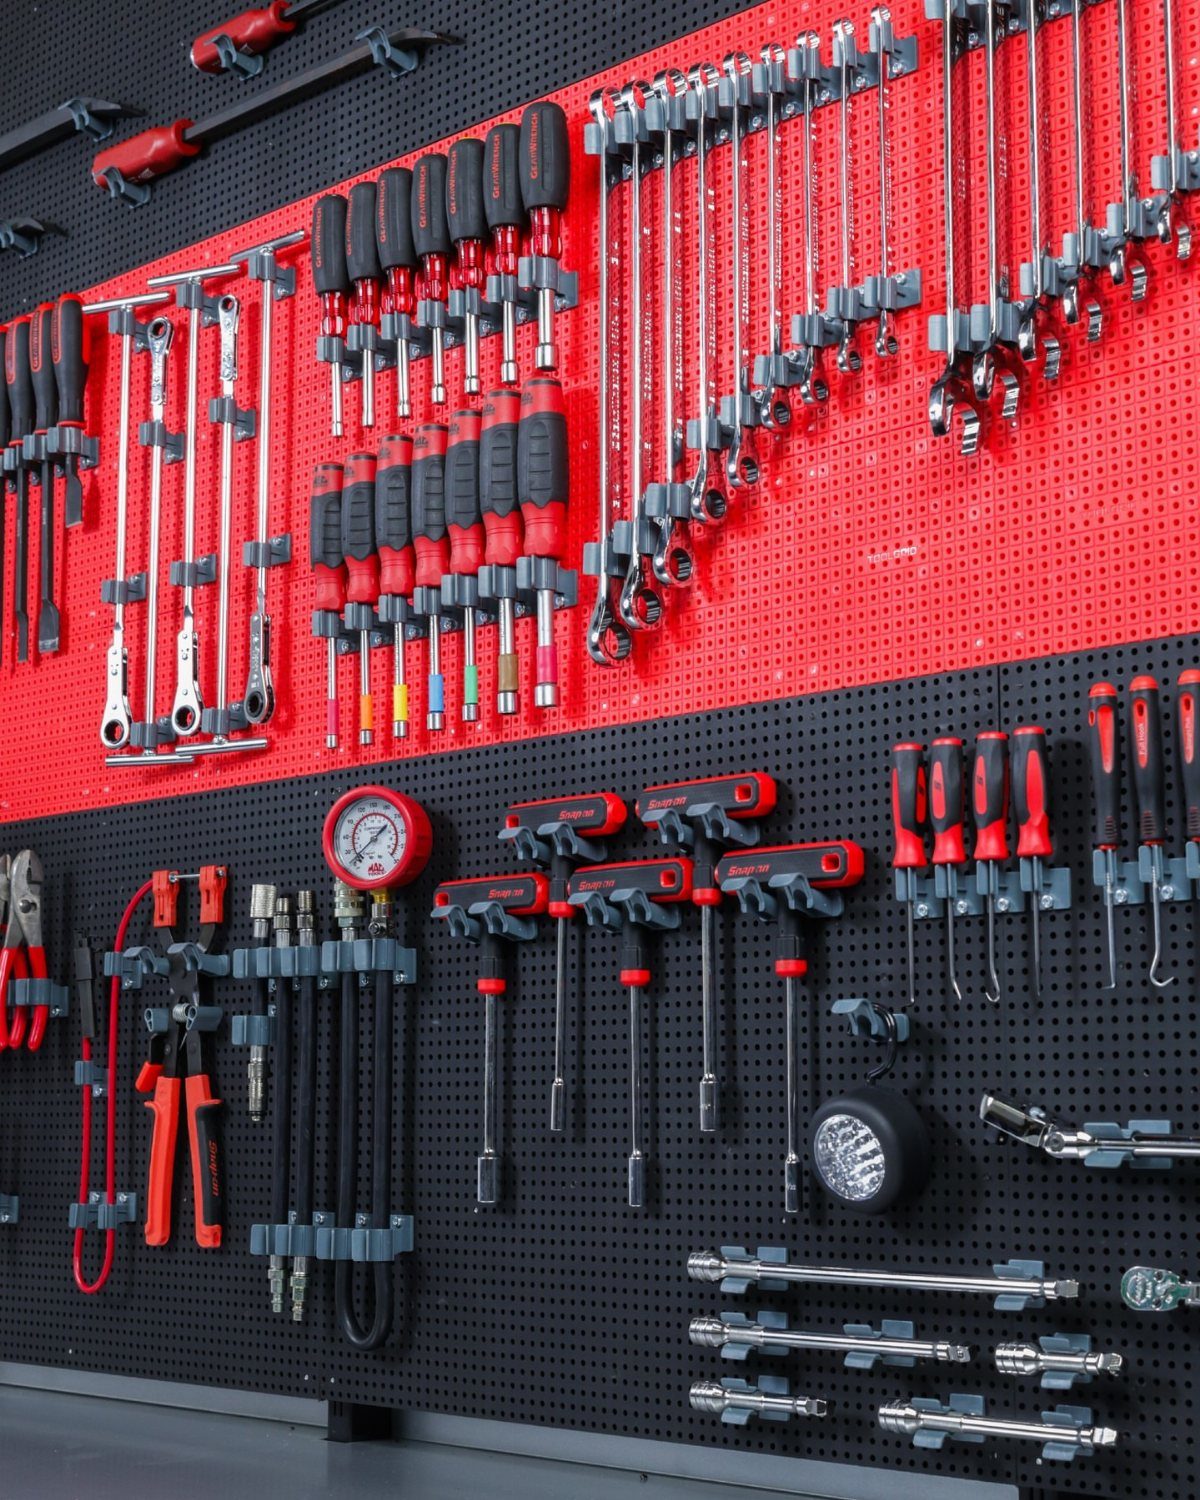
Pegboard is the cheapest way to get every wrench and screwdriver off a drawer floor and into sight. Plastic holders and clips snap into the holes, so the layout is never final.
Sort by task, not by tool type: put the things you use together side by side. Trace each tool’s outline with a marker once the layout feels right, and putting tools back becomes automatic.
Painting the board a dark color, as in the red and black here, also makes bright tools easier to spot.
4. Power Strip with USB Ports
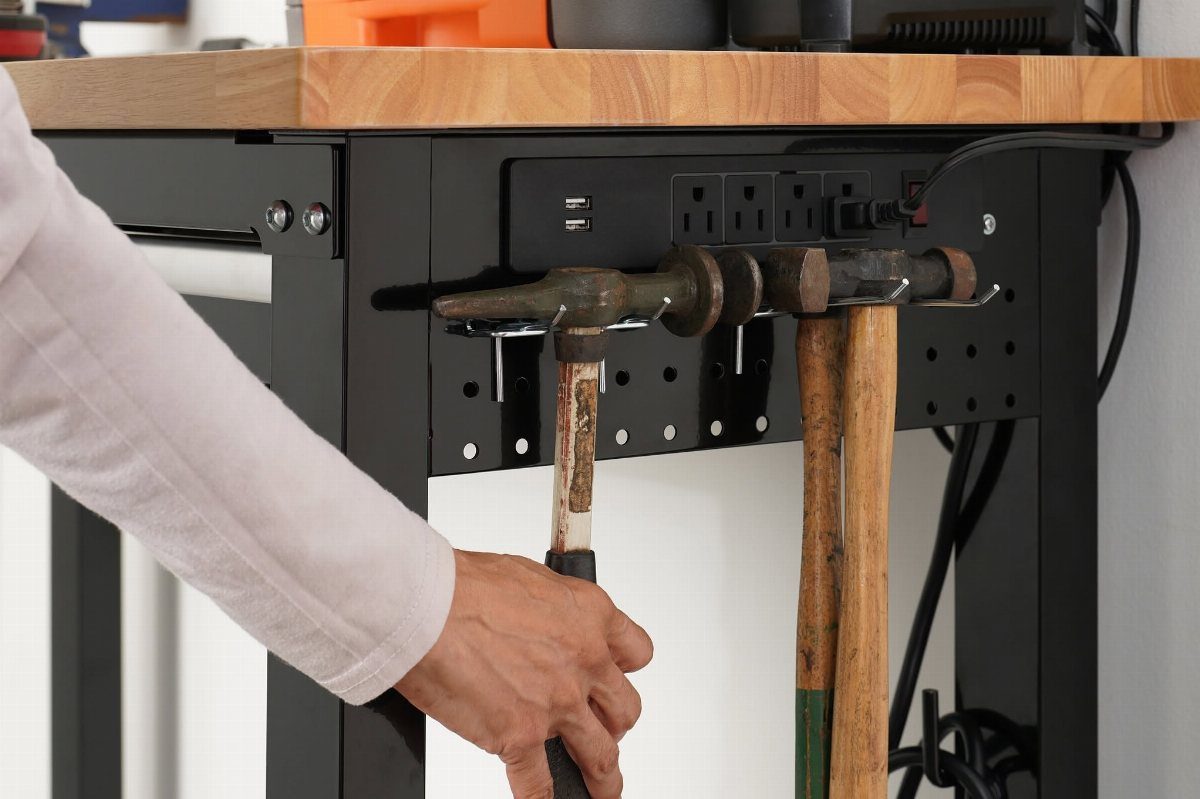
A power strip screwed to the bench frame, with three outlets and two USB ports, means no more crawling under the bench for an extension cord. Phones and rechargeable batteries can charge right where you work.
Mount it along the front or side rail of a metal frame, high enough that cords don’t drag across the work surface. Plug the strip into a single wall outlet and keep the run short.
A power strip with USB ports mounted at the bench edge is a quick upgrade, and I would do it before buying any other accessory.
5. Multi-Tier Electronics Repair Bench

Small parts get lost fast on a flat bench, so an upper tier built over the work surface solves the problem by lifting them out of the way.
Plastic bins hold screws and components, and testing gear sits at eye level, with a microscope on the main surface below.
Label every bin. Lots of compartments with no labels are worse than one messy pile.
A metal frame like this black one stays rigid under equipment, which matters when you are working at magnified detail. It takes more floor depth than a simple bench, so measure first.
6. French Cleat Tool Wall
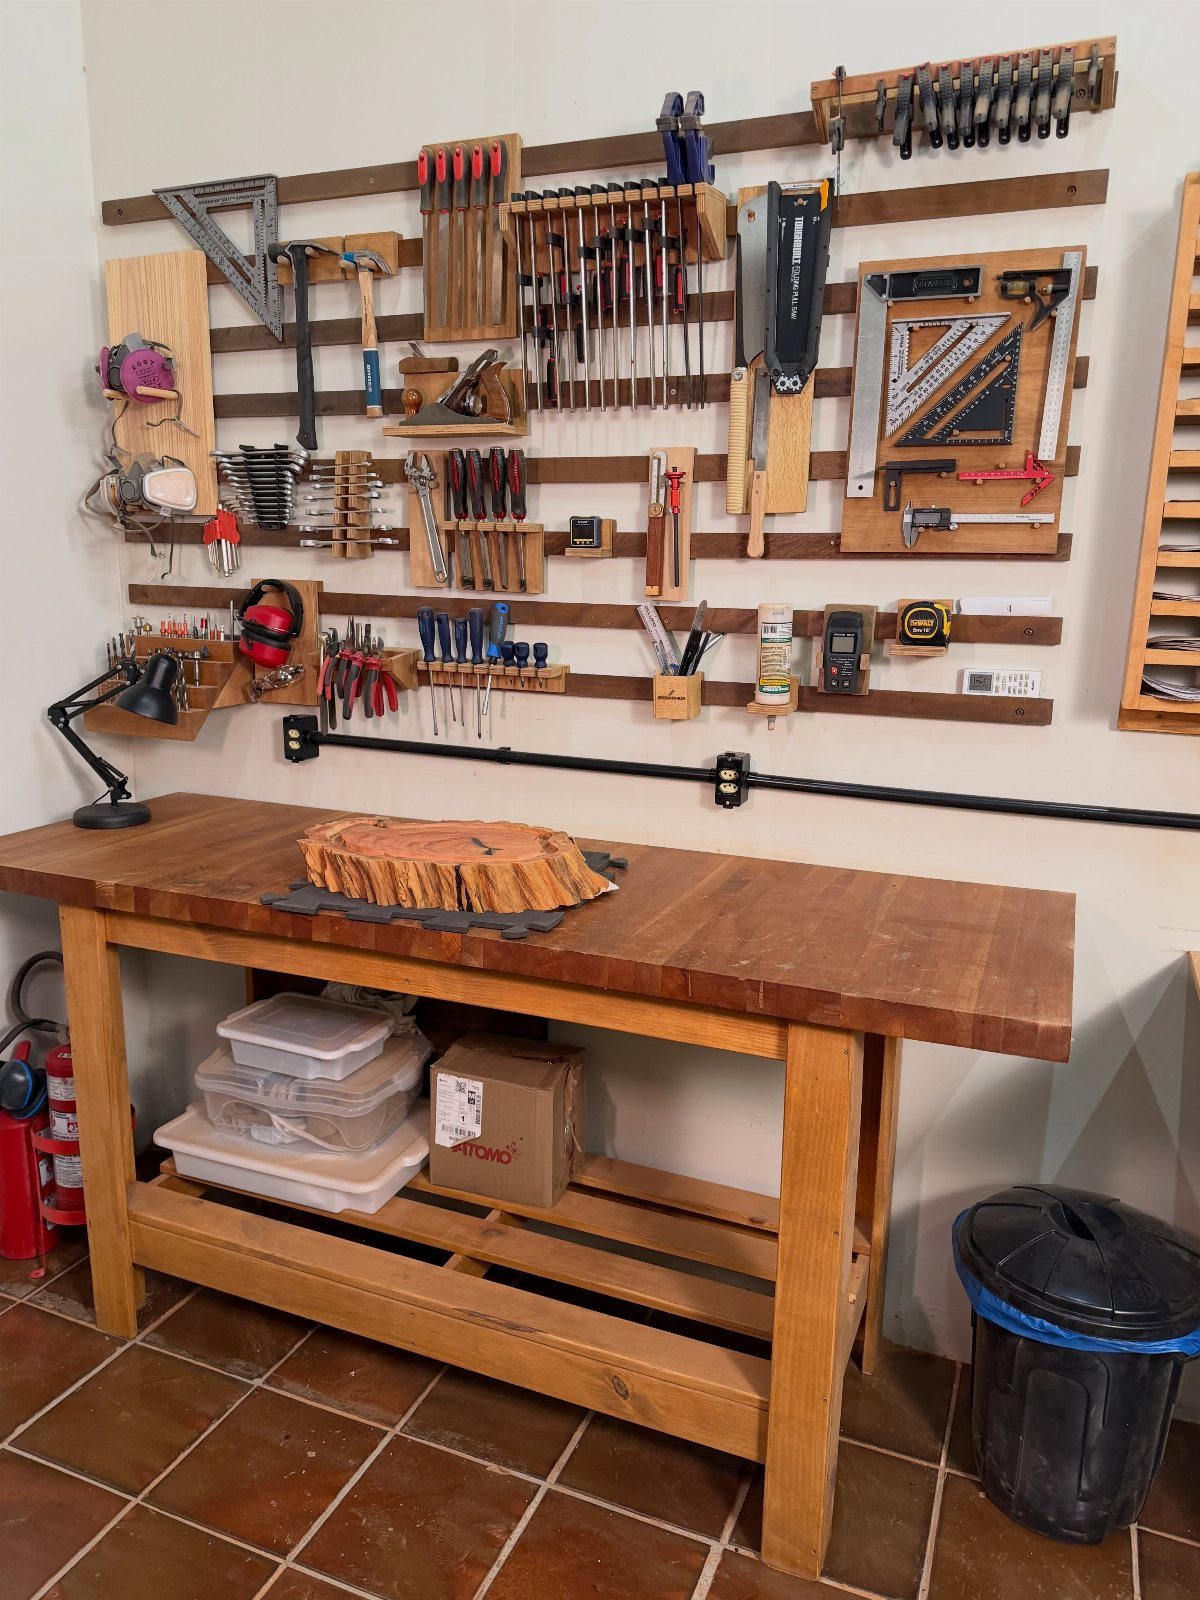
French cleats hold tools on angled strips of wood, so a hand tool wall can be rearranged in seconds by lifting a holder off and hanging it elsewhere. That flexibility beats fixed hooks for woodworkers whose tool set keeps changing.
Mount one cleat strip to the wall, cut a matching strip for each holder, and build the holders to fit your own chisels, saws and squares.
Hang the wall directly above the bench so your most-used tools stay within one arm’s reach. A scrap of plywood and an afternoon is enough to start.
7. Workbench Side Tool Holster
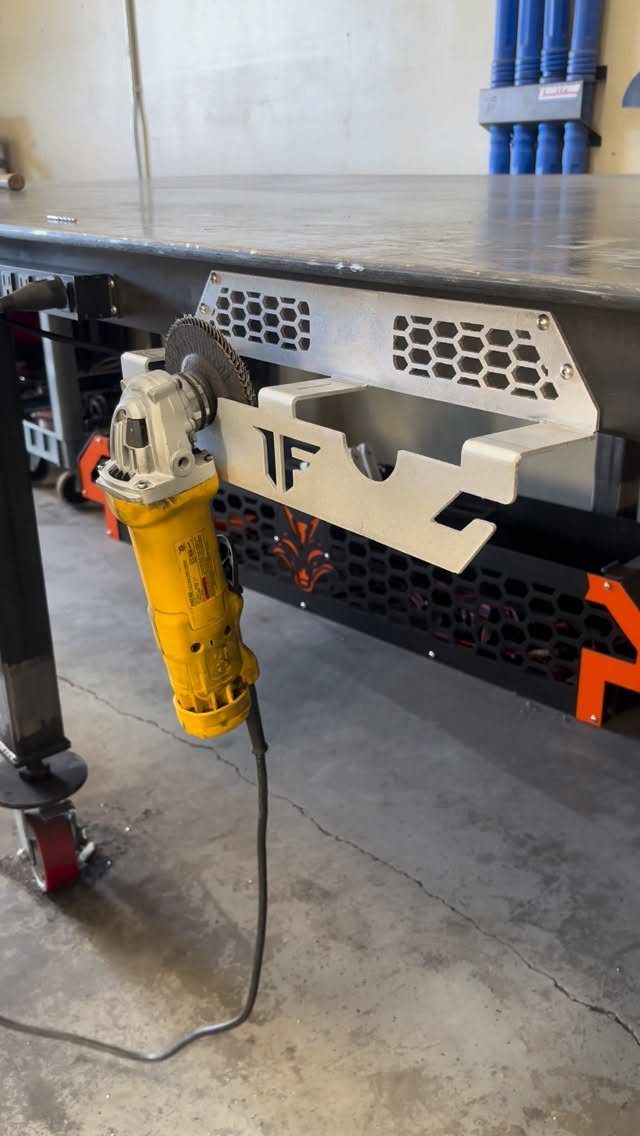
A power tool with a cord and a heavy head is awkward to store in a drawer, and a bracket cut to its shape on the side of the bench solves that.
The angle grinder drops into its own slot and stays put until the next cut.
Build the bracket around the tool you grab most, with the opening sized to the body so the grinder seats firmly. The side of the bench is empty space anyway, so nothing comes off the work surface.
Hold the tool in place and trace the cutout before you drill any mounting holes.
8. Wooden Tool Storage Wall Racks
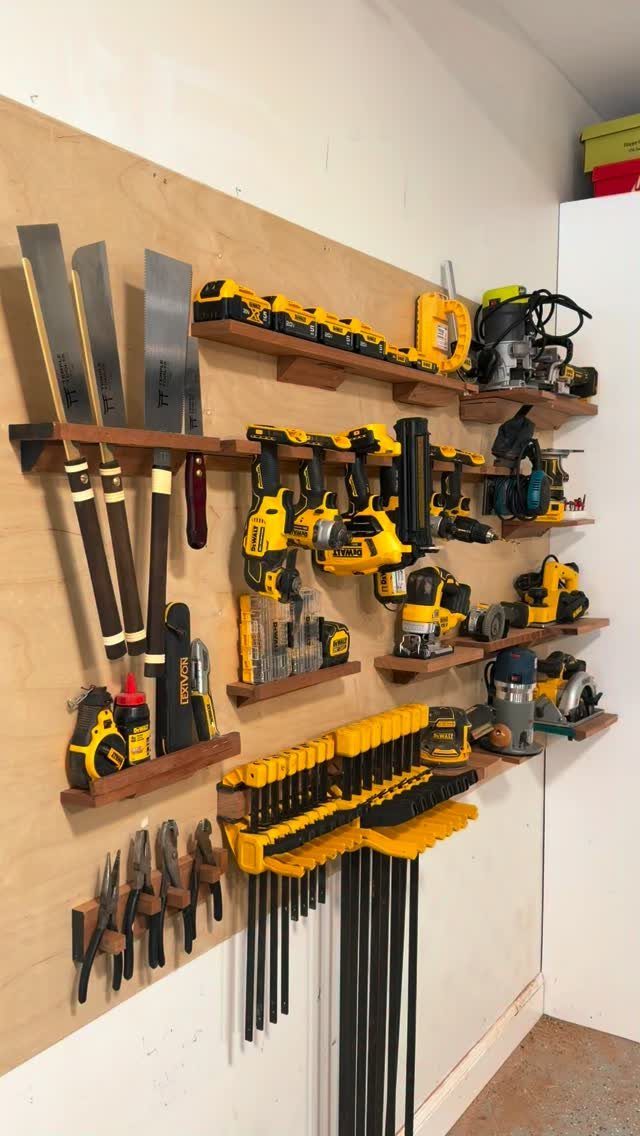
Plywood makes a forgiving wall for tool storage, because you can screw a shelf or rack into it almost anywhere. Shelves take the power tools, and open racks hold saws and clamps by their handles.
Build each piece to fit the tool it holds. A shelf cut to the width of a drill or a saw lets you see at a glance what is missing.
Lay everything out on the floor first, then screw it up.
Strength and Stability
Check the weight rating before you load a bench. Some steel models are rated to hold up to 2000 lbs, and a rating like that tells you the frame can take a heavy project without flexing.
Spread the load across the legs rather than stacking everything at the center of the top.
Keep a heavy rating in perspective, too: it only counts if the bench sits level on a solid floor, so shim any rocking leg before you start.
Workshop Ready
A bench meant for a vise or a drill press should be chosen with those tools in mind.
Mount a vise at a corner, over a leg, so the force of clamping goes straight down into the frame instead of twisting the top.
A drill press carries most of its weight up high in the head and motor, so it tips more easily than its size suggests.
Bolt it through the top rather than relying on its weight, and add a backing plate underneath so the fasteners don’t pull through.
Set the vise and press at opposite ends so each has elbow room.
Mobile Organization
Lockable casters are what make a mobile station both movable and safe to work at. Roll it into place, then step on every lock before you cut, drill or hammer.
Check that all the casters lock, not just two, and that the wheels also stop swiveling.
Load the heavy tools low in the cabinet so the station stays steady when you push it. Before you move it, close the drawers and doors so nothing slides out.






