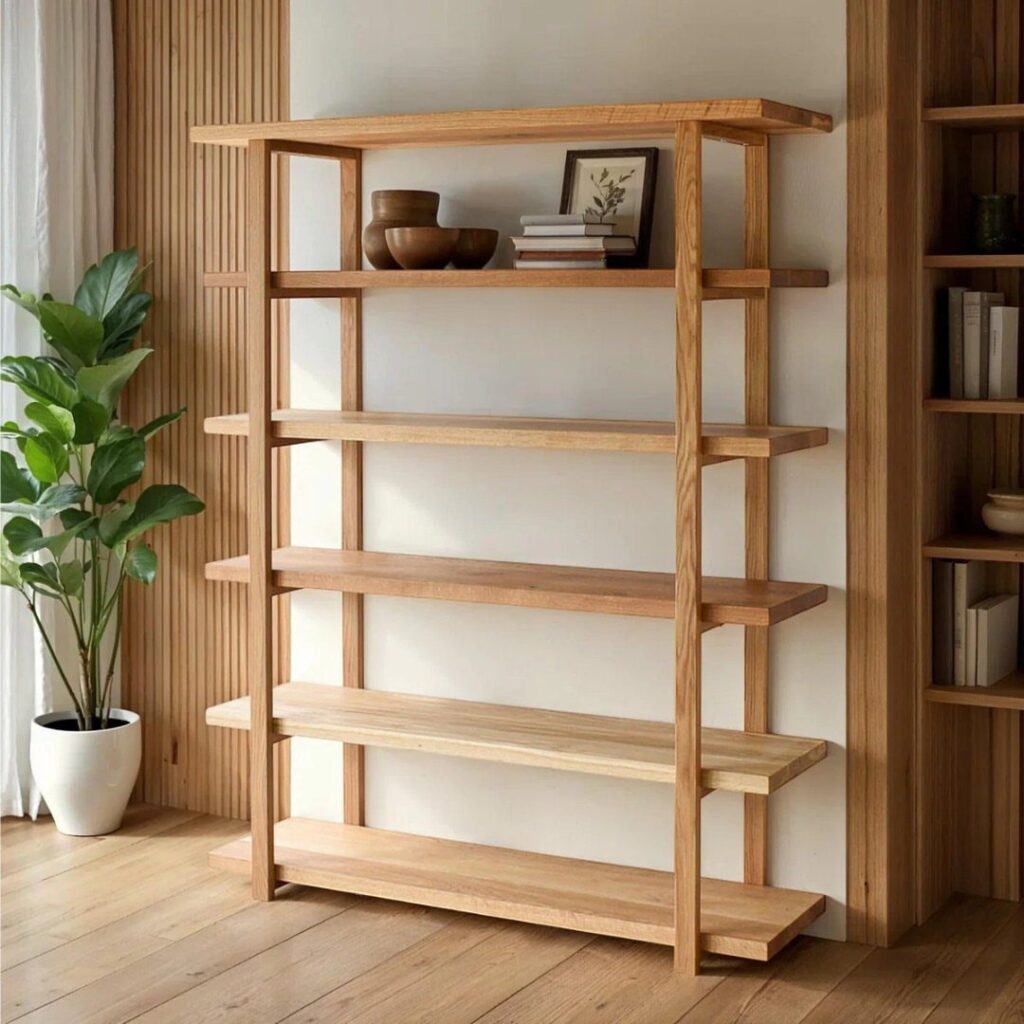
Your project list should start with the space where the piece will live, because that decides the wood, the finish and the size more than skill does.
The projects range from a simple stool that needs only a jigsaw and sandpaper to a wavy American flag carving that takes light passes and a practice run on scrap.
An Adirondack chair or a slatted shoe rack goes outside and needs an exterior finish, while a jewelry box or desktop clock stays indoors and can stay small.
Decide where the piece will live, whether that’s a hallway, a back porch or behind the sofa, then pick the build that fits.
1. Bookshelves
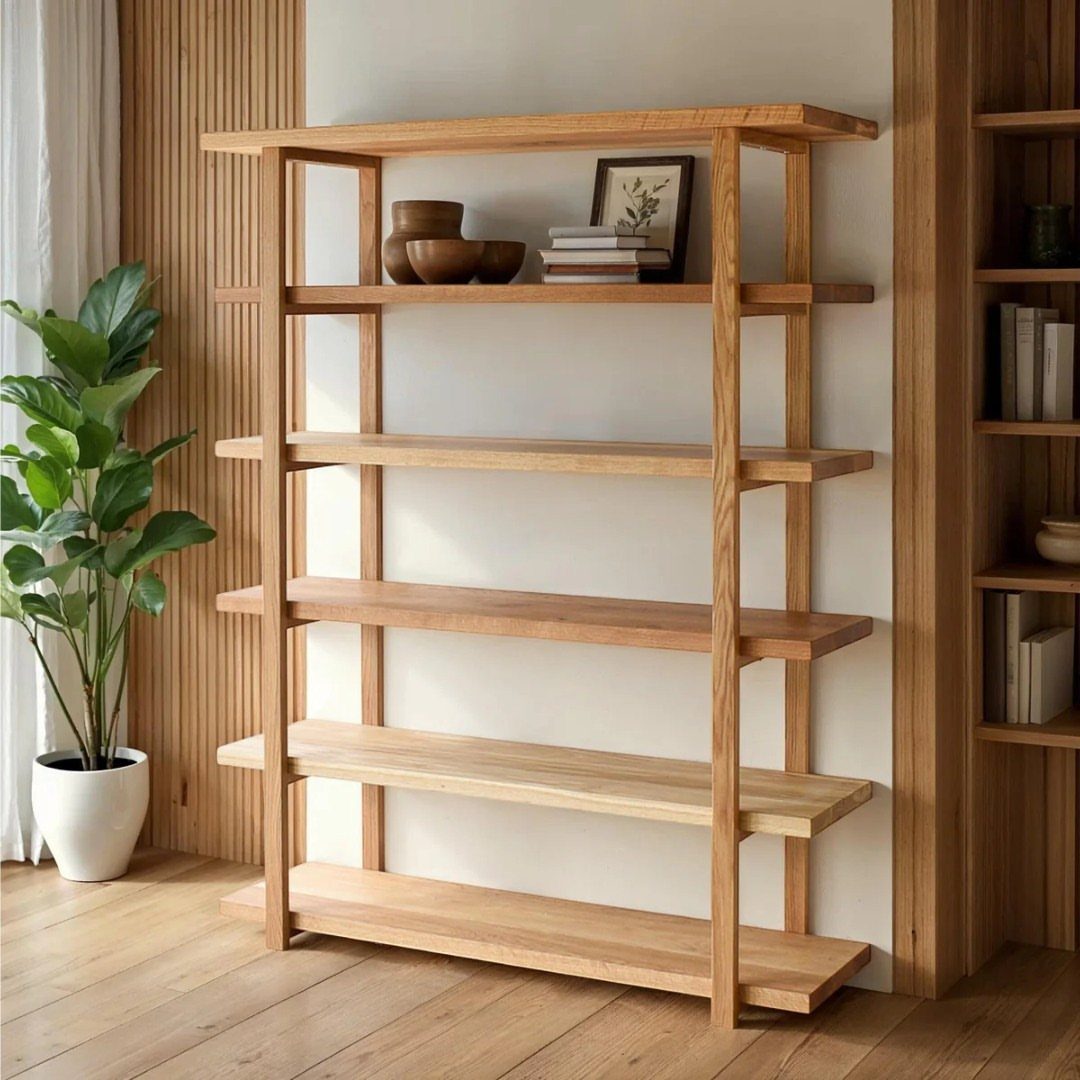
Open shelving with a light wood finish keeps a room feeling bright, but a full bookcase asks for more stamina than a first build should, so I’d start with a single short shelf: a couple of boards, a square, and a drill handle most of it.
Spacing is the one decision worth making on purpose. Bowls and books want different heights, so I would plan a couple of taller gaps among the shorter ones instead of dividing everything evenly.
Open shelves also show off dust and clutter, so they suit people who like to display things rather than hide them.
2. Adirondack Chairs
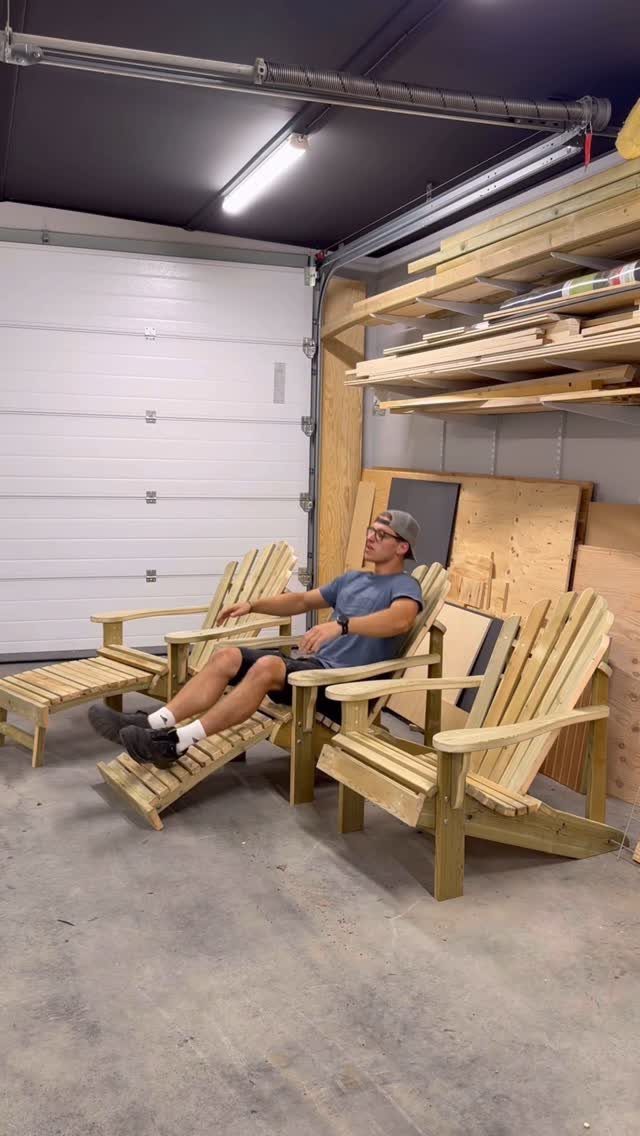
Three chairs in one garage tells me this design repeats well: once the first set of cut templates exists, the second and third go quickly.
An Adirondack chair has more angled cuts than most beginner projects, so it asks for patience more than skill. Trace every part from a single pattern, and the pieces will match.
A light wood like cedar or white oak suits an Adirondack chair, since both hold up outdoors and keep the airy, sun-bleached look. It also needs a weatherproof finish before it goes outside, and that step is worth doing right.
3. Shoe Rack
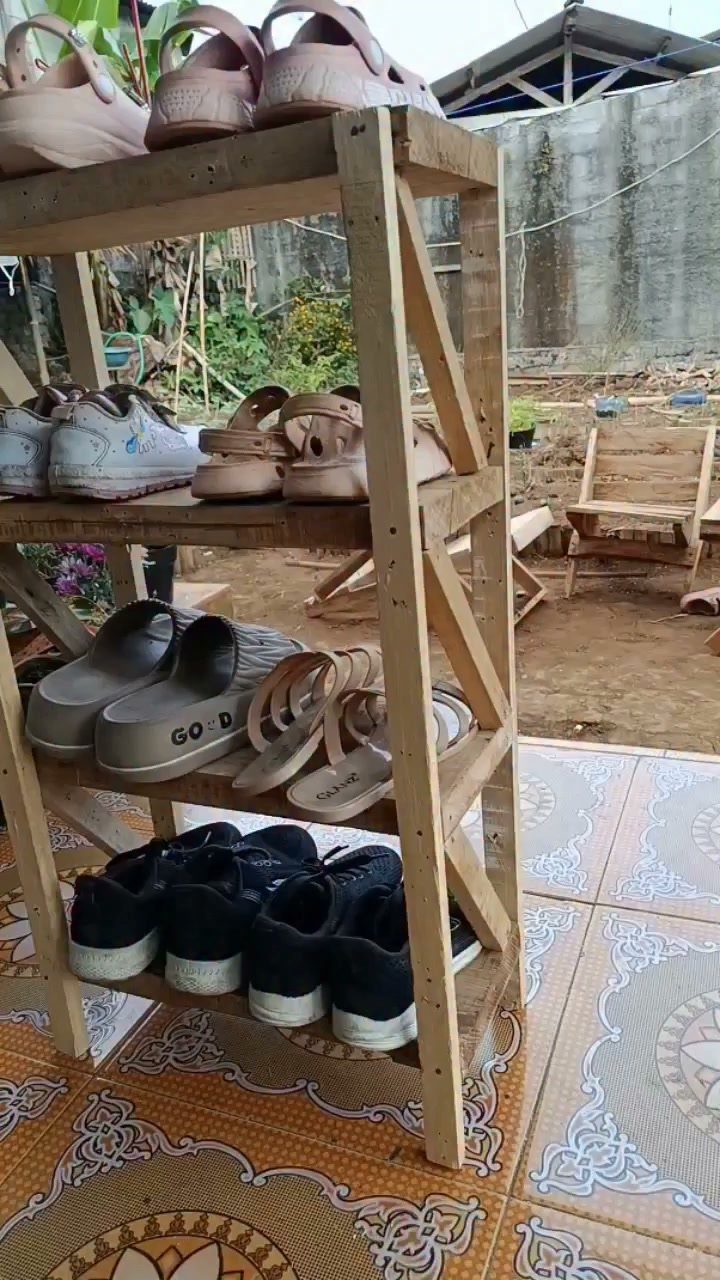
A slatted rack with 4 tiers lets sandals, sneakers and boots all dry in open air, which is why it works so well on a patio.
For the build, repeat one cut many times. Rails and slats come out identical, so set a stop block on the saw and cut them all at once.
Leave gaps between the slats so dirt falls through. Because it lives outside, I would seal it with an exterior finish before loading it up.
4. Birdhouse
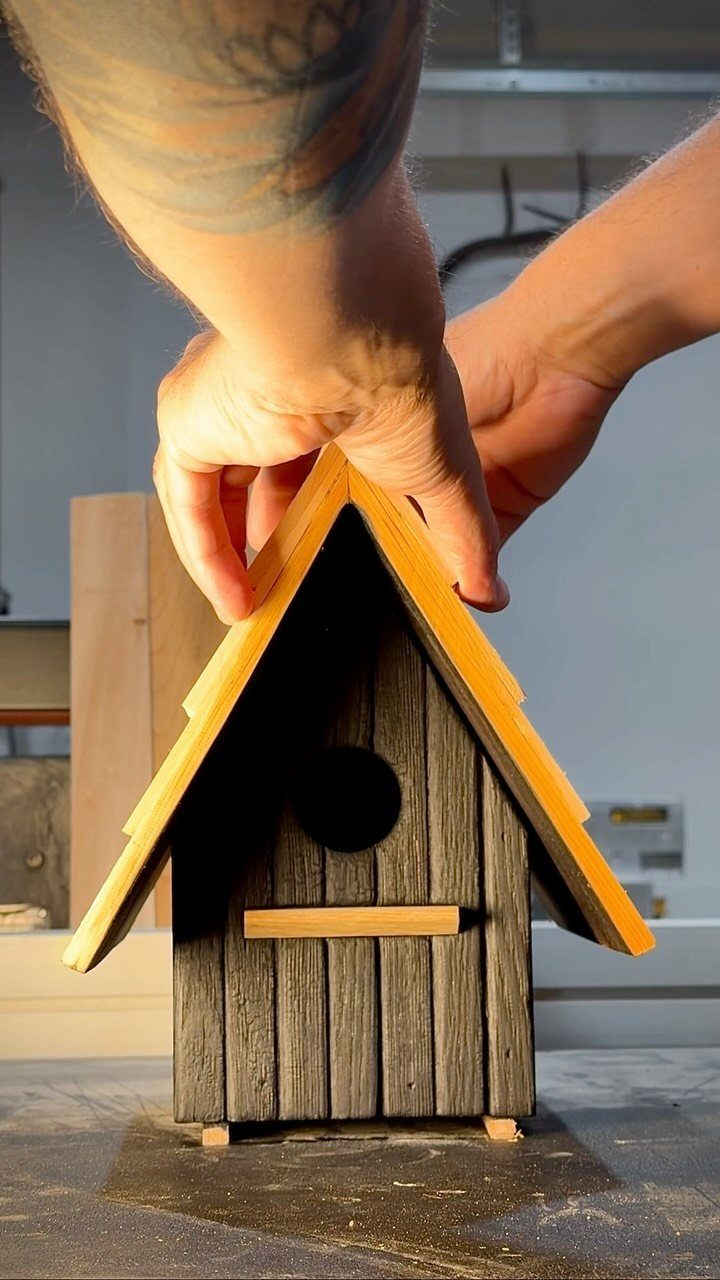
Paint decides whether a birdhouse looks like a project or like a piece of decor, and a dark grey body with a bright yellow roof is a bold, easy way to go.
Build the box first and keep the roof as a separate piece, so you can paint each part before gluing them together. Hands stay clean that way, and the edges come out crisp.
The maker described this one as part 2 of 3, which fits: building, painting and mounting each make a natural stage for an afternoon.
5. Easy Picnic Table
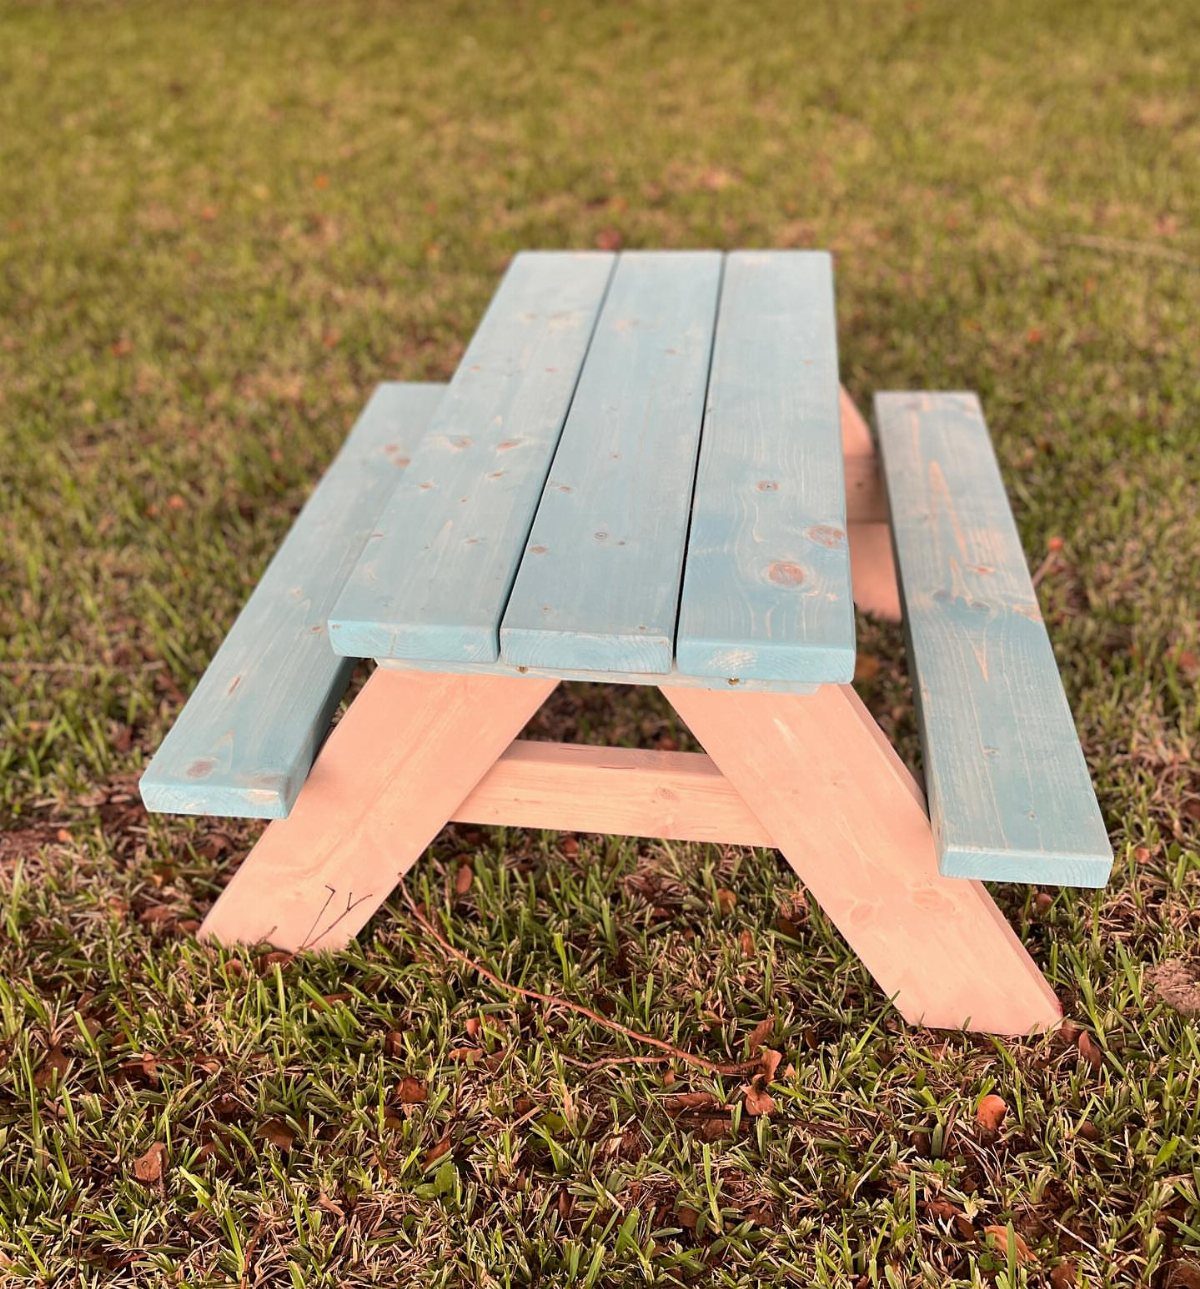
Kid-size picnic tables are about the friendliest first furniture build I know: flat boards, straight cuts, and a result that sits happily on a lawn.
Planks in 2 colors, like the blue and natural wood here, make the design look planned. Stain or paint the top boards separately before screwing them down.
Keep it small and the lumber bill stays low. A full-size table is a different budget and a much heavier carry.
6. A Stool
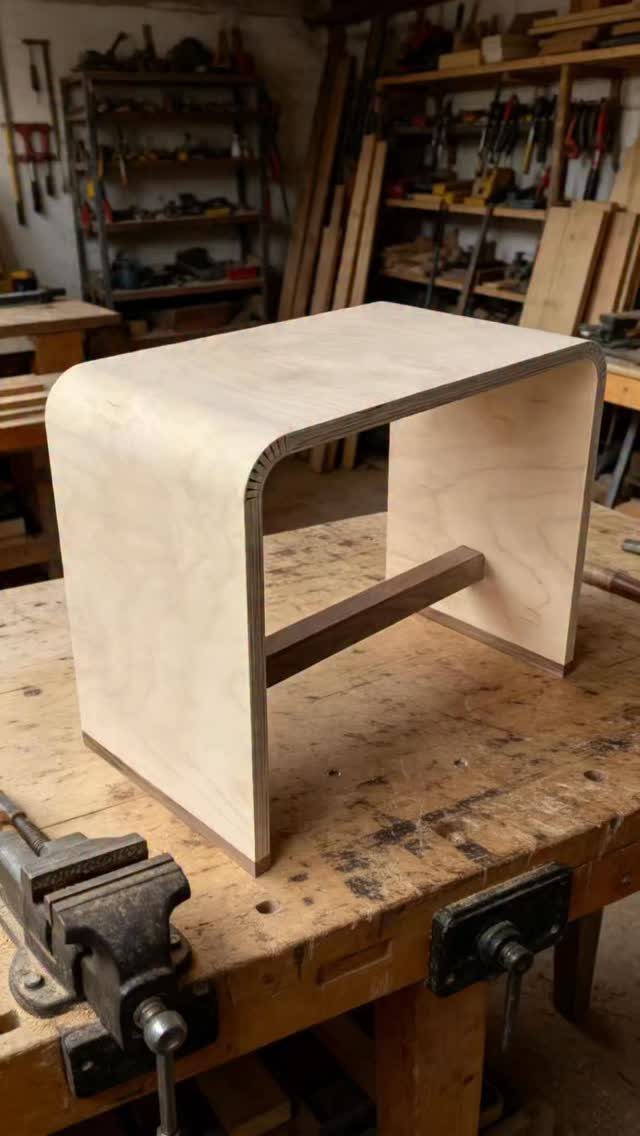
A stool is the gentle way into seat building, because there are no reclined angles or arms to worry about, just a top, legs and a brace.
This plywood version has curved corners on the top, and a round-over from a jigsaw and sandpaper gets you there without any special tool. The cross-brace is what keeps the legs from racking, so I would never skip it.
Plywood keeps the cost low and the parts flat. Sand the cut edges well, since plywood layers show there.
7. Picture Frames
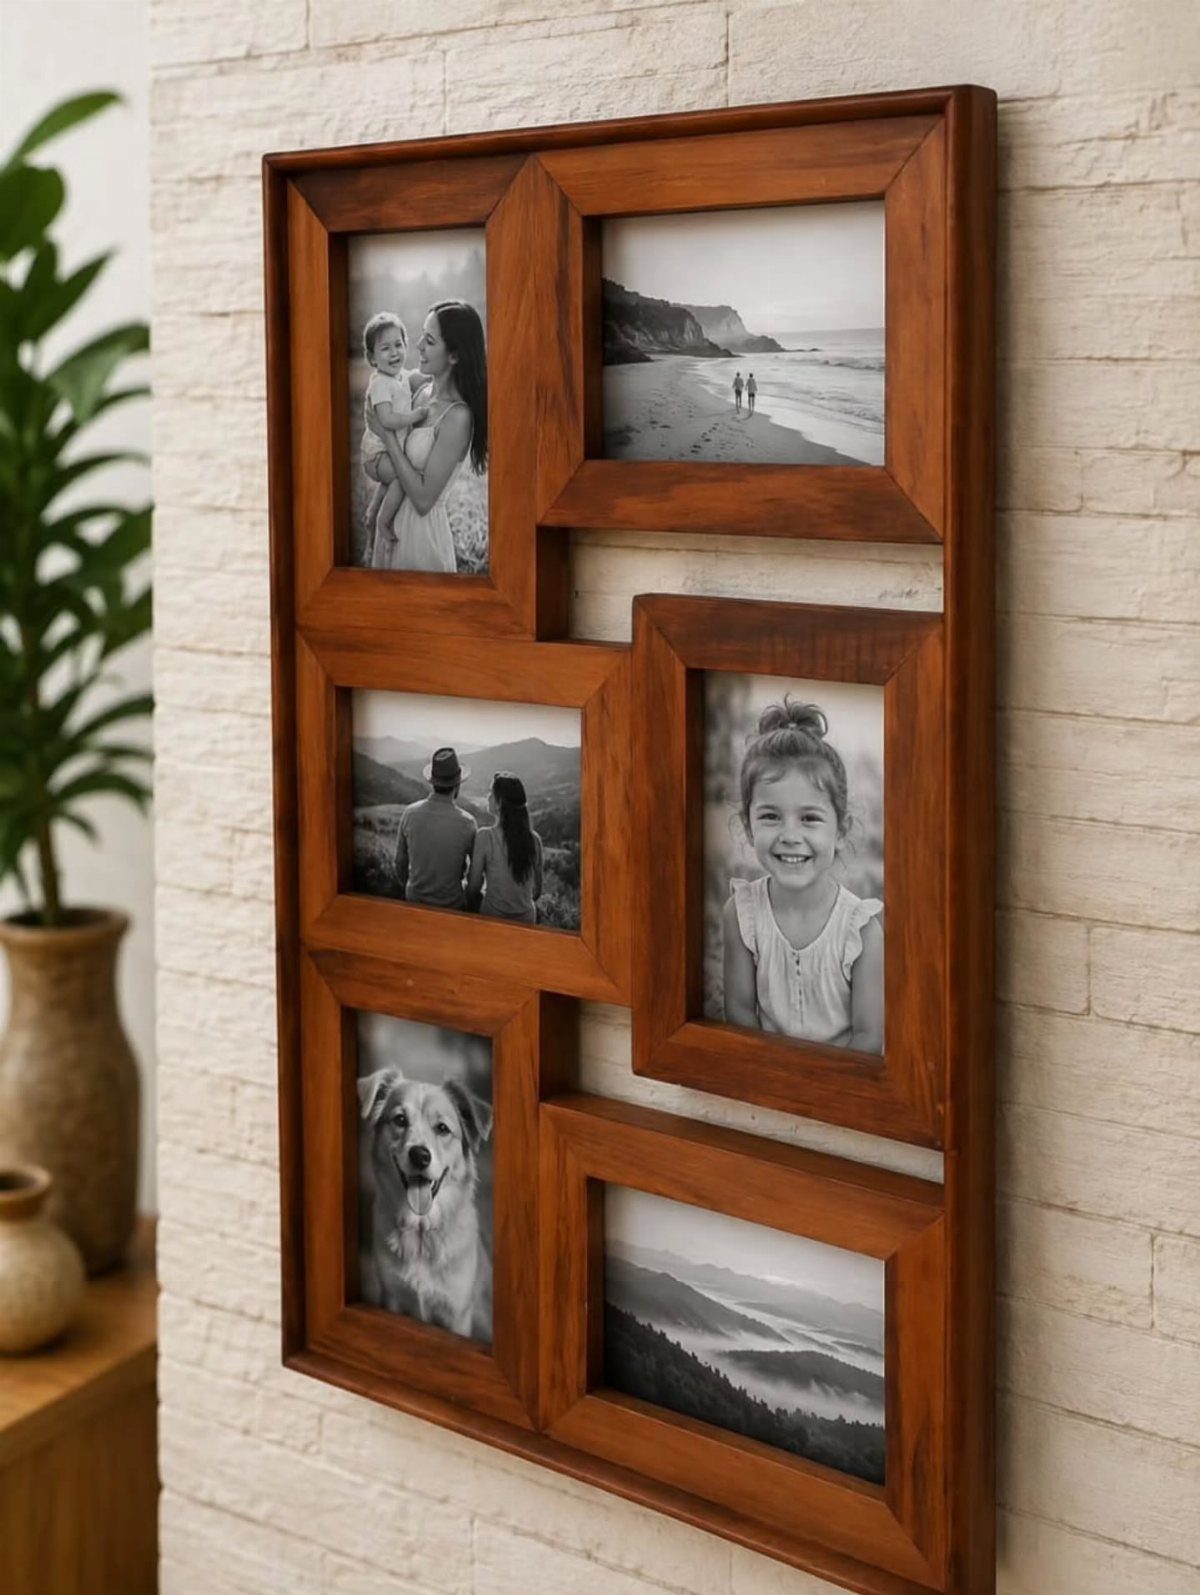
A multi-photo frame is a single wooden border with several openings, so one piece on the wall holds a whole family’s worth of pictures.
Black and white prints keep mixed subjects, like people, a dog and landscapes, looking like one set.
Size each opening to a standard print and cut the border pieces to match.
A brown stain is a safe choice for picture frames, since it gives light walls like white brick or painted drywall a warm edge without competing with the art.
Dry-fit everything before gluing, since a gap at one corner shows more in a grouped layout.
8. Plant Stands
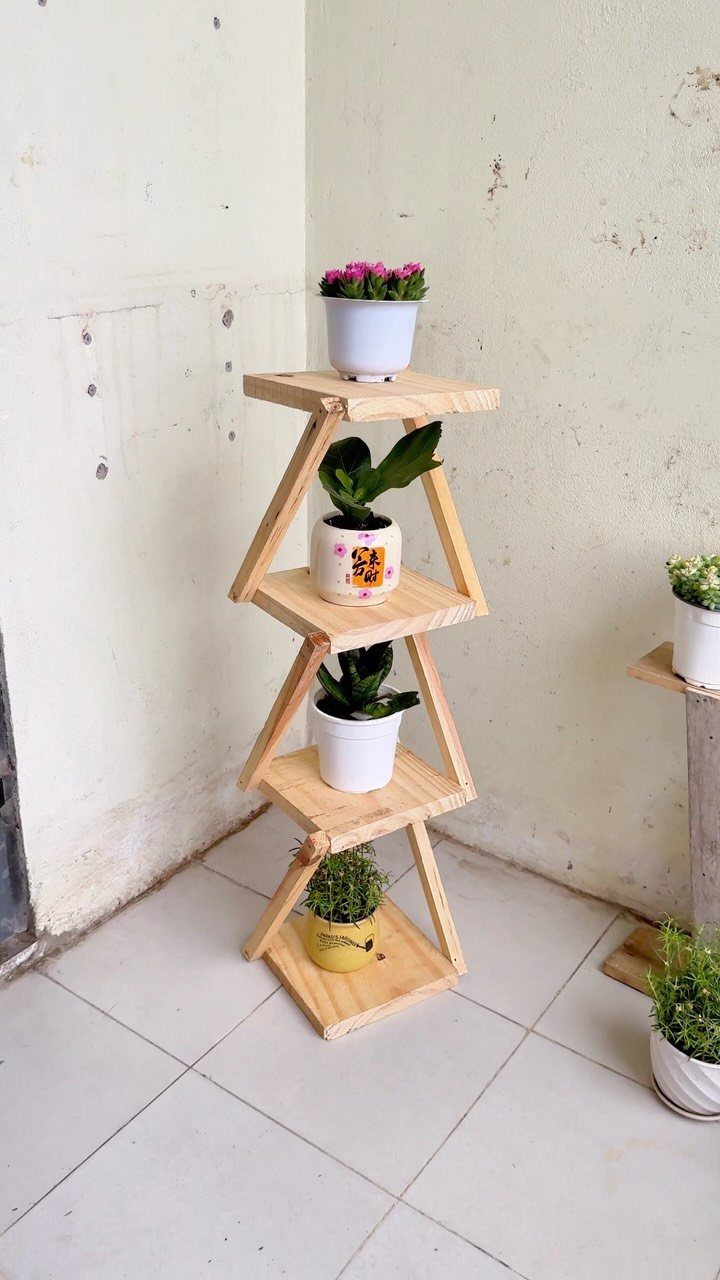
Three tiers in a triangular layout let several small pots share one footprint, which is handy when floor space is tight.
I would cut every tier from the same stock and mark the parts from one pattern, so the levels match. Leave the wood natural or give it a clear finish; a plain white wall lets the grain carry the look.
Check the stand with the pots in place before you call it done, because a wobble is easier to fix on the bench.
9. Cutting Board
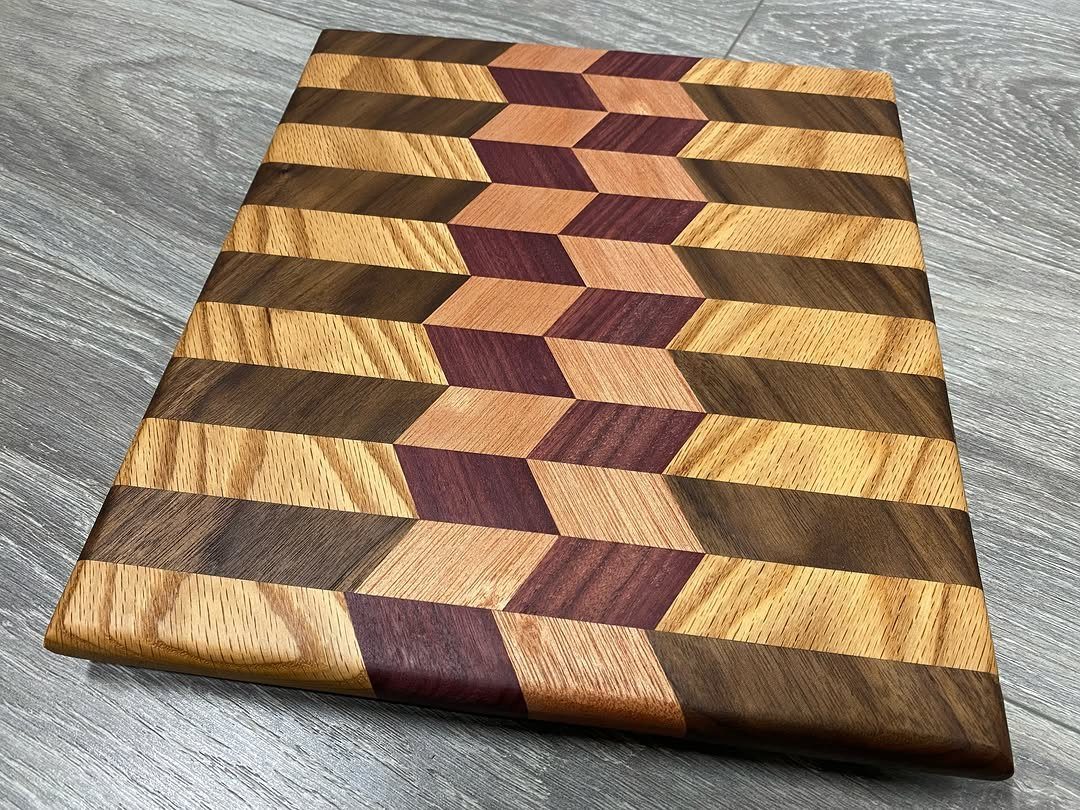
A cutting board with a 3D geometric pattern is built from strips of wood in several brown tones, glued up so the colors read as raised cubes.
Because the pattern depends on precise strips, accuracy matters more than speed.
Cut every piece to the same width, and clamp the glue-up with even pressure. Sand the board flat before finishing.
If the first one feels ambitious, start with plain alternating stripes. The same skills carry over, and the pattern can come later.
10. Jewelry Box
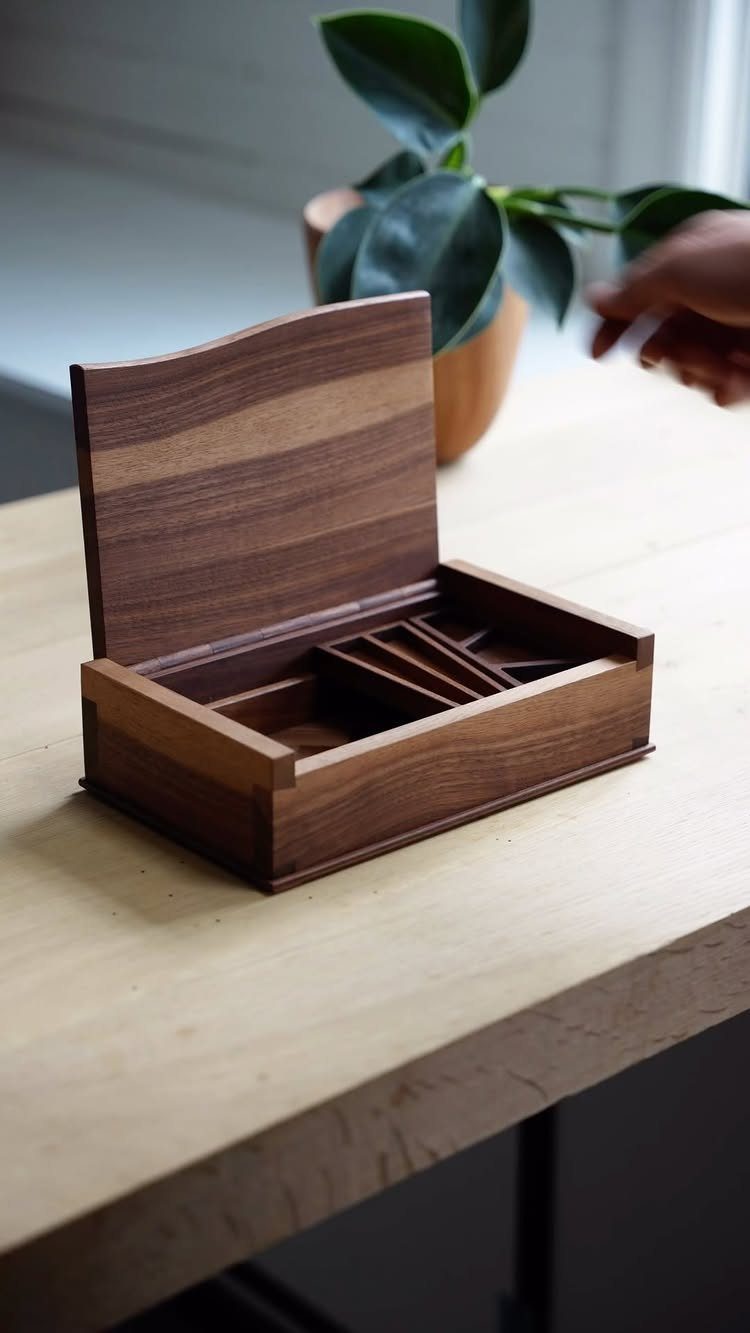
Dark wood, a curved lid and small compartments make a jewelry box that looks like a gift but is really a lesson in fitting parts together.
The compartments are the easiest part: thin dividers set in the tray keep rings and earrings from tangling. The curved lid is the harder step, so I would practice on scrap before cutting the good piece.
Keep the size small. A small box uses little wood, which suits a tight budget.
11. Desktop Clock
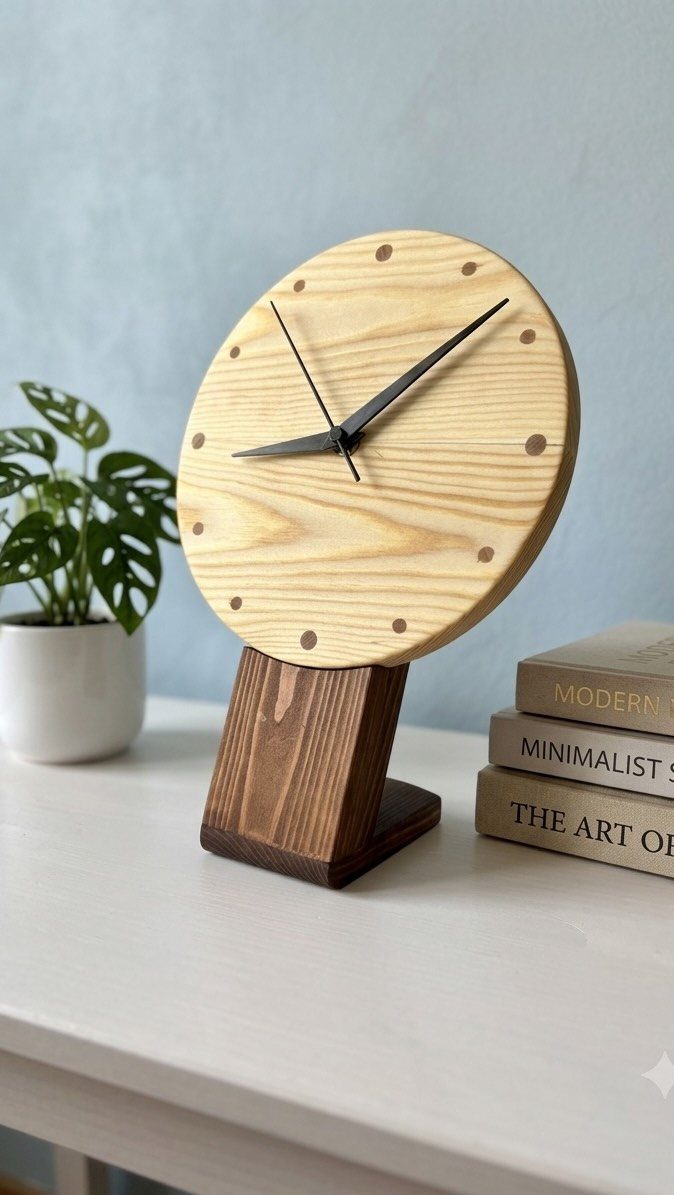
For a desktop clock, pair a light face with a dark brown base. The contrast makes the numbers easy to read at a glance and gives a simple build a modern look.
The clock movement is a separate part you buy, so choose it first and size the hole in the face to fit. Drill the center hole carefully, since hands that sit off-center are obvious on a round dial.
Keep the base heavy enough to stay put on a desk.
12. Tool Box
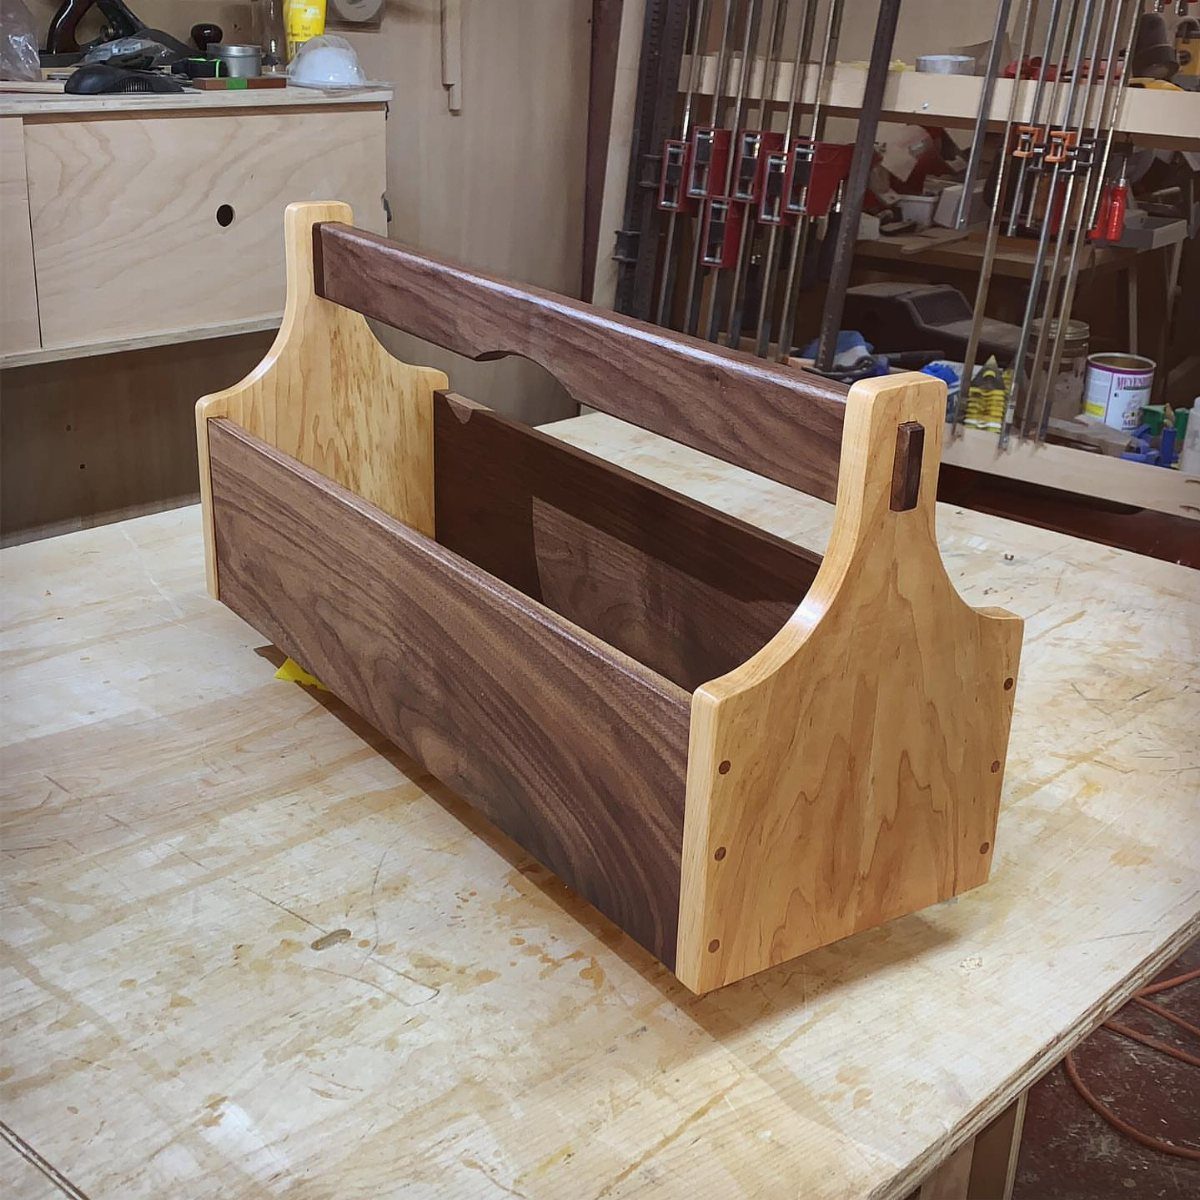
A tool caddy with a handle lets you carry everything to the job in one trip, and mixing light and dark wood makes it look finished rather than utilitarian.
Fix the handle with screws plus glue, because it takes the full weight of the tools. I would size the box around the tools you already own instead of a generic plan.
A little sanding on the handle makes carrying comfortable, and the shop gets tidier right away.
13. Nesting Trays
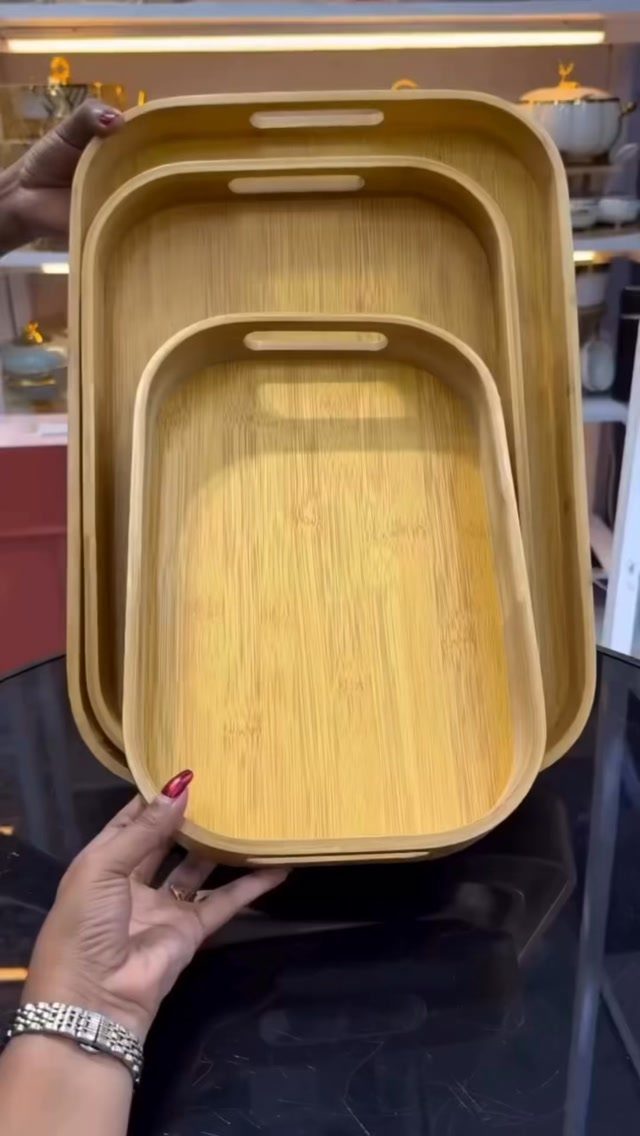
Nesting trays store in the space of one, which is what makes a set of three so handy for a small kitchen or a crowded desk.
Round the corners and cut a hand-sized opening in each tray, so one hand can lift it without a fight.
Cut all three from the same stock and step the sizes down evenly, so each tray drops into the next with a little room to spare. Sand the handle cutouts smooth, since fingers touch them every time.
Bamboo is a good pick for a tray set like this: it’s biodegradable, hard enough to take daily use, and lighter than most hardwoods.
14. Mail and Key Organizer
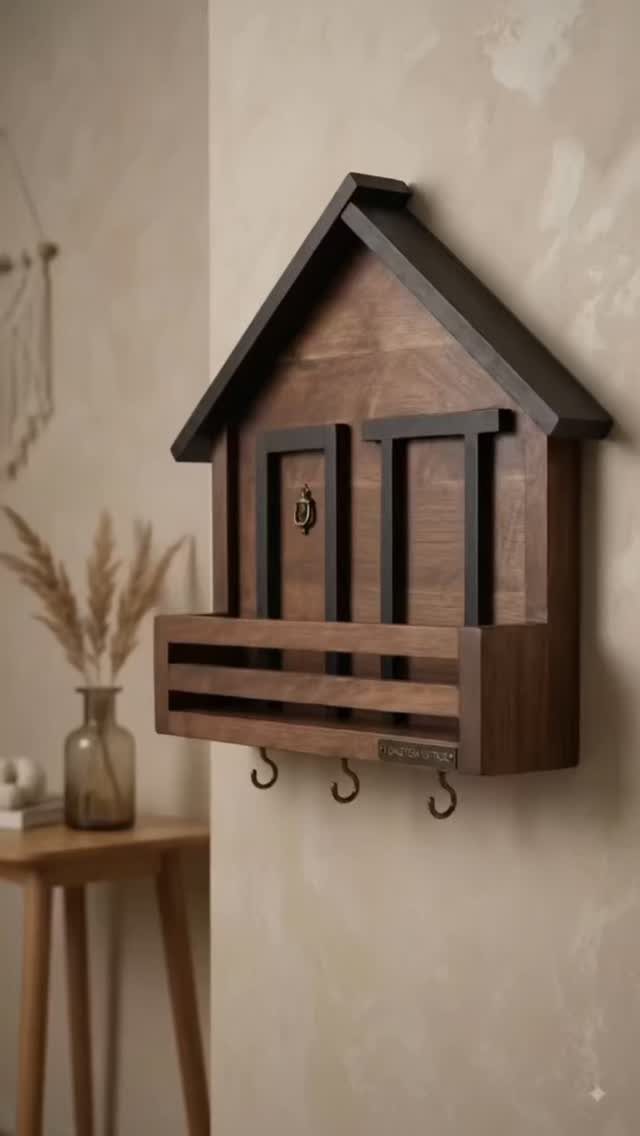
A house-shaped organizer by the front door gives mail, keys and a coat or bag a fixed home, so nothing gets hunted for on the way out.
Build it as one small box with a slatted shelf for letters, then add a hook for keys and a row along the bottom.
Metal hooks hold up better than wooden pegs, I think, because keys and bags wear at wood.
Mount it into a stud or use wall anchors, since a loaded rack pulls on its fasteners. Keep it slim and it fits above a small table.
15. Dolly
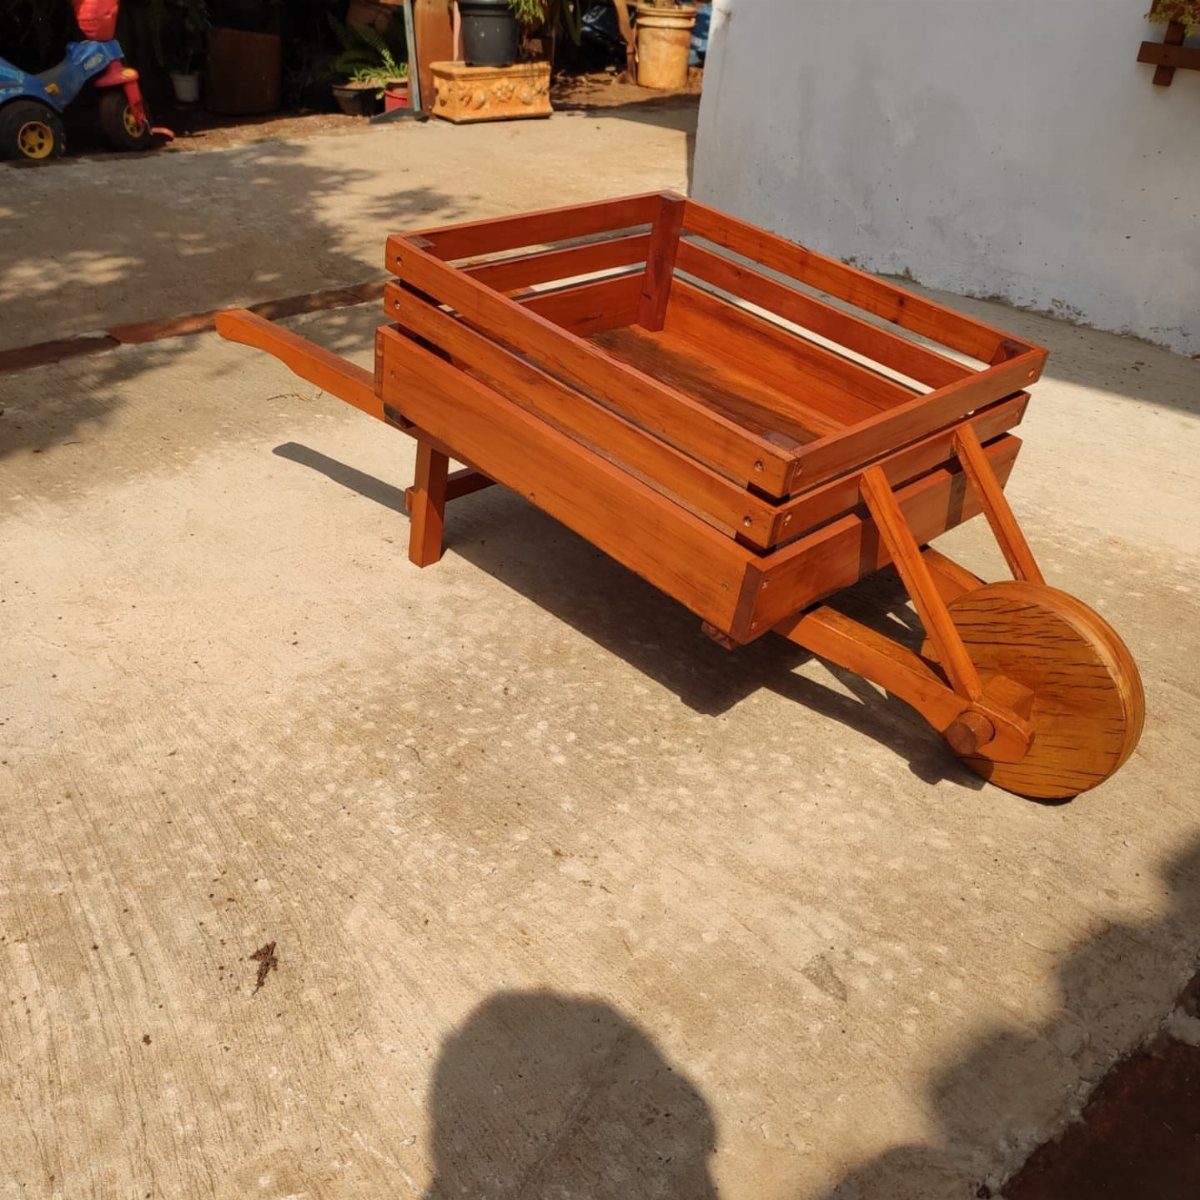
A one-wheeled cart with a slatted bed and long handles turns a heavy load into something you can roll across a yard, and it is simpler to build than it looks.
The handles are the part that takes the strain, so I would use screws plus glue there.
The wheel is the one piece you buy, so choose it first and size the frame around it.
Concrete is about the easiest surface for a dolly, since a hard, flat floor lets even a small wheel roll with little push.
16. Dog Feeding Station
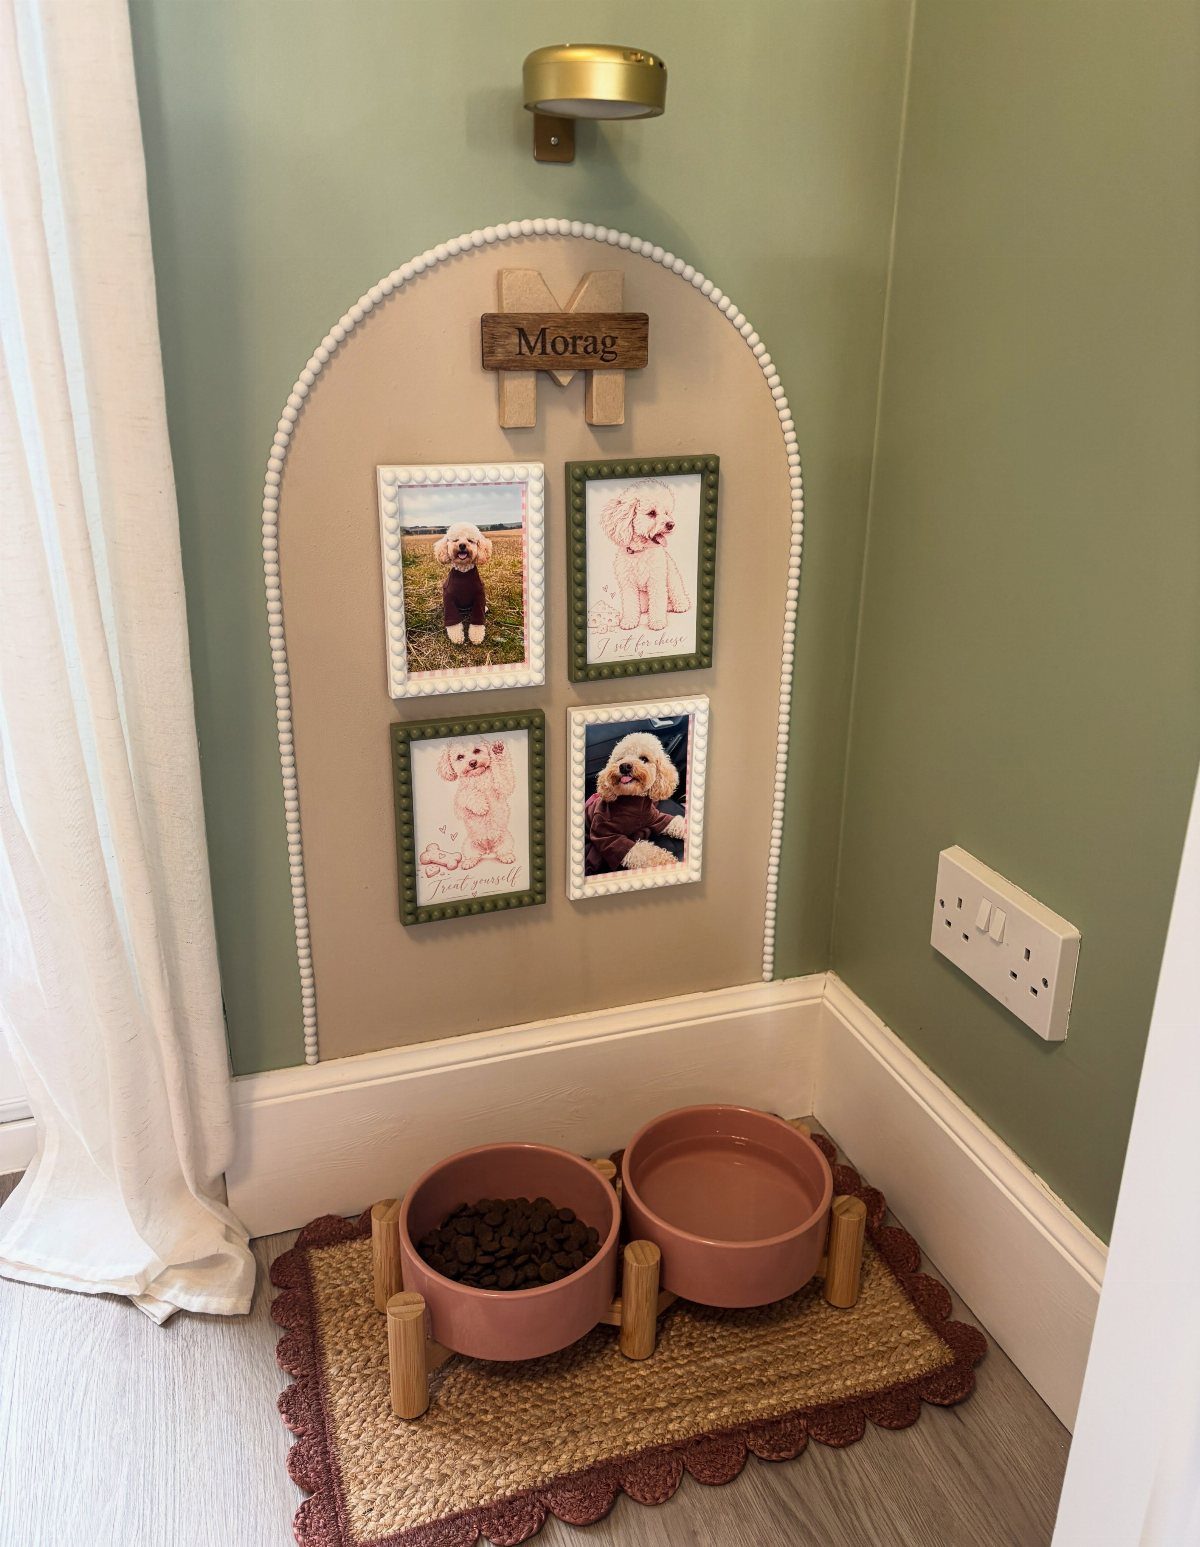
Raising a pair of bowls on a wooden stand keeps food and water in one tidy spot, and it keeps the floor around them cleaner.
Cut the openings to match your bowls before assembling anything. Test with the real bowls, since a snug rim keeps them from sliding when a dog pushes at them.
A woven mat underneath catches spills and protects the floor. Sand every edge well, because pets will nose around all of it.
17. Power Tool Charging Station
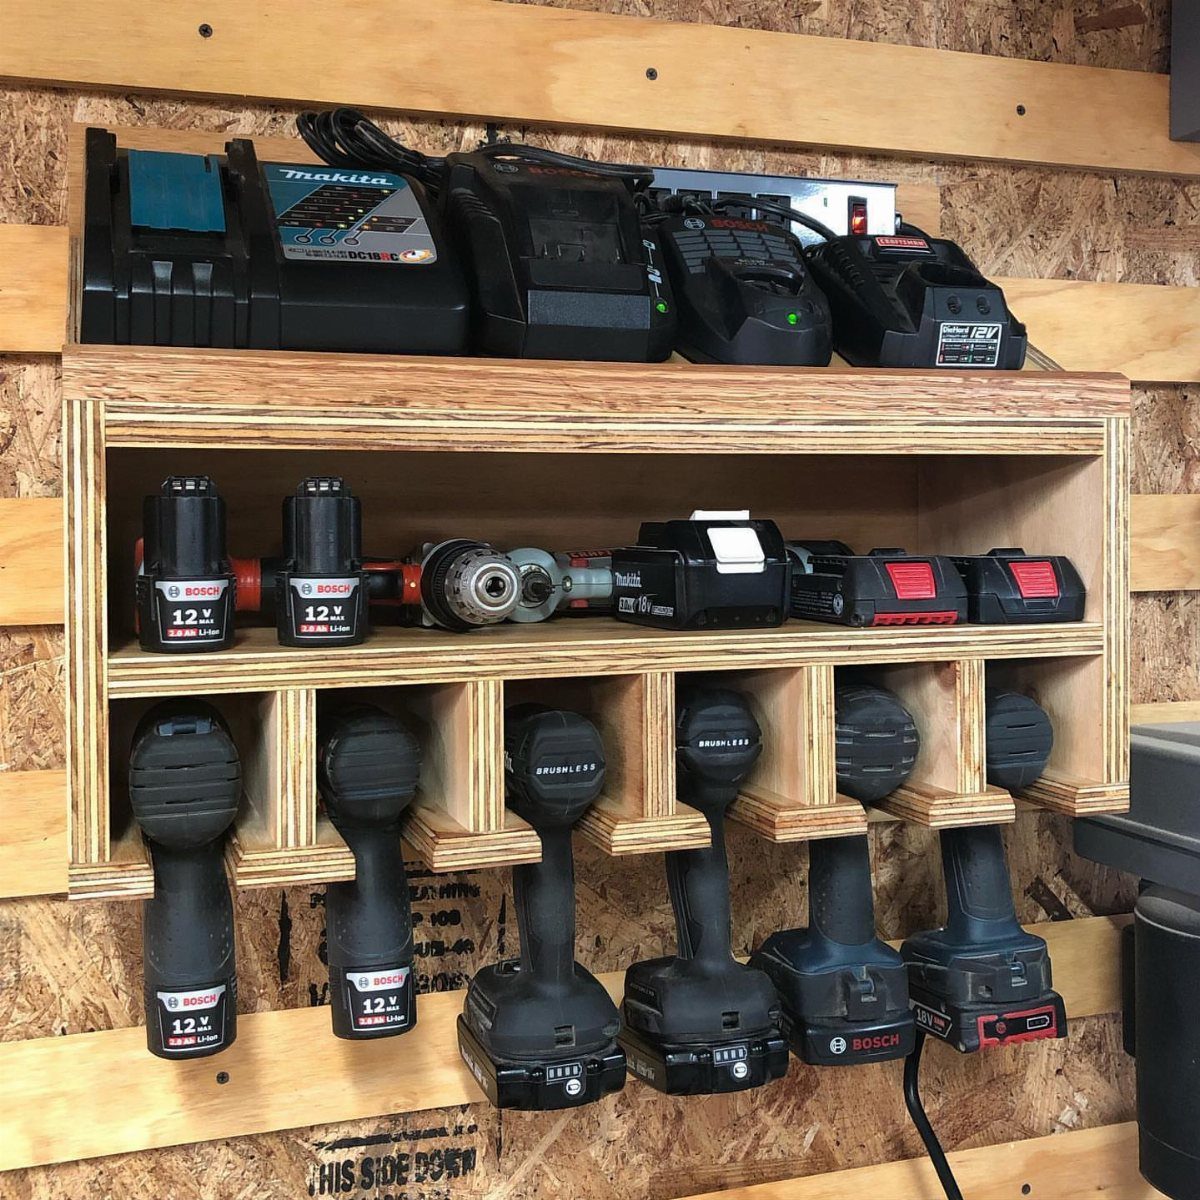
Cordless drills, spare batteries and chargers pile up fast, and a plywood panel on the wall gives each one a place to sit and charge.
Plan the layout around your own tools.
Lay the drills and chargers on the board, trace them, then build holders to fit, with outlets and charger cords in mind. Brands differ in size, so a Bosch holder will not suit a Makita.
Screw the panel into studs, because a full rack of tools is heavy.
18. Behind-Sofa Console Shelf
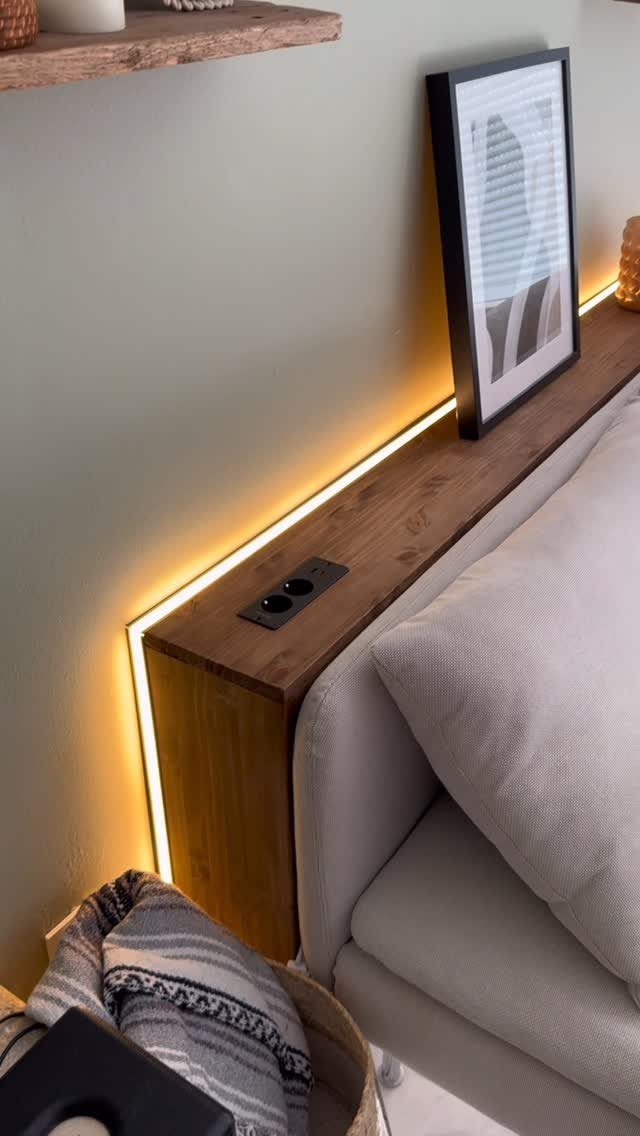
Space behind a sofa usually goes to waste, and a slim console there adds a surface for a drink, a lamp or a phone.
Run the strip’s cord to the strip before you attach it, and keep the shelf narrow enough to leave walking room.
Set the top at sofa-back height so it sits flush. Wiring a power strip in is easy; just keep cords tucked away behind the shelf.
19. Wavy American Flag Art
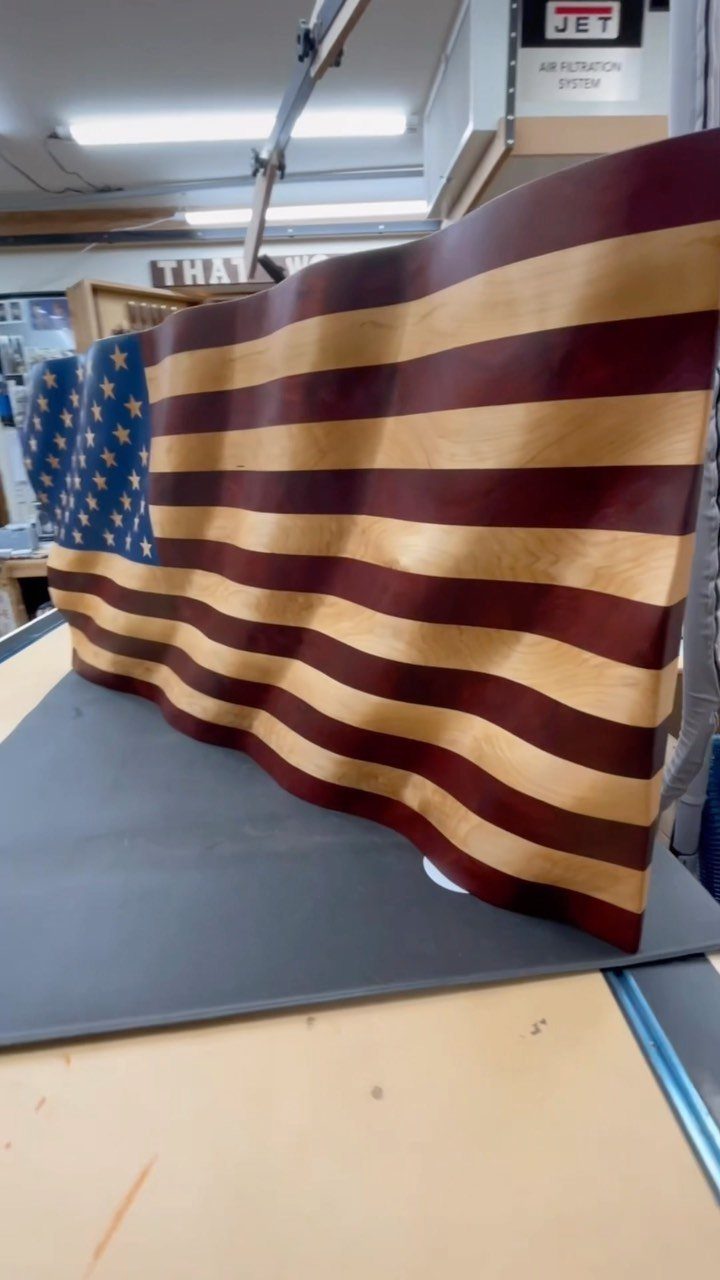
A waving flag carved in wood is a wall piece you can build around one idea: the ripple.
The stripes and the star field all have to bend together, so the wave is the part to plan before any cutting starts.
Sketch the curve on paper first, then mark depth lines on the block so every stripe follows the same rhythm. Take material off in light passes, since wood you have removed will not go back on.
This is more of a carving project than a quick afternoon build, so I would try the wave on a scrap piece before committing to the good board.
20. Carved Texture Block
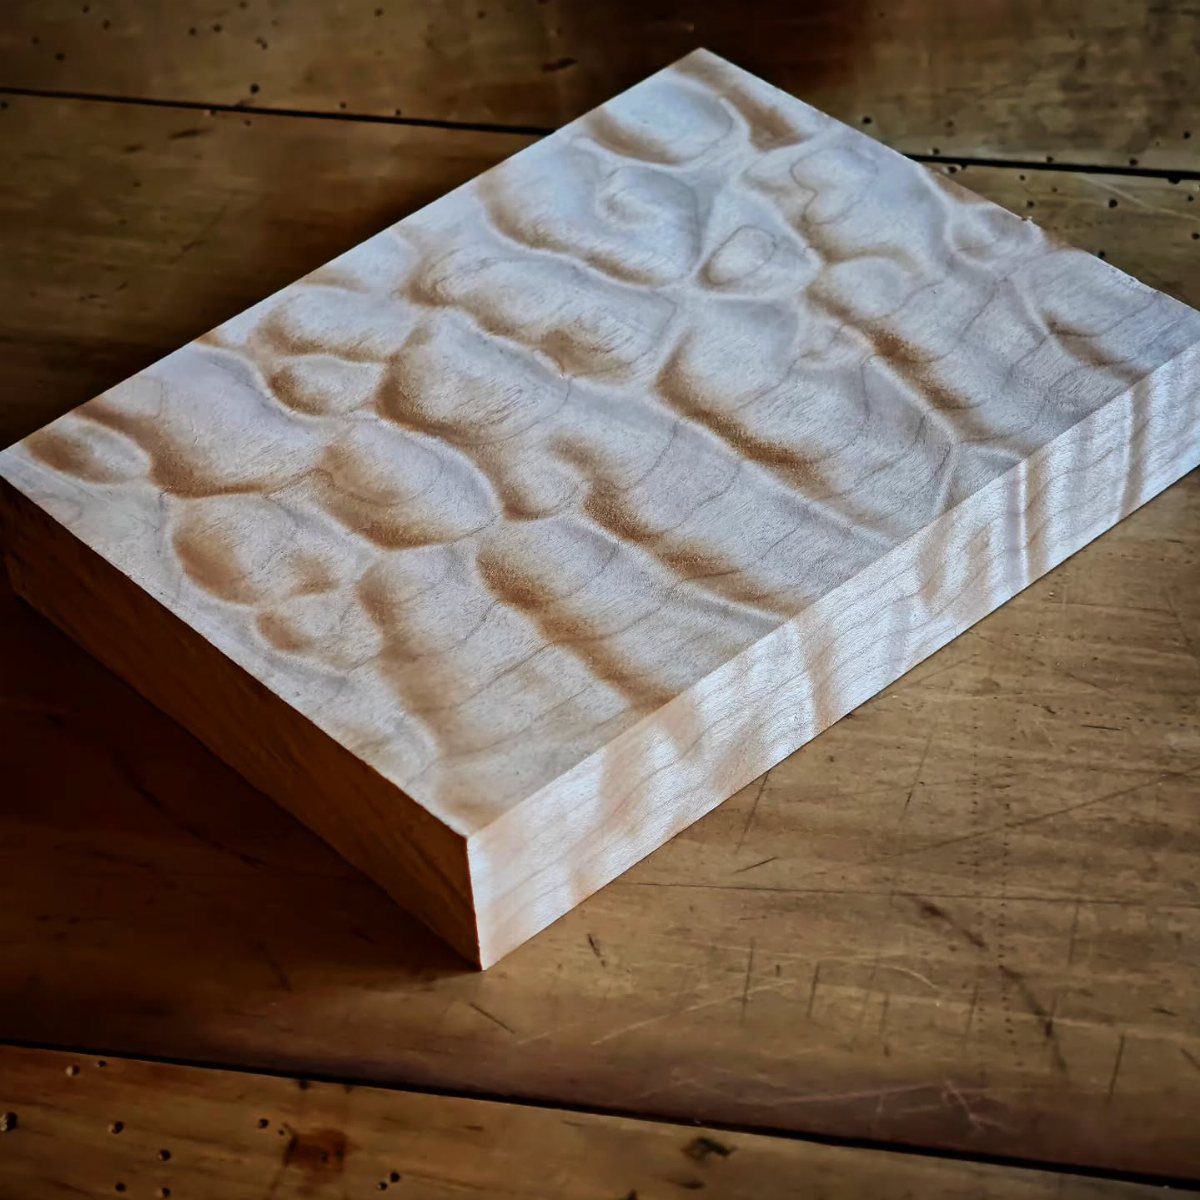
Rippling waves carved into a plain block of light wood make a small decorative piece that asks for patience more than money. One block, a few hand tools and some sandpaper are enough to start.
Light wood shows every shadow of the carving, so keep the wave lines flowing in one direction and make them overlap softly instead of cutting each one separately. Test the pattern on a scrap edge first.
Sand last, working with the grain, so the ridges stay smooth without losing their shape. A clear finish keeps the pale color intact.
Choosing a First Project
Aim for a project that is small but not too small. A coaster set gives you almost nothing to learn from, while a full bookcase asks for stamina you may not have built yet.
Pick one with a single joint at its center. Cut and fit that joint a few times in one build and it starts to feel familiar, which is how a skill actually sticks.
Use real wood for it, not scraps of whatever is around. Working with the material you will end up using later teaches you more per hour.
Choose something you will want to look at when it is done. Finishing a piece you like is what brings you back to the bench for the next one.
Skill Development Advice
Practice cuts have their place, but a real project teaches faster. A board with a purpose makes you care about the line, and caring is what sharpens your eye.
Expect to get something wrong. A gap in a joint or a crooked cut is information about your saw, your marking or your patience, and the next piece will be better for it.
I keep my flawed first attempts where I can see them. They show how far a few projects can take you.
Materials and Tools
A hardwood like oak, maple, or walnut costs more per board foot than pine, and for projects people will handle every day, I think the extra money is worth it.
Cherry, soft maple (not hard maple, which fights you), walnut and oak all work, and they show you how tools behave in the wood you will use later.
Pine is honest and humble, but it is milled mostly for construction, so the boards are often rushed through drying and cause trouble at the saw and plane.
Soft wood also demands a sharper edge, which makes learning to sharpen harder.
Skip reclaimed and pallet wood on a first build. It adds a variable you can avoid.
Invest in a few basic hand tools and learn them well. Those skills carry over to every power tool you pick up later.
Frequently Asked Questions
What are the easiest woodworking projects?
A stool, a kid-size picnic table, a birdhouse, a picture frame and a cutting board are all friendly first builds.
A basic stool skips the angled backs and armrests of a chair; it’s a top, 4 legs and a brace. A kid-size picnic table is flat boards and straight cuts.
What should I consider when choosing a woodworking project?
Aim for a size that isn’t tiny, with one joint doing the main work at the center. Cut that joint three or four times in a single build and your hands start to know it.
Buy real boards instead of digging through scraps, and pick a design you’ll enjoy seeing on a shelf, because a finished piece you like is what gets you back in the shop.
What are things made of wood?
Wood makes furniture like bookshelves, stools, picnic tables and Adirondack chairs.
It also makes small household pieces such as cutting boards, jewelry boxes, picture frames, nesting trays and desktop clocks. Outdoors it becomes birdhouses and shoe racks, and in the shop it becomes tool caddies and charging stations for cordless tools.
What wood should I use for a first woodworking project?
Hardwoods like cherry, soft maple, walnut and oak are what I would use.
Hardwoods run higher per board foot than pine, yet they teach you how a saw, chisel and plane act in the wood you’ll likely use down the road.
Most pine is cut for framing and dried fast, so it tends to tear, warp and gum up the blade and plane.
Leave reclaimed lumber and pallet boards for later; hidden nails, uneven thickness and unknown dryness are problems a first project can do without.






