Wood choice decides this whole list before technique does: a pale board with minimal, fine grain, like beech, birch or sycamore, burns evenly, while plywood, OSB and MDF can give off toxic fumes when heated, so the board in your garage may rule itself out.
The list covers pen use, heat settings, burning techniques, a clear finish and shop safety, and a personalized coaster makes a good afternoon project to practice all of it on.
Match the heat to the wood you have, and test it on a scrap first; the Understanding Heat Settings section covers how.
1. Using a Wood Burning Pen
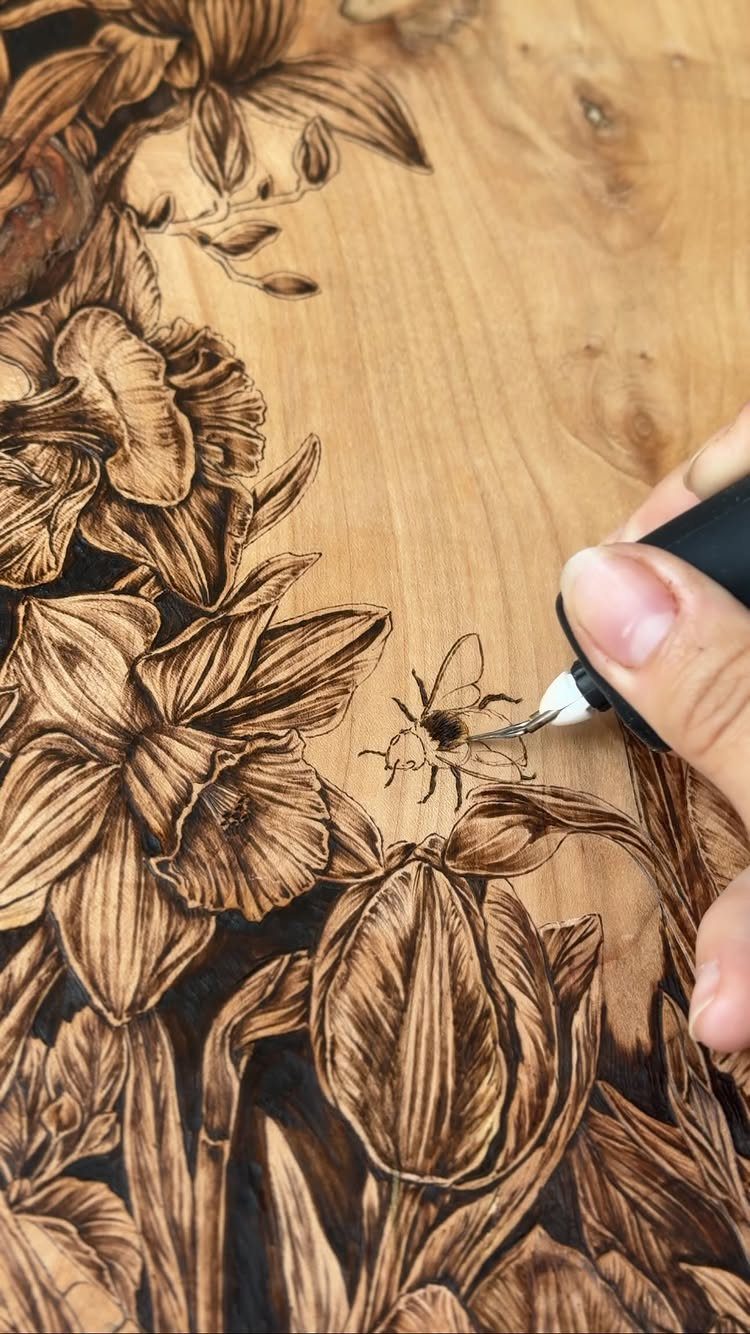
Pen angle and speed decide how clean a line comes out. Hold the pen like a pencil, let the tip do the work, and pull it toward you instead of pushing, so the metal glides without snagging the grain.
Slow strokes burn dark and fast strokes stay light.
Practice on a scrap board first, and keep the tip loaded with as little pressure as you can manage. Small details like the bee’s wings reward a light hand.
2. Personalized Coasters
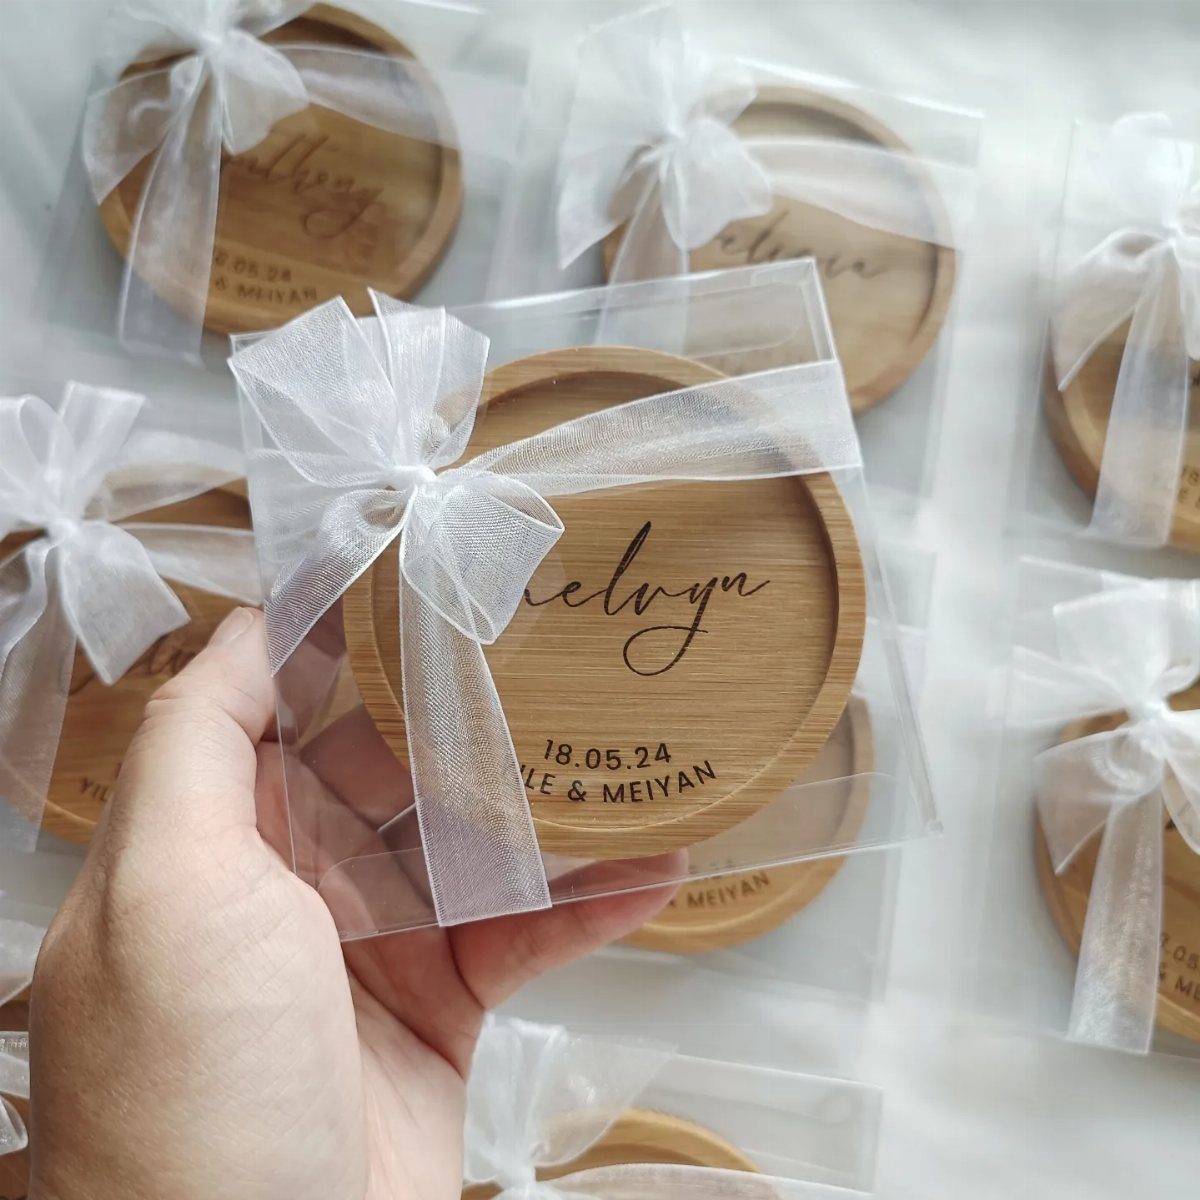
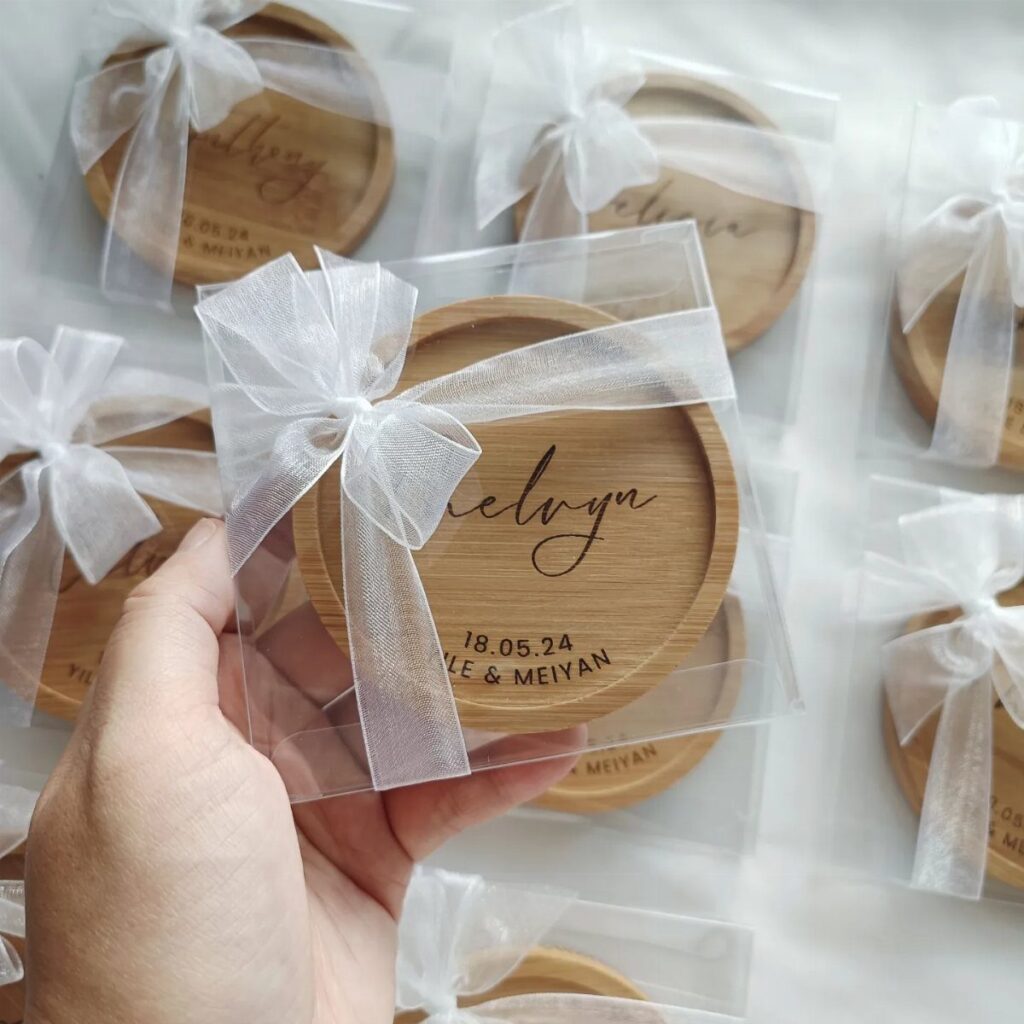
A round coaster with a name and a date burned into the center makes a gift that people actually keep. Pick a simple, readable lettering style, because thin or fussy letters fill in fast with a burning pen.
Pencil the text first and center it before you burn.
Engraving a date on a coaster takes only a few short strokes per number, so it makes a good first project for a beginner with a free afternoon. Wrap each coaster in ribbon and it is ready to hand over.
3. Wood Burning Techniques
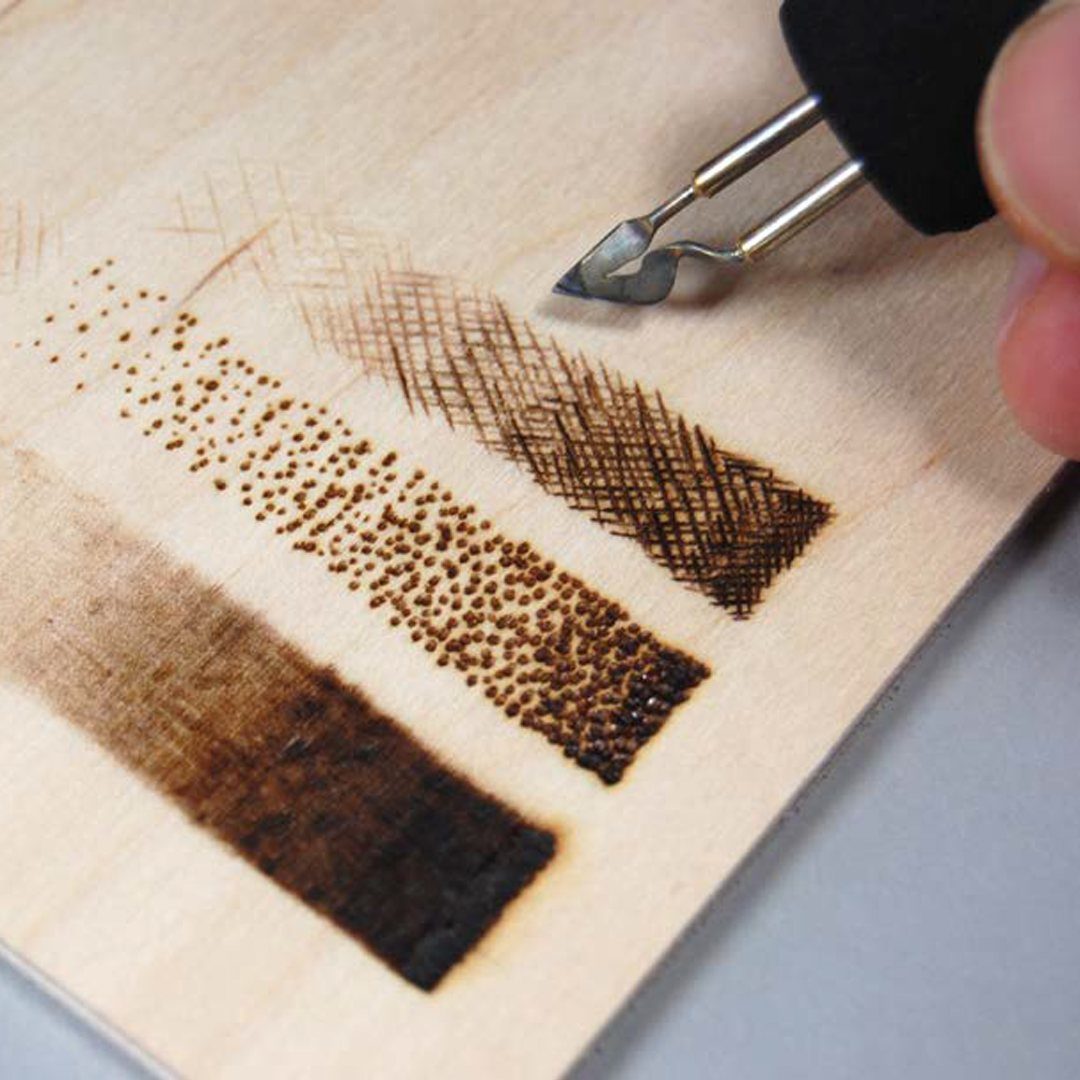
3 habits cover most of what a beginner needs: cross-hatching, stippling and shading. Each one is a different way of laying down the same heat.
Cross-hatching uses crossing lines, stippling uses dots, and shading comes from how heavily you layer strokes.
Burn a test board with all of them before touching a real project. I would start with stippling, since a dot is hard to ruin, and let the dots sit closer together where you want the darkest areas.
4. Clear Finish
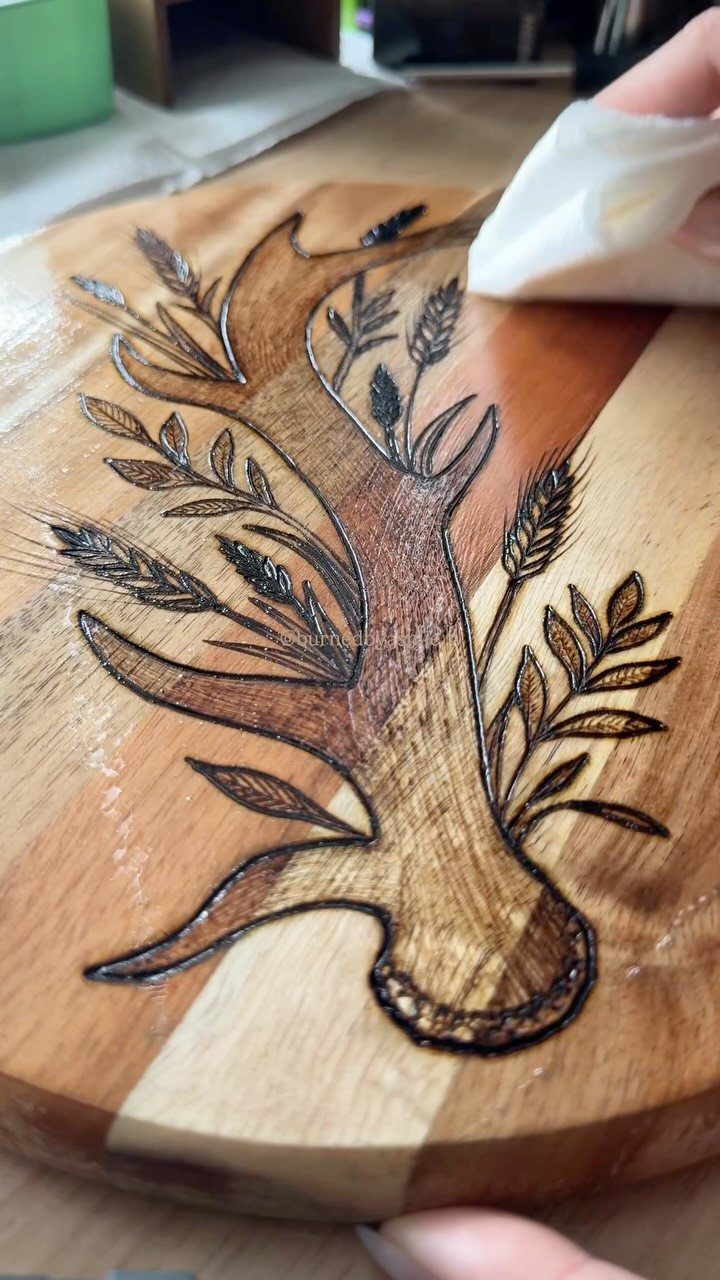
A clear finish seals the work and deepens the wood tone, which makes the burned lines look richer. Wait until the pen has cooled and the wood is dust-free, then wipe the surface gently.
Apply it with a clean white cloth in thin, even coats, moving with the grain. Thin coats beat one heavy one, which can pool in the carved lines of a design like these antlers.
Before sealing the real piece, brush the finish onto a scrap board you’ve already burned, since some clear coats can darken or smear the lines.
Choosing the Right Wood
Grain decides more than most beginners expect. Pick a board with a minimal, fine grain, because heavy grain lines pull the pen off course and show through the design.
Beech, birch and sycamore are the usual choices, and they are pale, smooth and burn evenly. Oak works too, though it is darker and has an open grain, so the burn shows less contrast.
Skip anything stained, painted, pressure treated or molded. Plywood, OSB and MDF are off the list as well, since they can give off toxic fumes when heated.
Sap and resin cause trouble, so choose untreated wood without much of either. If you can’t tell what species a board is, don’t burn it until you’ve identified it.
Understanding Heat Settings
Wood type sets the heat you need, so the same dial position won’t give the same line on every board. Softwood burns at a lower temperature than hardwood, and it will scorch quickly if you run it hot.
Start low on a scrap of the same wood you plan to use. Raise the heat a little at a time until the line comes out clean at a pace you can control.
Sap, hardness and heavy grain all change how a board responds. A resinous or very hard piece may need a different setting from one spot to the next, so retest whenever the wood changes.
Ventilation and Workspace Safety
Burning wood puts smoke in the air that stings eyes and irritates lungs, so I put on a respirator-style mask and safety goggles before the pen even heats up, every session. Gloves help too, especially when you sand.
Sand outdoors or with good airflow, since the dust is a hazard of its own. Open a window and set a fan to move the air out of the room.
A steady table under good light matters more than people expect, and I slide a ceramic tile or a metal baking sheet beneath the board so a stray hot tip has nothing to scorch.
Keep the area clear of paper, fabric and anything else that catches easily.
Any time you stop to look at the design or grab a pencil, park the pen in its stand; a hot tip laid on paper, fabric, or a bare tabletop can start a scorch mark or a fire in seconds.
Wood burning has its risks, but as long as you take the proper precautions pyrography can be perfectly safe.
— Gathered
Frequently Asked Questions
What is pyrography?
Pyrography is decorating wood or other materials by burning marks into them with a heated tool, usually a pen-like metal tip. Pyrography is Greek for "fire writing," and "wood burning" is just the plain name most people use for it.
What is the difference between pyrography and wood burning?
There is no real difference.
Pyrography is the formal name for wood burning, and both mean using heat to draw designs on wood. Pyrography can also cover other materials, such as leather.
Is wood burning safe?
It is safe enough when you set up the shop with a few habits in place.
A respirator mask, safety goggles and a window or fan keep the smoke off you, and a ceramic tile or metal baking sheet under the board protects the table.
How to choose wood for wood burning?
Pick untreated, smooth, fine-grained wood with little sap or resin. Birch, beech and sycamore are my picks, since their pale color makes the lines pop and they burn evenly; maple and oak will work, though the contrast is softer.
How do you use a wood burning pen?
Grip the pen the way you would a pencil, drag it toward your body, and let the tip float over the surface instead of digging in.
Speed controls shade: a slow pull makes a dark line, a quick one leaves it pale, so keep the pressure as light as possible.
Test on an offcut of the same board before touching the project, and nudge the dial up in small steps until the line looks crisp.






