Your tools decide which of these builds is yours: a drill, a saw and sandpaper cover nearly every project here, while a cardboard stool needs only scissors, glue and a free hour or two.
If you own no planer or jointer, pick the builds that start with pre-surfaced boards, and the pallet bed frame, with almost no cutting, is the lowest-effort way to start.
1. Simple Bed Frame
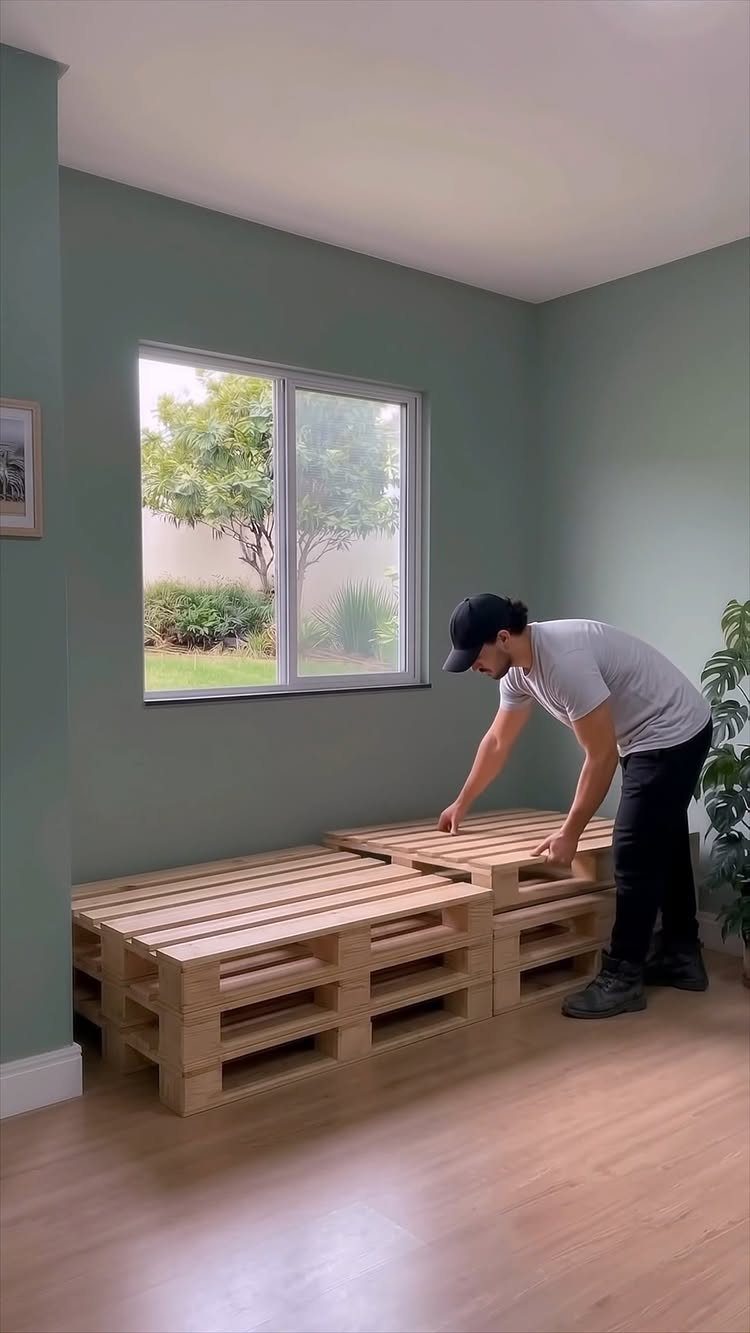
A pallet bed frame is about as basic as bed building gets: wooden pallets arranged on the floor to hold up a mattress. For a reader with limited time and tools, that means almost no cutting.
Lay the pallets out flat and push them tight together before the mattress goes on.
Sand any rough boards, since bare feet and bedding will find every splinter. A low frame suits a small room, and when budget comes first I would pick it over a store-bought frame every time.
2. Plant Stand
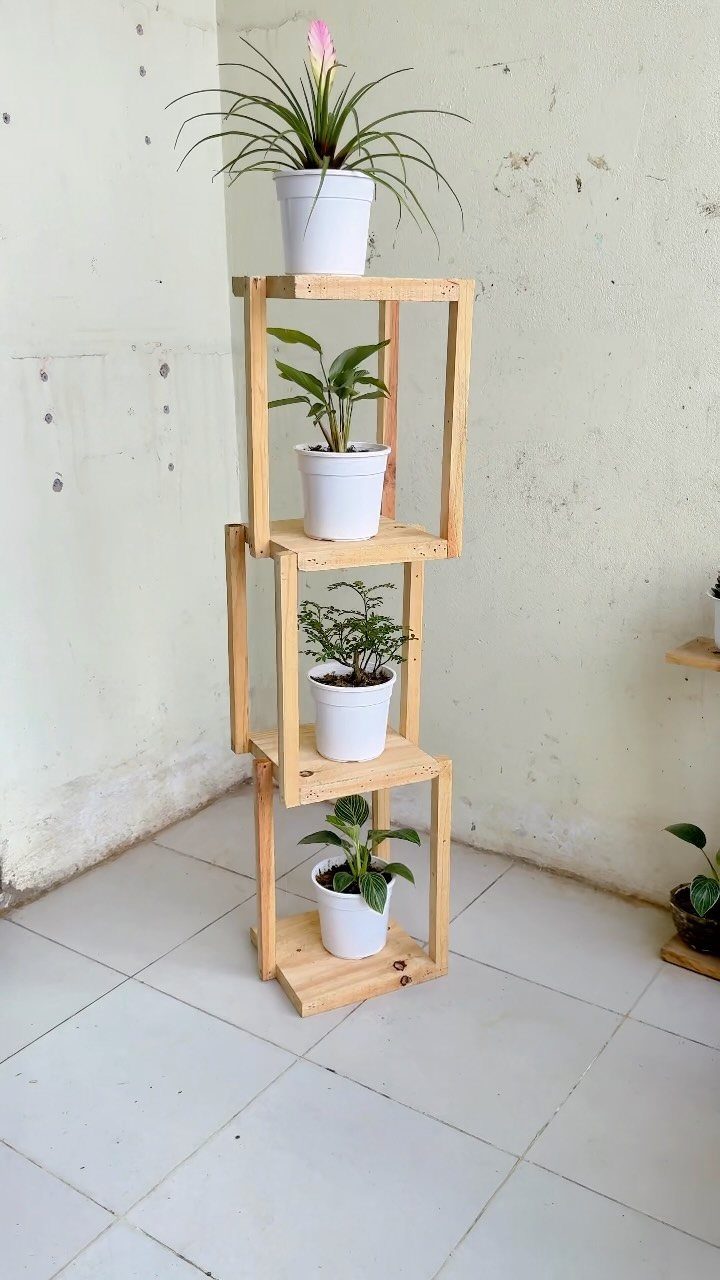
A wooden plant stand gives indoor plants height without eating floor space, and a narrow footprint keeps it out of the way. That is why a tiered version works well against a plain wall.
Stacking levels also lets you group plants so each one is easy to see and reach. Keep the pots matching, as the white ones do here, and the wood stays the focus.
I would build the tiers from the same board width so the whole stand looks planned, and finish the wood before any pot sits on it.
3. Console Table
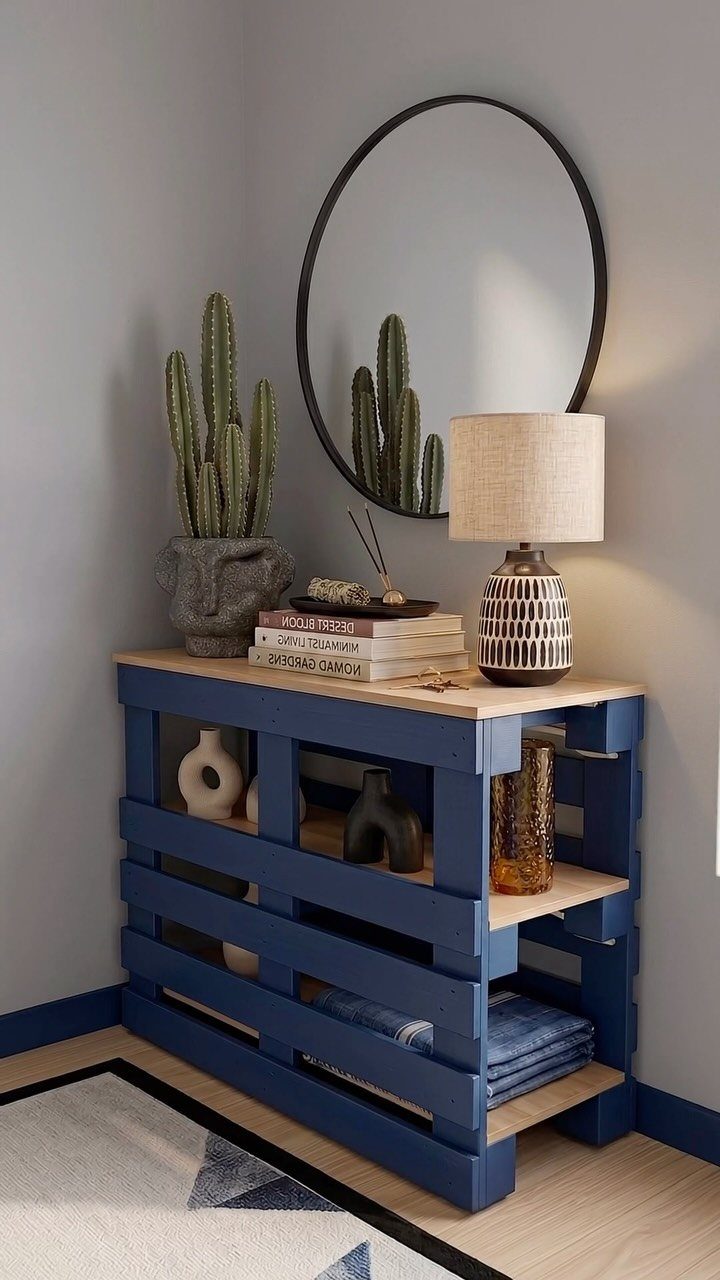
Narrow and low-fuss, a console table fits the strip of wall behind a sofa or beside a door.
A pallet-built version keeps the cost down, and a lighter top over a painted base, like the blue and pale wood here, gives it a finished look.
Sand the top smooth, since lamps, books and small plants will sit right on it. Paint the base before attaching the top so you do not get paint on the clean wood.
4. Vintage Suitcase Side Table
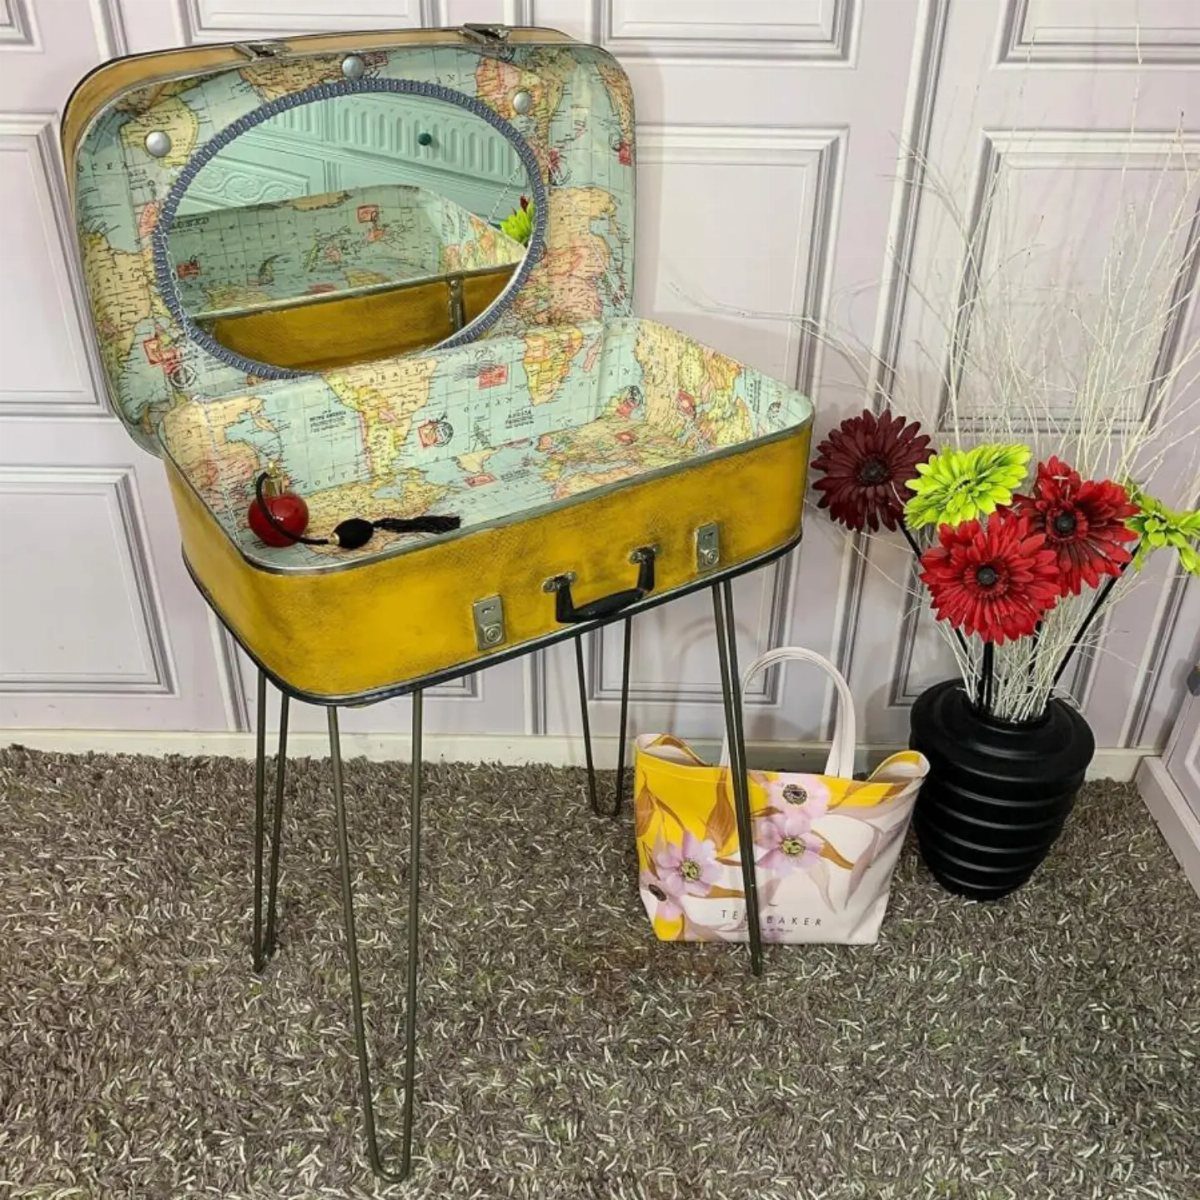
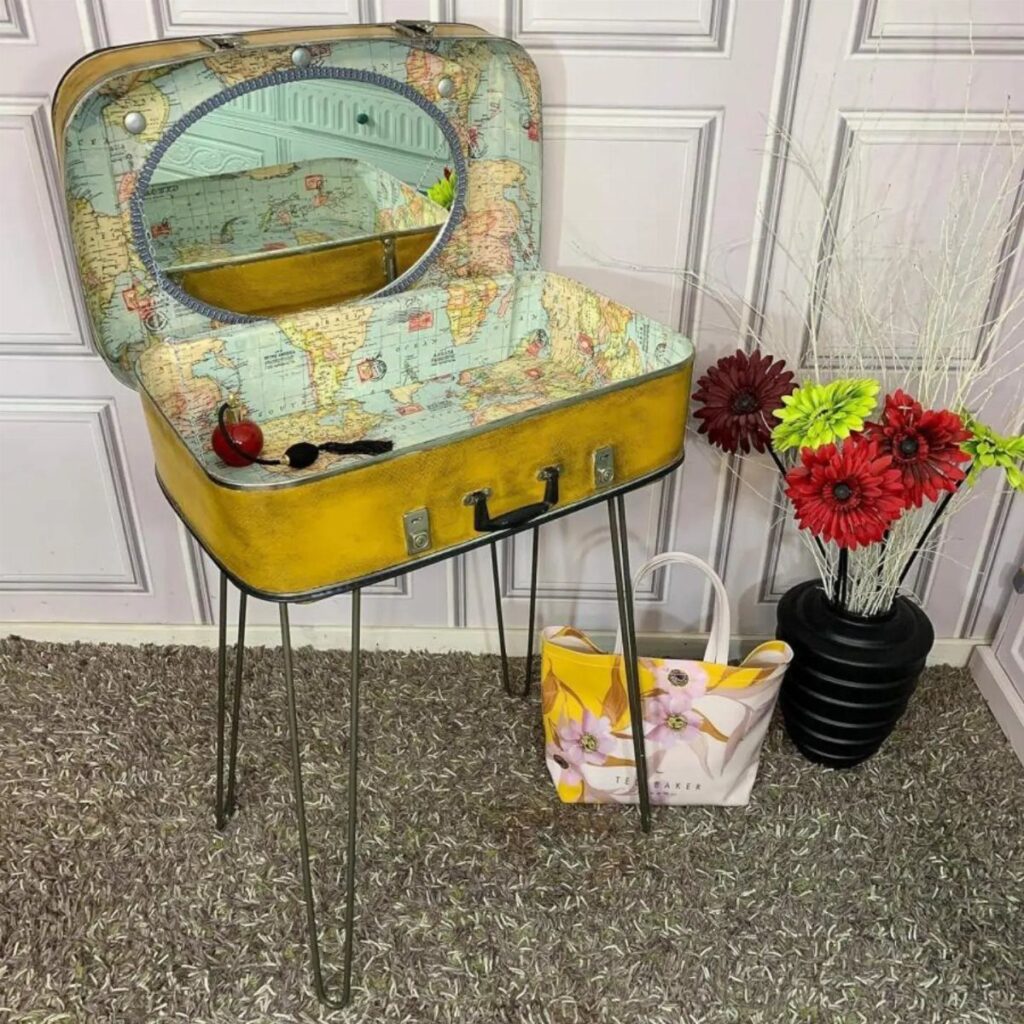
Old luggage already has a lid, a lining and a frame, so a vintage suitcase side table is mostly a matter of adding legs.
Thin hairpin legs mounted under a yellow case lift it to a usable height and keep the look light.
The suitcase doubles as hidden storage, and a mirror or map lining makes opening it a small treat.
Pick a case sturdy enough to hold a lamp or a vase, and fasten the legs through the base firmly. Check the fit before drilling anything.
5. Fur Bench

Soft seating beats hard seating for a hallway or bedroom corner, and a faux fur bench delivers it with very little building. A plain wooden frame on wooden legs, topped with a layer of faux fur, is the whole recipe.
Cut the top to size, pad it if you want a cushioned feel, and wrap the fur over it.
Staple it underneath where nobody sees. Faux fur costs less than real, and cats clearly approve, though you may be sharing the bench.
6. Wooden Slatted Lounge Chair
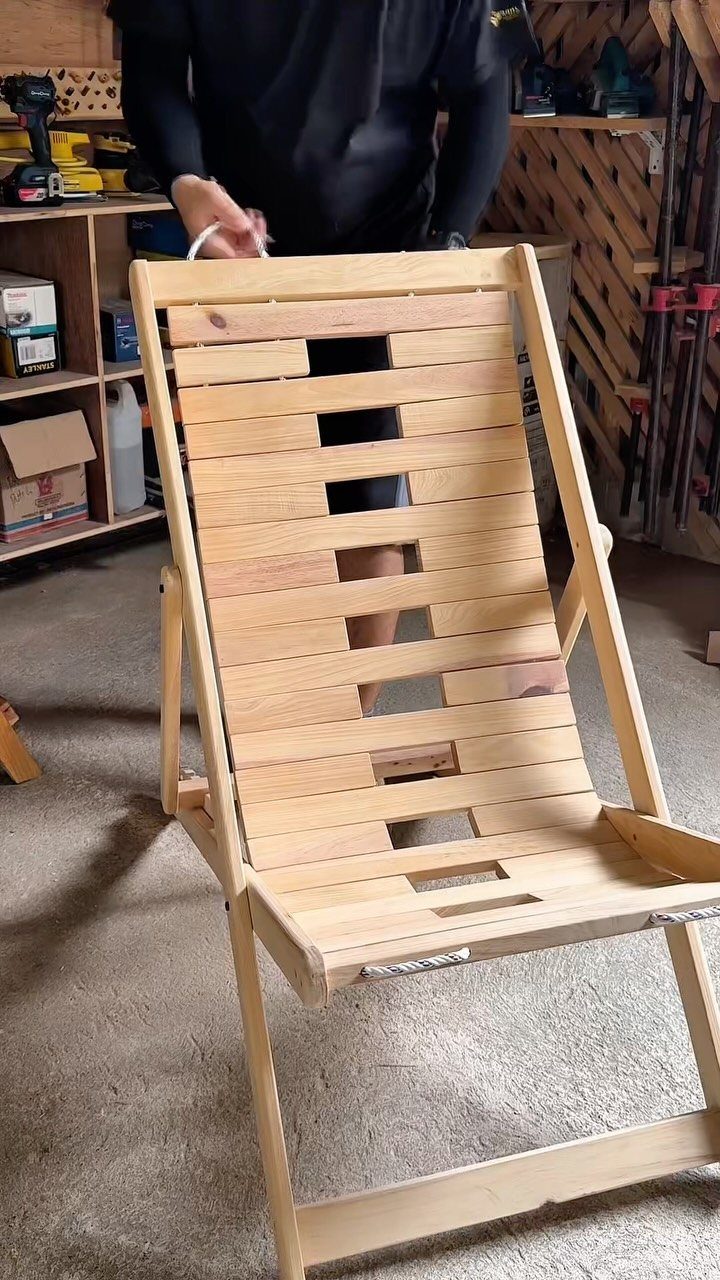
Light-colored slats give this lounge chair its relaxed shape, and building it in a home workshop needs only basic tools and patience. Repeating one slat size keeps cuts simple and the look clean.
Sand every slat and edge before assembly, because arms and backs get touched constantly. Leave even gaps between slats and use a scrap spacer to keep them consistent.
I would choose a pale wood and a clear finish, so the slat pattern stays the main feature. Plan more than one afternoon for this one.
An ordinary rubber air hose makes the perfect deck chair when you weave it through holes drilled along two L-shaped plywood plank frames. Once you get the hose spacing and tension right, enjoy the springy, relaxing support of this surprisingly comfy lounger.
— Bob Vila
7. Wooden Storage Bench
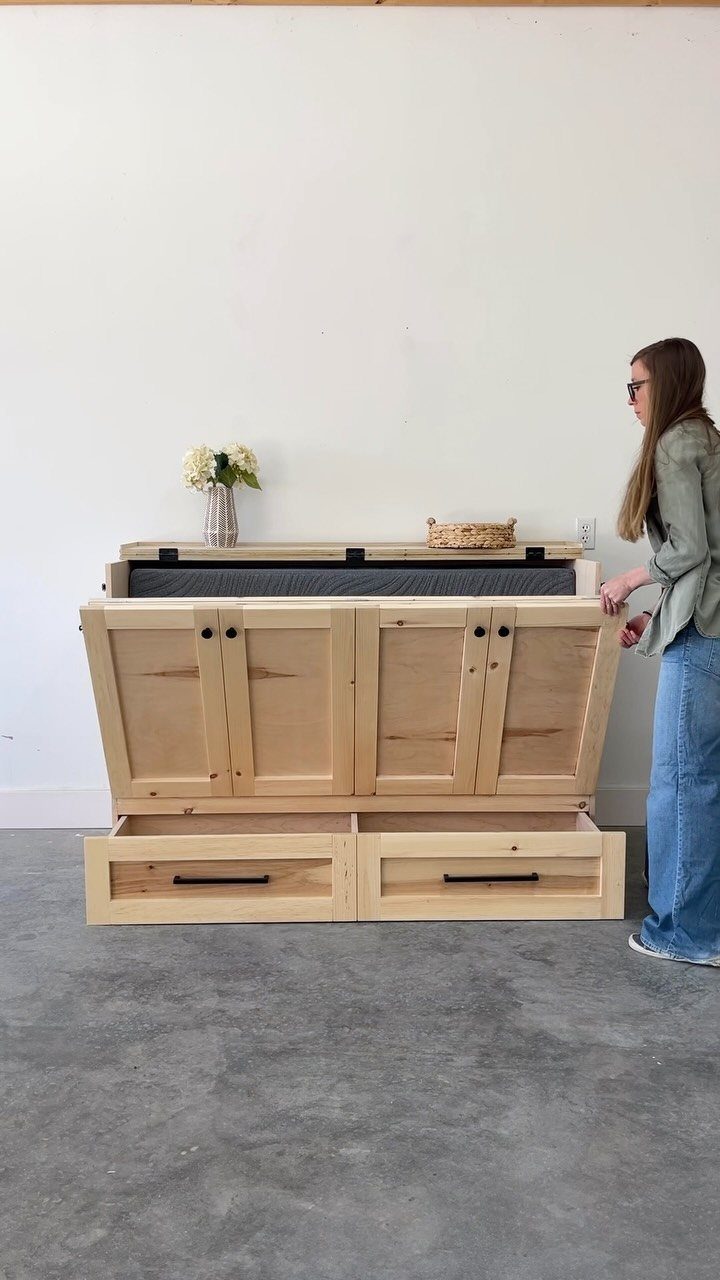
A storage bench with a flip-top lid and open drawers gives you 2 ways in: lift the seat for bulky items, or pull a drawer for the small things you grab daily.
That split keeps shoes, blankets and odds and ends sorted without a second piece of furniture.
Build the box first, then fit the drawers, and hang the lid last so you can check the clearance.
Sand the seat well, since it takes the most contact. A clear coat over the pale wood is what I’d pick here, since it lets the grain do the decorating.
Expect this to run longer than an afternoon, mostly because of the drawers.
8. Simple Wooden Nightstand
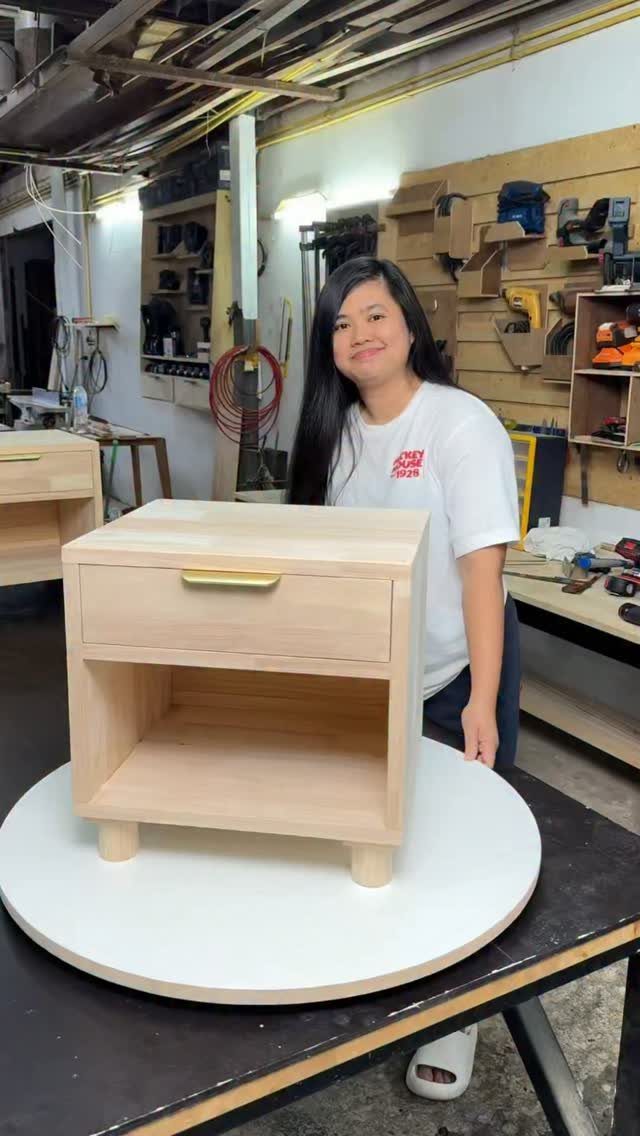
Small enough to tuck beside a bed, this nightstand pairs one drawer with an open lower shelf. The drawer hides chargers and clutter; the shelf holds a book or a basket within easy reach.
For a budget build, a single drawer is far less work than a stack of them, which is why I like this design for a first nightstand.
Sand every edge, since your hand will find them in the dark. Keep the wood light and the finish clear, and the piece stays quiet next to bedding.
Test the drawer fit before you finish it.
9. Cardboard Stool or Side Table
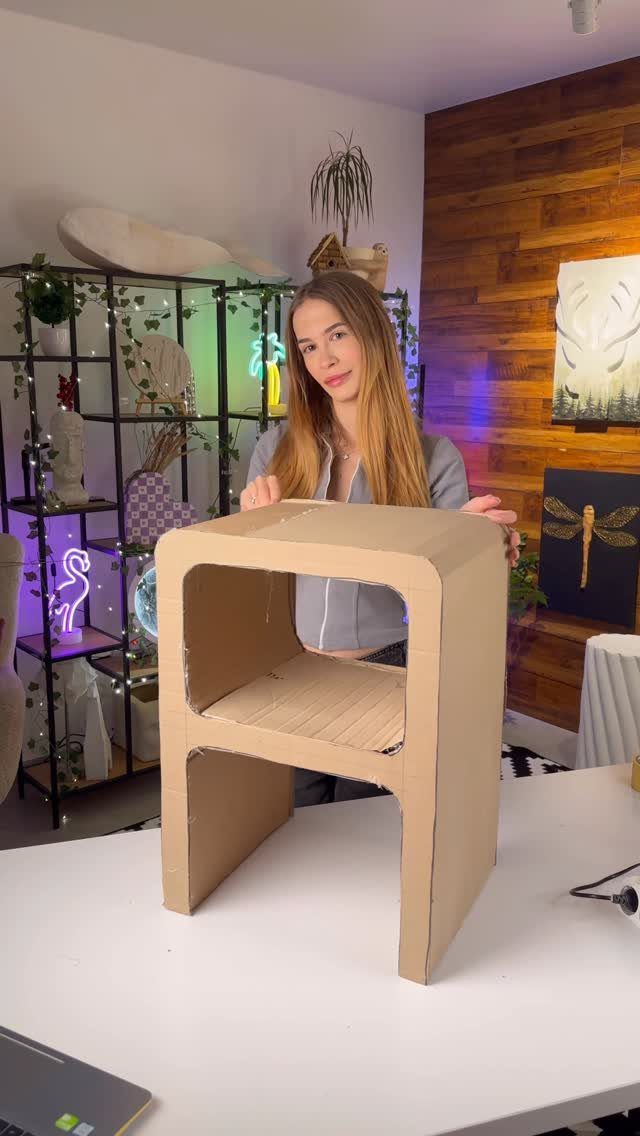
Folded brown cardboard can hold a small stool together, and the material costs almost nothing. Cardboard costs next to nothing, so this one suits anyone with scissors, glue and a free hour or two.
Cut identical strips or panels so the layers stack evenly, and glue each one firmly before adding the next.
I would treat it as a light seat or a side table for a lamp or a mug, not a place for heavy use. Leave the brown surface bare, which looks good on its own.
Basic Tools Needed
Screws, brackets and a level cover most of what these builds ask for. Add a drill, a saw and sandpaper, and basic woodworking tools are enough for nearly every project.
Before you buy a single board, check what your saws and sander can handle, because a species or thickness your tools struggle with will slow the whole build.
Pre-surfaced boards save the most work if you don’t own a planer or jointer.
Parts with matching dimensions get cut in one batch, so set the saw or stop block once and run every piece through. Matching pieces come out identical, and the build goes together without fiddling.
Choose hardware for function first, then style. A bracket that hides under a tabletop beats a pretty one that can’t carry the load.
Check the level on the finished piece before the final screws go in, because a wobble is far easier to fix at that stage.
Customization Options
Color is the easiest change, and paint, stain or a clear coat each give a different result. Paint hides the wood and suits a mismatched build, while stain and clear finish let the grain show.
Decorative finishes add personality without changing the build. A stencil, a two-tone split or a wood-burned border works on almost any flat surface.
Test a finish on a scrap board first. Wood takes color unevenly, and a trial piece shows the result before it lands on your project.
Hardware is another quick swap. New knobs, pulls or brackets change the look of a plain piece in minutes.
Skill Level
Most of these projects suit beginners with basic skills, and many finish in a few hours. Start with the one that needs the fewest cuts, and let your confidence set the next pick.
Read the whole plan before you cut anything. Most beginner mistakes come from measuring once and discovering a missing step halfway through.
Cut a spare piece or two if lumber is cheap, since practice boards cost less than a ruined one. Take your time with sanding and finishing, because those steps decide whether a simple piece looks handmade in a good way.
Frequently Asked Questions
What is the easiest furniture to make?
Wooden pallets laid flat and pushed tight together need almost no cutting, which makes a pallet bed frame about as easy as furniture gets.
A cardboard stool and a faux fur bench are also low-effort: one needs only scissors and glue, the other a plain wooden frame with fur stapled over the top.
Is it cheaper to buy or make furniture?
Making it is usually cheaper when you pick budget-friendly builds. Against a store-bought frame, a pallet bed wins on cost, and a pallet console table keeps the spending down too.
A cardboard stool costs next to nothing. A nightstand with one drawer is far less work and money than one with a stack of drawers.
What are easy DIY woodworking projects for beginners?
A plant stand, a pallet console table, a simple nightstand with one drawer, and a wooden storage bench all work well with basic tools.
Many of these finish in a few hours, though a slatted lounge chair or a bench with drawers takes longer than an afternoon.






