Your tools and your space decide which of these woodwork craft ideas to build first: a phone holder needs only a small offcut, while a barn door on a sliding track needs a doorway, a long track and real floor room to work.
Most of the list falls between those two, from scrap-wood pieces and a pallet planter that costs little or nothing to a jewelry box with a divider grid.
If you own a saw, a drill and sandpaper, start with whatever fits the space you already have.
1. DIY Wooden Hooks
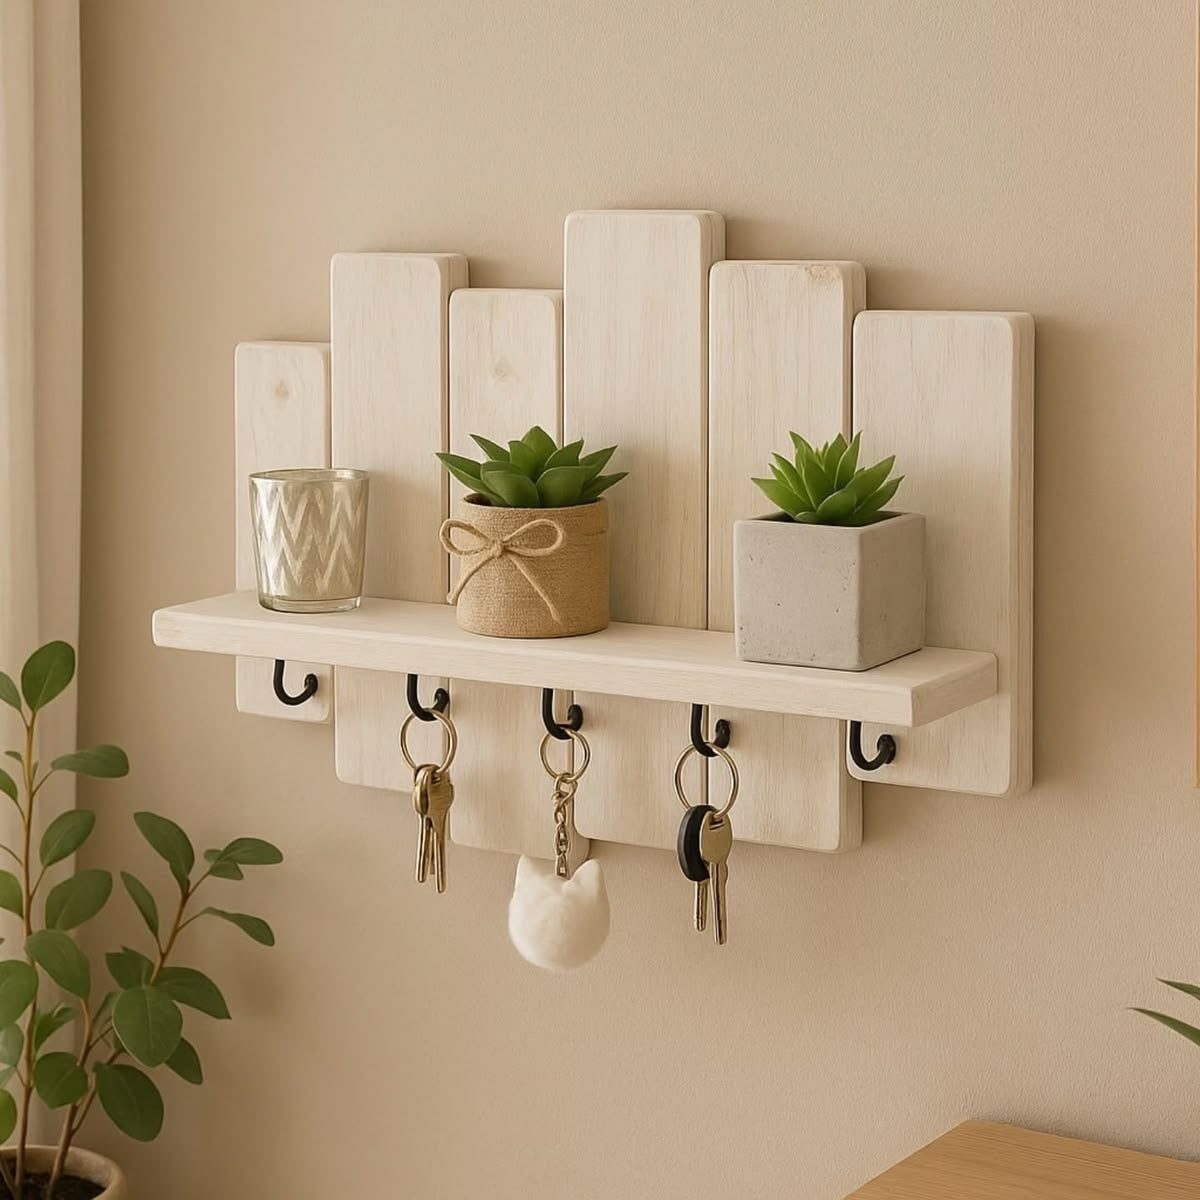
A single board with a row of hooks and a small shelf on top does 2 jobs by the door: keys hang below, and the shelf holds a candle or a couple of small succulents.
White paint keeps it quiet against a plain wall.
Screw the hooks in after painting, so the paint doesn’t gum up the threads. Anchor the board to studs where you can, because a loaded shelf pulls outward.
2. DIY Wooden Wall Art
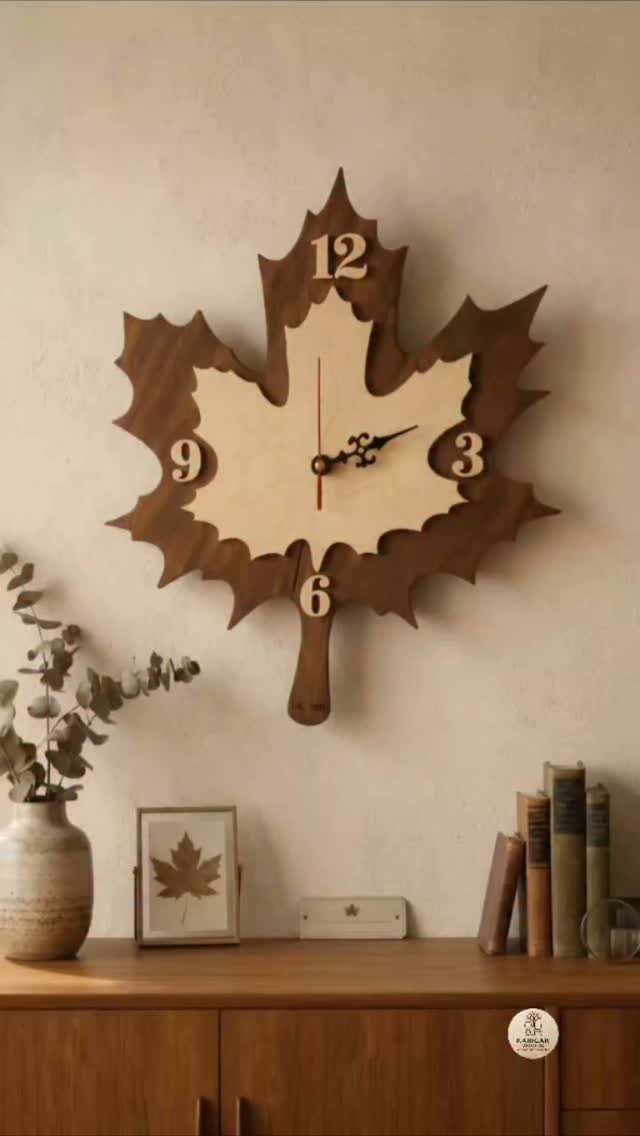
Wall art doesn’t have to be a flat picture; a shaped outline does the work with no paint at all.
Marking only 12, 3, 6 and 9 keeps the layout simple and the leaf shape clean. Trace a paper template first, then cut the wood once you like the outline.
3. DIY Wooden Plant Stand
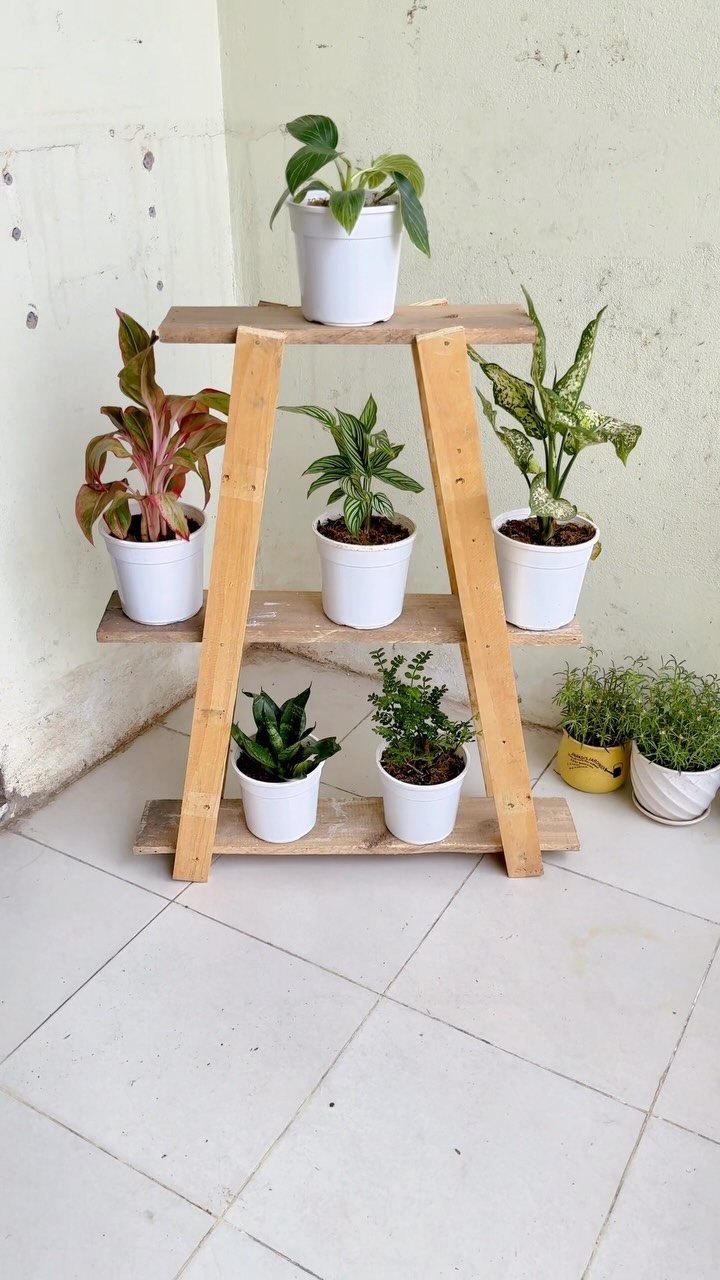
A tiered stand holds several plants in a footprint no wider than one pot, which is why it beats a flat shelf for small spaces.
Each level can carry a few small pots, and the light-colored wood stays out of the way of the greenery.
Build it for steps that stay level on a tile floor. Seal the wood if the stand will see watering, and I’d add a saucer under each pot.
4. DIY Dog Bowl Stand
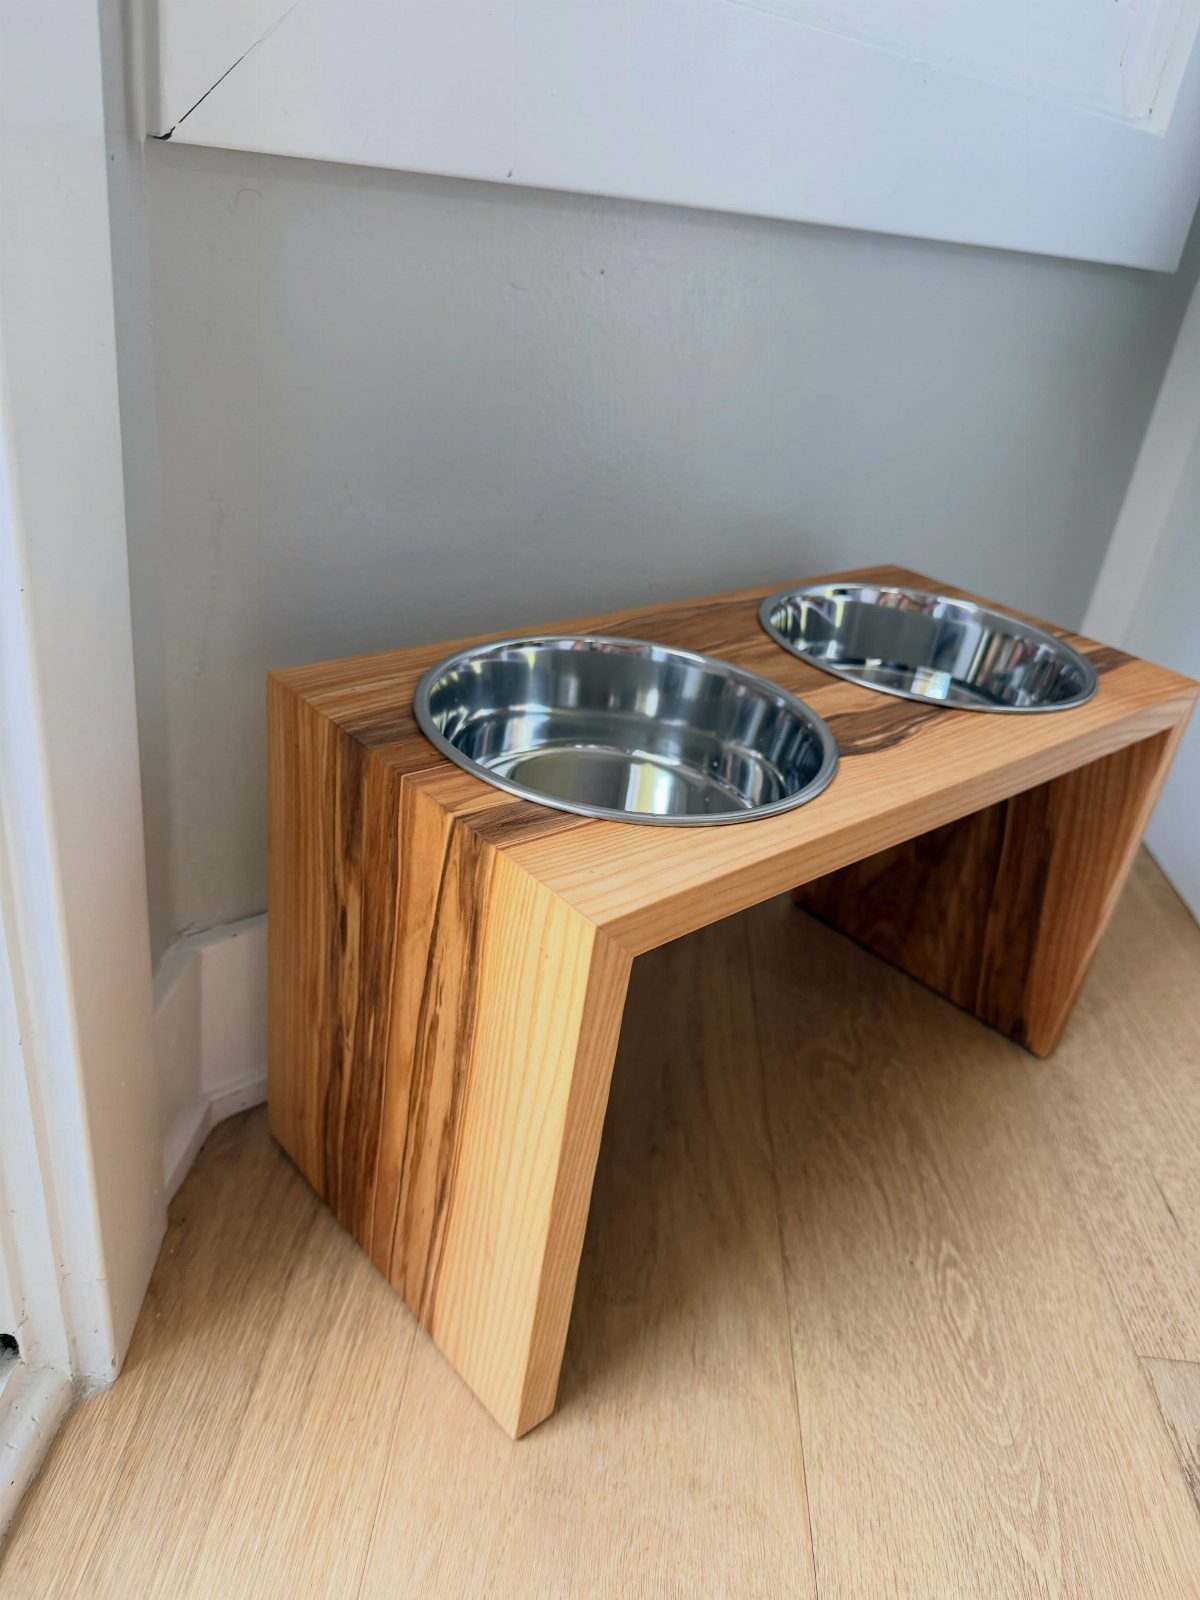
Raising the bowls off the floor changes how a dog stands while eating, and a simple wooden frame with 2 holes does it.
Stainless steel bowls drop into cutouts and sit snug, so they don’t slide when your dog nudges them.
Measure your bowls’ rims before cutting the openings, so the lip rests on the wood. Pick a height that suits your dog’s size, since a stand that’s too tall is as awkward as none at all.
5. Cutting Board
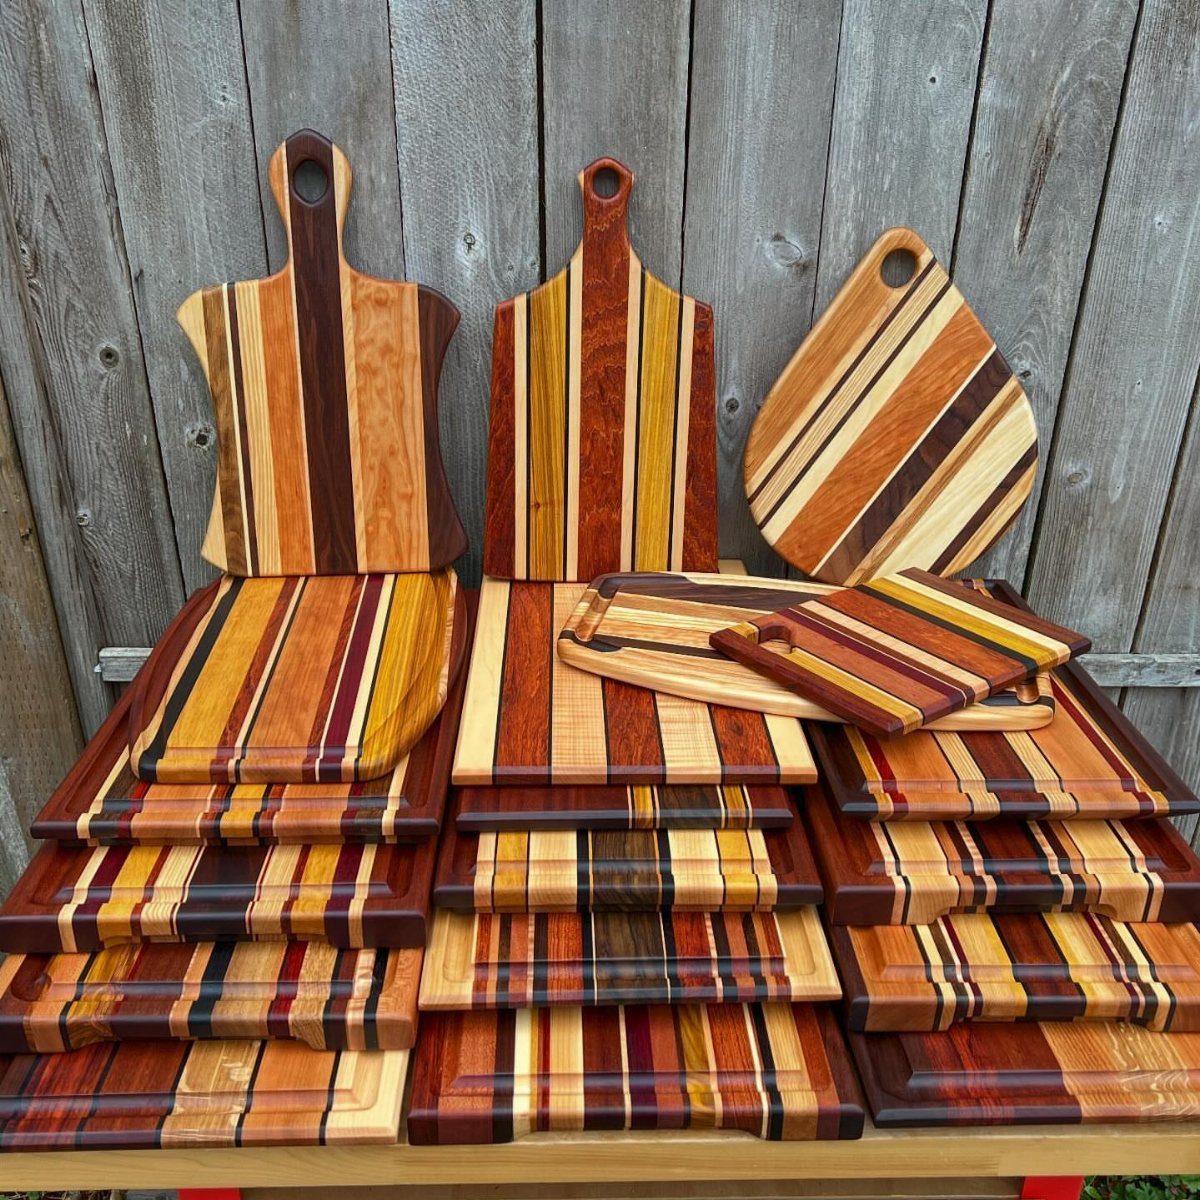
Stripes are what make a cutting board look like a project instead of a slab. Gluing together strips of different woods gives you the multi-colored pattern, and it makes a good first lesson in cutting, gluing and sanding.
Start with a plain rectangle before trying rounded or odd shapes.
Sand through the grits until the surface feels smooth, and finish with a food-safe oil. Boards this size also make easy gifts.
6. Pallet Planter Boxes
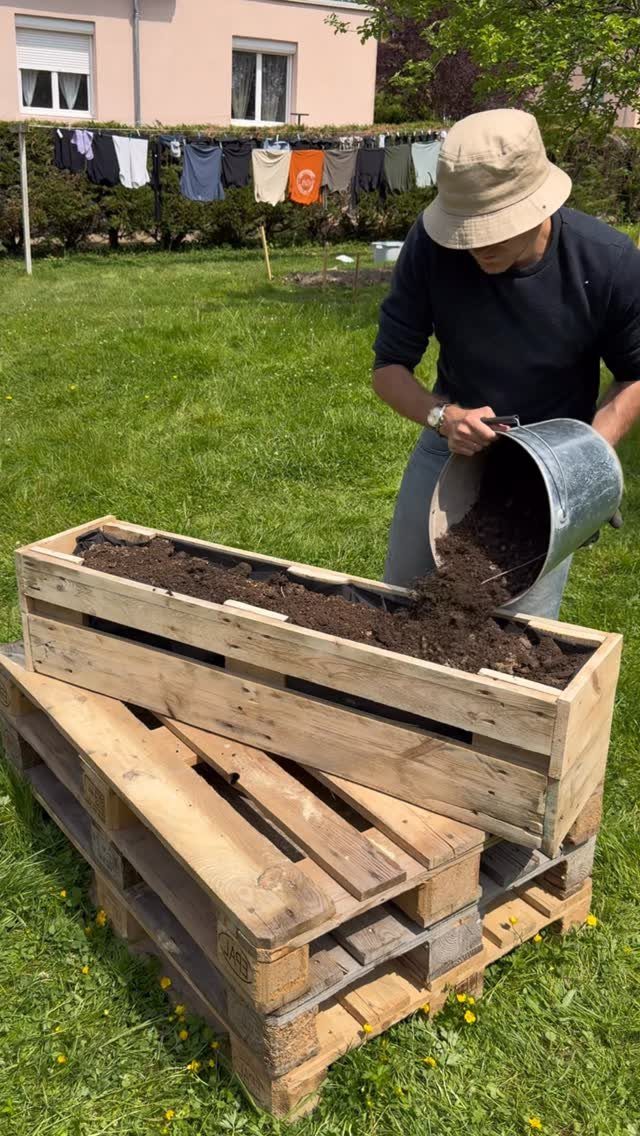
Pallets cost little or nothing, which makes a long planter box about the cheapest garden project here. Pull the boards apart, then reassemble them into a trough that sits right on the lawn.
Take your time pulling the nails, since splitting boards wastes your best wood. Line the inside before filling it with soil so the wood lasts longer, and drill a few drainage holes in the bottom.
7. DIY Spice Rack
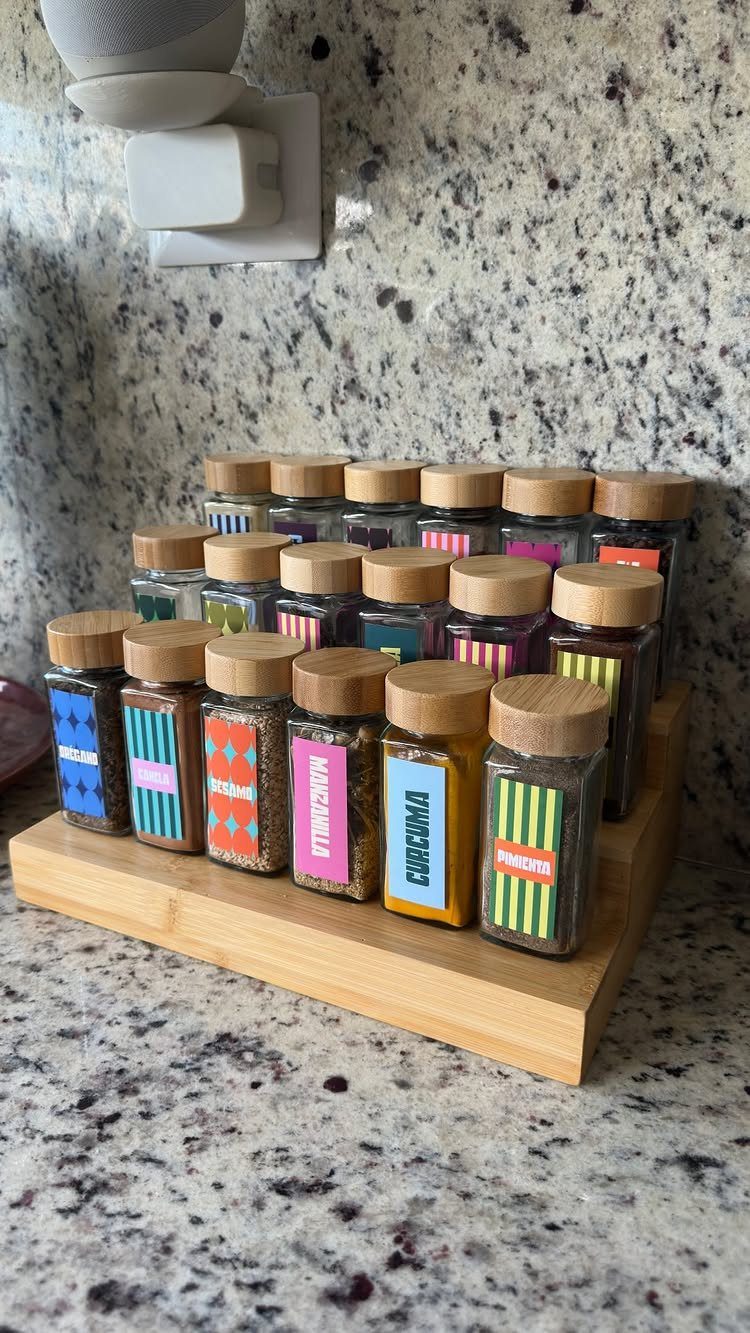
A rack that sits on the counter needs no wall mounting, which suits a rental kitchen.
Measure your jars and size the shelf openings to fit them first, then pick up the saw. Write the labels in one handwriting style, so a mixed set of spices reads as a matched one.
8. Step Stool
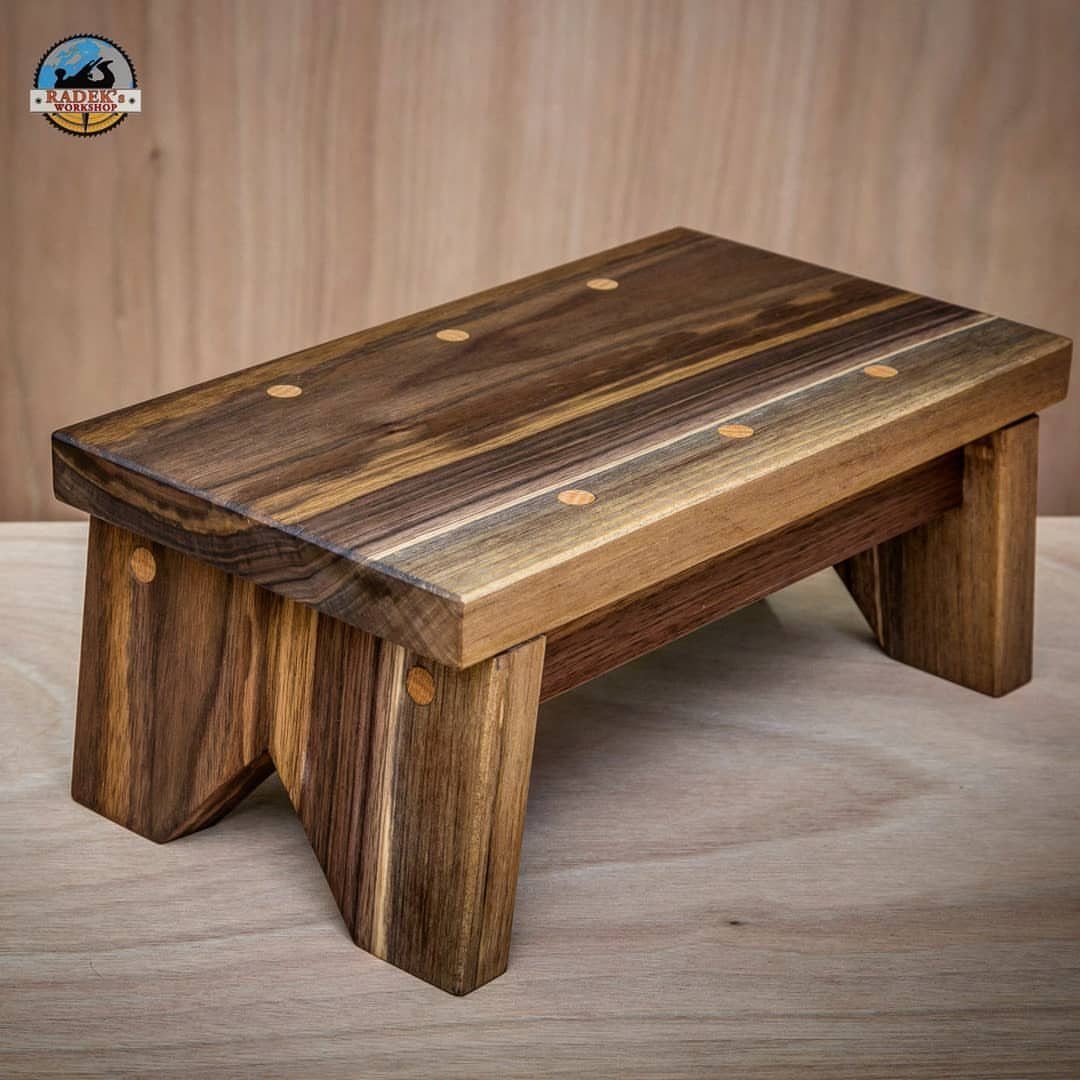
Thick legs and a dark, open grain give a step stool its sturdy look, and the round plugs over the screws finish it off. Plugs hide the fasteners and add a decorative detail for almost no cost.
Cut the legs and top from the same thick stock so the stool feels solid underfoot. Set the plugs with a little glue, then sand them flush before you finish the wood.
9. DIY Phone Holder
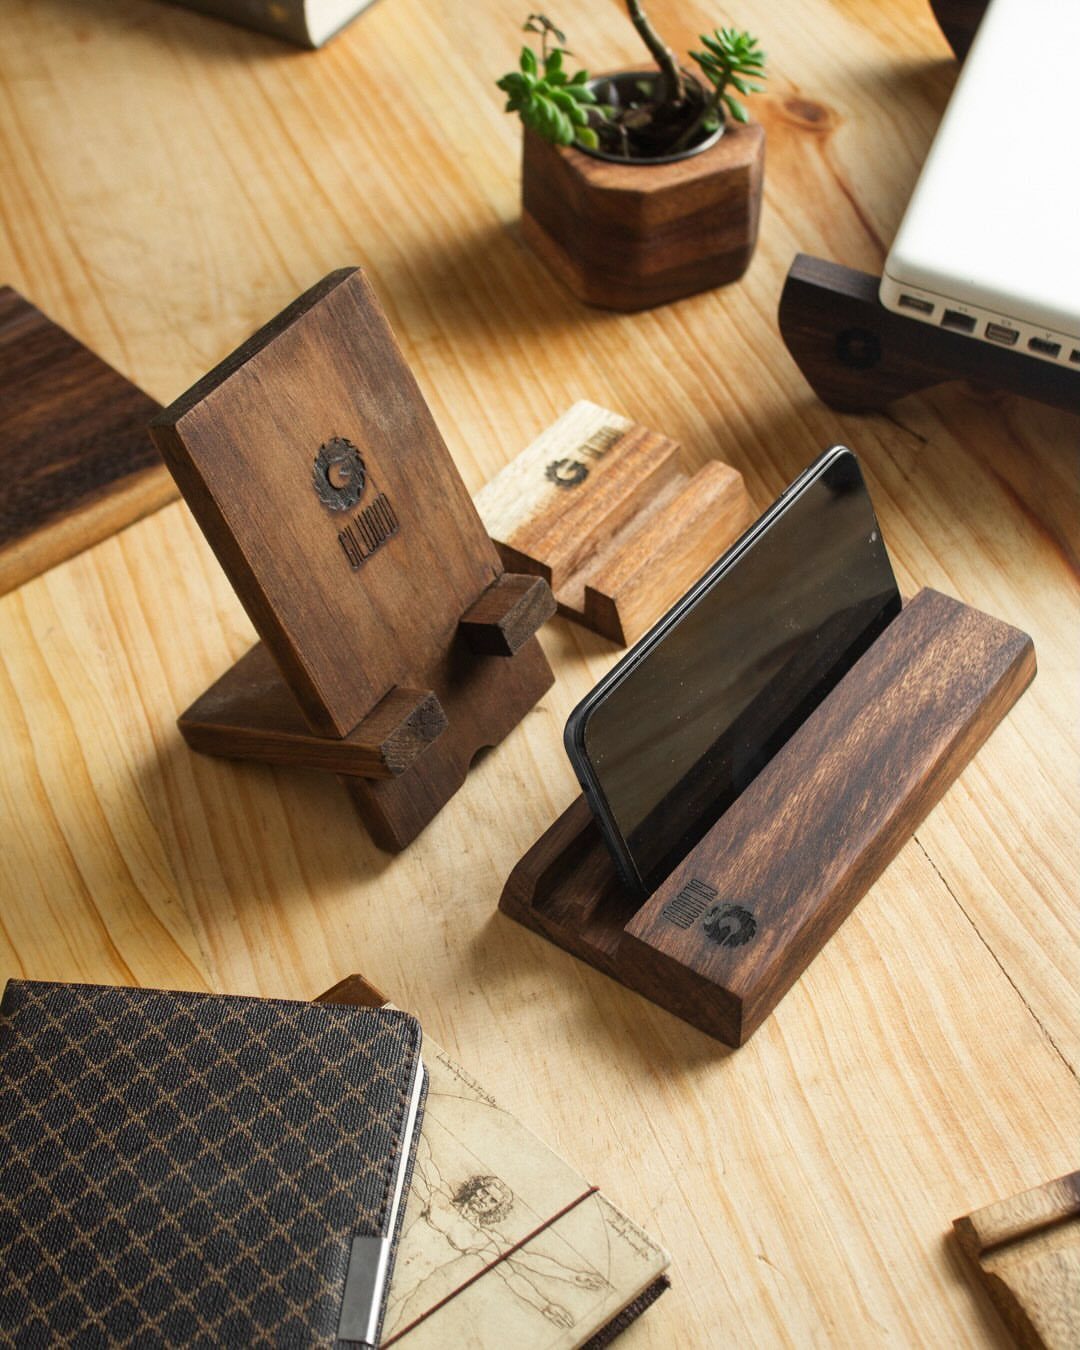
A phone holder is about the quickest afternoon project around, and a small offcut is often all it takes. One slot holds a phone upright for video calls or for showing photos on a desk.
Cut the slot a bit wider than your phone, with a case on. Make a few at once in different sizes, so a tablet or a smaller phone also has a place to stand.
10. Wooden Christmas Tree

Thin slats twisting around a center turn plain stock into a spiral tree that stands without a single ornament. Wood is the only material you really need, which keeps the cost low.
Cut every slat a little shorter than the one below it, and stagger them evenly around the core.
Dry-fit the whole stack before gluing. A plain, unpainted finish looks good against a gray wall.
11. DIY Wooden Picture Frames
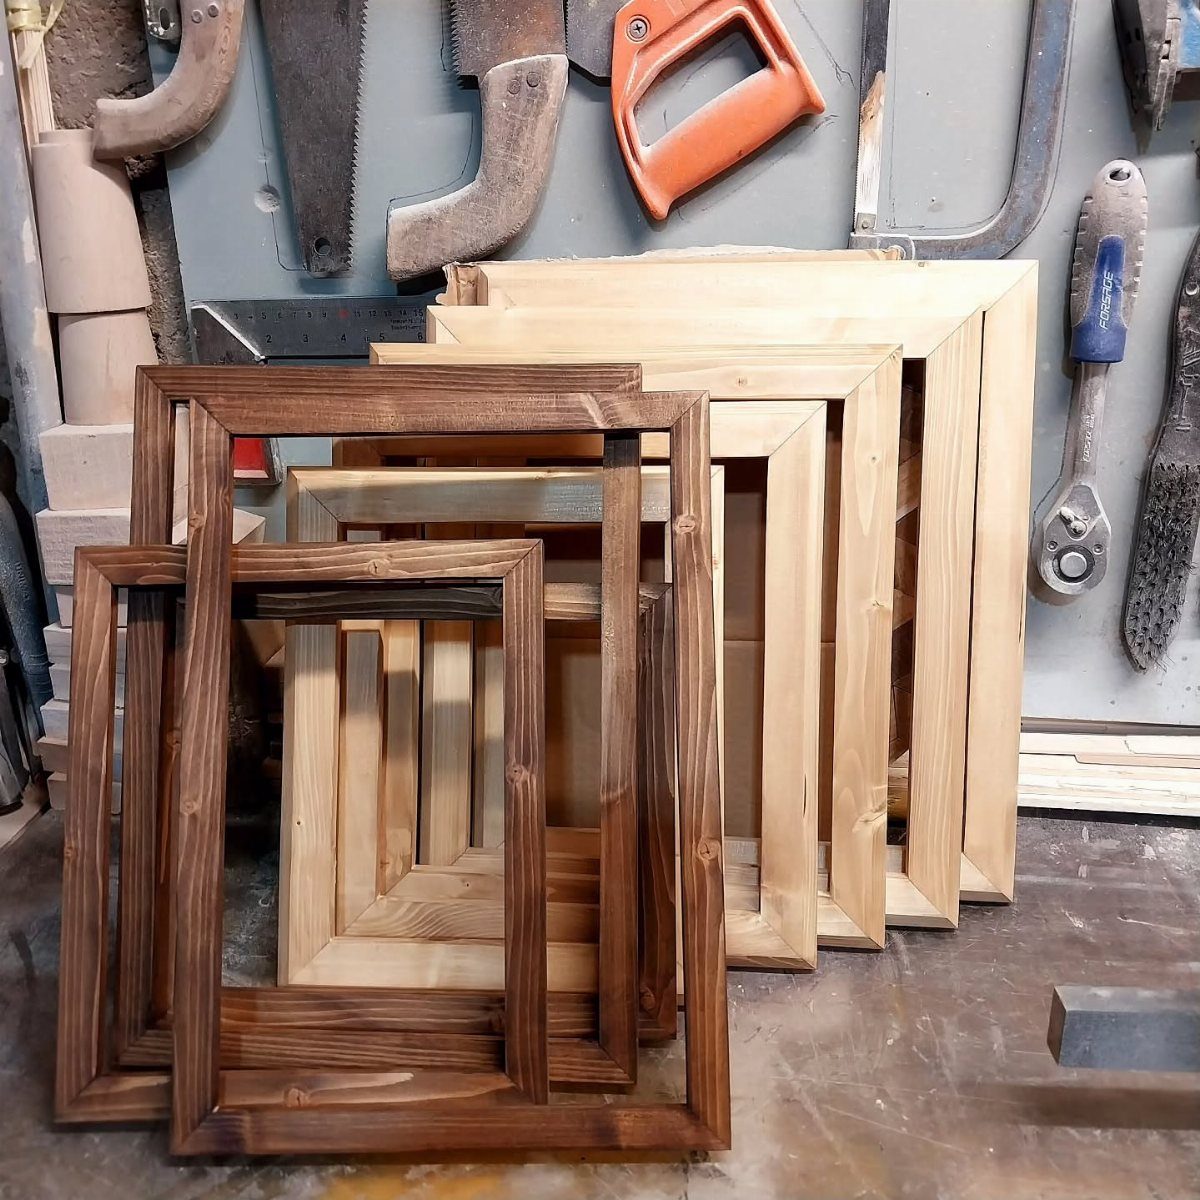
Frames are a forgiving first lesson in mitered corners, and a stain choice makes each one yours. Natural wood suits bright rooms, while a dark brown stain gives photos a heavier border.
Cut every side from the same board so the grain flows around each corner.
Test the stain on a scrap first, since it looks different on each wood. Making several sizes in one session saves setup time.
12. DIY Wooden Jewelry Box
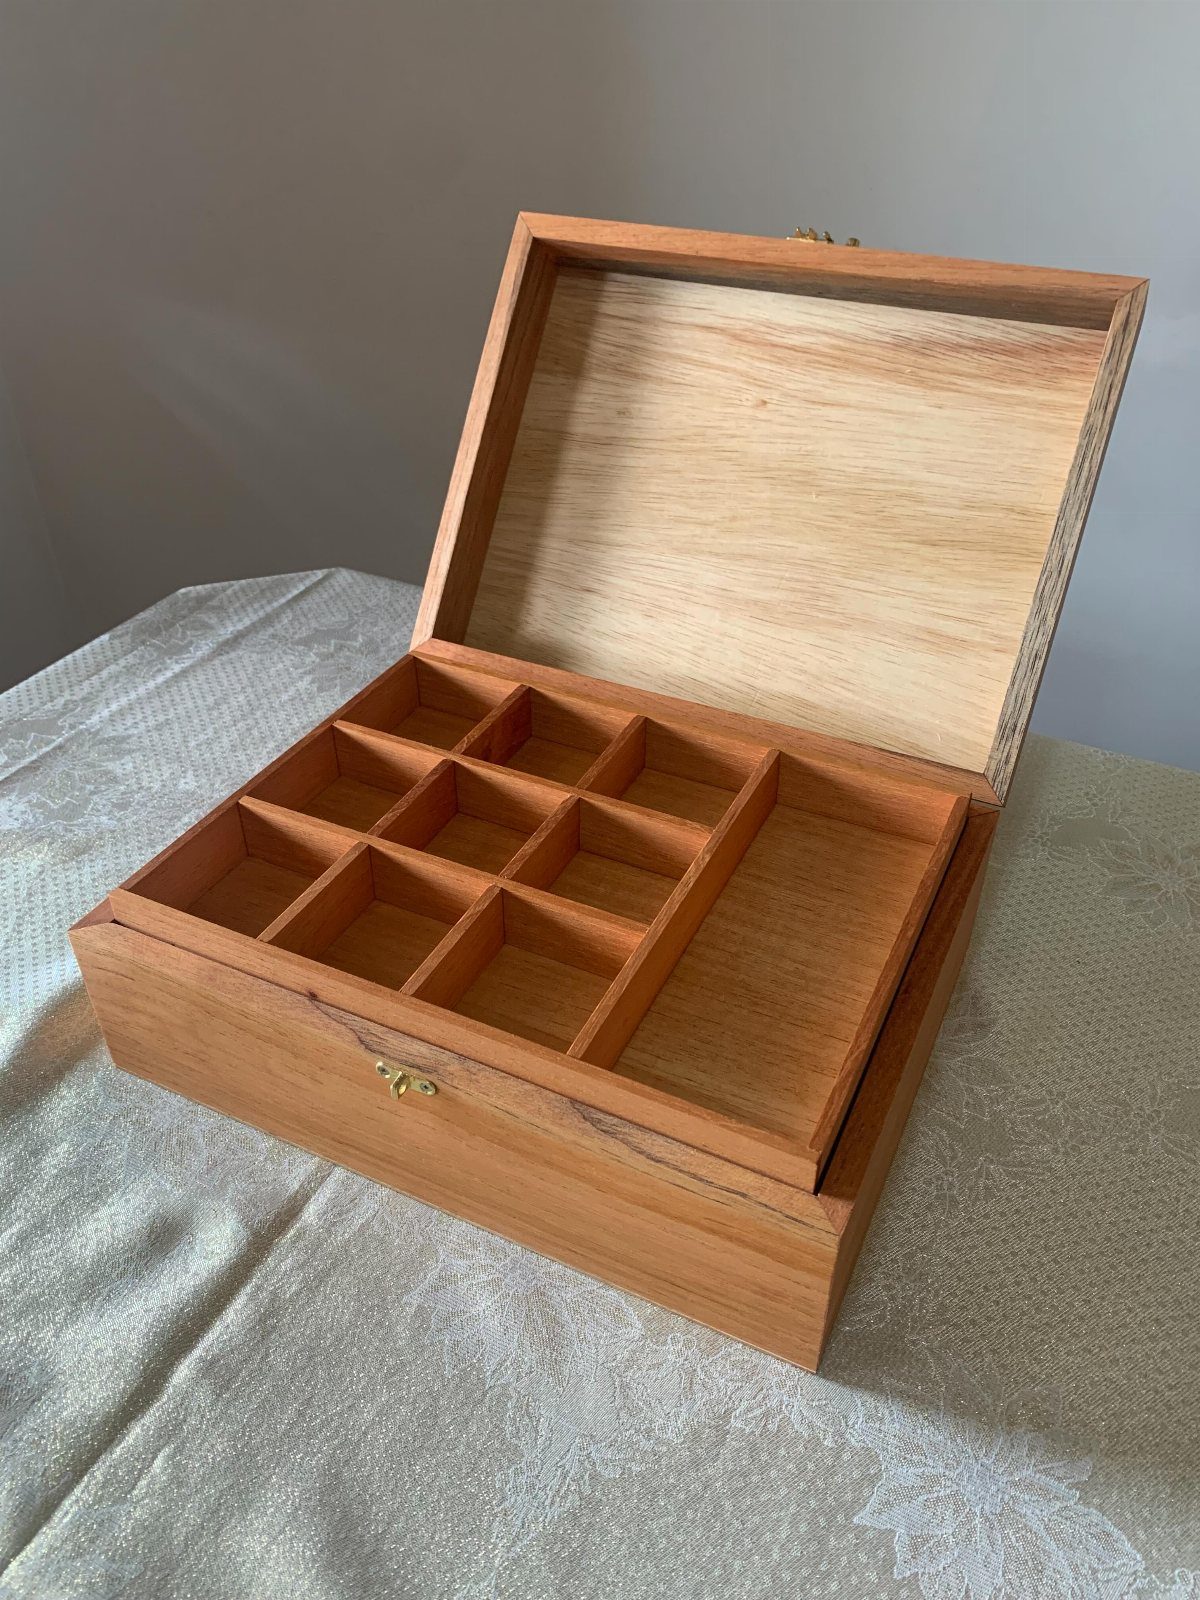
A grid of small compartments keeps rings, studs and chains from tangling, which is what makes a jewelry box worth building over buying. A light wood keeps the inside of the box easy on the eyes.
Plan the divider layout on paper first, then size the grid to what you actually own.
Thin dividers waste less space than thick ones. Sand the inside smooth so nothing snags.
13. DIY Wooden Garden Markers
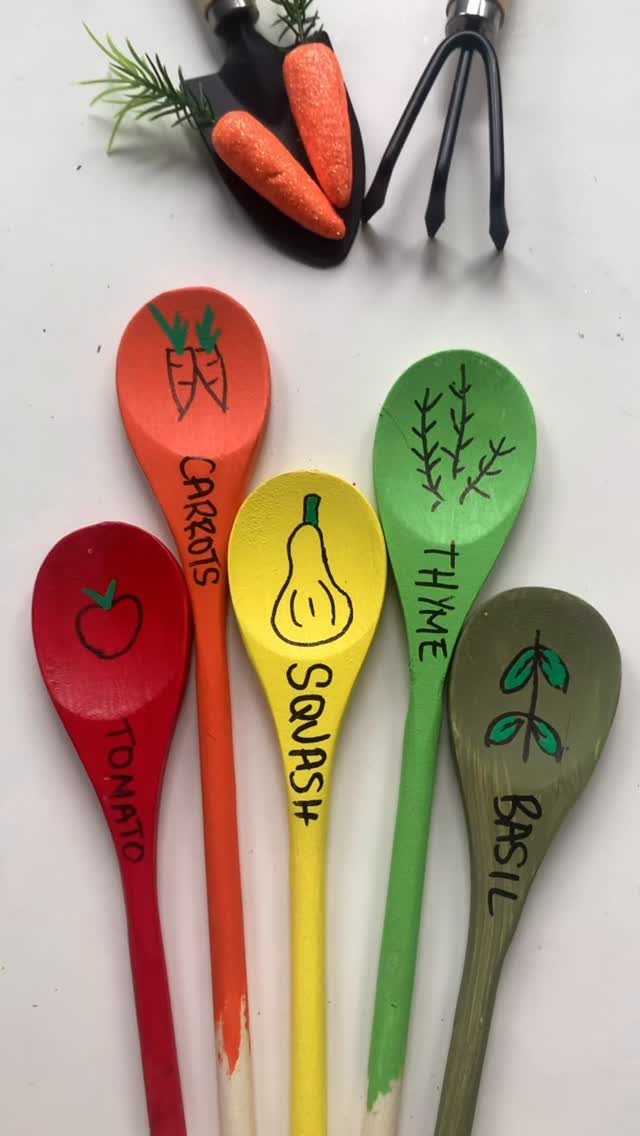
Painted wooden spoons make garden markers that cost almost nothing, and the bowl of the spoon is a ready-made spot for a small drawing of the plant.
Write the name in block capitals along the handle so it reads from standing height.
Push the handle into the soil bowl-side up. Use outdoor-rated paint, or seal the finished spoon, since rain and watering will wear bare paint down.
14. Easy Barn Door
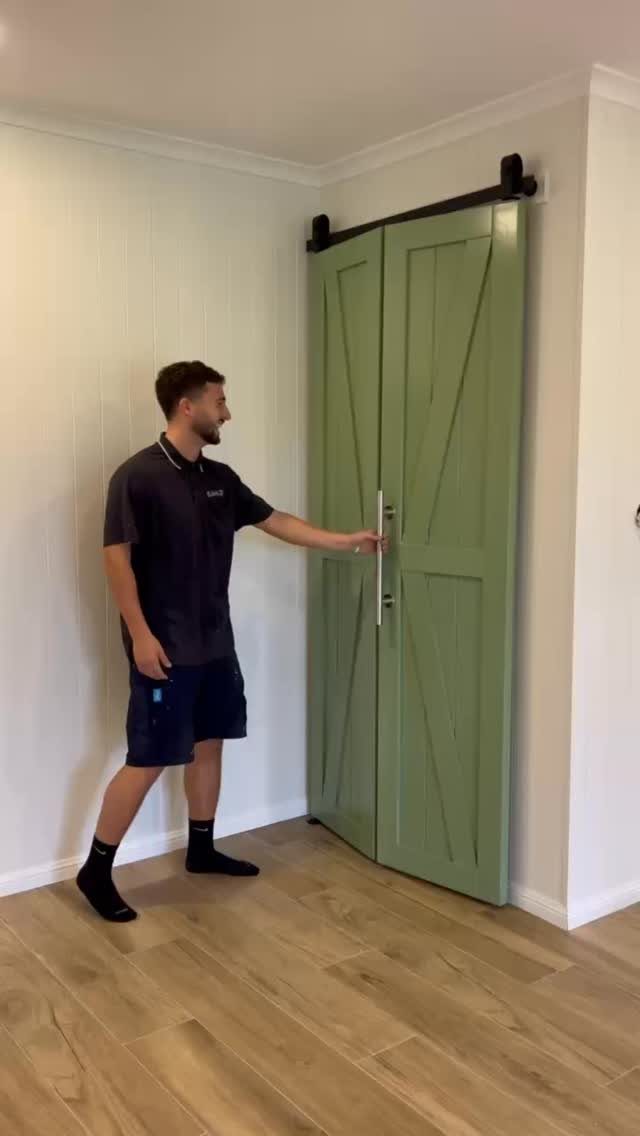
A double barn door on a black sliding track can hang in a doorway or cover something you would rather not see, like shelving or a closet.
Painted green, it becomes the color note of the room instead of just a door.
Pick a bold color against white walls, as it reads clearly.
Black hardware sets off the green nicely. Check the track length against the door width before buying anything.
15. Wooden Lanterns
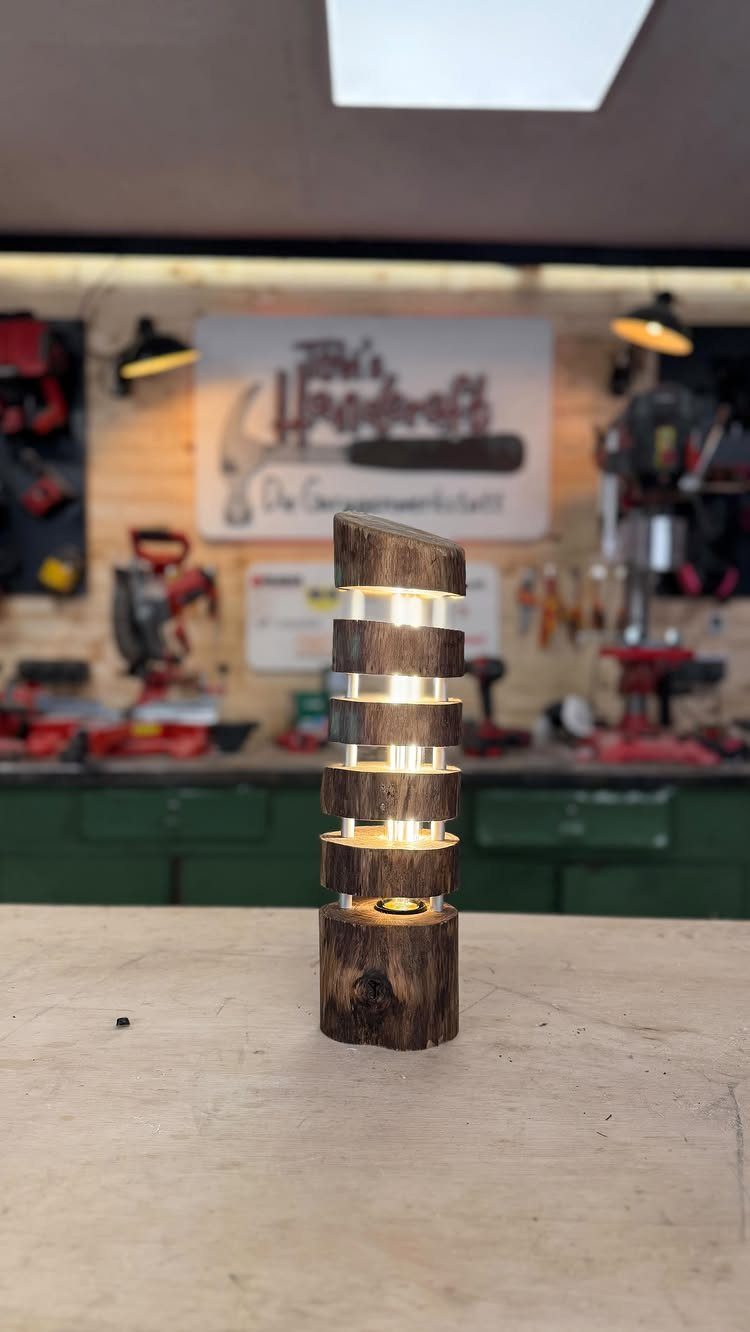
Stacked slices of carved wood make a lantern that glows through its cutouts, and the light does most of the decorating.
A small battery light inside is my choice over a flame, since it keeps the wood away from heat.
16. DIY Candle Holder
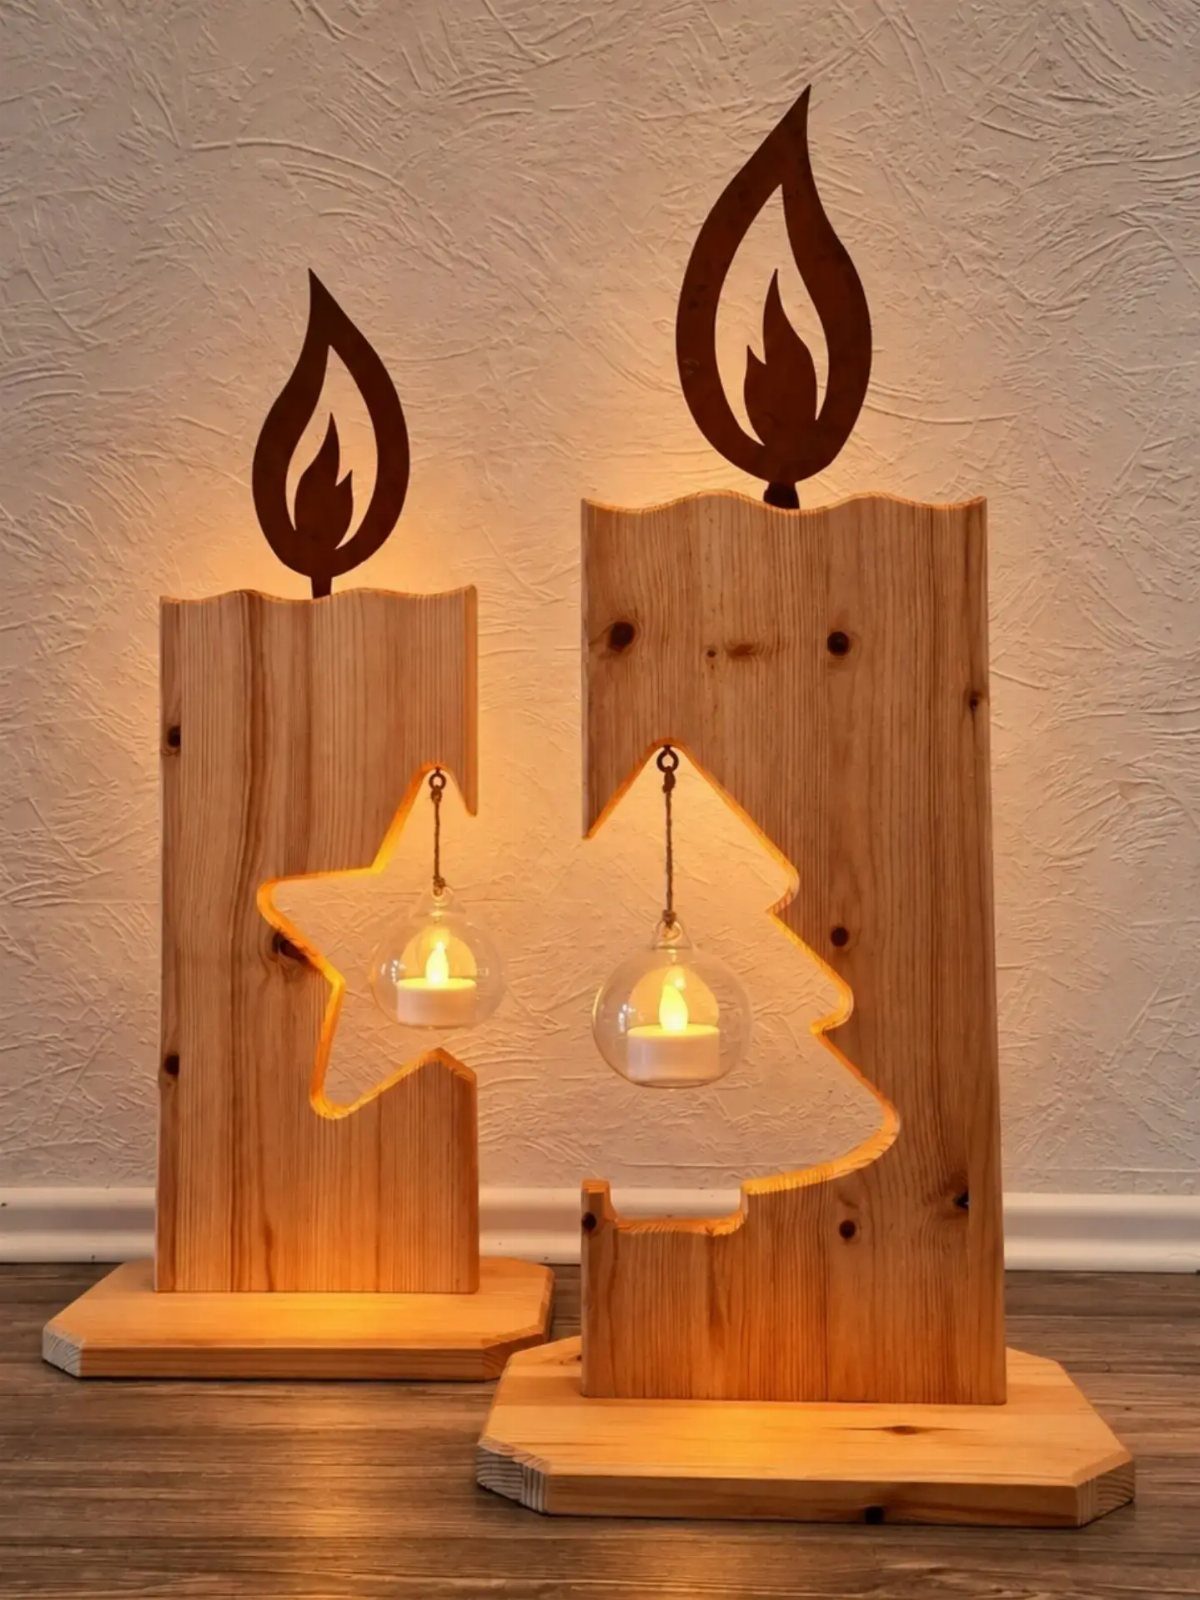
Set on a base, a pair looks tidy on a floor or a table.
Cut the star holes a little wider than the tea light cups so the glass drops in without forcing. I’d use battery tea lights if the holes are snug, so heat is never an issue.
17. DIY Wooden Shelves
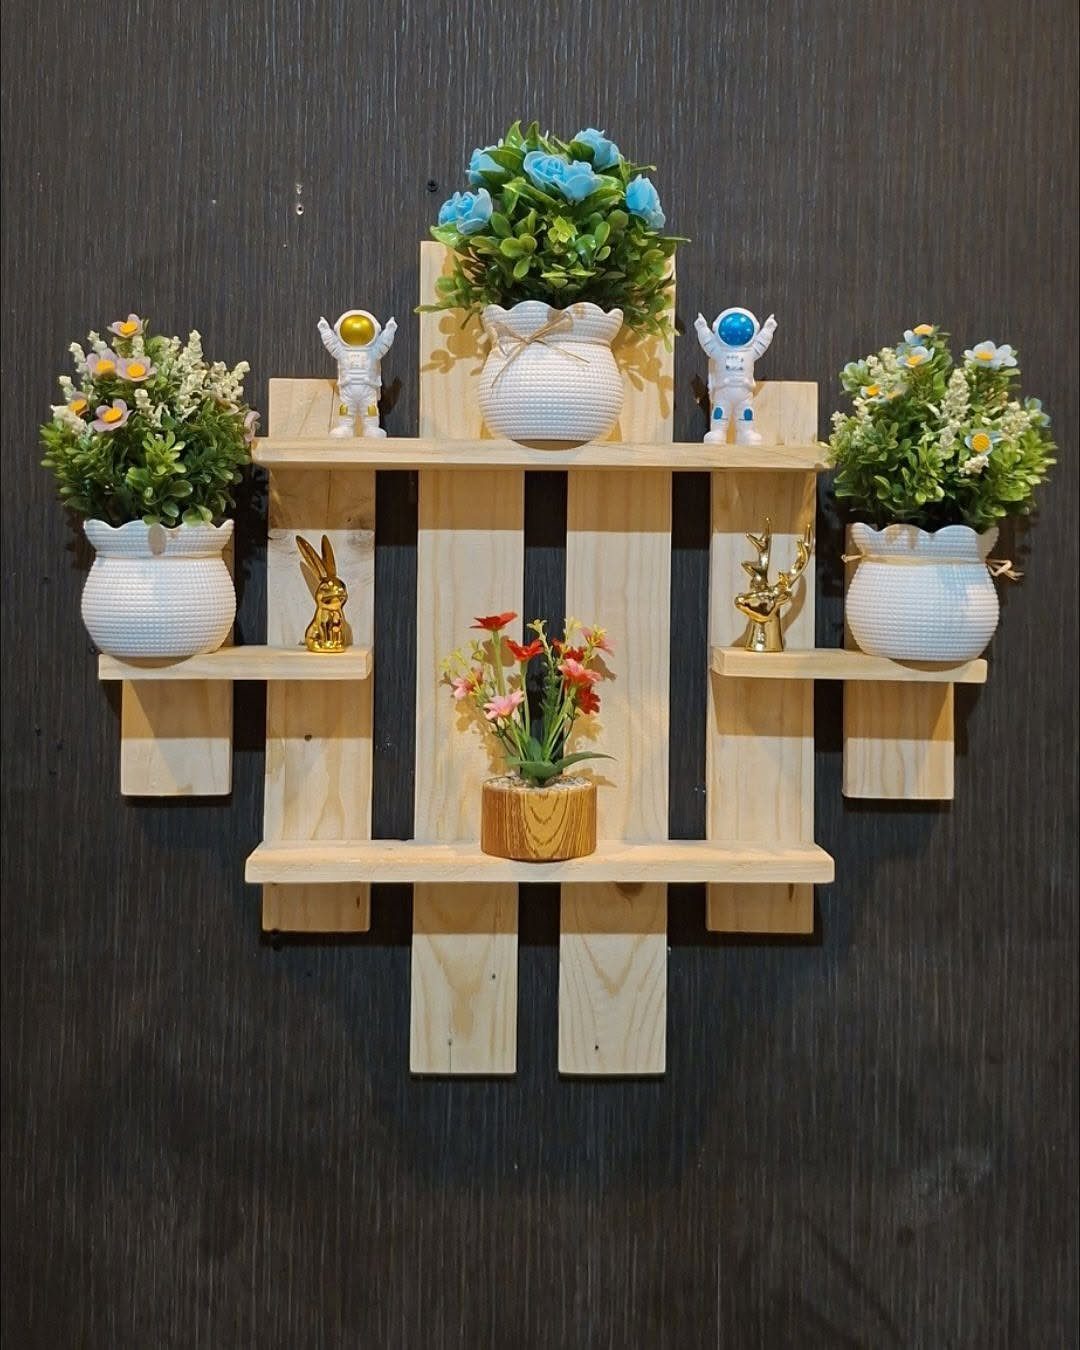
A light wooden shelf against a dark wall gets noticed, and the contrast does half the styling work. Plants and small figurines fit well on one, since neither needs much depth.
Space the shelves to fit your tallest pot before you mark the wall.
Anchor into studs where you can, because plants and ceramics add up in weight. Run 120-grit paper over every corner and cut face until nothing catches your thumb.
18. DIY Wooden Birdhouse
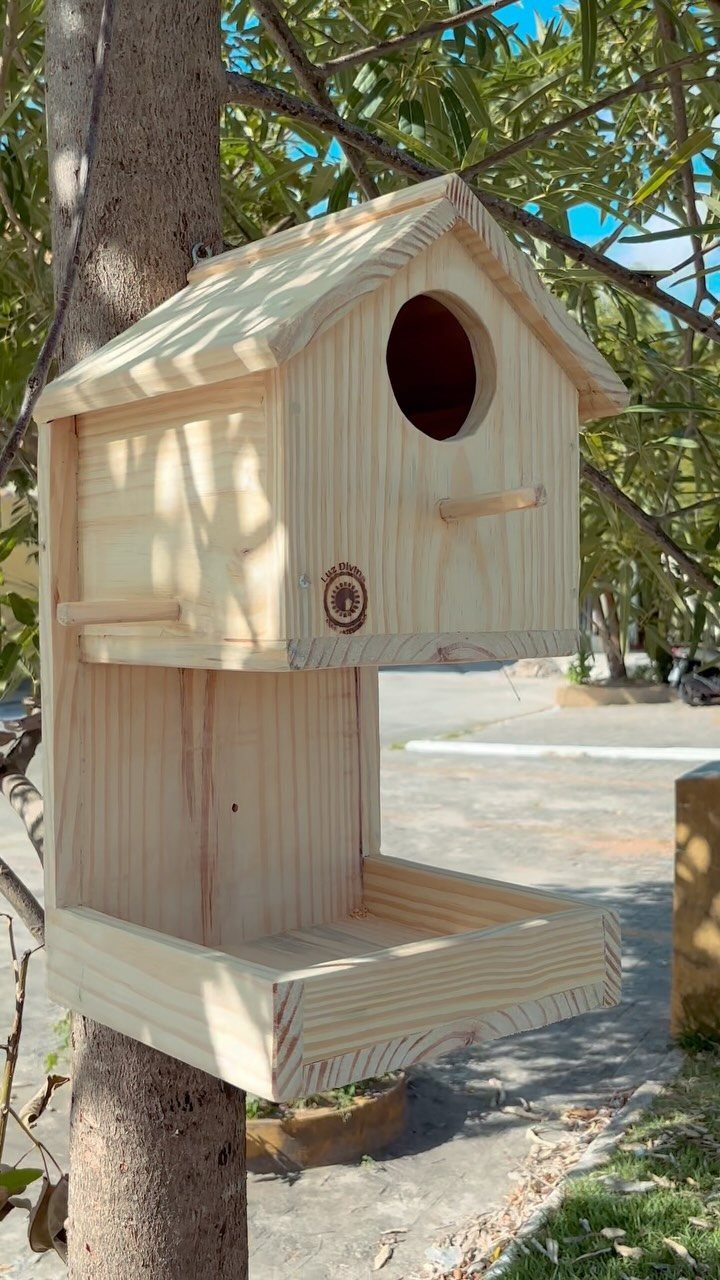
A birdhouse with a perch and a feeding tray does double duty: shelter above, a place to eat below. Light, natural wood weathers quietly on a tree trunk and blends into the garden.
Skip paint on the inside.
Mount it firmly to the trunk so it doesn’t swing in the wind, and keep the tray removable so cleaning is easy. A small branded mark on the front is optional, but a burned-in one makes a nice personal touch.
Using Scrap Wood Effectively
Offcuts pile up faster than most people expect, and the pile is free material. Sort it by thickness and length, then match the pieces to small builds instead of buying new stock.
Keep a bin for pieces too small to hold safely at the saw. Those are best saved for sanding practice or test finishes.
Check each piece for nails, staples and cracks before cutting. Hidden metal chews up blades, and a cracked piece can split under a screw.
Mixed leftovers of different woods rarely match in color. Stain or paint evens them out, or you can lean into the contrast on purpose.
Beginner Woodworking Tips
A cutting board is a good first build because it is forgiving. A stand to hold boards upright in the kitchen is another beginner-friendly option, and any scrap wood will do for it.
Measure twice, mark with a sharp pencil, and cut on the waste side of the line. Accuracy comes from repetition, so make two or three of the same small piece and compare them.
Learning a few hand tool skills first, such as sawing a straight line and planing an edge, pays off on every later project.
Safety in Woodworking
Children should be supervised any time tools are out, and the safest rule is to keep them out of the work area while power tools run.
Wear safety glasses for every cut, sanding job and nail strike. Add hearing protection for saws and routers, and a dust mask when sanding.
Match the tool to the task. Clamp the workpiece instead of holding it with your hand, keep blades sharp, and unplug a tool before changing a blade or bit.
Tie back long hair and skip loose sleeves and dangling jewelry near moving parts.
Frequently Asked Questions
What are some useful things I can make with wood?
A cutting board, a step stool, a spice rack and a set of wall shelves are all useful and doable in an afternoon.
A cutting board made from glued strips of different woods teaches cutting, gluing and sanding in one build. Garden planters made from pallet boards and a hook board with a small shelf by the door are good picks too.
Where can I buy wood for crafts?
Local hardware stores, lumber yards and online retailers all sell wood for small projects. Before spending anything, check your own scrap pile, since offcuts sorted by thickness and length can cover small builds like a phone holder.
Pallets are another cheap source for a planter box, as long as you pull the nails slowly so the boards don’t split.
What are easy woodworking projects I can do for free?
A phone stand might be the fastest build on the list: take a small offcut and cut a slot just wider than your phone, case included.
Garden markers from painted wooden spoons cost almost nothing, and a pallet planter box runs little or nothing since pallets are often free.
Before you buy anything, sort your scrap pile by size, then match each piece to a small project that fits it.






