The state of the surface you’re starting with decides which of these fixes makes sense, from stain on bare wood to paint, appliqués or a mirrored front.
The ideas here run from cheap wrapping paper to a $500 resale on a dark grey painted piece to glued-on mirror glass, so match the effort to the dresser’s condition before spending a dime.
1. Wood Stain
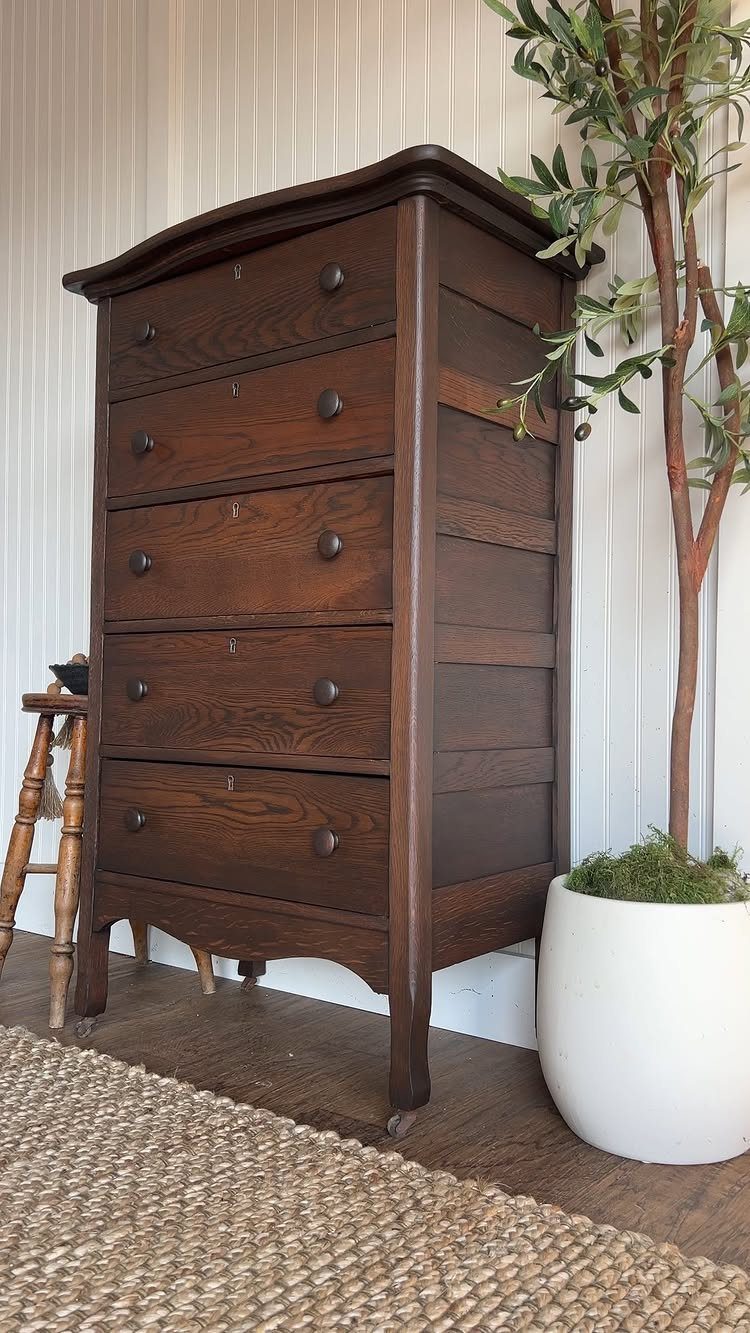
Raw wood is where a stain job starts, and no shortcut changes that. The maker of this dresser used an orbital sander and a 3×4 sander to strip it down before staining, and that is the right order.
Stain soaks into bare wood and can’t grip old finish, so any leftover varnish shows up as blotchy patches. A dark brown like this one hides small scars and lets the grain show.
Wipe on, wipe off, and let it dry before you judge the color.
2. New Knobs and Handles
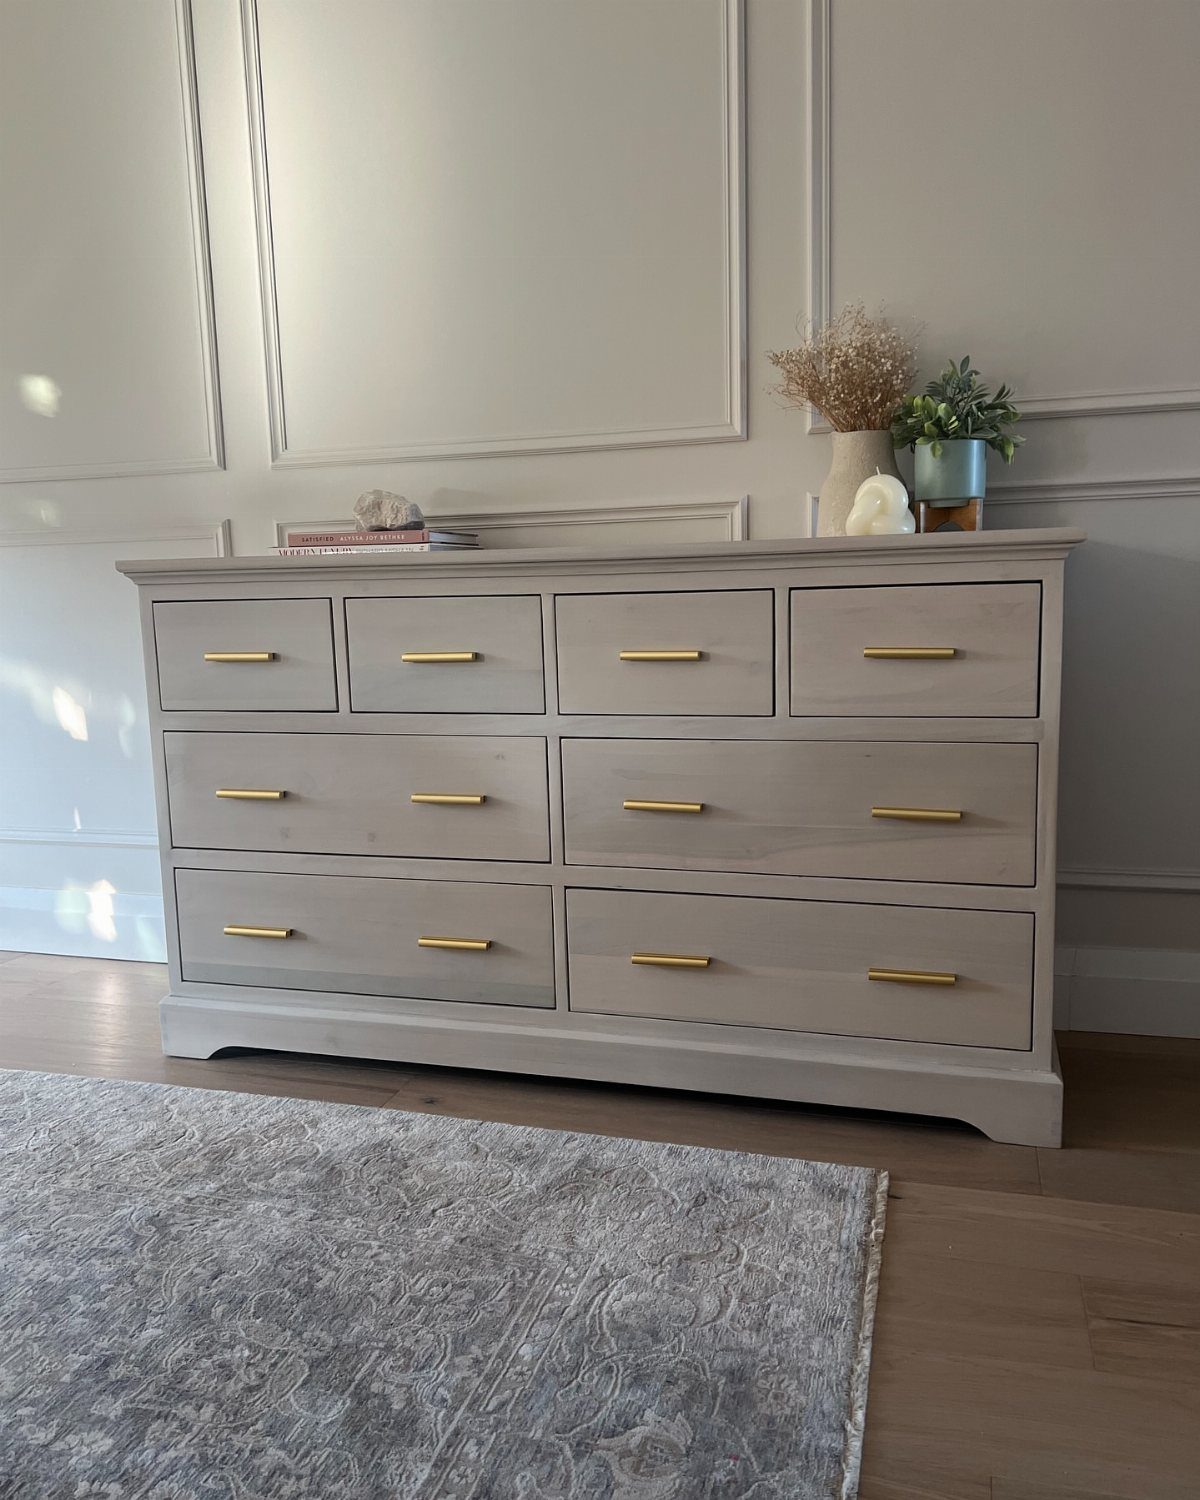
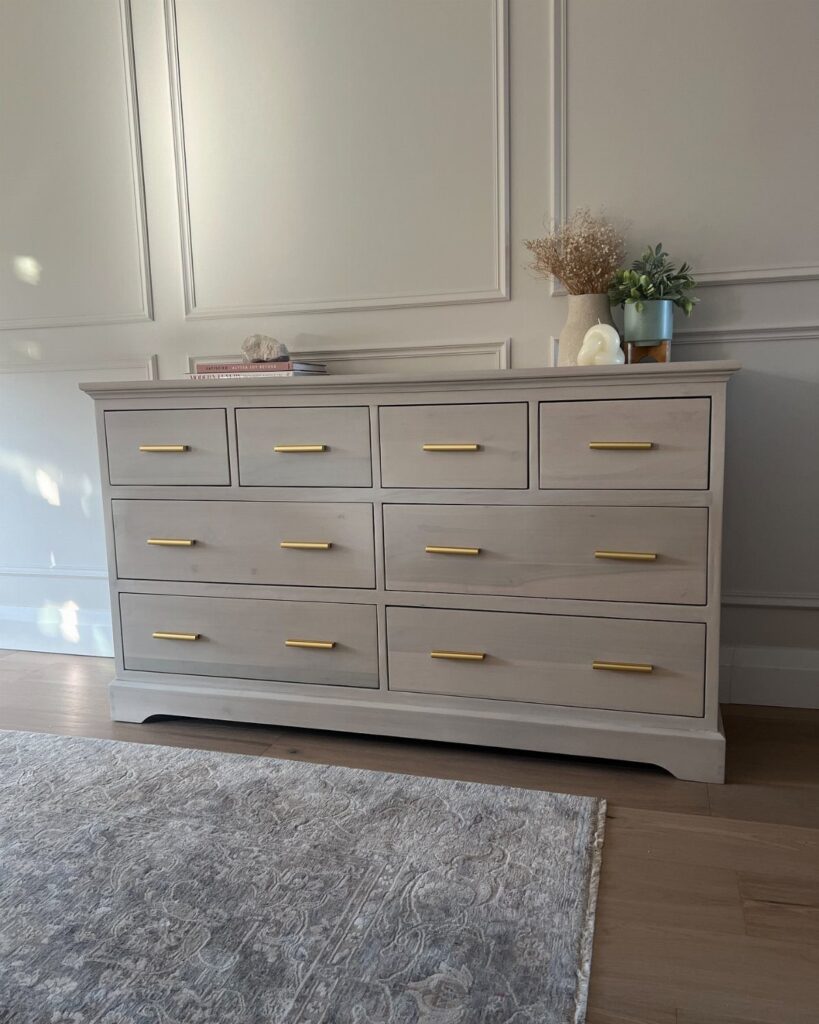
New hardware costs less than any other fix for a tired dresser, and it’s usually the first thing anyone notices. Slim gold bars against soft grey read as modern, while round knobs would pull the same dresser toward traditional.
Measure the distance between the screw holes before you shop. New pulls that match that spacing drop right in with no drilling.
If the spacing doesn’t match, you’ll have to fill and redrill, so buy to fit.
3. Decoupage
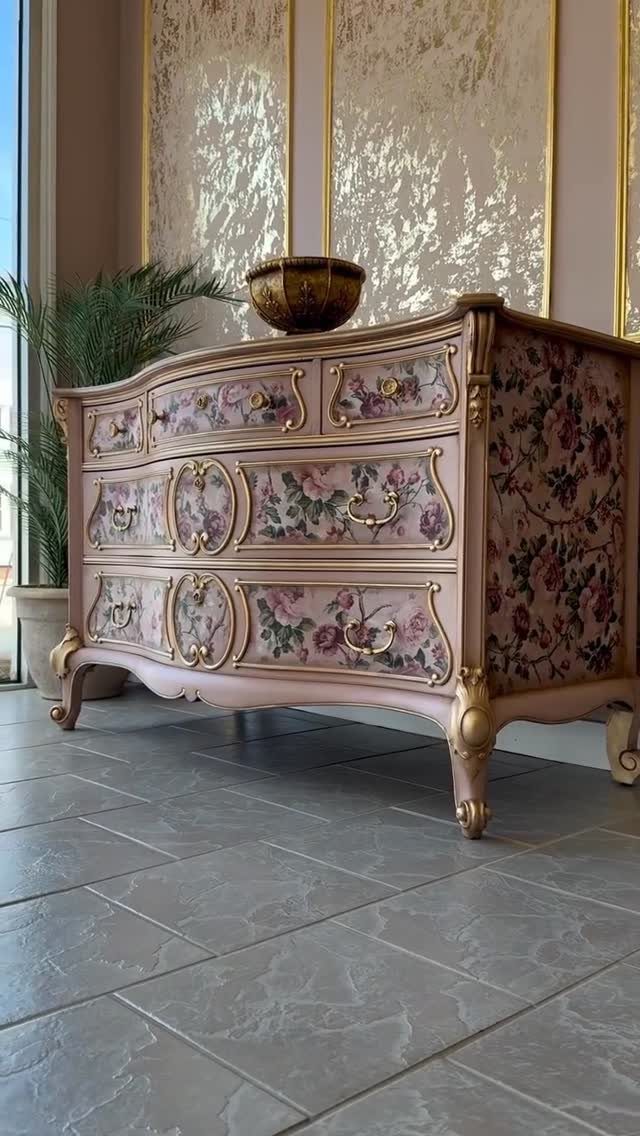
Paper or fabric glued to a painted surface turns a plain drawer front into a pattern you could never buy ready-made. Florals on pink, with gold trim around the edges, give this dresser a vintage feel.
Paint the dresser first, then cut your paper to fit each drawer front so the design lines up across the piece. A thin coat of decoupage glue under and over the paper seals it.
Smooth out air bubbles as you go, working from the center outward.
4. Painted Dresser
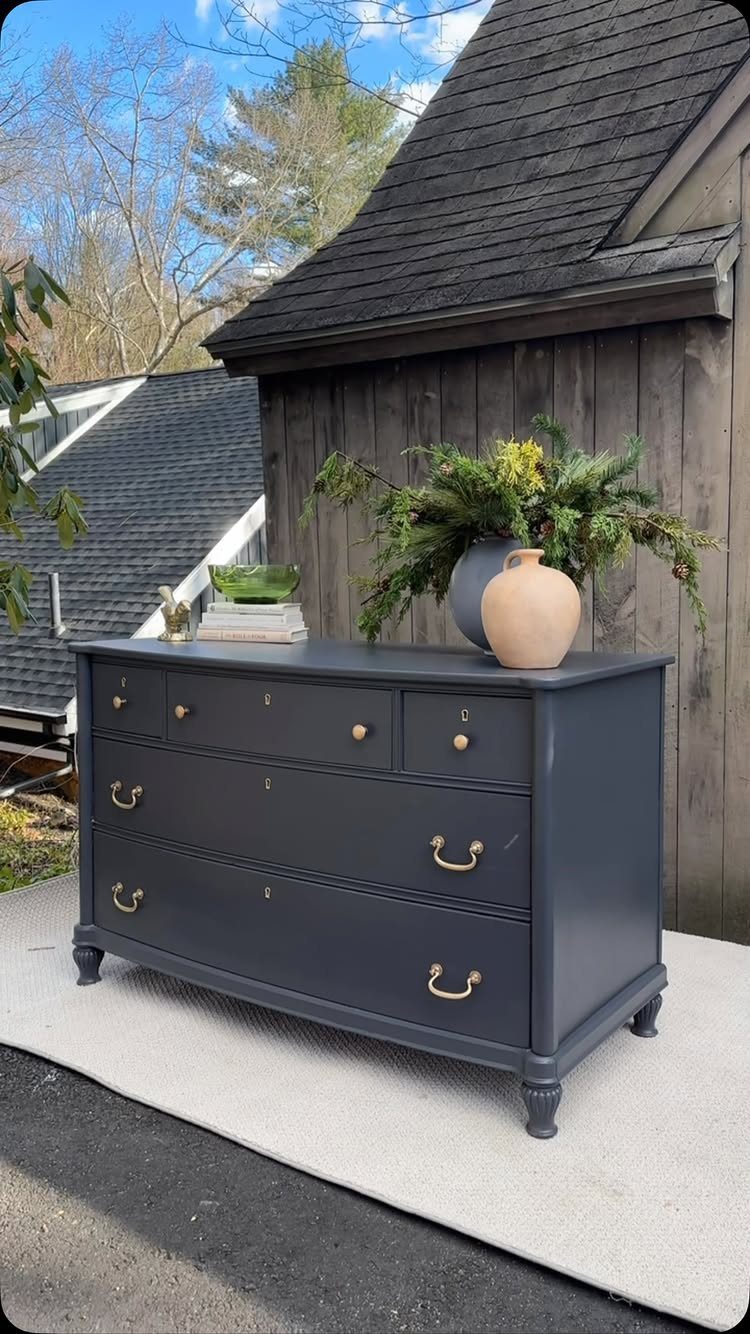
Paint rewards good bones, and a dresser with turned legs and solid wood has them.
The maker of this dark grey piece sold it for $500 and said they should have charged more, which tells you what a well-built find can bring.
Dark grey with gold hardware looks expensive, and it hides wear better than a pale color. Look closely at the wood first: solid construction is worth far more than a fancy shape in cheap board.
Paint is the budget route for a reason.
5. Two-tone Finish
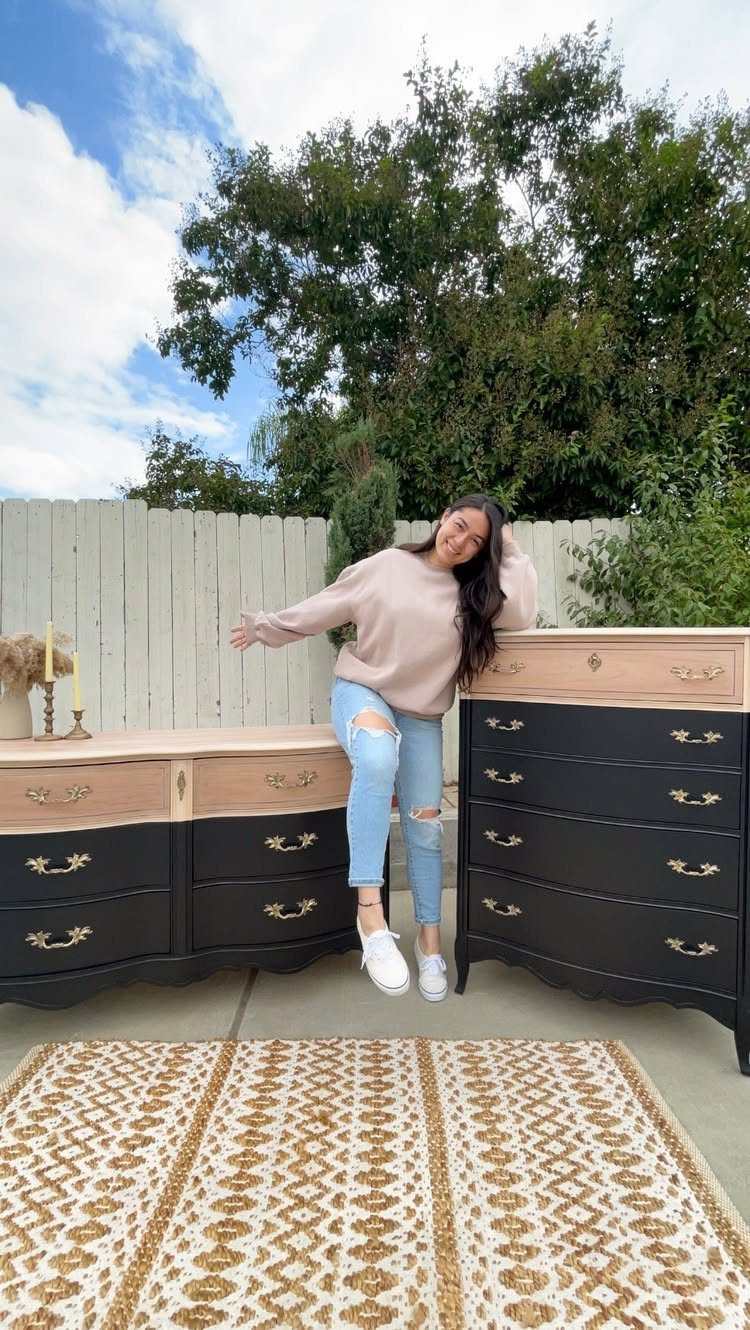
Black paint on the body with bare wood left showing gives a dresser 2 personalities at once. Keeping the gold handles on both pieces ties the contrast together.
Pick one part to leave natural, such as the top or the drawer fronts, and tape the edge carefully before you paint the rest.
A clean line matters more here than anywhere else, since the eye goes straight to where the 2 finishes meet.
Stain or seal the exposed wood so it holds up.
6. Stencil Designs
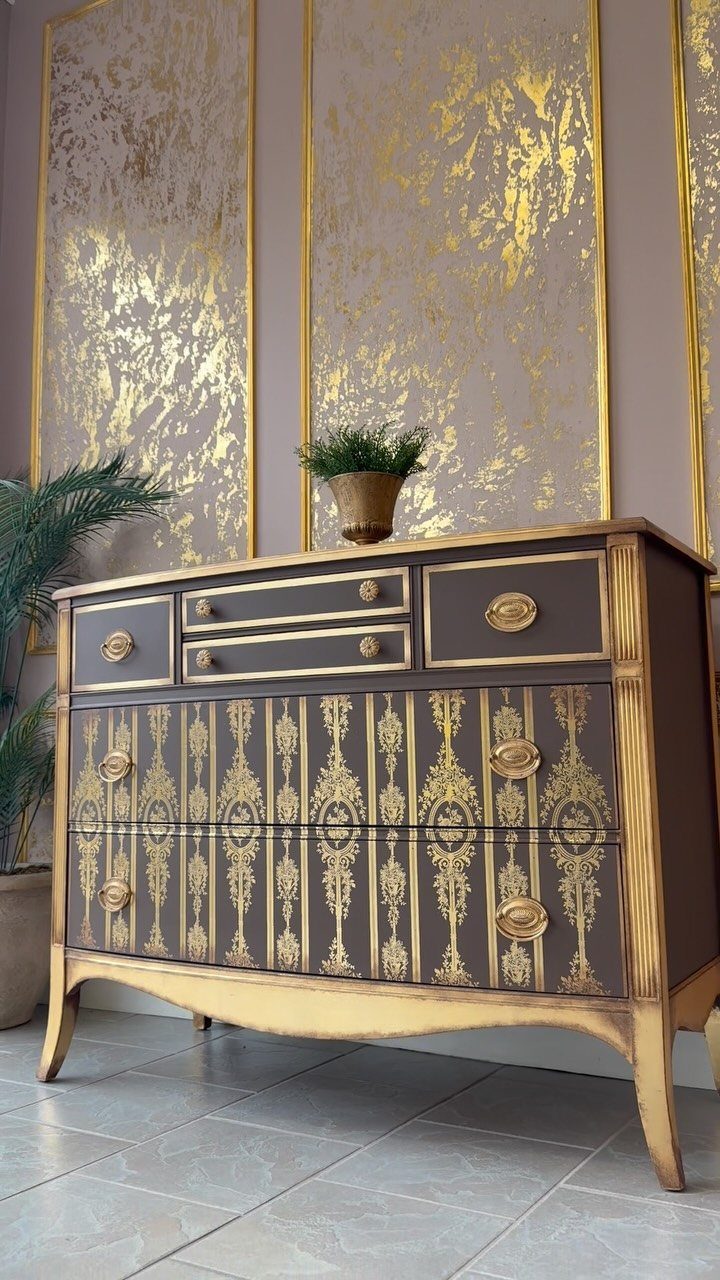
Gold stenciling over dark brown is a high-contrast pairing that makes a simple repeat pattern look rich. A dresser like this one gets gold on the trim as well, so the pattern and the edges echo each other.
Tape the stencil down flat and use very little paint on a dabbing brush; too much creeps under the edges and blurs the design. Lift the stencil straight up rather than dragging it.
Test on cardboard first to judge how much paint you need.
7. Mirrored Dresser
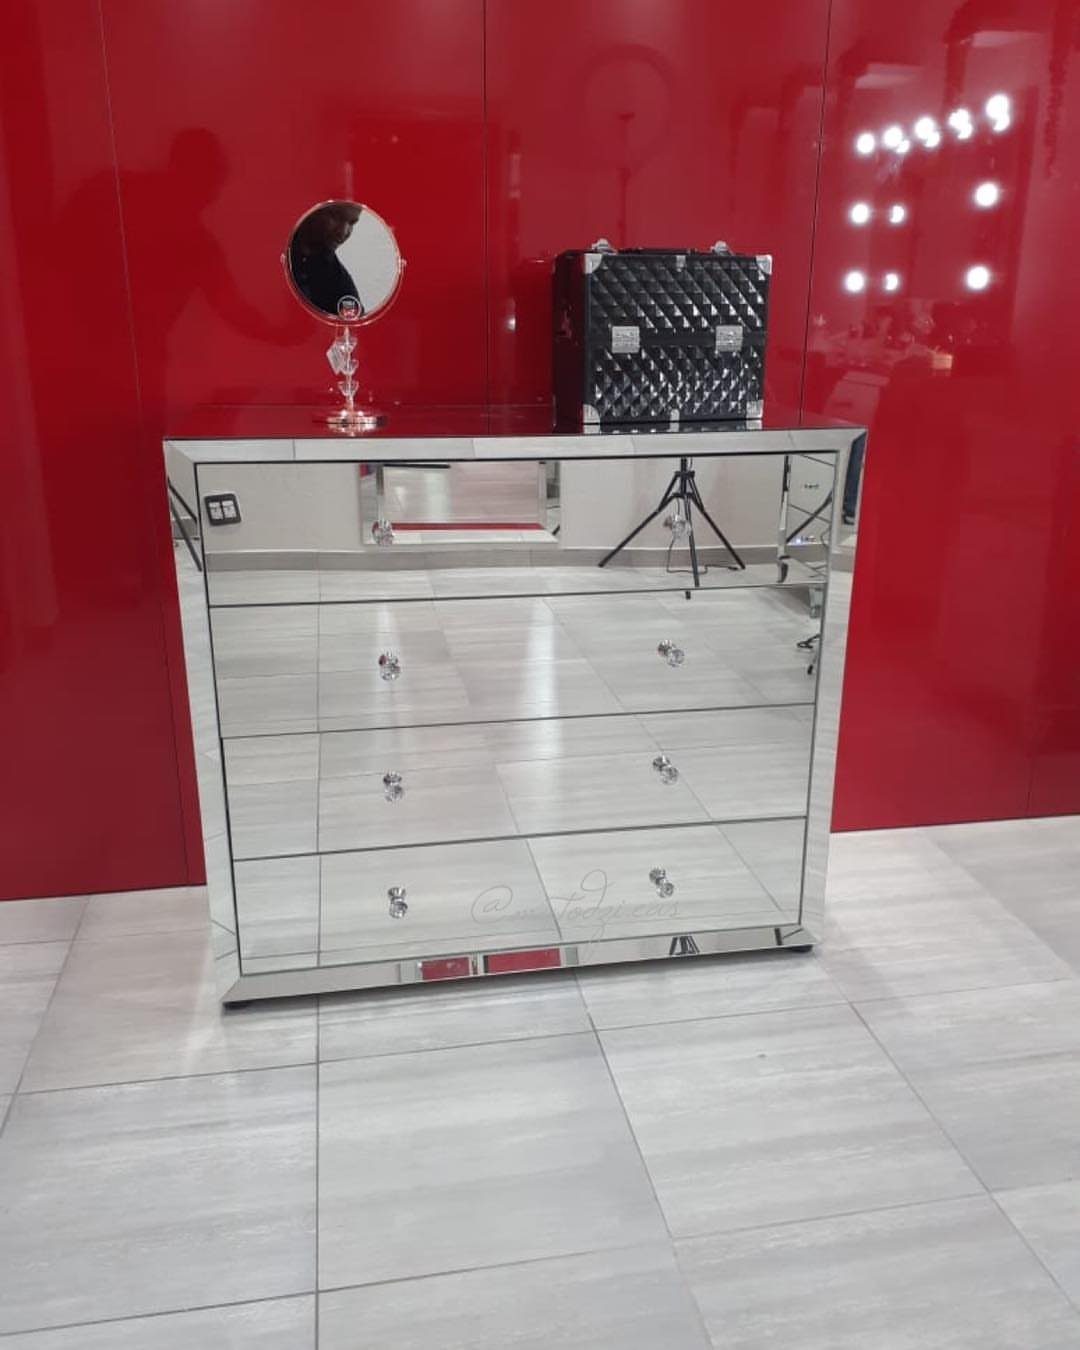
Mirror glass on a dresser bounces light around a room, which helps a dark corner more than any lamp I know.
Crystal knobs suit a mirrored dresser better than plain wood pulls would, because they pick up the light and echo the glass instead of fighting it.
Mirrored panels or tiles can be glued onto the drawer fronts and top. Check the fit of each piece on the drawer before you commit to adhesive.
Fingerprints show on glass, so keep a cloth nearby.
8. Chalkboard Paint
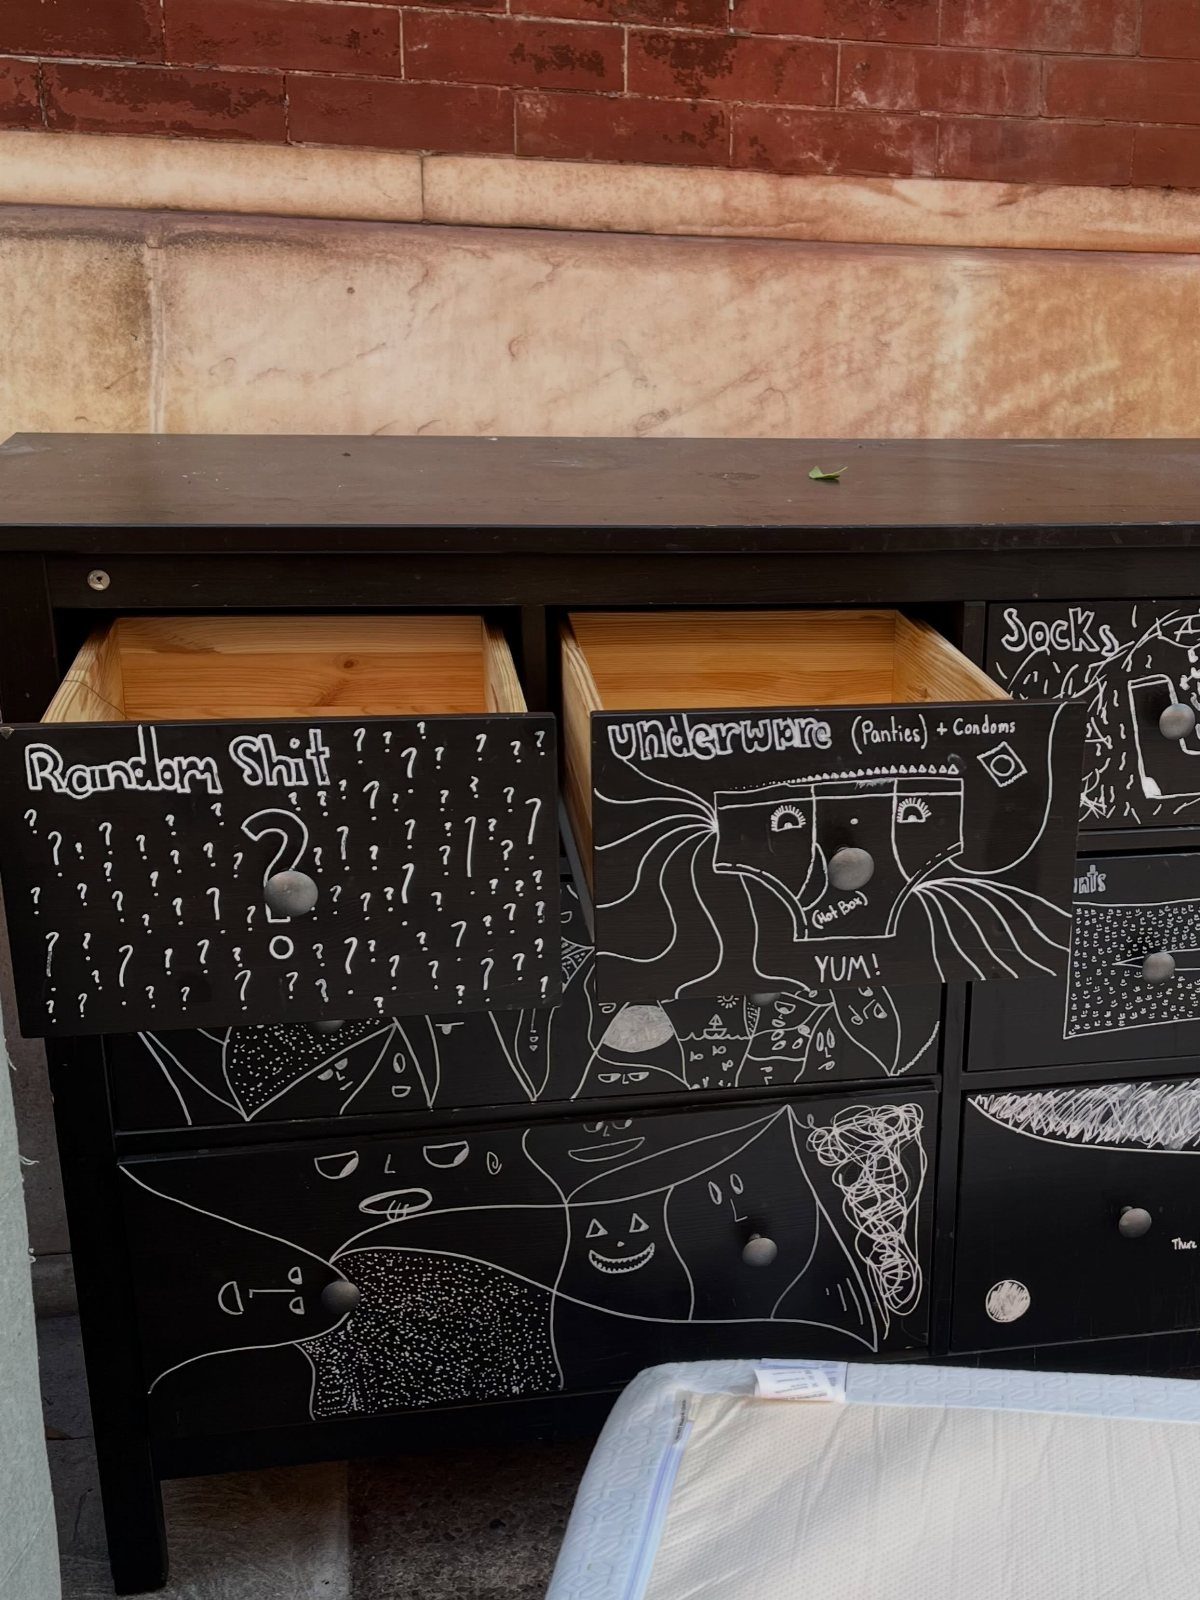
A coat of chalkboard paint turns drawer fronts into labels you can rewrite whenever your needs change. Black is the classic color, and white chalk reads clearly against it.
Sand lightly, wipe off the dust, and brush on thin coats, letting each dry before the next.
Chalk is easy to wipe away, so a dresser kept in a kid’s room or a garage can carry new labels and drawings every month.
Rubbing chalk on the dry surface and wiping it off before the first drawing is a common prep step, and worth doing.
“Wallpaper is so forgiving and a roll goes a long way,” DIYer Claire Armstrong says. Here, Claire used dark blue chalky finish paint ( Annie Sloan’s Oxford Navy ) and a $35 tropical wallpaper from Amazon to give her IKEA HEMNES some vibrancy.
9. Decorative Wood Appliqués
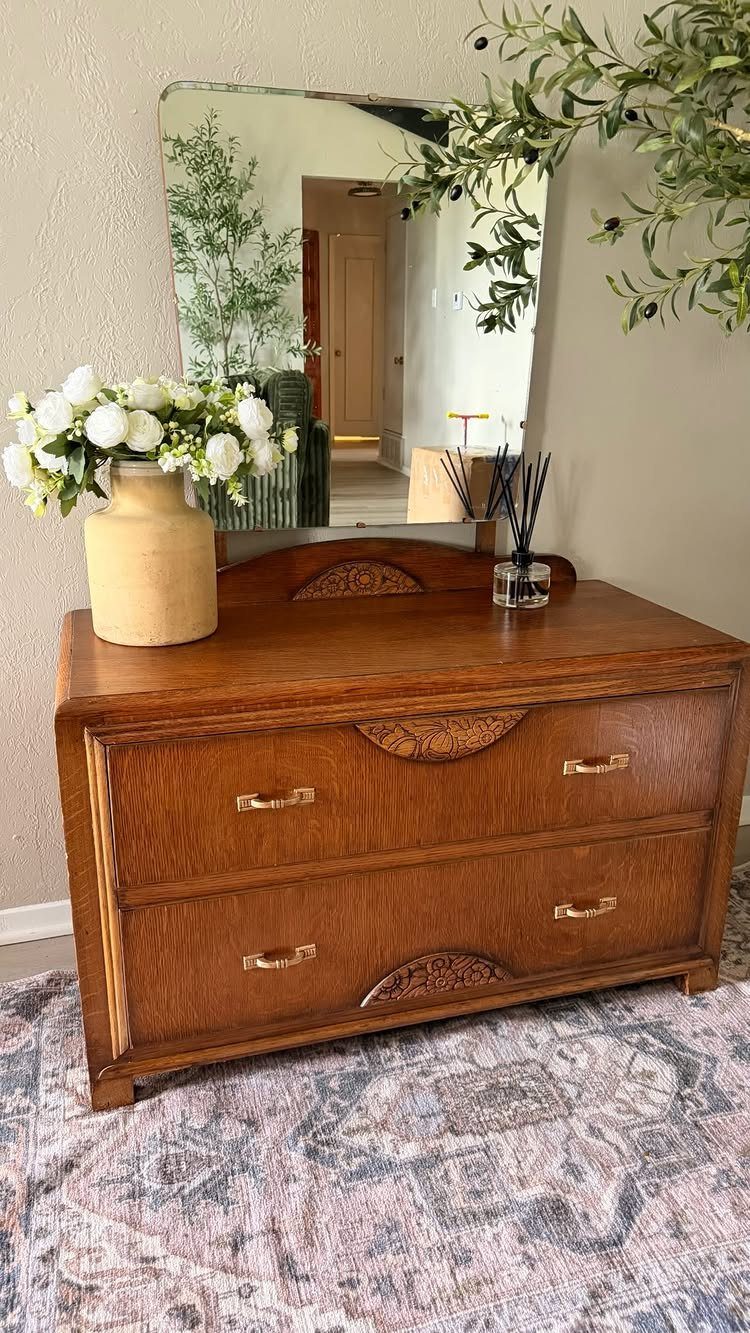
Carved wood appliqués are pre-made ornaments you glue to flat drawer fronts and the top edge, and they give a plain dresser raised detail without any carving on your part. Wood-toned pieces on wood keep the look classic.
Dry-fit every piece first and mark its spot with pencil so the pattern stays centered. Wood glue and a few clamps or weights hold them flat while they set.
Paint or stain the appliqués to match the dresser before you glue them down. Touching up around the edges afterward is fussy work.
10. Fluted or Ribbed Drawer Fronts
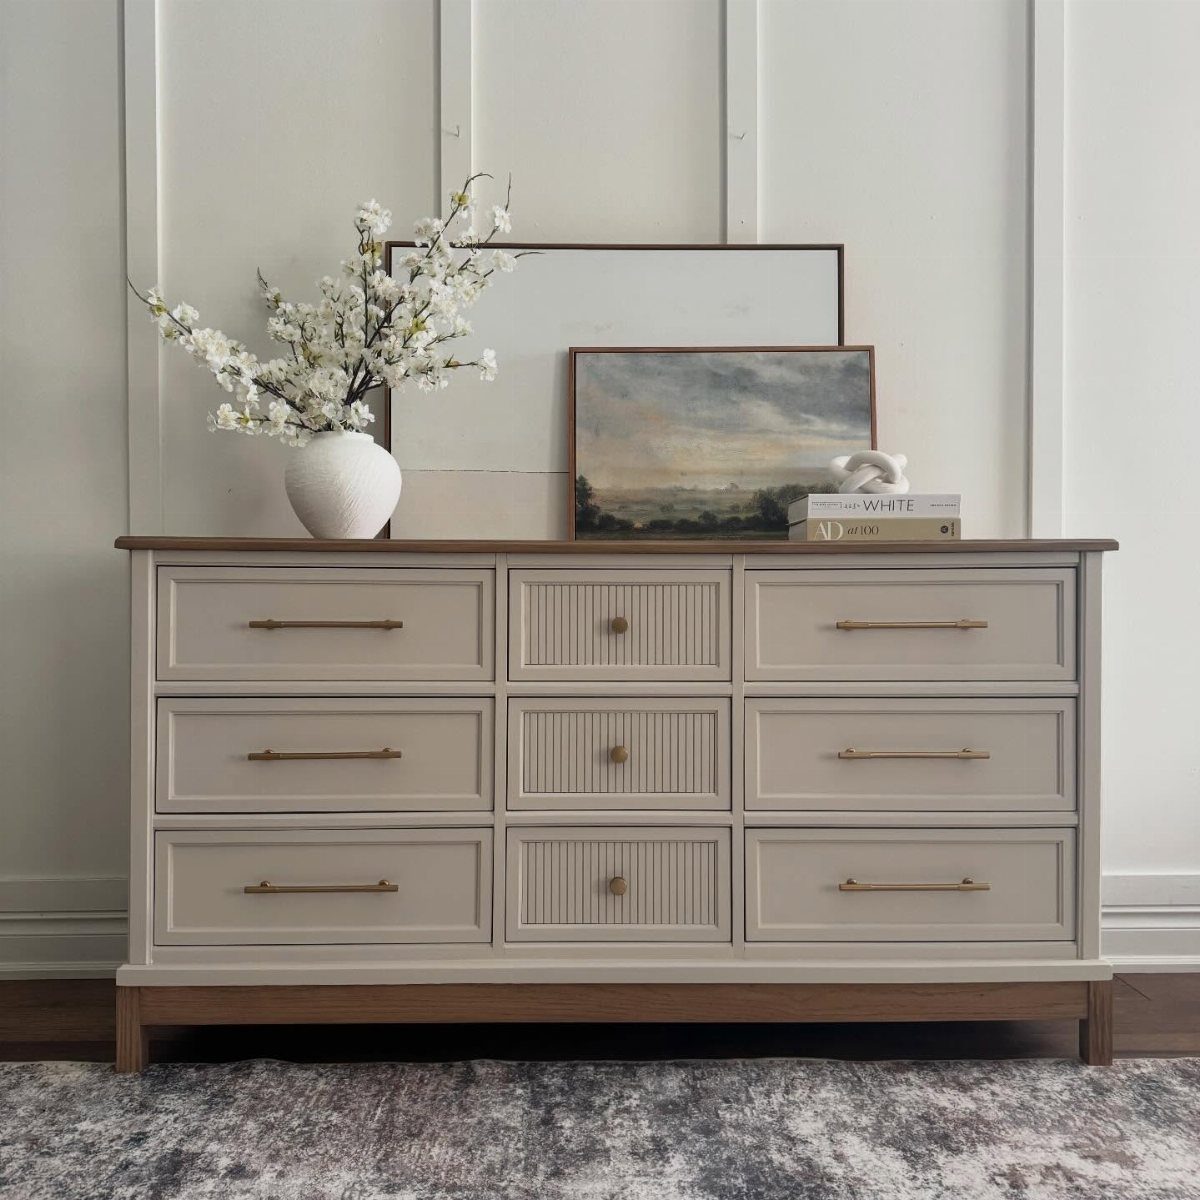
Fluted fronts add vertical texture, and on a soft beige dresser they make a flat drawer look custom-built. Gold handles suit the ridges well, since the metal catches light against the pale finish.
I would flute only the center drawers, as this dresser does, because a full set of ridges can look busy. Ready-made fluted panels or strips can be glued onto smooth fronts, which is far easier than cutting grooves yourself.
Paint everything one color after attaching, so the ridges read as part of the drawer.
11. Patterned Drawer Liners
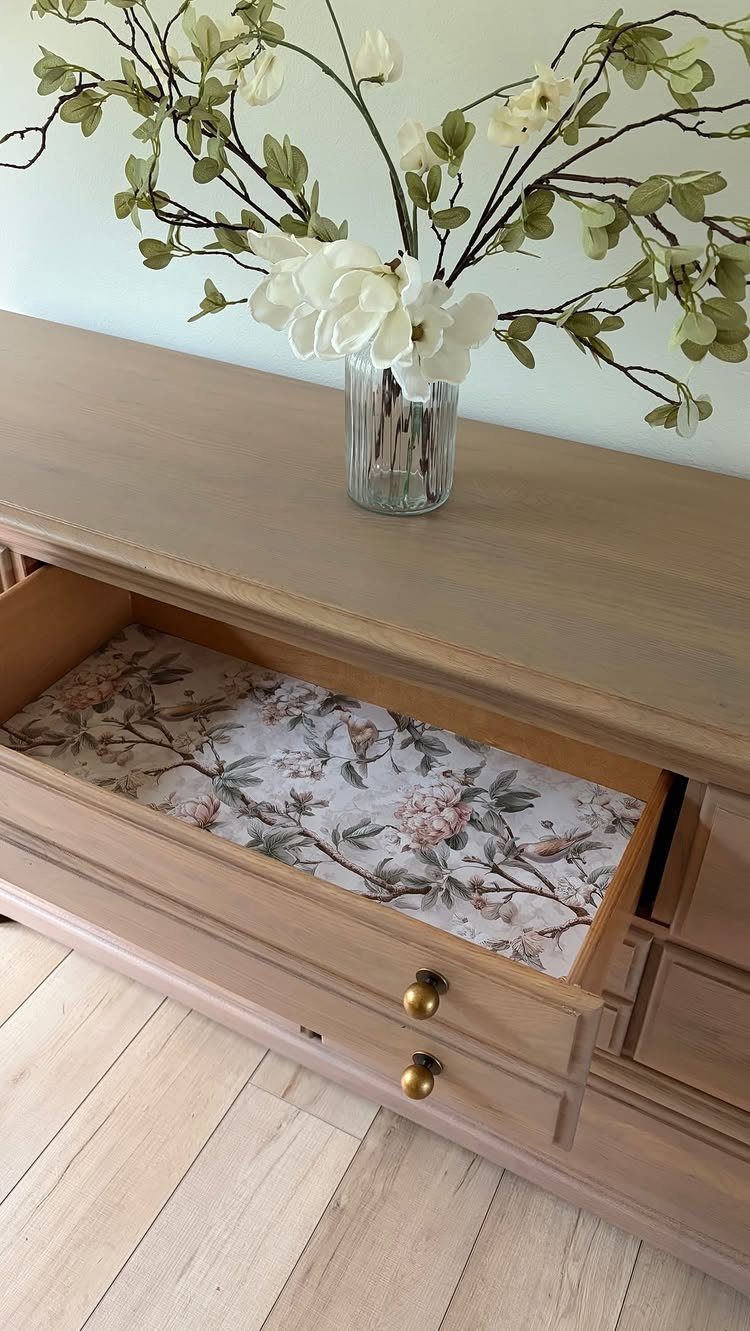
Lining the inside of the drawers with floral paper gives you a surprise every time you open one, and the outside can stay quiet.
Patterned drawer liners are an easy fix for a tired dresser, since a single sheet of wrapping paper or decorative paper covers a drawer bottom.
Trace the drawer bottom onto the back of the paper and cut just inside the line so it lies flat. Tape or light adhesive keeps it from sliding around.
Pick a pattern that complements the dresser’s finish; a floral on light wood feels fresh.
Preparation Tips for Painting
Sanding and cleaning come before any paint or stain, and skipping either shows later as peeling. Paint grips a scuffed, clean surface far better than a glossy or greasy one, so wipe off dust and grime once you finish sanding.
Primer is worth the extra step. It gives the paint an even base to sit on, and the topcoat goes on smoother.
Choosing the Right Materials
Good quality paint or stain costs more up front, but cheaper options wear off sooner and leave you doing touch-ups. A dresser sees daily use, so I put the money into the finish rather than the extras.
Water-based products make cleanup easier, since brushes and drips wash out with soap and water. That alone makes them my pick for an afternoon project.
Maintenance for Restored Dressers
A protective top layer is what keeps a restored dresser looking good. It shields the finish from scratches and everyday wear, and wax is a fine choice if you like a smooth feel under your hand.
Keep heavy items off the top and out of the drawers’ way. Weight can mar a fresh finish and strain the piece, so set the heavy things somewhere sturdier.
A damaged veneer top doesn’t rule out a makeover either; even a beat-up piece can be worth the work.
Frequently Asked Questions
How can I make my old dresser look more modern?
New hardware is the quickest change. Hardware sets the style more than the color does: a grey dresser with slim gold bar pulls looks current, and the same piece with round knobs looks traditional.
Painting in a dark grey or black and keeping gold pulls adds to that look, and the pulls cost less than any other fix.
How much would it cost to restore a dresser?
Most projects come in under $100, and new hardware or paper drawer liners are the cheapest places to start.
For the lowest cost, a coat of paint wins over stripping and restaining. Spending a bit more on good paint or stain pays off, since cheaper finishes wear off sooner and leave you touching up.
Can I just paint over a dresser without sanding?
Sanding is the better call. A clean, lightly scuffed surface holds paint well, while a glossy or greasy one lets it slip, and that’s where peeling starts if the prep gets skipped.
Wipe off the dust and grime after sanding, then add primer so the topcoat goes on smoother.






