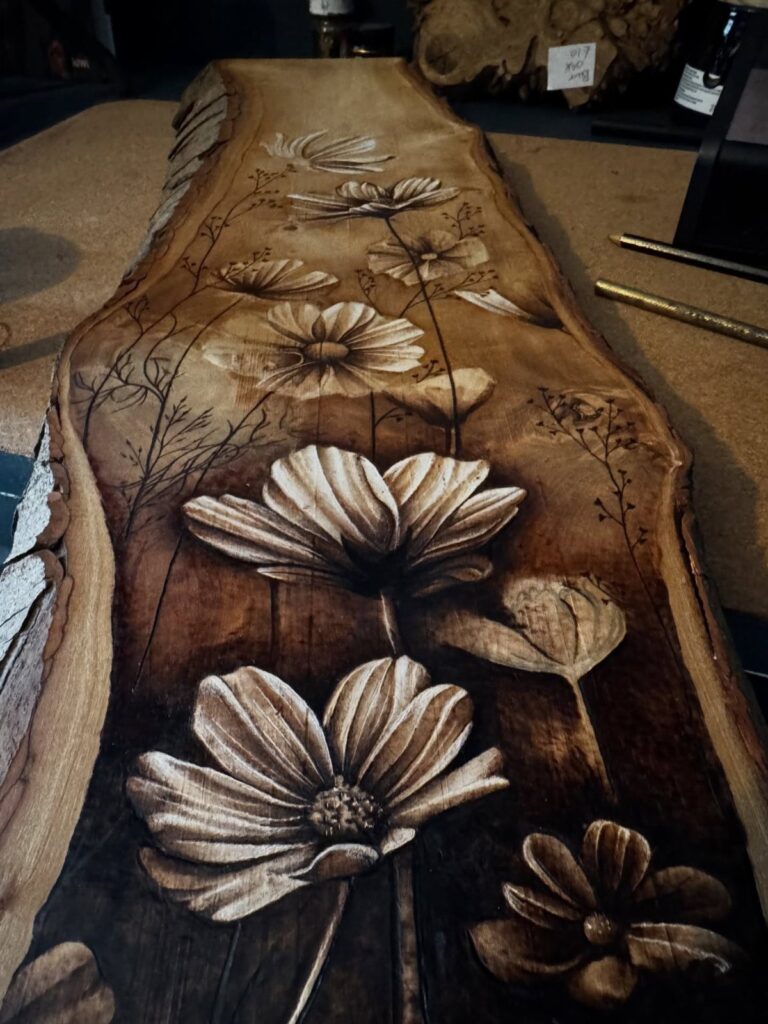
The surface decides which of these ideas works for you: a flat, pale, smooth board suits a plaque or a wall hanging, a round disc suits a coaster, and a spoon handle or a pair of earrings only holds a small motif.
Start with the wood already in your shop, then pick the pen: a fixed-temperature pen is enough for lettering, while shading calls for one with adjustable heat.
1. Wooden Spoons with Burned Designs
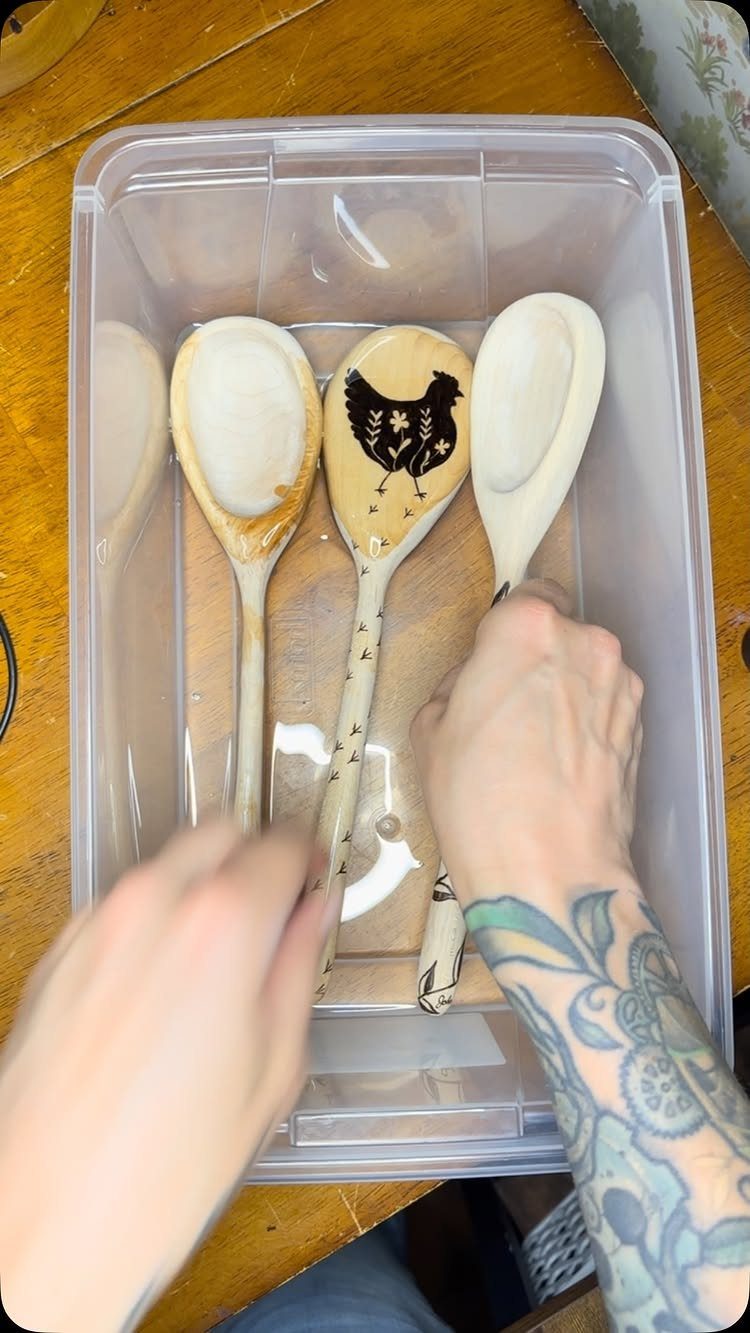
A wooden spoon is one of the friendliest first surfaces for a wood burning pen. The handle is a narrow, smooth strip, so a small motif like a chicken fits without any layout headaches.
Keep the design on the handle or the back of the bowl, away from the part that touches food. Light, simple line work also holds up better than heavy shading in a kitchen tool that gets washed often.
A set of 4 spoons with matching or related animals makes an easy afternoon project and a gift that actually gets used.
2. Wooden Plaques with Burned Designs
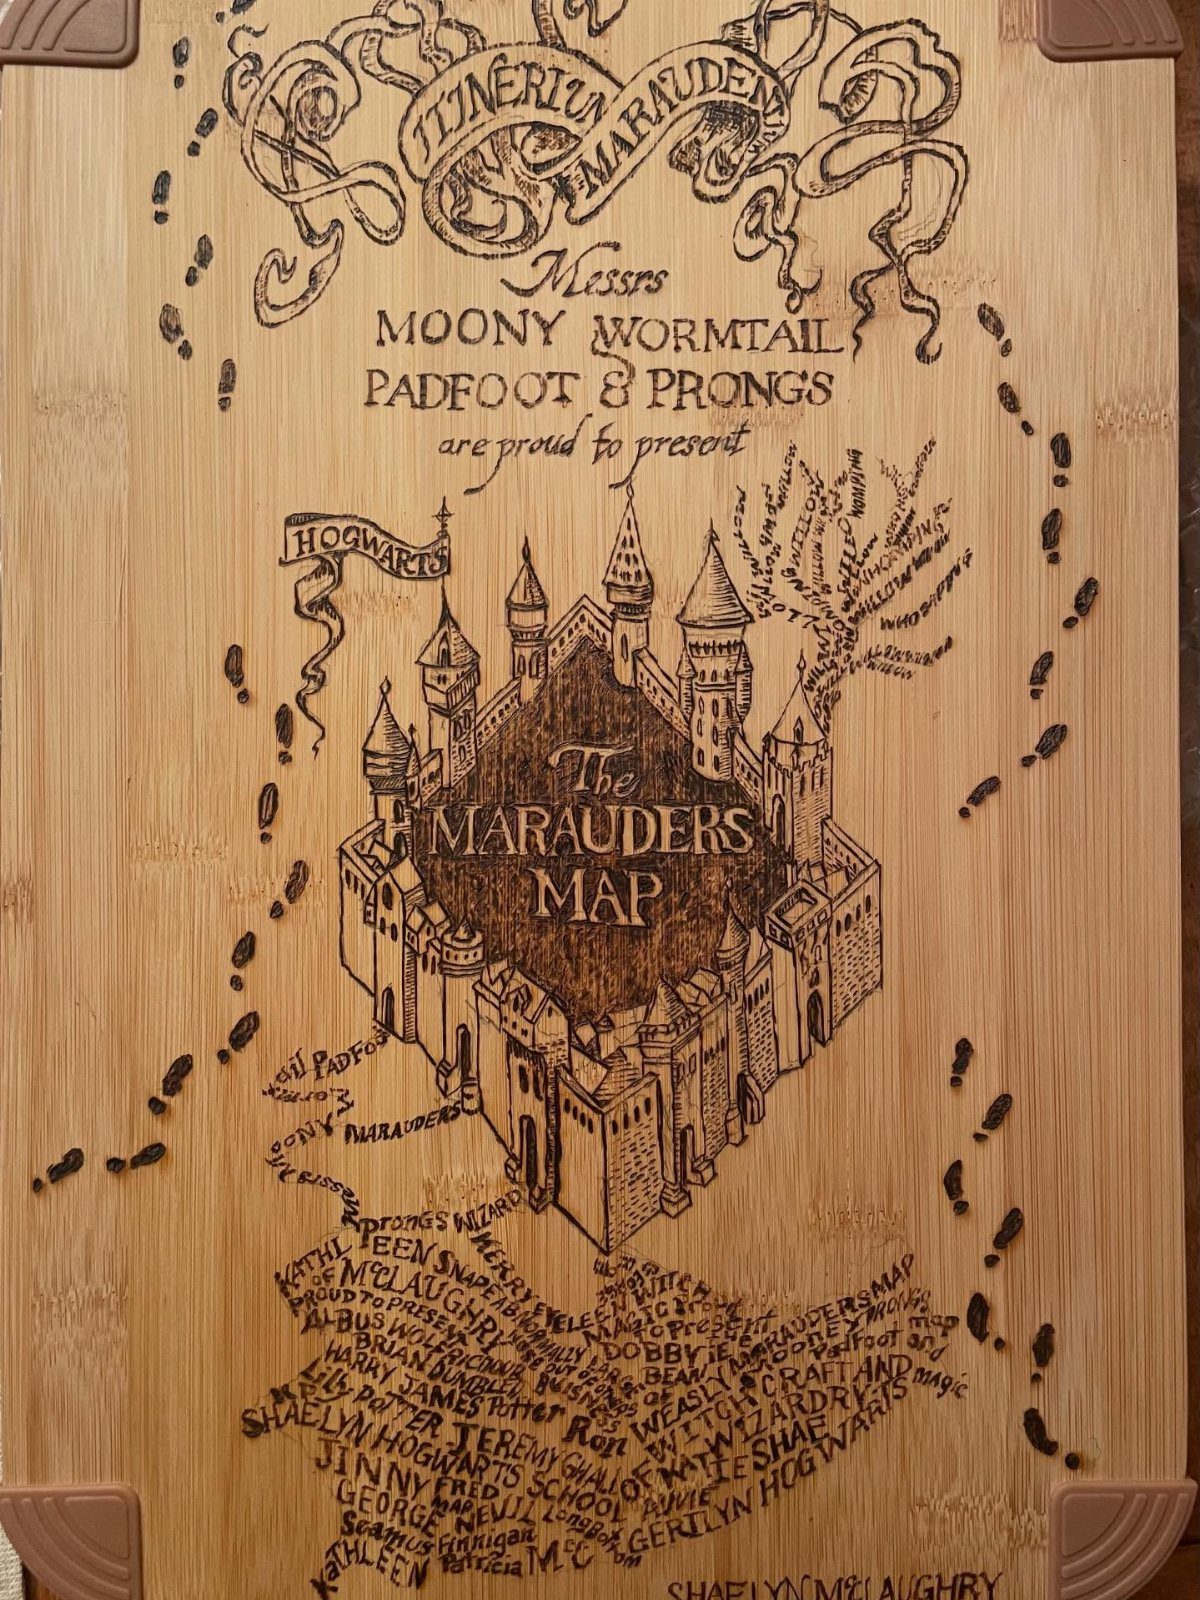
Plaques give you a flat, framed-looking canvas, which makes them the right choice when you want a detailed scene instead of a quick symbol.
A single board can hold a whole map-style scene, with a castle, a trail of footprints and hand-lettered names, as long as you pencil the layout first and burn the lettering last.
Names and small text are where most people struggle, so sketch the lettering in pencil first and burn over it slowly. Pick a plaque large enough that the smallest words aren’t cramped.
Personalized signs are the simpler route: one name, one border, done in an afternoon.
3. Wood Burning Wall Hangings
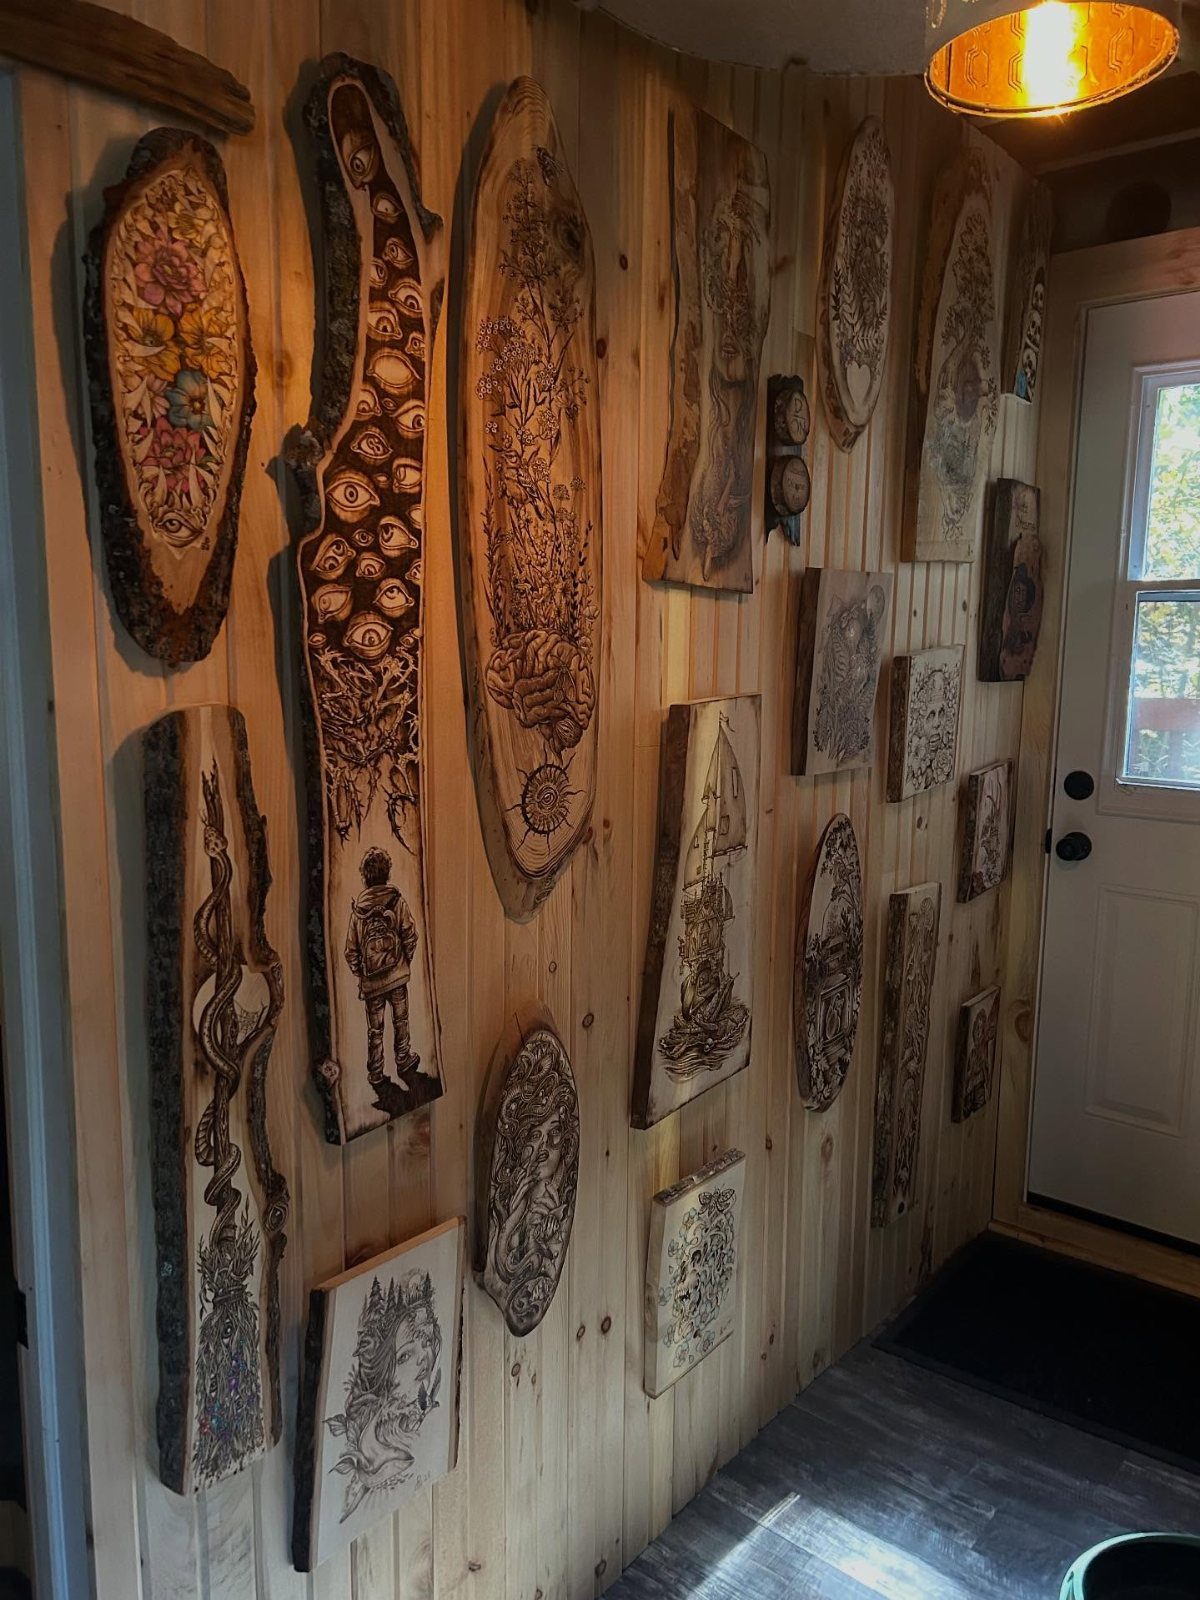
Hanging pieces let you mix shapes: round slices, long planks and rough slabs can share one wall and each carries its own burned picture.
I like leaving the wood’s natural edge and grain in place because they act as the frame, so you skip the framing step.
Burn all your pieces before you decide on the arrangement. Then lay them on the floor, shuffle until the sizes balance, and mount them.
Choose a consistent style, such as all line work, so a mixed set still looks planned.
4. Coasters
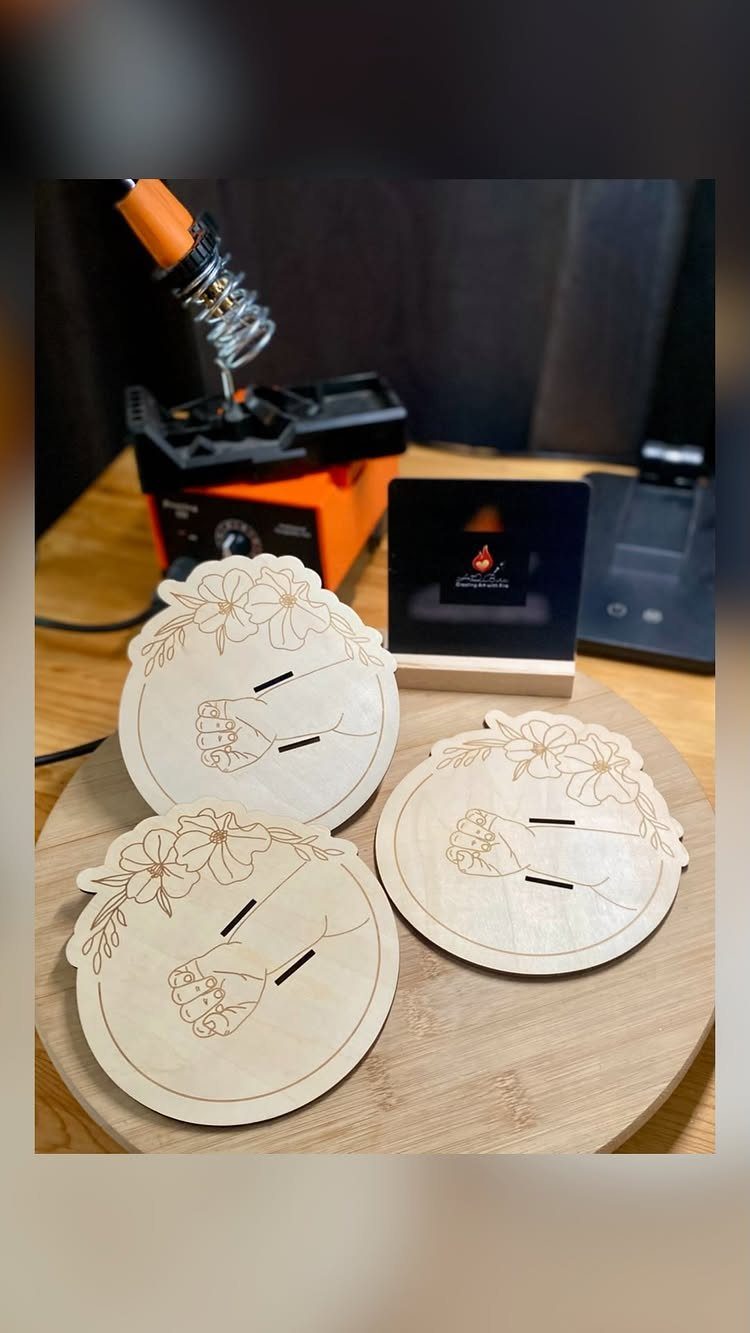
Coasters suit beginners well because a round, flat disc is easy to hold and the design area is small enough to finish in one sitting.
Line art of hands and flowers works nicely here, since thin continuous lines need no shading skills.
Make a set of 3 or 4 with a shared theme but slightly different drawings. Sand the face smooth before burning so your lines stay crisp.
Since these will hold drinks, I would seal them once the burning is done.
5. Ornaments
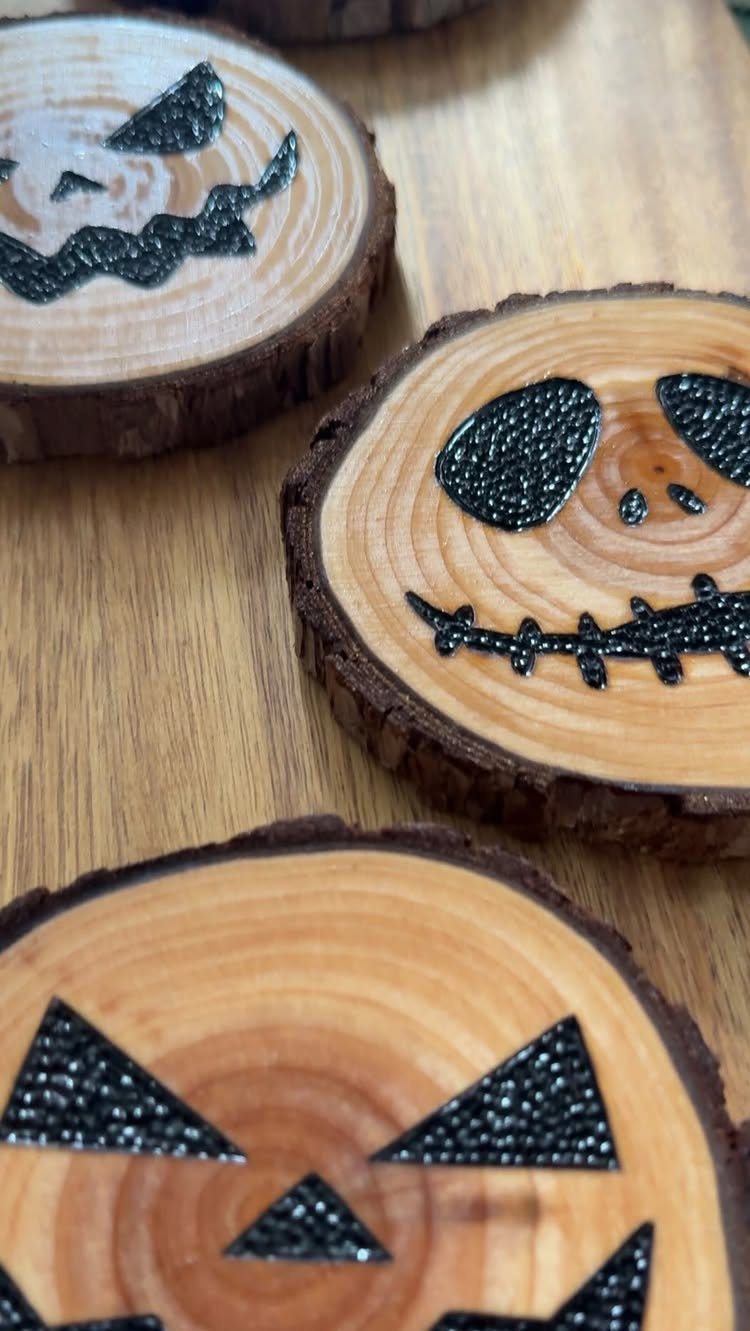
Small wood slices turn into ornaments with very little effort, and a jack-o’-lantern face is about the simplest design there is: 2 triangle eyes, a nose and a jagged grin.
Because each slice is its own piece, uneven faces just look charming.
Burn a few at once so you can pick up speed and get the expression right by the third one. Drill a small hole near the top edge if you want to hang them.
Swap the pumpkin for snowflakes or stars and the same method covers any season.
6. Pet Portraits
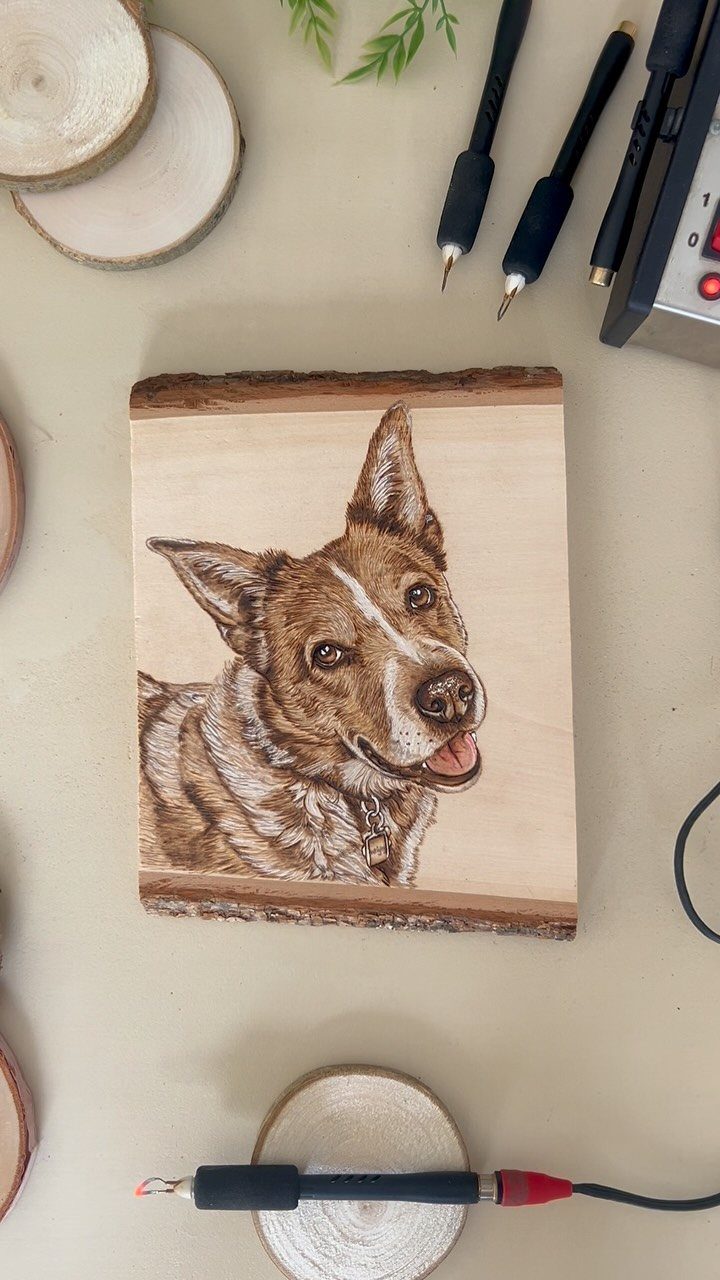
A pet portrait asks the most of your pen, and it pays off more than any other idea here.
A dog’s likeness lives in the eyes, nose and fur direction, so spend your time on those and keep the rest loose.
Work from a clear, well-lit photo of the animal and transfer a light pencil outline to the wood. A live-edge slab gives the portrait a natural border, which saves you from drawing one.
Build darker areas in layers instead of pressing hard. You can always add heat, but you can’t remove it.
7. Tables with Wood Burning
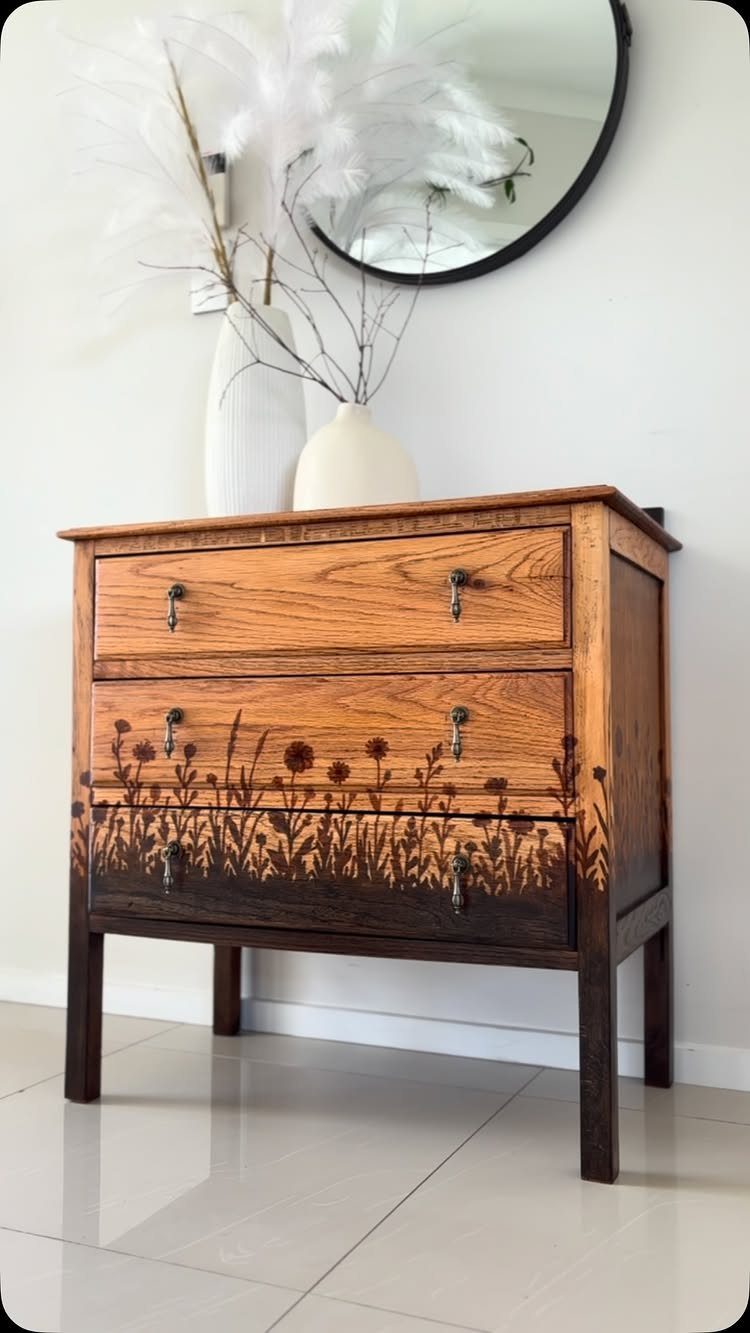
A burned design on a chest of drawers gives plain furniture a one-off look, and the flat drawer fronts are the easiest place to start because you can lay each one on the bench and work it level.
Drawer fronts are flat, framed panels, so a wildflower pattern can run across two of them and stay readable from across the room.
Burning only the bottom 2 drawers, as this chest does, keeps the piece calm. Leave the top drawer bare and the pattern has room to breathe.
Pencil the stems first so they line up from one drawer to the next, then burn them in one pass. Sand the wood smooth before you start, because bare, even wood takes a crisp line.
Test the pen on the back of a drawer first, so you know how the wood reacts before you commit to the front.
8. DIY Plant Markers
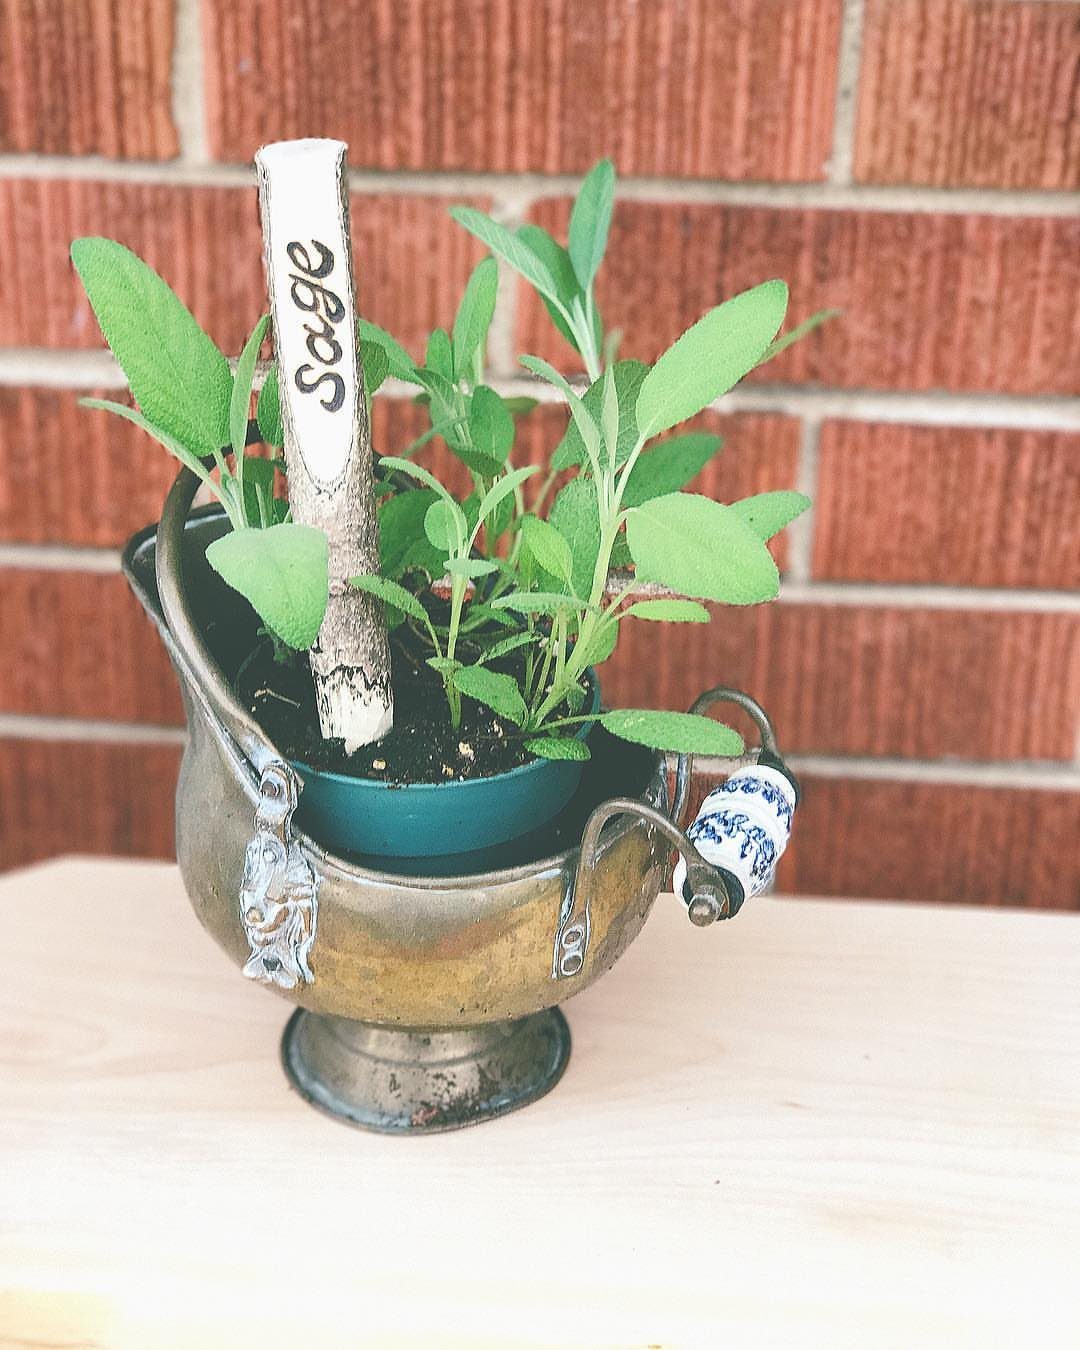
Garden markers are a quick afternoon project: one word, one small stake, and a pot you can identify at a glance. Sage burned onto a plain wooden marker reads clearly because dark letters sit well on pale wood.
Keep the lettering simple. Block capitals or a clean print hand are easier to burn than script, and pencil guidelines keep the baseline straight.
Burn a whole batch of herbs in one sitting, since the pen is already hot and your hand has the rhythm of the letters by the second marker.
Pick a marker shape you like and repeat it, so the pots look like a set.
Burned letters are a good choice for markers because they can’t smear the way ink can.
9. Wood Burning Wooden Earrings
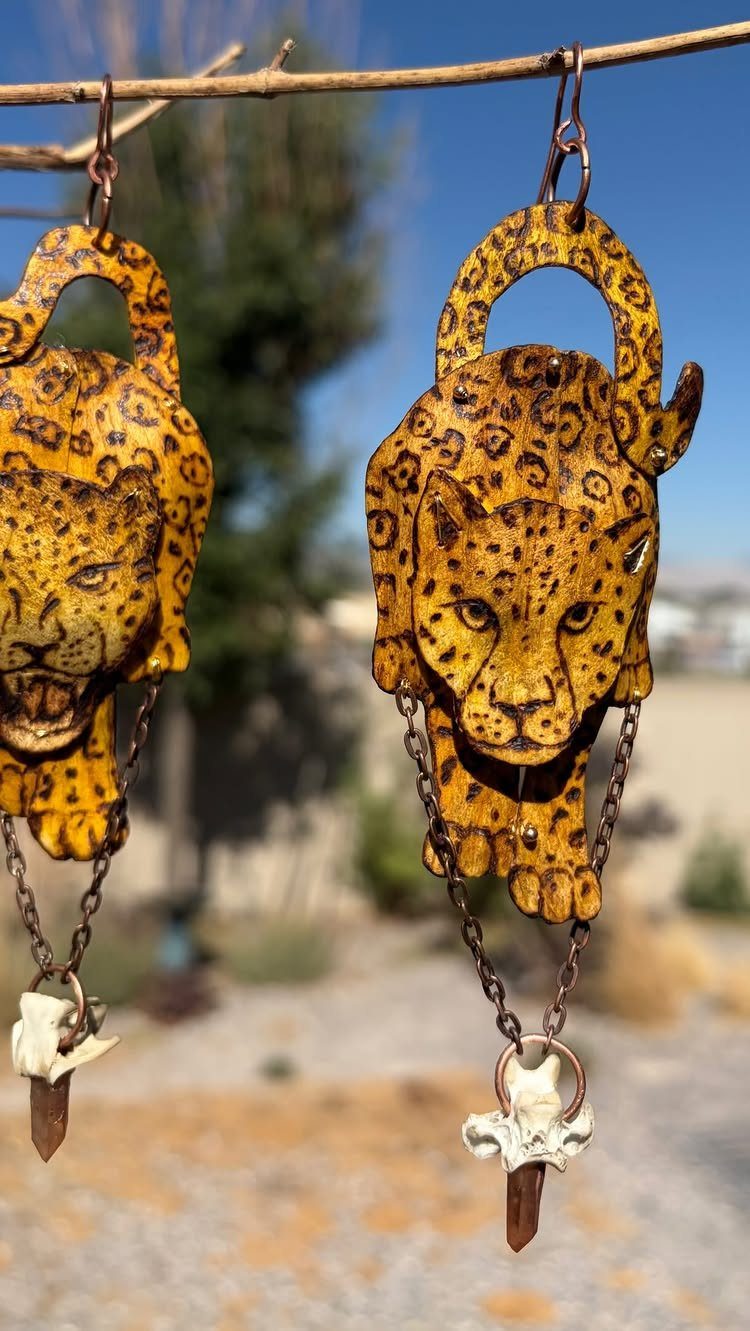
Earrings are the smallest canvas on this list, and that is the appeal.
A cut-out animal shape, like a leopard, needs only a few burned marks for spots and a face, so the wood and the outline do most of the work.
Use a fine tip and a light touch. Tiny details scorch fast, and a spot that spreads into a blob can’t be undone, so practice on scrap first.
Burn before you assemble. Finish the wood, then add the hooks and any charms, such as the bone ones on this pair.
Make each earring separately and let small differences stay. A matched pair that is slightly imperfect still looks handmade, which is the point of making them.
Finding Inspiration
A blank board can make a creative slump feel even deeper, and I think everyone who burns wood hits that wall eventually.
A constraint fixes it faster than more options do: pick one object, one subject or one word, and let that narrow the field.
Try a random method.
Write a long list of things you could burn, close your eyes, and point. If the first pick doesn’t appeal, point again, or think about how your own burned touches could change that object.
Old social media challenge prompts are another good source. Search the hashtags #burntmonthchallenge, #burntmarch, #burntfebruary and #burntday, and you’ll find a ready supply of single-word prompts to work from.
If drawing from scratch is the sticking point, individual patterns are sold in template stores. They give you a clean design to burn while you build confidence.
Choosing Materials
Start with the wood.
Pale, smooth, tightly grained boards such as basswood or birch plywood show a burned line clearly and take detail well. Open-grained or resinous wood burns unevenly, so save it for bold, simple designs.
Match the tool to the job.
A basic fixed-temperature pen handles line work and lettering. A pen with adjustable heat gives you control for shading and fine detail, and I’d pick it if you plan to burn often.
Think about use before you burn. Anything that sees water, heat or handling needs a finish, and the finish should suit the piece: a food-safe oil for kitchen items, a clear sealer for things that get wet or rubbed.
Test the finish on a scrap you’ve already burned. Some finishes darken or smear burned lines.
Techniques and Tools
The tip decides the effect. A fine writing tip draws thin, even lines.
A shading tip is flatter and lays down soft tone. Changing tips changes the look more than changing the design does.
Heat and speed work together.
Move slowly for dark, deep lines and faster for light ones. Let the pen reach full temperature before you start, or your first strokes will come out patchy.
Practice each stroke on scrap wood from the same board you’ll use: long lines, short lines, dots and filled shapes. A scrap test like that shows you how the wood reacts.
If you’re unsure which tool to buy, read a beginner guide to wood burning tools first. The right pen depends on how fine your work will be, so match it to the project.
Frequently Asked Questions
What wood burning tools are recommended?
For outlines and lettering, a fixed-temperature pen is all the hardware you need to get going.
Anyone who expects to burn regularly should spend a little more on an adjustable-heat pen, because turning the temperature down or up is what makes smooth shading and small details possible.
Swapping tips changes the result as much as the pen does: a fine point gives thin, steady lines, and a flat, angled tip spreads a soft, even tone.
How do I start wood burning?
Start with a small, flat project like a coaster or a wooden spoon handle, using simple line art instead of shading.
Start with light, smooth wood with a tight grain, like basswood or birch plywood, and give the pen a few minutes to heat fully before it touches the surface.
Before touching the real piece, test lines of different lengths, dots and solid fills on an offcut cut from the same board, so you can see how that particular wood takes the heat.






