The ideas here run from a toy car cut from scrap in an afternoon to a checkerboard cutting board that takes careful measuring and tight clamping, with burned pet portraits, planters, and wall hooks in between.
Your tools and skill level decide which one is yours: if you own only a saw, a drill, and sandpaper, start with a straight-cut box, shelf, or sign, and save the routed slots and glued strips for later.
Most of these need little beyond 220-grit sandpaper and a finish suited to where the piece will live.
1. Decorated Wooden Stool
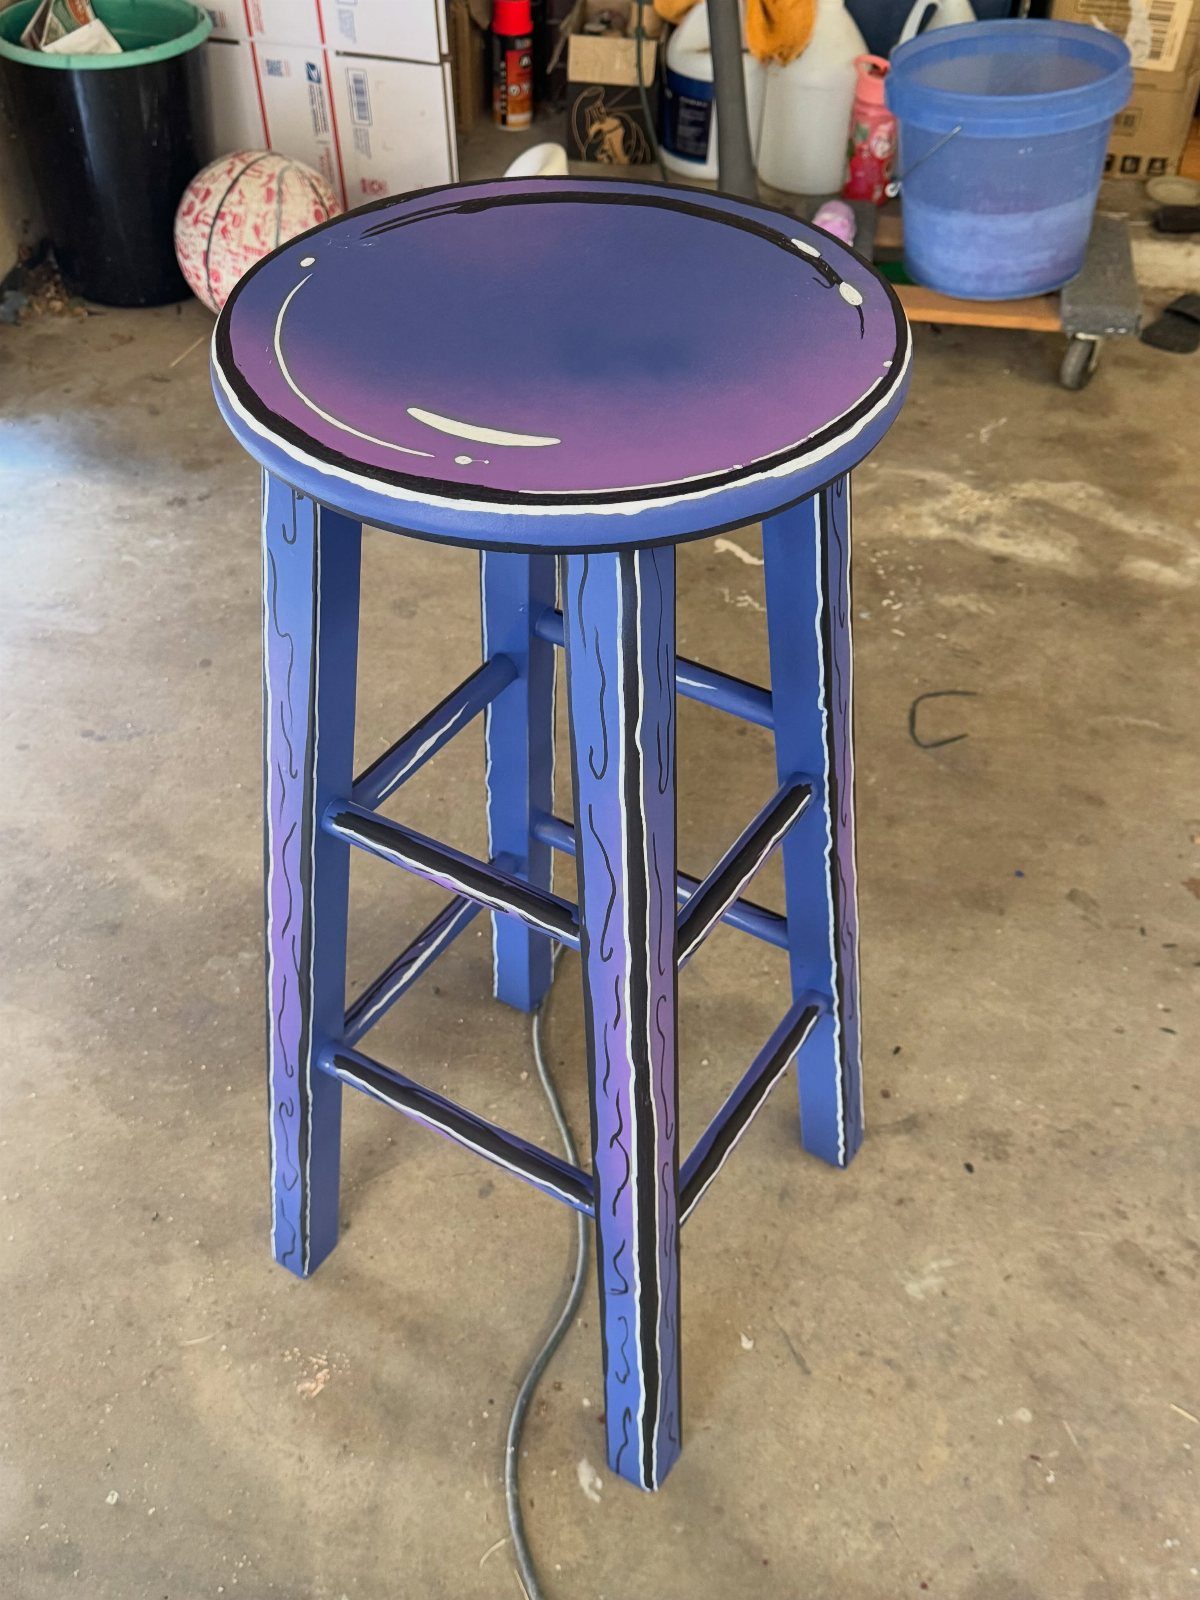
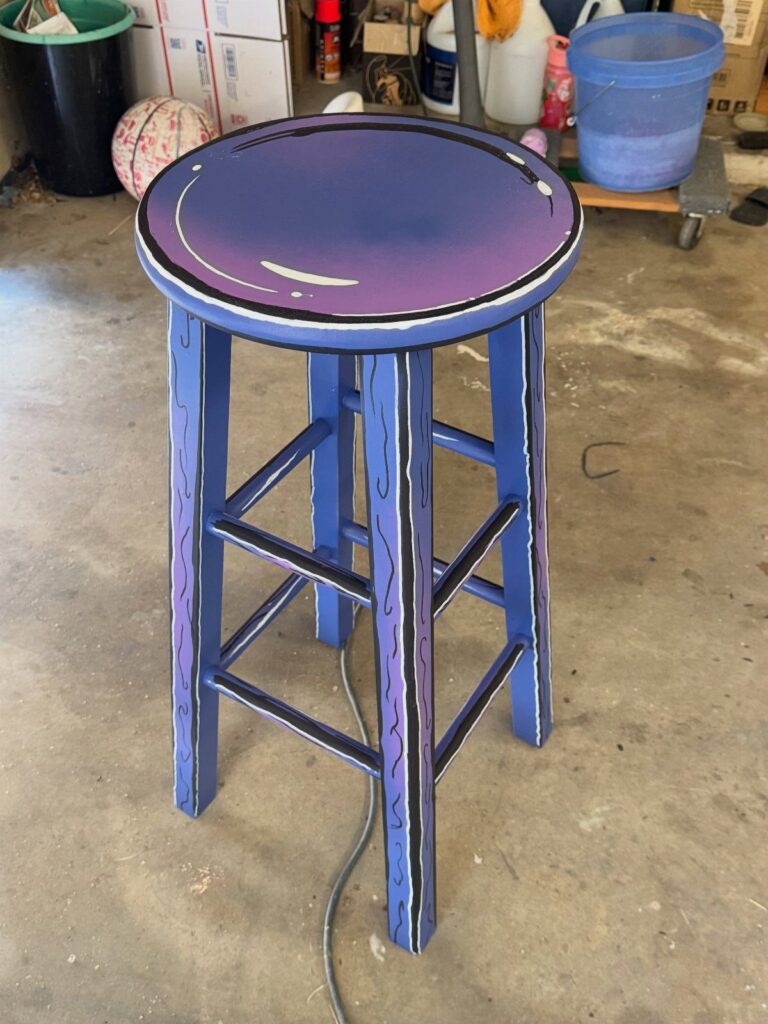
A plain stool is a good first canvas, because the seat and legs give you flat and round surfaces to practice on.
Painting the seat and legs in 2 contrasting colors, then outlining the shapes in black, gives the stool a cartoon look that reads clearly even from across a room.
Sand the bare wood lightly first so the paint grips. Wait for each color to dry before drawing the black lines, or they will smear into the fill.
2. DIY Wooden Toy Car
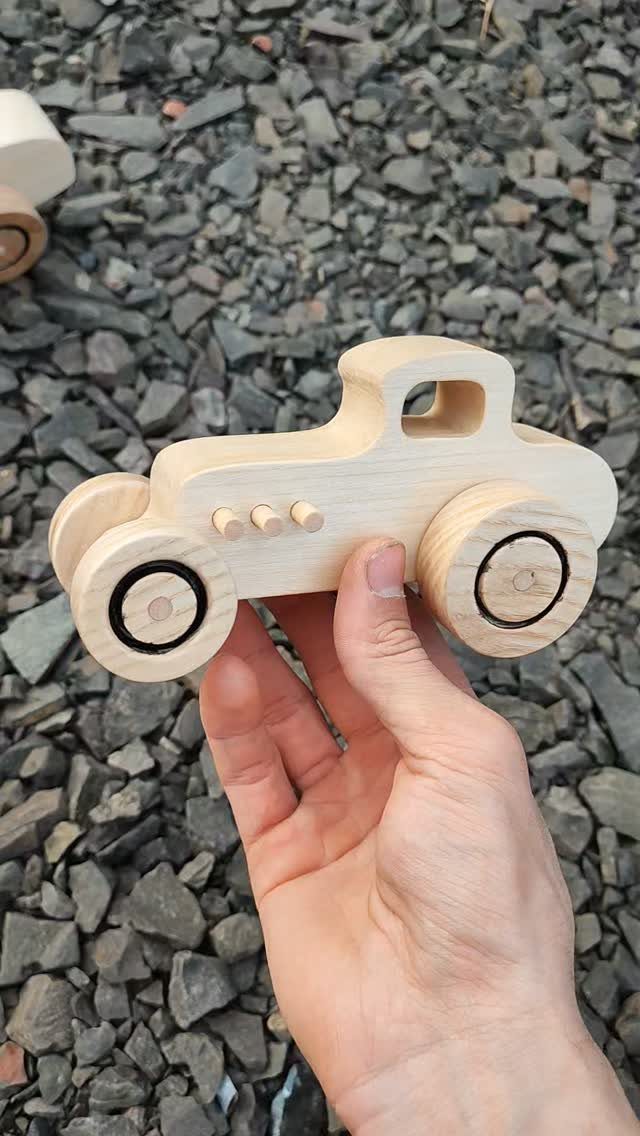
Small enough to hold in one hand, a wooden toy car is a project for scrap pieces and an afternoon. Leaving the wood unfinished keeps it looking honest and simple.
Sand every edge and corner until nothing catches your fingertip, since kids will chew on and drop it. For a finish, I would pick something food-safe and leave the grain showing rather than covering it with paint.
3. Wooden Pet Portraits
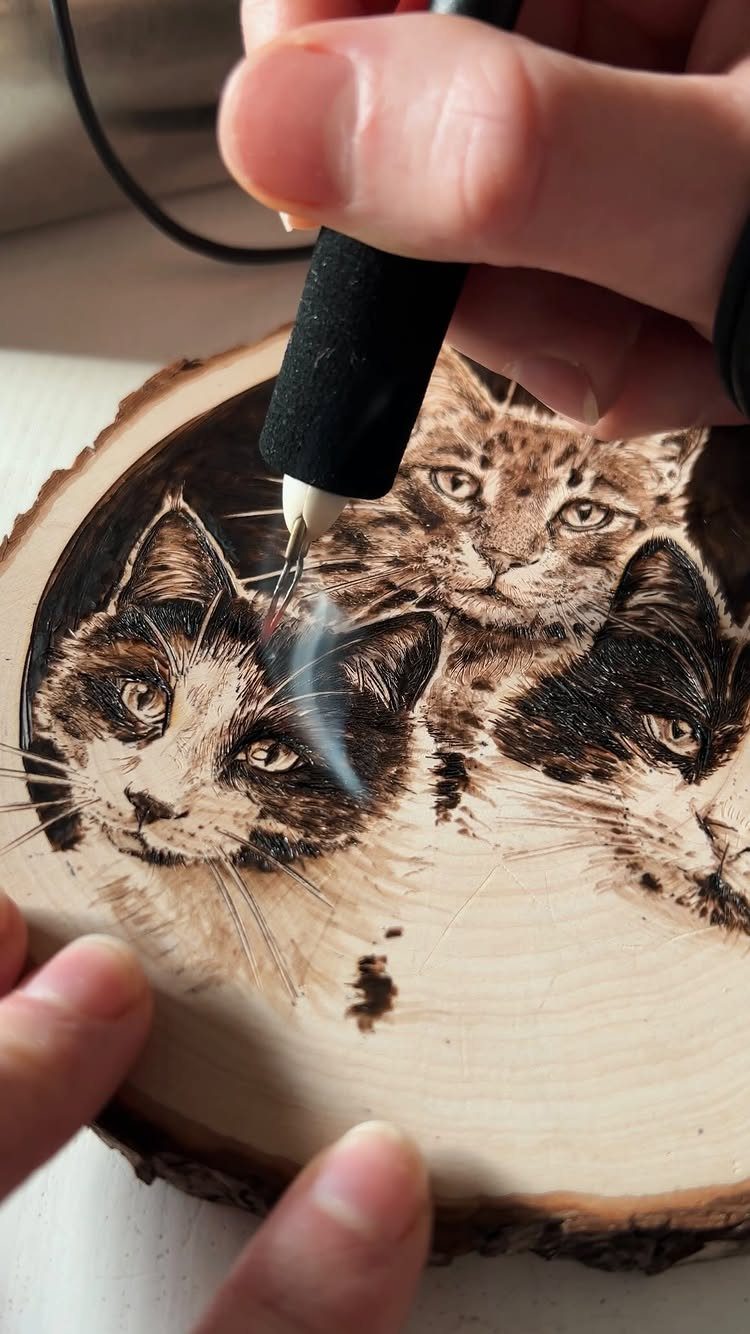
Cats, dogs, or a whole household of both can be burned into a wood slice with a basic pyrography pen. The natural bark edge frames the portrait, so you skip building a frame.
Sketch the animals in pencil first, then burn the eyes and noses before anything else; those features carry the likeness.
Use light, quick strokes for fur and build darkness in layers. Practice on a spare slice, because burned lines do not erase.
4. DIY Desk Organizer
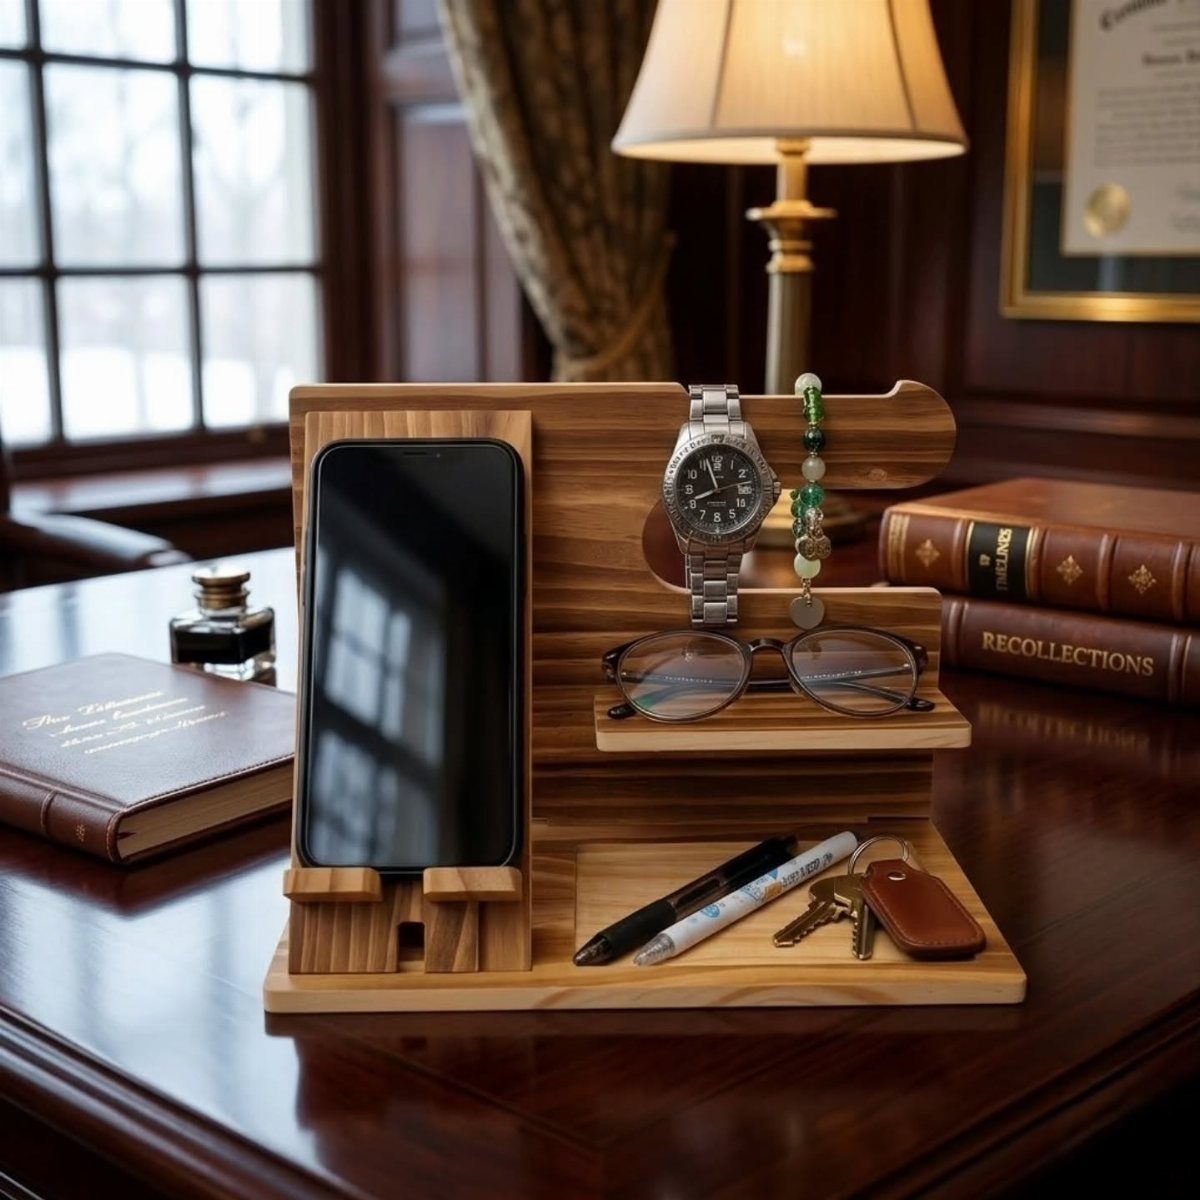
Phone, watch, glasses, pens, and keys all land in one spot with a wooden desk organizer, which is why it earns its place on a desk. Build it with separate compartments sized to what you actually carry.
Measure your own phone and glasses before cutting, so each slot fits snugly. A dark stain suits a dark desk, while a clear finish keeps the organizer light and bright against a pale one.
5. Candle Holders
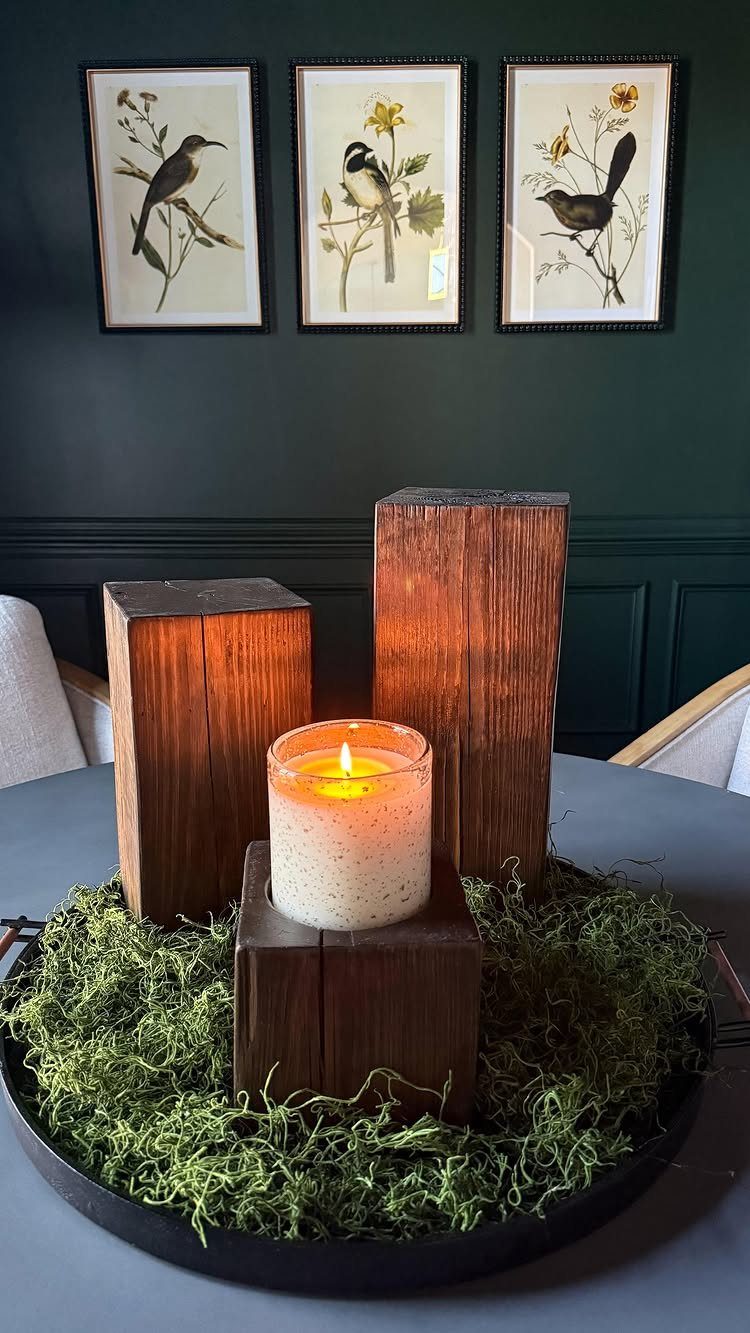
Offcuts that seem too small to keep make good candle holders. Cut rectangular blocks in different heights, and the group looks arranged even on a bare shelf.
Drill or cut a recess sized to the candle you plan to use, and consider a tray of moss or stones beneath the blocks.
Wood and flame do not mix casually, so choose a candle that sits well inside its hole and never leave it burning unattended.
6. Wood Plant Stand
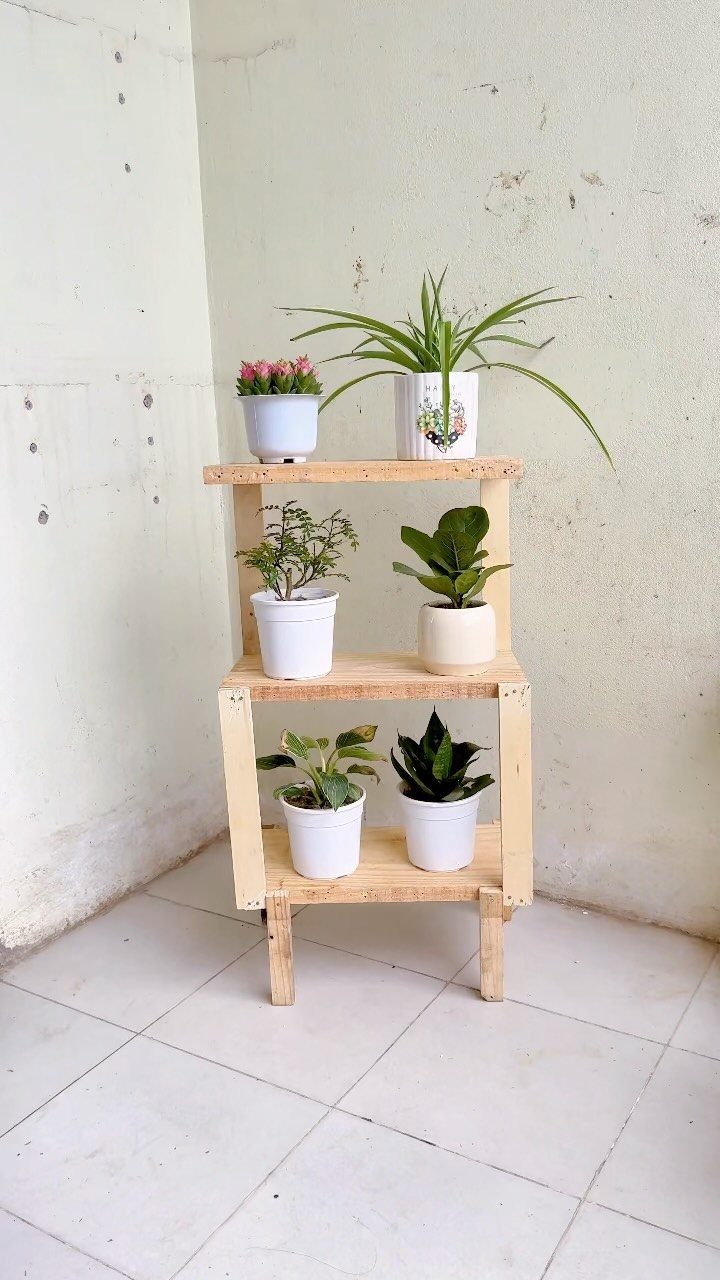
Three tiers give a plant stand room for six pots without using much floor space, and a light wood keeps the greenery as the focus. Stepped shelves also let each plant catch its own share of light.
Build the tiers sturdy enough for full, watered pots, which are heavier than they look. Set each pot in a saucer so water never reaches the wood, and seal the shelves with a finish that tolerates the occasional spill.
7. Wooden Serving Tray
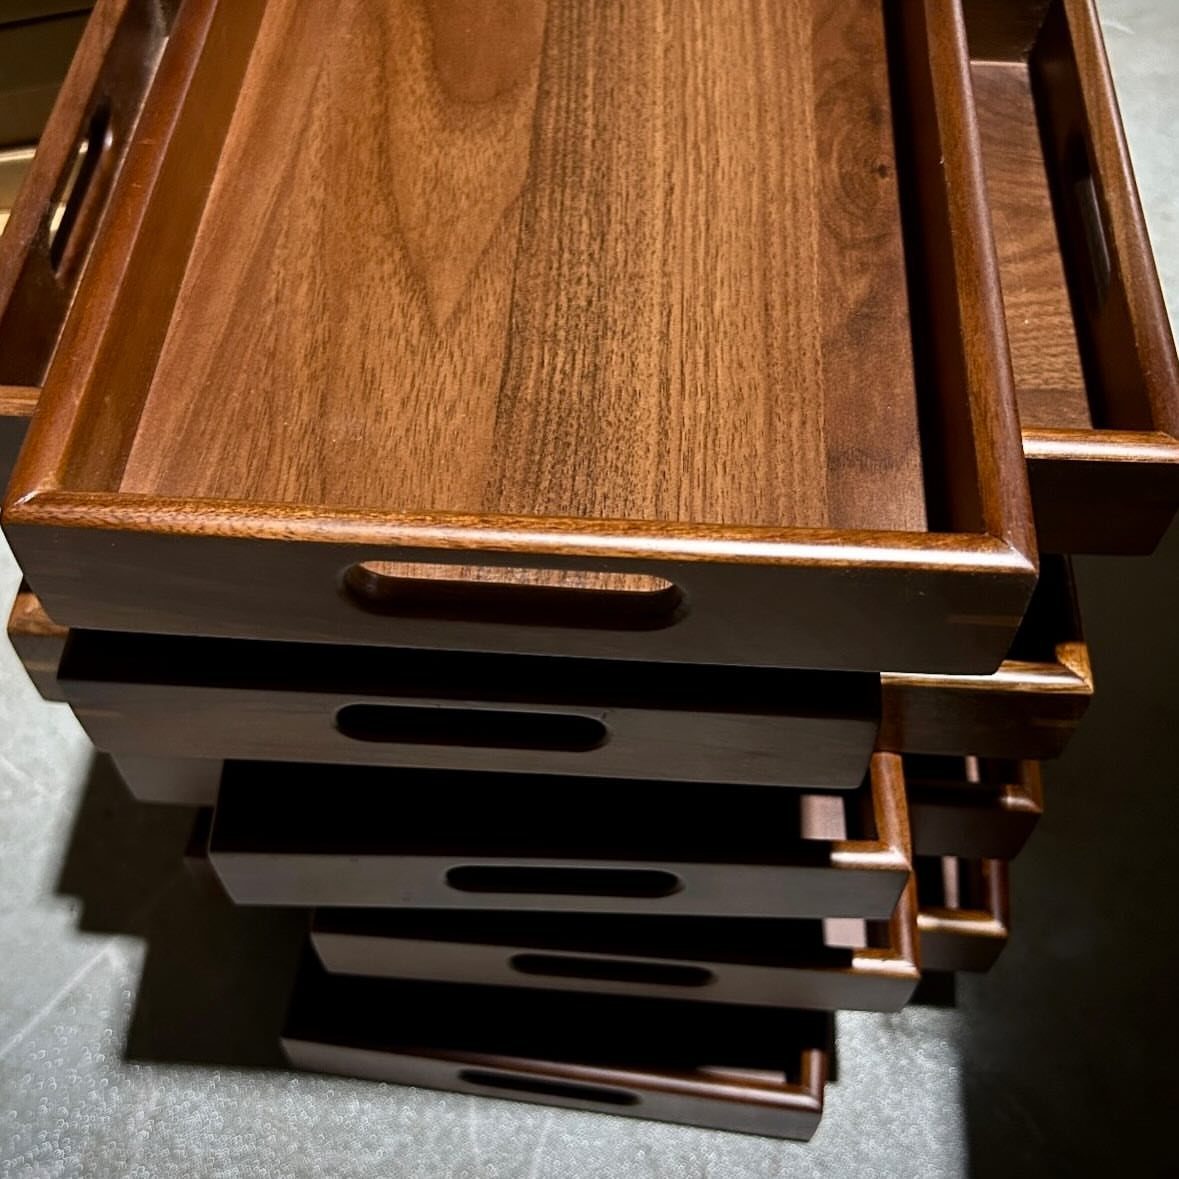
A serving tray with cutout handles is one of the easier ways to make something both useful and good-looking. Cutting the grips into the board itself, rather than screwing on hardware, keeps the lines clean and leaves nothing to loosen.
Sand the handle openings with extra care, since your fingers will rub there every time you carry it. A dark stain gives a polished look, and a few coats of clear finish on top make it easy to wipe down.
8. Wooden Jewelry Box
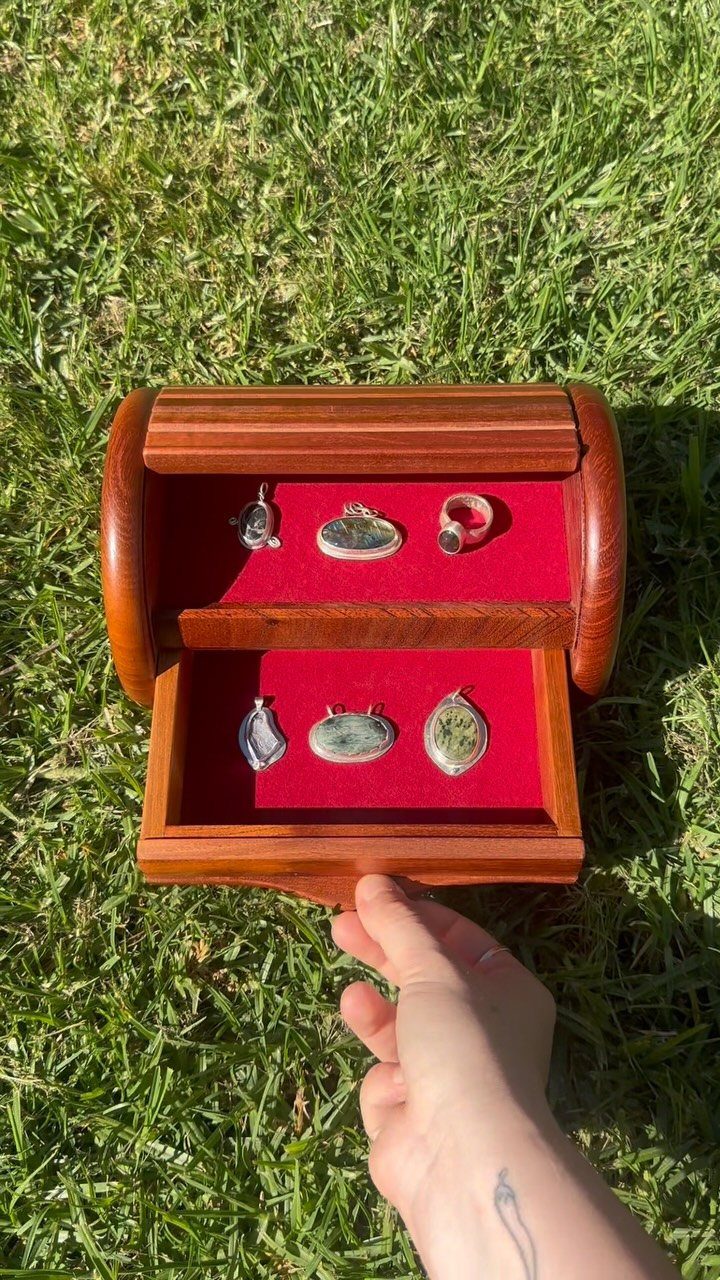
Rounded corners and a soft lining make a small wooden jewelry box feel like a gift, even when the wood itself is plain. Red velvet inside pairs well with the warm grain, and rings and pendants stand out against it.
Cut the lining a hair smaller than the interior so it sits flat without bunching. Sand the lid and base edges smooth, because a rough rim snags chains and thin bands.
9. DIY Garden Cart
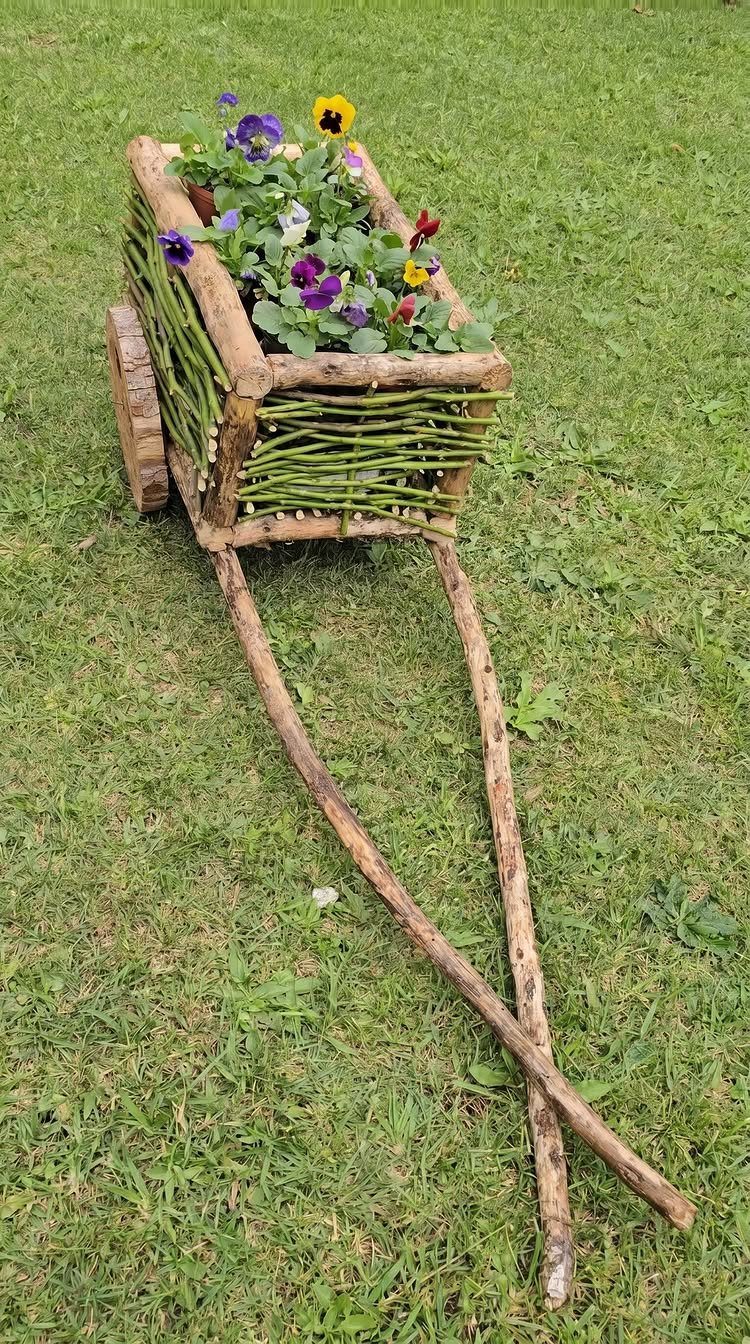
A garden cart planter gives you a rolling flower bed, and pansies fill one with color from rim to rim. Build the box from sturdy boards, since wet soil is heavy.
Drill a few drainage holes in the bottom so water does not pool and rot the wood. I would pick an outdoor-rated finish and set the cart where the wheels can actually roll, like a lawn edge or a path.
10. Modern Geometric Wall Hanging
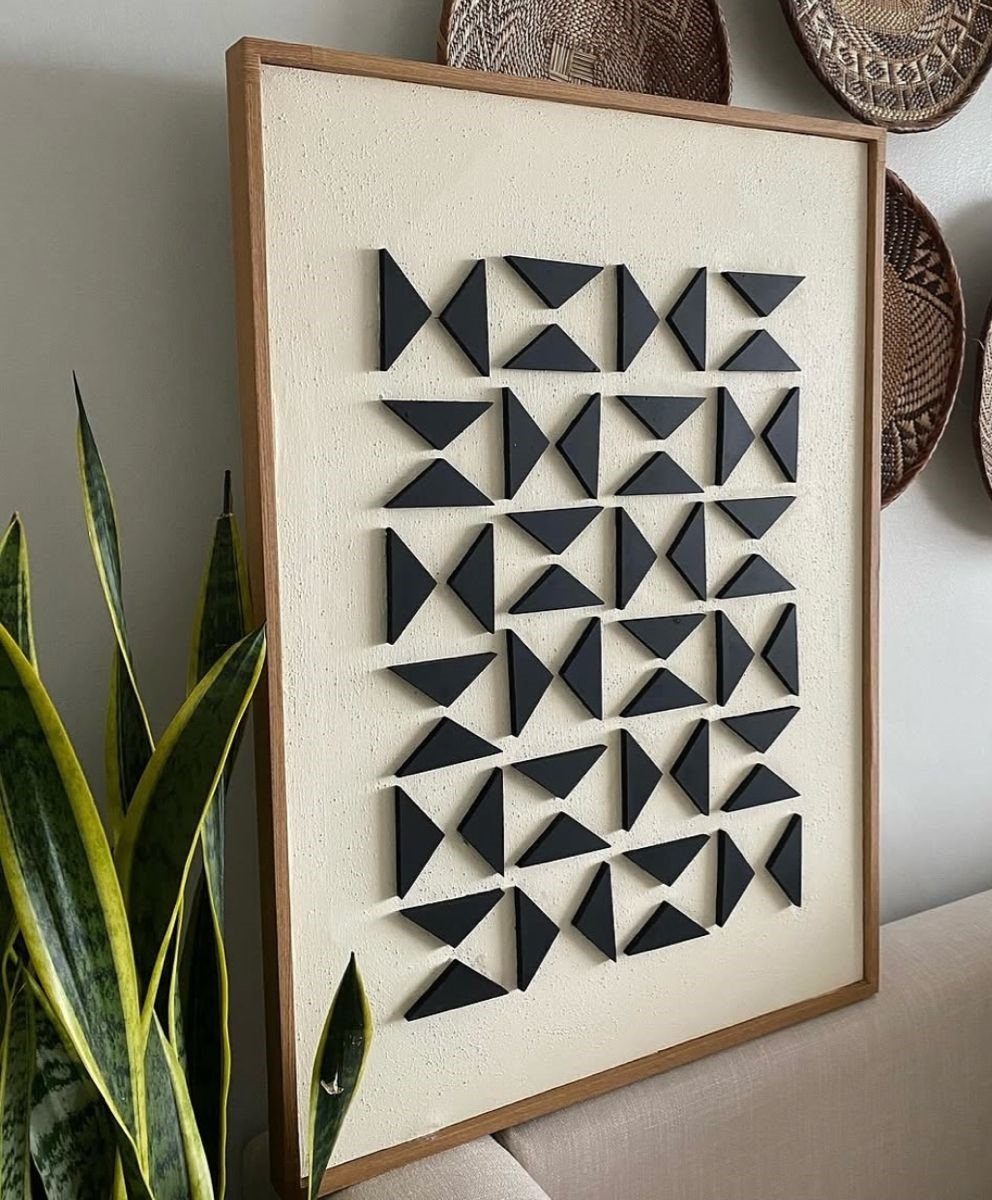
The contrast keeps it modern with almost no decoration.
Lay every piece out on the backing before gluing anything, and shift them until the spacing feels even.
Triangles cut from one board match in thickness, which keeps the surface tidy. A frame finishes the edges.
11. Cutting Boards
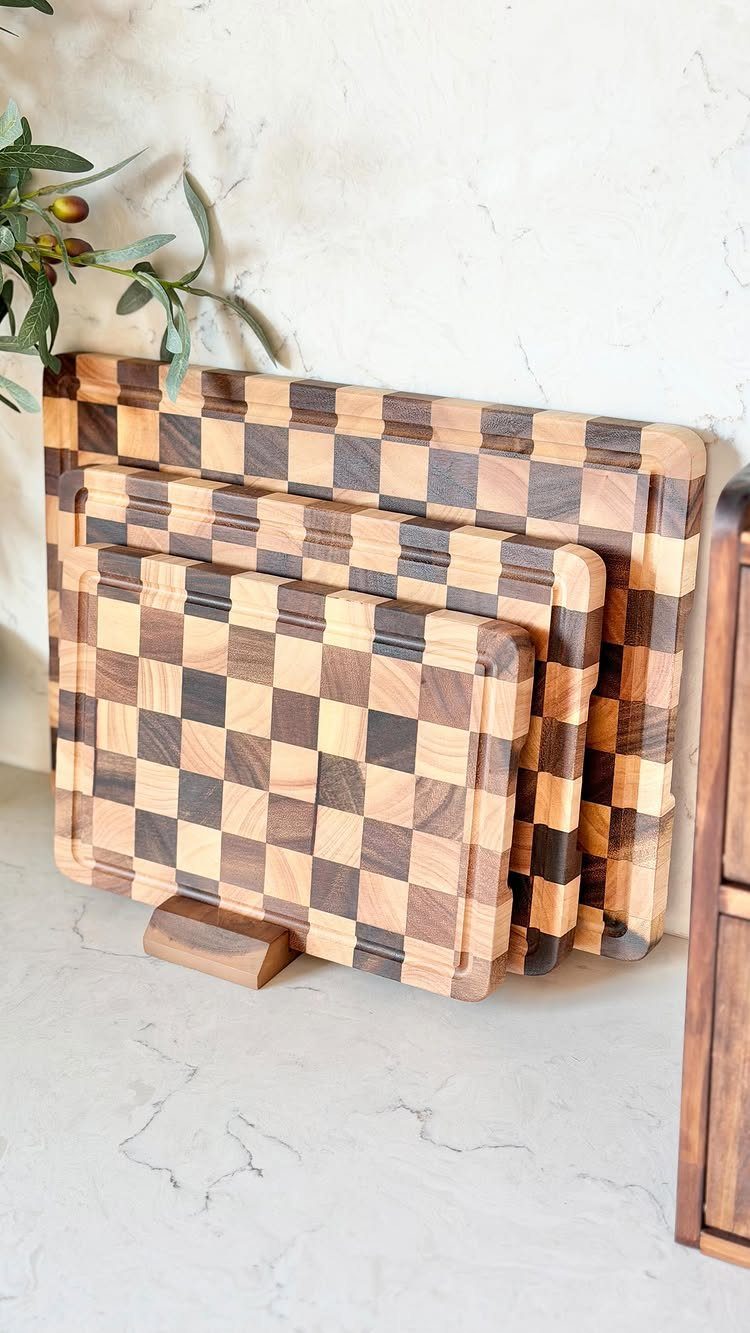
Checkerboard cutting boards come from strips of light and dark wood glued together, cut across, and flipped so the tones alternate. The pattern looks complicated, but it is mostly careful measuring.
Cut every strip to the same width, or the squares will drift out of line.
Clamp tightly while the glue dries, then sand until the surface is flat. Pick woods that contrast well, and finish with a food-safe oil.
12. Wood Slices Wall Decor

The oval shape and visible grain do the framing for you.
Sand the face smooth before painting, and seal the paint once it dries.
Hang a few slices together, and mount them on a wall of matching wood if you want the effect to feel built in. Hooks below can hold hats or keys.
13. DIY Perpetual Calendar
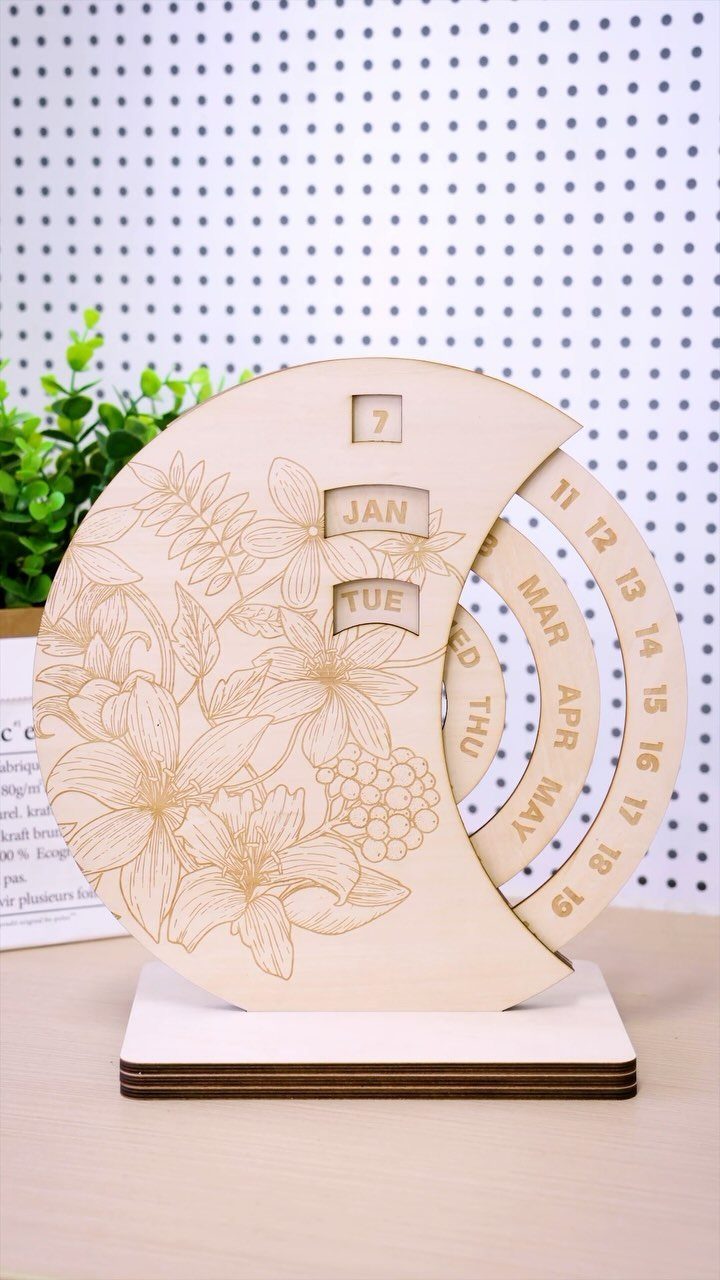
A perpetual calendar swaps paper for wood blocks you turn by hand, so the date, month, and weekday stay readable on a shelf all year. Floral engraving adds detail without any paint.
Plan three separate sliding or turning pieces, one each for the day number, the month, and the weekday, and sand every edge so they move without catching. A sturdy base keeps the pieces upright while you change them each morning.
14. DIY Recipe Holder
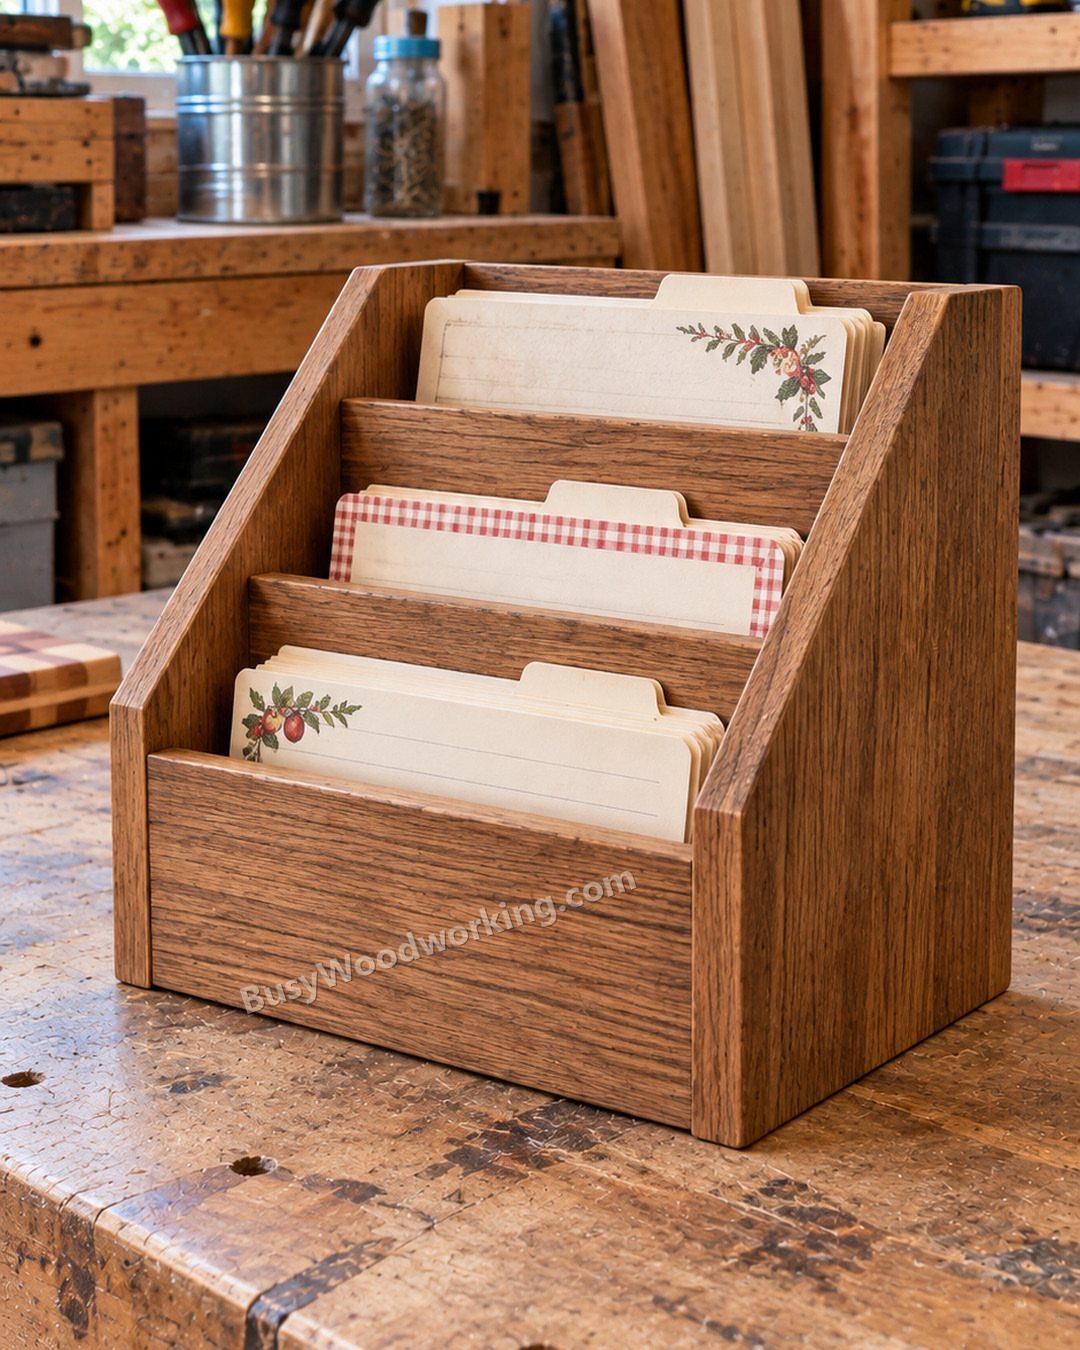
Recipe cards slip into a tiered wooden holder, and the stepped fronts let you read each card without pulling it out. That keeps splattered fingers off the paper while you cook.
Cut the slots a little wider than your thickest card, and keep the front lip low enough that the titles show.
Sand the slots smooth so cards do not fray. A clear finish wipes clean after kitchen messes.
15. Wooden Wall Hooks
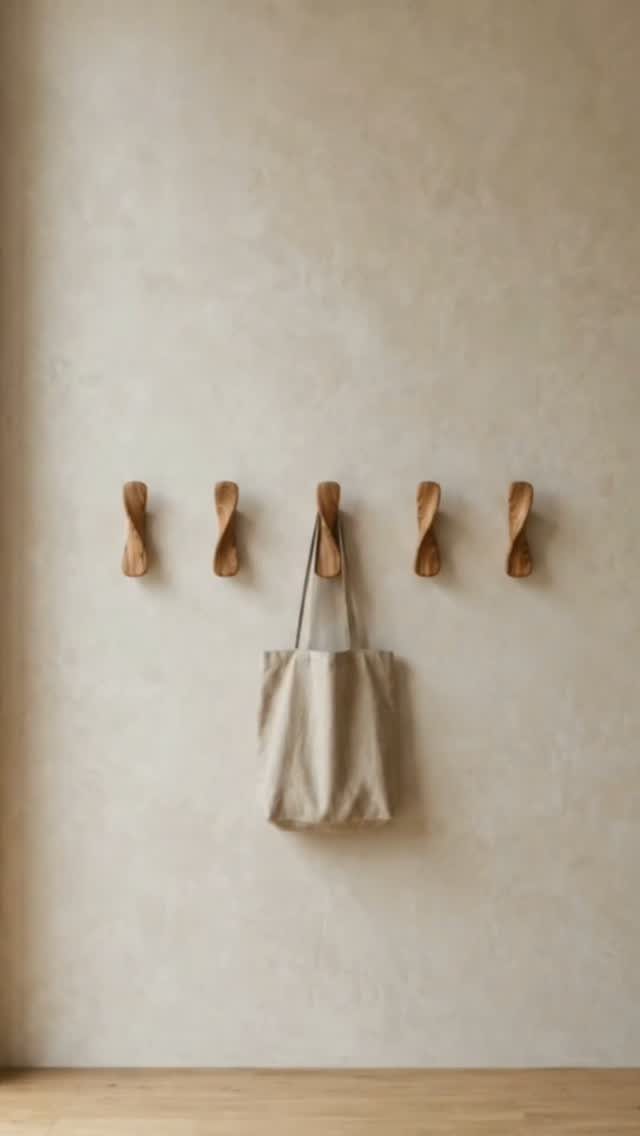
Twisted wooden hooks turn a bare stretch of wall into a spot for bags, coats, and hats. The spiral shape looks carved, and it gives a strap something to settle into.
Mount them in an even row, and mark the spacing with painter’s tape before you drill.
Wide spacing lets a bulky tote hang without crowding its neighbor. Screw into studs, or use wall anchors, if the hooks will carry heavy loads.
16. DIY Blanket Ladder
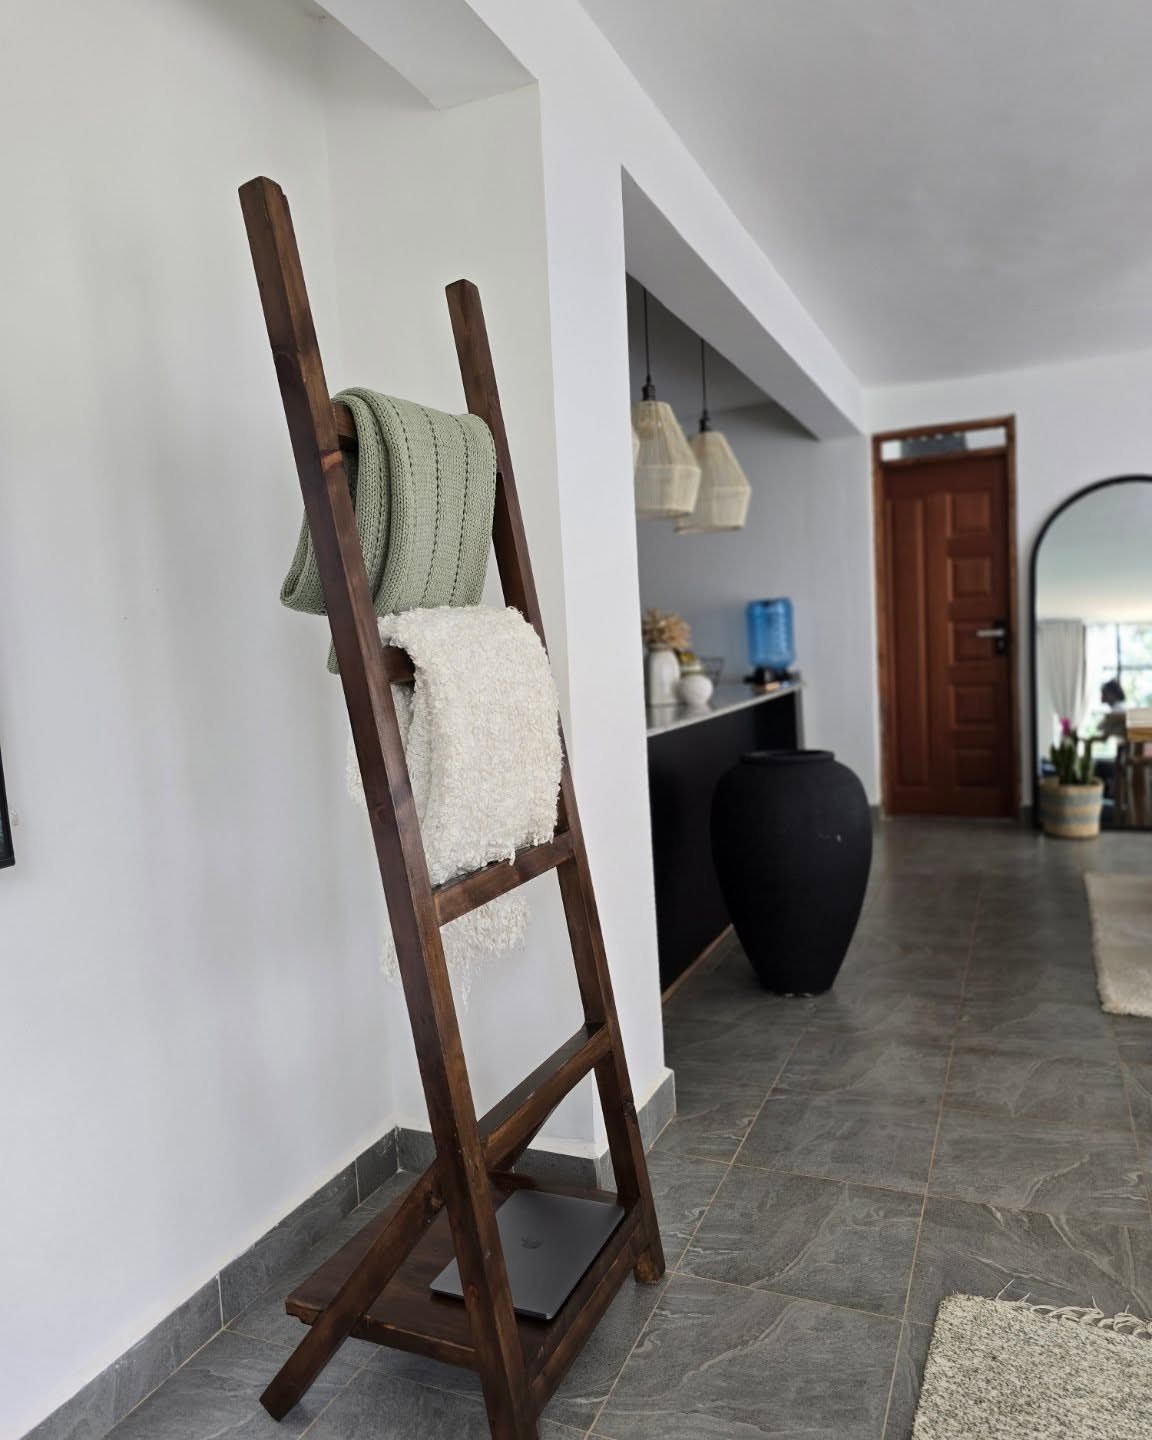
Leaning a dark wood ladder against the wall gives blankets a home that looks intentional, and the rungs make folding unnecessary. Just drape each throw over a rung.
Cut the 2 side rails the same length, and space the rungs evenly so blankets hang straight.
Sand the rungs round enough to be gentle on fabric. Angle the feet slightly so the ladder rests firmly against the wall without slipping.
17. Wooden Charging Station
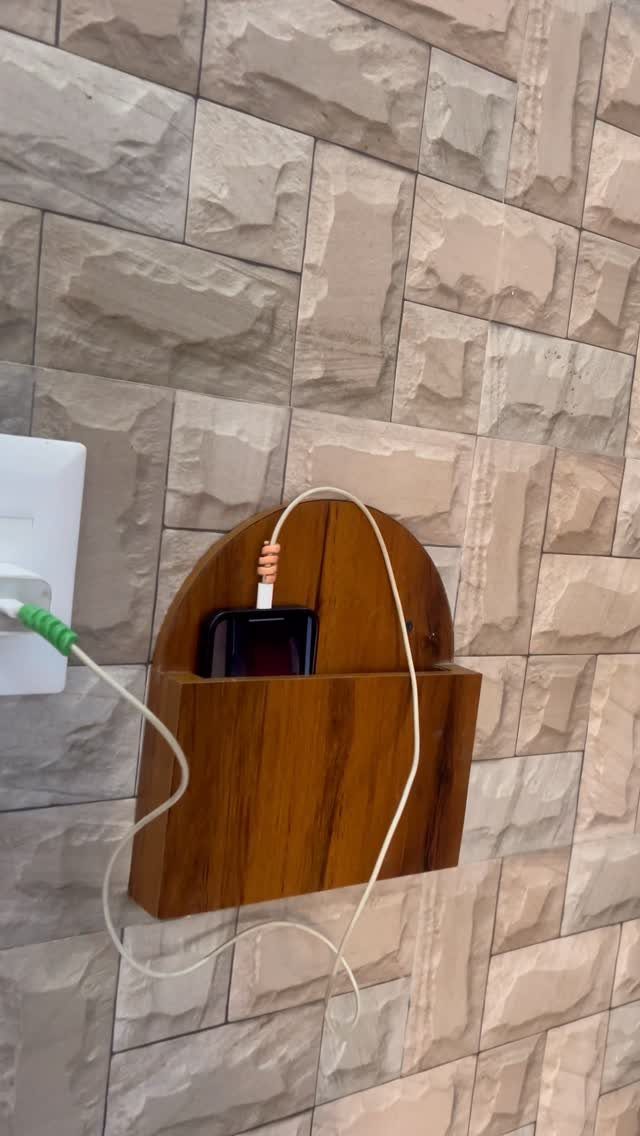
A charging station is a small block or shelf with a routed slot that holds the phone upright, plus a hole or notch at the back so the cable can run to the outlet without dangling across the counter.
Mounting it beside the outlet means the cord stays short and tidy.
Cut a shallow ledge or slot that fits your phone and its case, and leave a gap for the cable.
Run 220-grit sandpaper over the slot and every edge, since a rough lip will scuff a phone screen and case. Measure the outlet height before you fix it to the wall.
Best-selling Woodworking Projects
Wall signs, floating shelves, and picture frames lead the home decor group of projects that sell, and coasters sit right beside them. Their appeal is simple: nearly every household has a wall to fill or a surface to protect.
Custom wall signs have an edge because one board can carry a family name, a house number, or a favorite phrase. Floating shelves reward clean cuts and tight joints more than fancy design.
Outside the decor category, kitchen and dining pieces such as wine racks and wooden utensils move well.
So do storage items like coat racks, magazine racks, and key holders. Birdhouses, bird feeders, step stools, and small tables round out the list.
If you want to build for sale, pick one category and make a small run of similar pieces. A set of matching coasters or a few signs in different wording teaches more than one-off builds.
Tips for Beginners
Start with a project that needs a saw, a drill, sandpaper, and little else. Fewer tools mean fewer places to get stuck, and a finished piece builds confidence faster than a half-built ambitious one.
Choose a design with straight cuts and simple joints. A box, a shelf, or a sign teaches measuring, cutting square, and sanding, and those 3 habits carry into every later build.
Buy a little more wood than the plan calls for, so a miscut doesn’t end your afternoon. Cheap pine is fine for practice.
Read the whole plan before cutting anything, and check each measurement twice. Wear safety glasses and a dust mask whenever you saw or sand.
Finally, keep your first few projects small enough to finish in one sitting. Quick wins keep you in the shop.
Materials for Wood Projects
Reclaimed wood brings character that new lumber can’t match: weathered grain, nail holes, and varied color. Check it for hidden nails and screws before it touches a blade, and expect to sand more than usual.
Plywood is the practical pick for flat work like signs and backing panels.
It stays stable, costs less than solid boards, and takes paint well. Sand the exposed edges, since the layers show there.
Craft store wood surfaces, such as plaques, rounds, and precut shapes, save you the cutting. They suit beginners who want to spend the time on decoration.
For decorating, paint gives solid color and Mod Podge lets you bond paper or fabric designs to the surface. Seal either one with a clear topcoat so it holds up to handling.
Match the material to the job: heavy use calls for solid wood, and display pieces can use cheaper stock.
Frequently Asked Questions
What are some DIY projects I can make from wood?
A desk organizer, serving tray, cutting board, blanket ladder, plant stand, and set of wall hooks are all good picks. For something decorative, try a burned pet portrait on a wood slice or a jewelry box.
What is the hottest craft right now for adults?
Wood crafts that are useful and decorative at once are a strong bet, such as wall signs, floating shelves, serving trays, and custom coasters.
Wood burning is another popular route: a basic pyrography pen can turn a wood slice into a pet portrait. Both start cheaply and finish in an afternoon, which keeps them easy to try.






