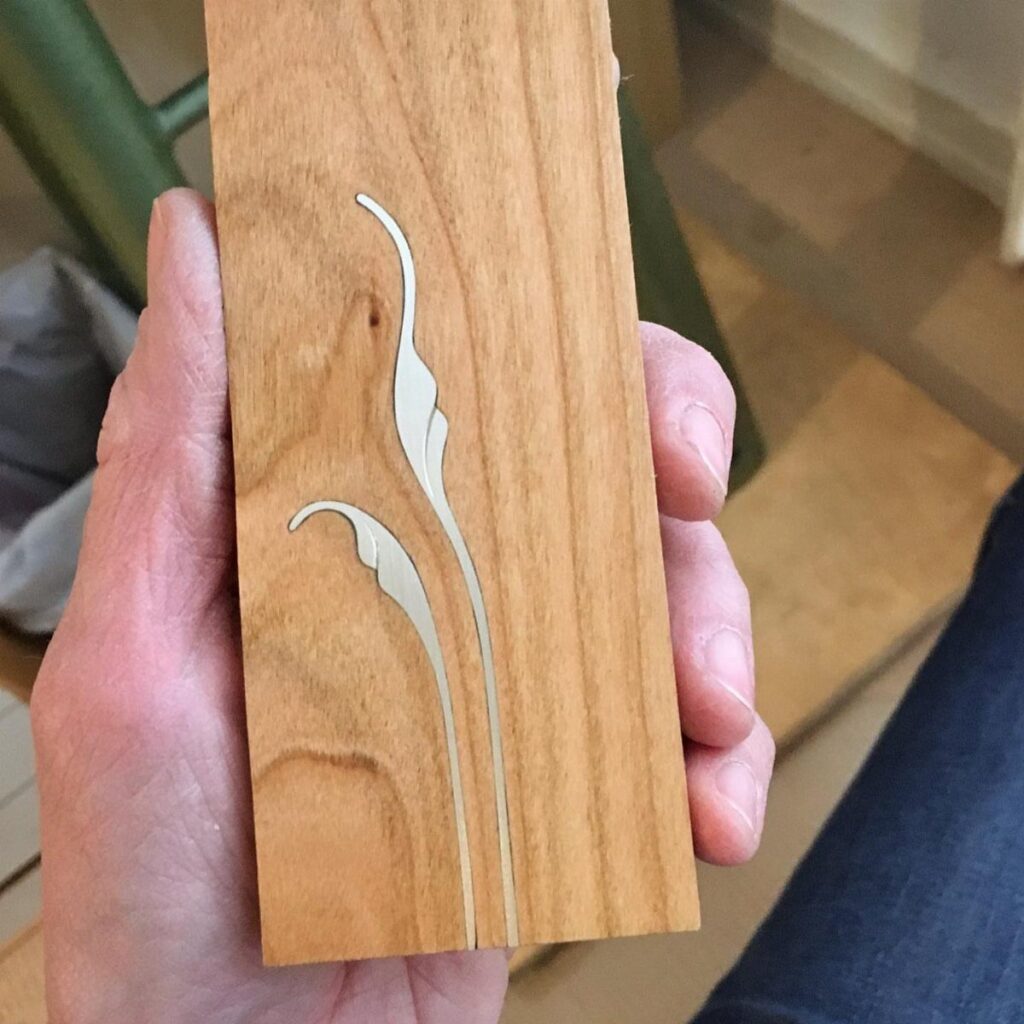
The metal in these builds runs from a thin inlaid line in wood to hairpin legs and a table with human-figure legs, and the deciding factor is how much metalwork you want to do yourself.
With only a drill, sander and saw, the hairpin leg table, the serving tray with its metal rim and handles, and the lamps with ready-made glass panels are all within reach.
Real metalwork stays with the figure-leg table, and the hairpin leg table keeps it to bolting on store-bought legs, so a basic drill and a few hand tools cover most of this list.
1. Metal Inlay in Wood
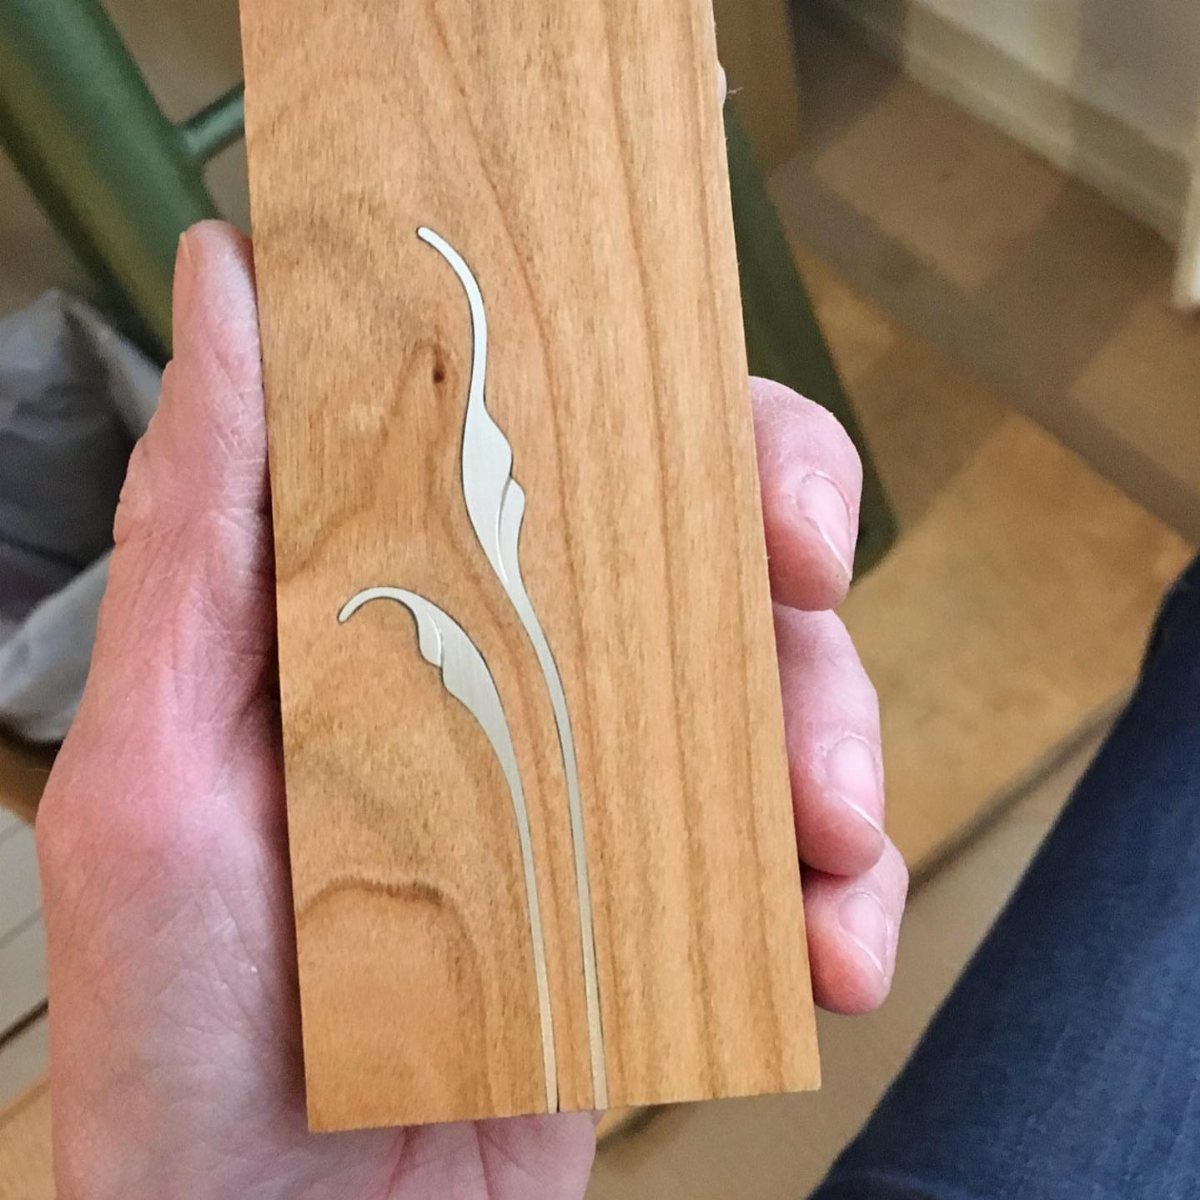
Light-brown wood suits this well, since the metal reads clearly against it.
For a first try, I would keep the curve gentle and the piece small, like a coaster or a board-sized panel.
Tight curves are harder to cut cleanly, and the metal only looks deliberate when the edges of the channel are crisp.
Start on scrap before touching the good plank.
2. Hairpin Leg Table
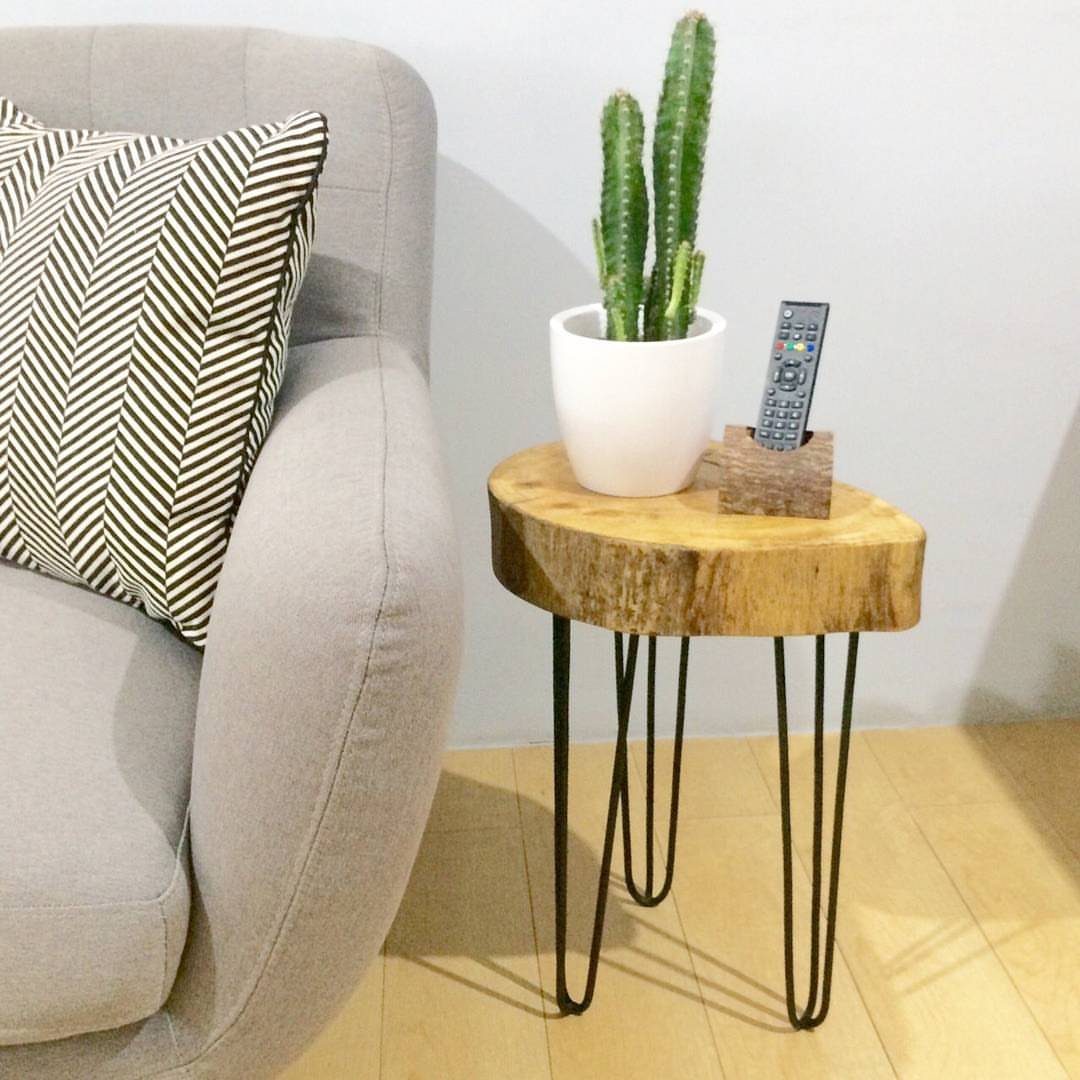
Black hairpin legs under a round live-edge slab make a side table that looks finished with very little work. The slab is the star, so spend your time choosing a piece with an interesting edge and sanding the top smooth.
Hairpin legs are sold as sets and bolt on with screws, which keeps this within reach of anyone with a drill. I like black against pale wood; it keeps the look light and modern.
Cost is mostly the slab and the legs. Sanding and a clear finish are cheap.
The table shown here costs less than $30 to build, but there is a wide variety to choose from for the top, including slate, granite, limestone, marble or decorative tile. Prices for these materials range from $5 to $20+.
3. Simple Serving Tray
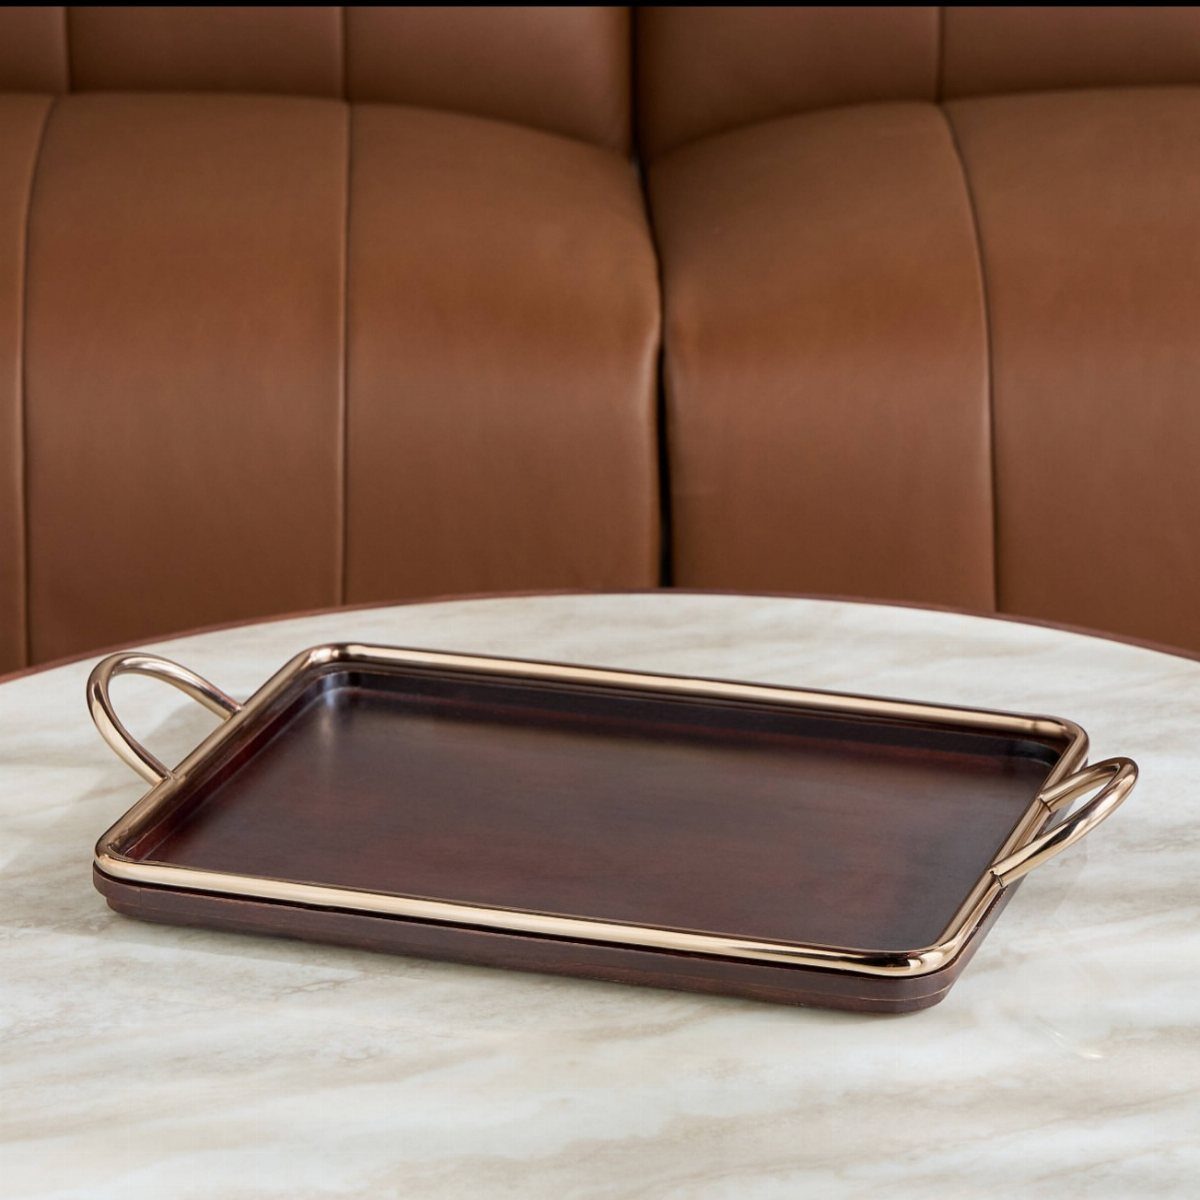
Dark wood with gold metal handles and a metal rim is a tray that looks pricier than it is.
A flat panel, 2 handles and a rim: that is the whole build, which is why I call it a friendly first project.
Pre-drill the handle holes so the wood does not split near the ends. Sand through the grits before finishing, since dark stain shows every scratch.
Hardware stores sell metal rim strips and handles, so a tray like this comes together in a single session with basic tools.
4. Wood and Glass Lamps
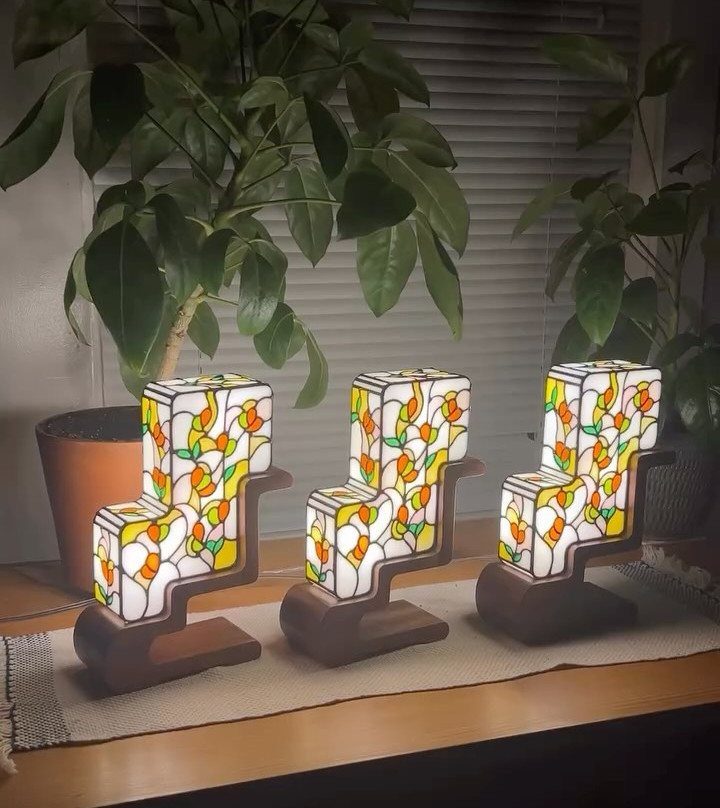
Stained or architectural glass panels set into a wooden base give a lamp that glows in color and still feels warm.
Making 3 matching ones, as in this setup, is smart: once the base is figured out, the rest is repetition.
Cut all the bases from one board so the grain matches across the set. Dark stain makes the glass colors stand out.
Glass panels can be bought ready-made, which spares you cutting glass. That is the route I would take for a first lamp.
5. Table with Human-Figure Legs
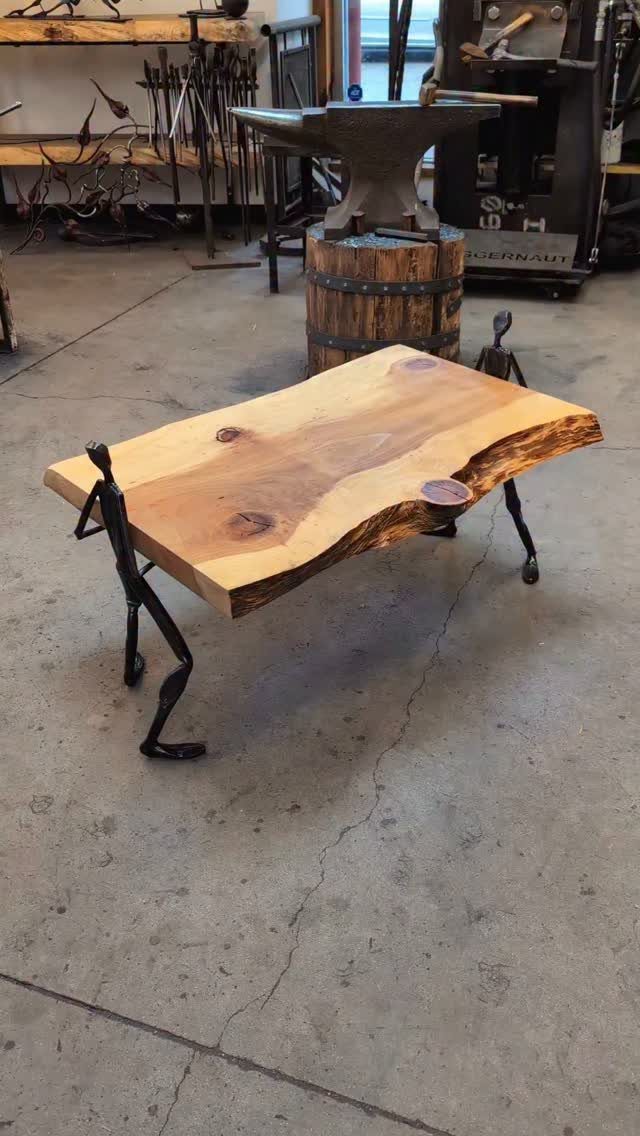
Black metal legs shaped like human figures hold up a live-edge slab and make a table people will talk about.
This is the hardest idea on the list, since the legs mean real metalwork, so it suits someone with a forge or welder.
If you lack those tools, I would buy or commission the figures and build only the top. A simple, thick slab keeps attention on the legs.
Plan on the legs being the main cost and the main effort.
Skill Levels for Projects
Nearly every skill level has free plans online, and the good ones come with numbered steps, clear diagrams, and a full materials list so you can check your cut list before you buy a single board.
Pick one with all three before you buy a single board.
Beginners do well with simple shelves and cutting boards. Kitchen cabinets sit at the advanced end, and I would earn my way up to them with a few smaller builds first.
If a plan lists recommended products, treat that as a shopping shortcut, not a rule.
Print the plan, or save it to your phone, and carry it down the aisle so you can match each part to what’s on the shelf.
Combining Materials in Projects
Against wood’s soft, organic grain, metal reads as crisp and hard, and the kind you pick sets the mood: black steel feels industrial, while brushed brass or copper feels warmer.
Brass adds warmth, blackened steel leans industrial, and brushed aluminum looks clean and contemporary.
Species and finish matter as much as the metal. A brass accent can look luxurious on one wood and fussy on another, so hold a sample against your board before you commit.
Small projects are the easy place to start. A single metal accent makes a piece feel more custom and personal, and it costs far less than building a whole coffee table or console around the idea.
Glass and textiles follow the same logic: pick one material to lead, and let the others support it.
Tools and Materials Needed
Basic woodworking tools will cover most of these builds: a drill, a sander, a saw, clamps and a tape measure. Beyond that, buy only what the specific project calls for.
Epoxy and metal sheets are the 2 materials I would plan around. Epoxy fills channels and gaps, and sheet metal gives you the inlay or accent itself.
Wear safety glasses and a dust mask when you sand, and gloves when you handle cut metal, since the edges are sharp.
Test the epoxy and any finish on scrap first, so you know how they behave before they touch the good piece.






