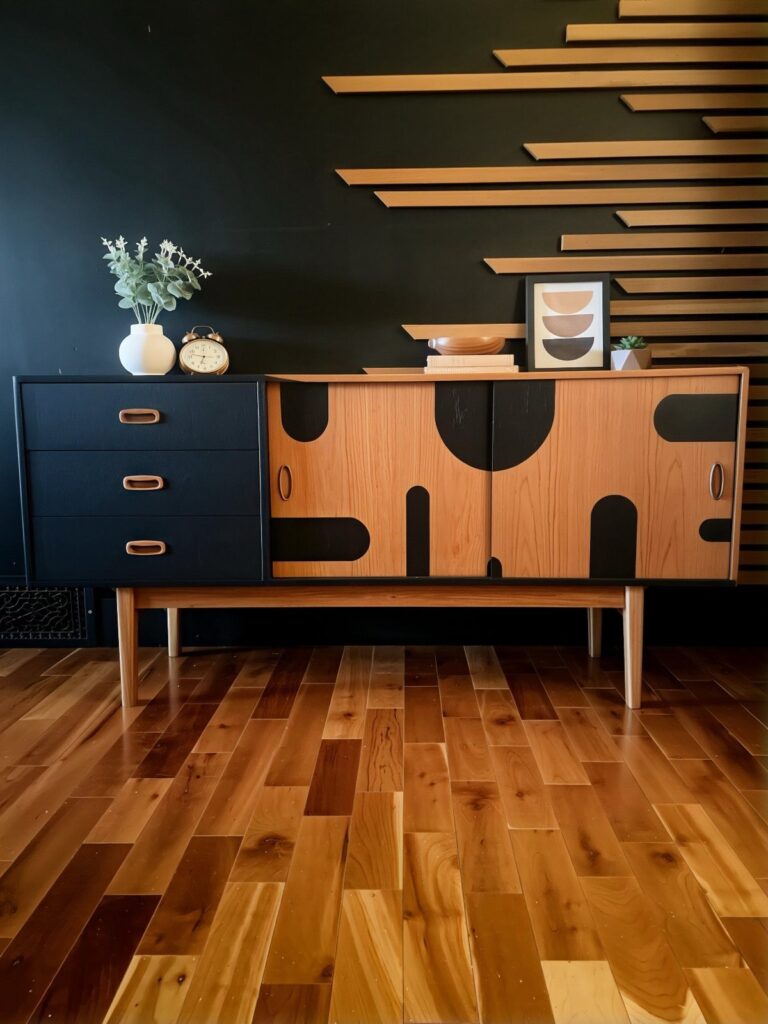
The ideas run from swapping a set of knobs in minutes to tiling a whole dresser in glossy burgundy, and the piece you already own decides where you land.
A sturdy, solid one can take a heavy finish like tile or a glass top, while a worn or wobbly one is better off with paint, wallpaper or new hardware.
Sanding, wiping and sketching are the same prep on every piece, so match the idea to the tools in your house and the afternoon you have.
1. Dresser Vanity
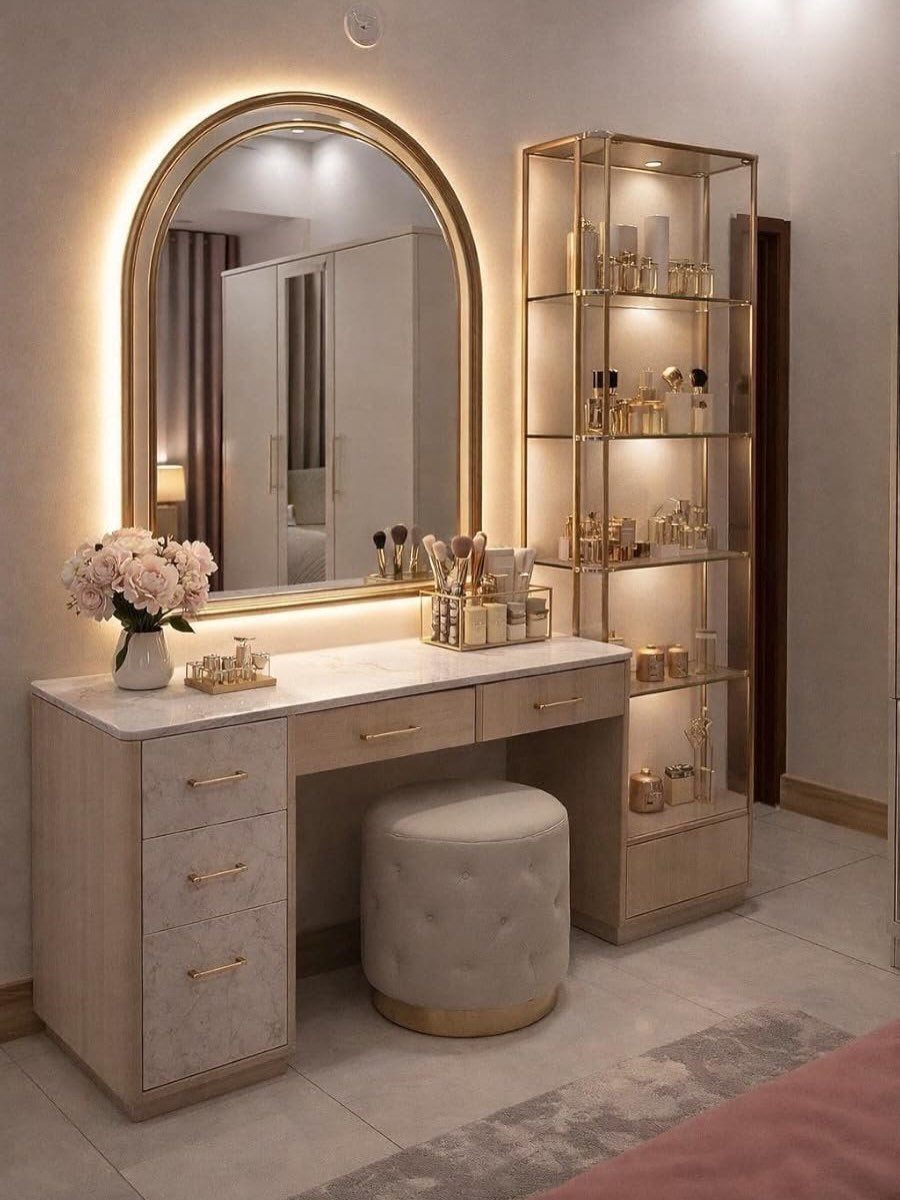
A dresser makes a better vanity than most store-bought tables because the drawers already hold the brushes, hair tools and jewelry that would otherwise crowd the top. Keep the surface clear for a mirror and a small tray.
An arched mirror with a backlight softens a boxy dresser, since the curve breaks up all those hard right angles. A stone-look top adds polish, though it costs extra and a plain painted top is the budget route.
2. Cabinet Bar Setup
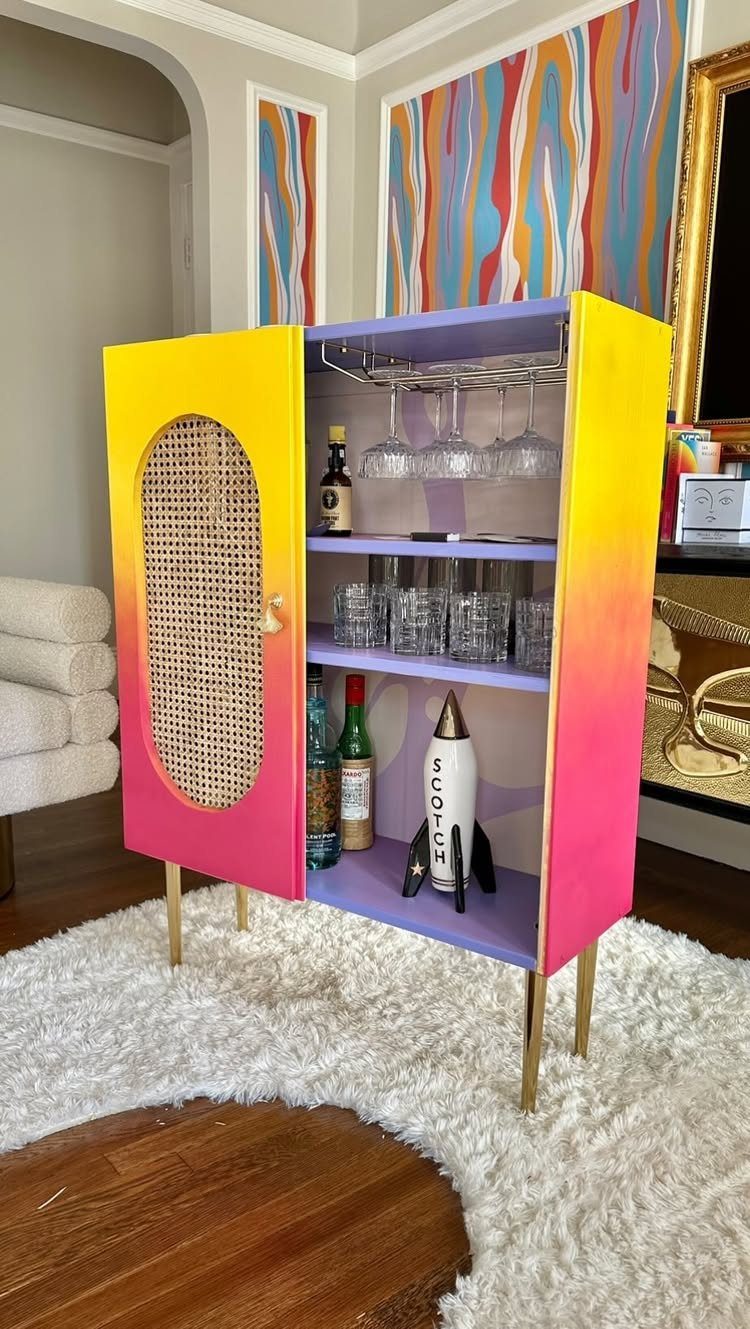
Old cabinets already have the shelves and doors a bar needs, so the conversion is mostly paint and a few smart choices about what goes where.
A gradient finish takes patience, since the colors have to blend while the paint is wet. For a faster afternoon, one bold color does nearly the same job.
3. Paint Fabric Upholstery
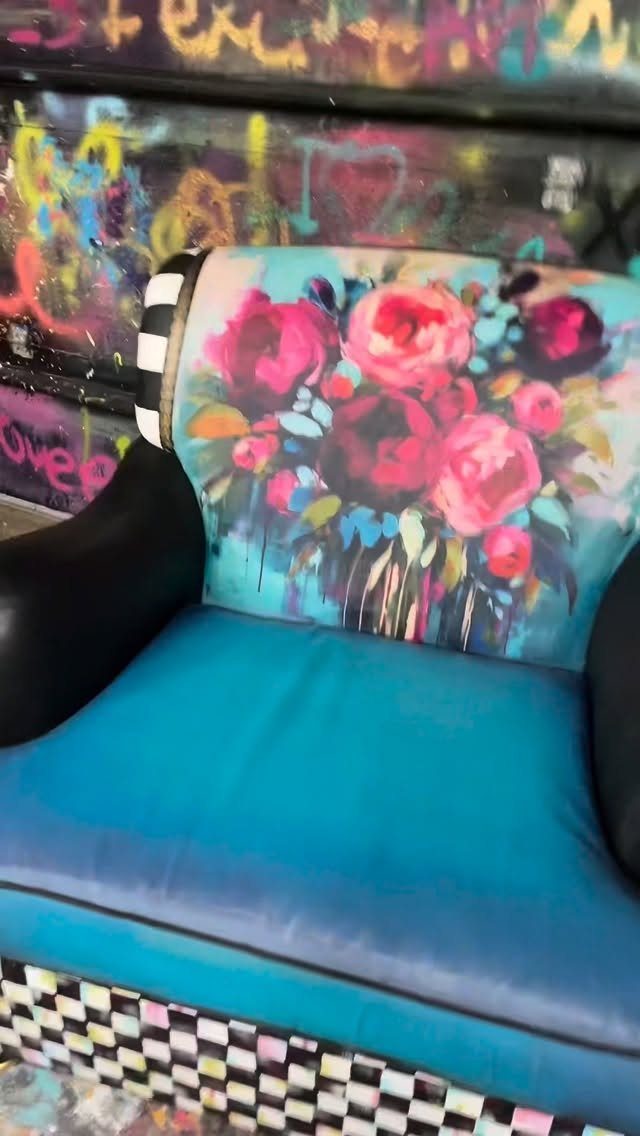
Fabric paint on a tired armchair costs far less than reupholstering, and it lets you add a pattern fabric stores will not sell.
A painted floral on the back and a checkered base turn a plain blue chair into the room’s focal point.
Stick with chalk or clay paint, as the maker of this piece advises. Test on a hidden spot first, because the fabric decides how the paint settles.
4. Painted Shelves Built-In Look
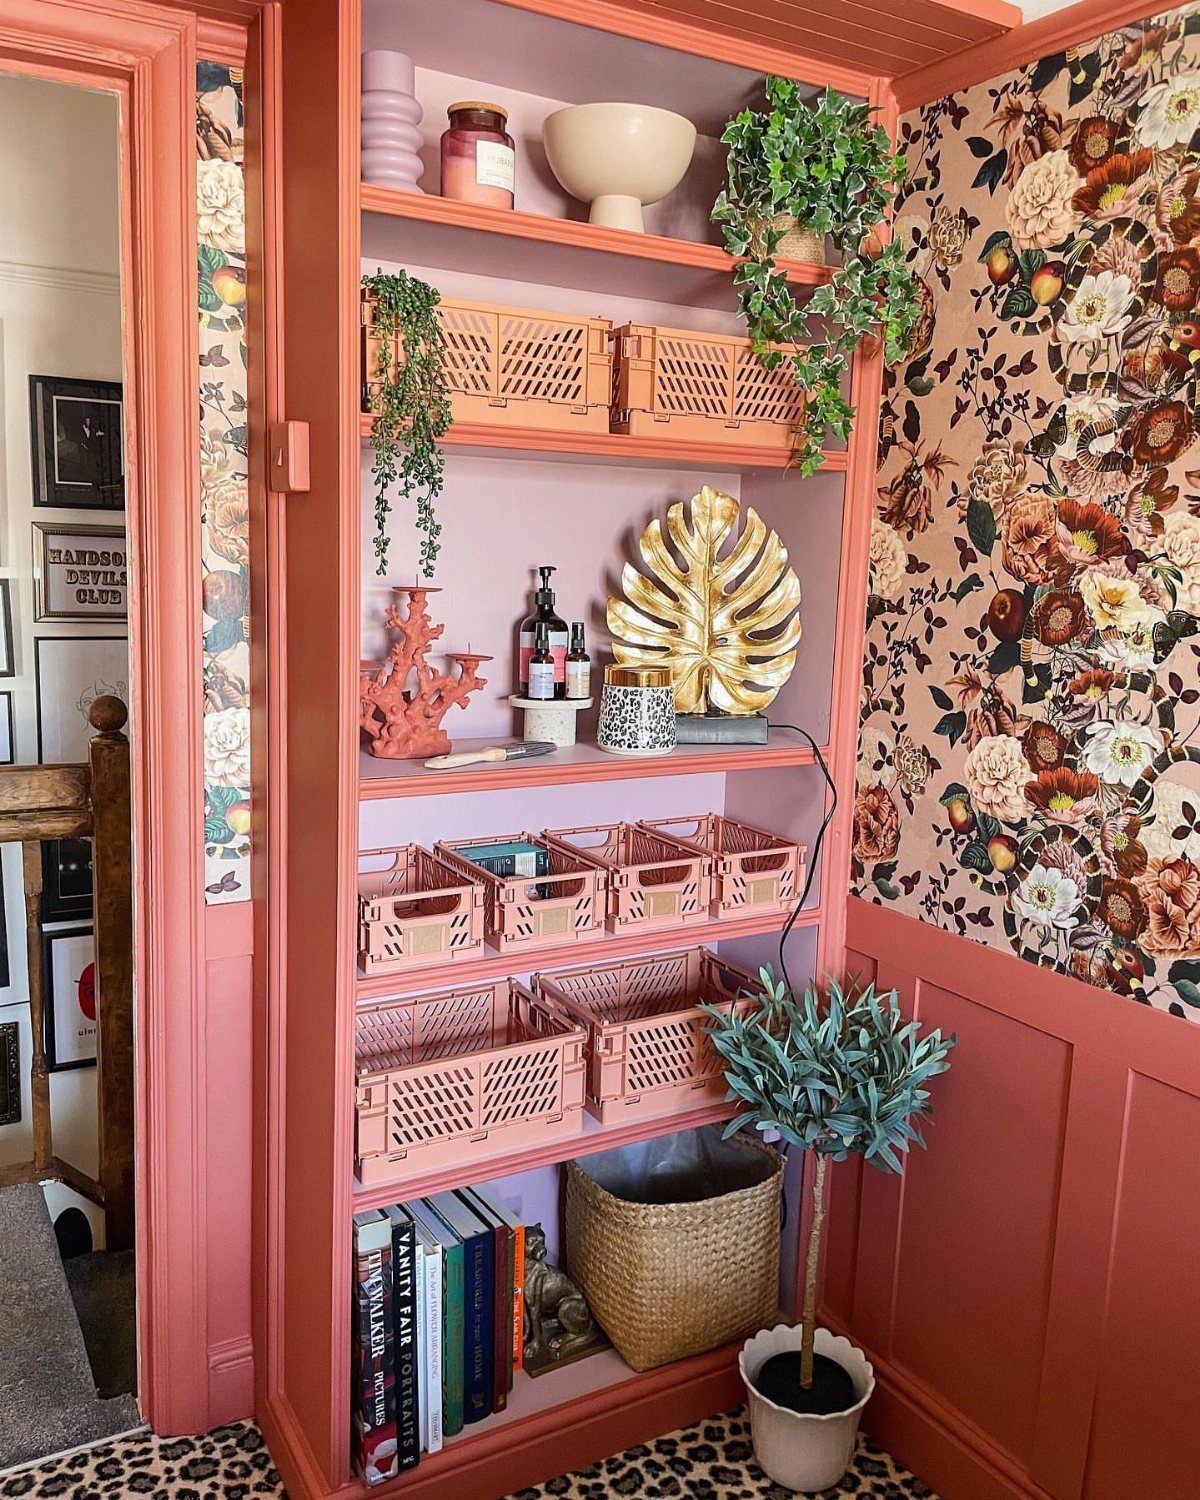
Painting open shelves the exact color of the wall makes them read like part of the architecture.
Use the same paint on the wall and the shelf frame so the edges melt together, then let the baskets, books and plants supply contrast.
A bold shade like this coral-pink hides nothing, so fill any gaps and sand before the first coat. Paint is the cheap part of this project; prep is where the time goes.
5. New Knobs and Pulls
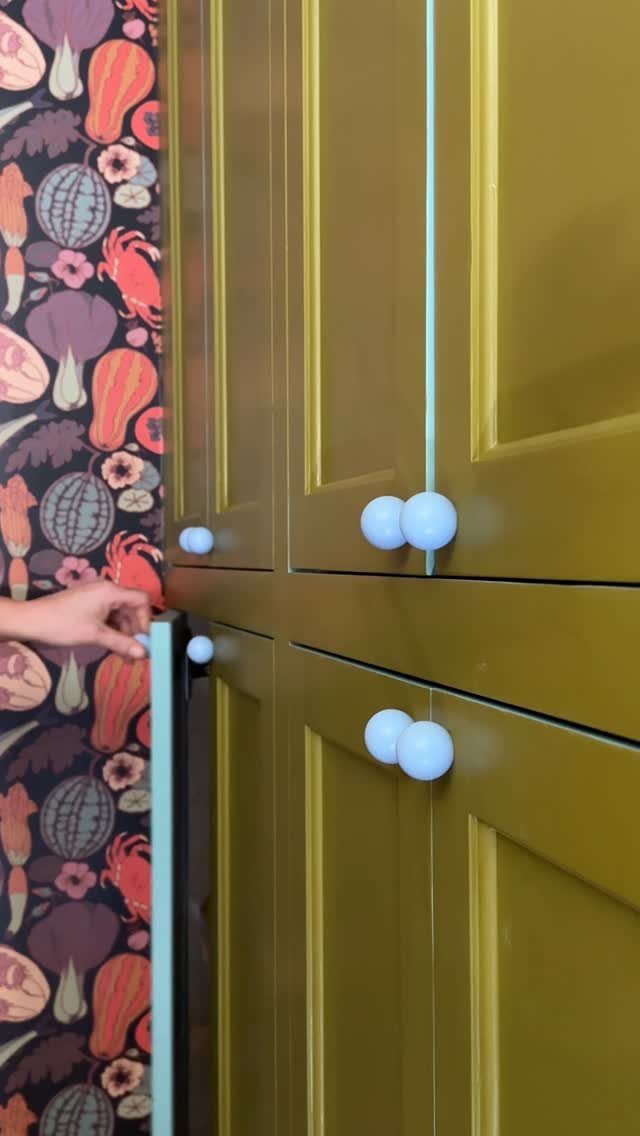
Swapping hardware is the smallest change you can make to a piece of furniture, and it is often the most noticeable. Round white knobs on a mustard cabinet look crisp and a little playful, and they take minutes to install.
Before buying, measure the distance between the existing screw holes, center to center.
Matching that spacing means no new drilling. If you switch from pulls to knobs, plan to fill the extra hole.
6. Vintage Trunk Coffee Table
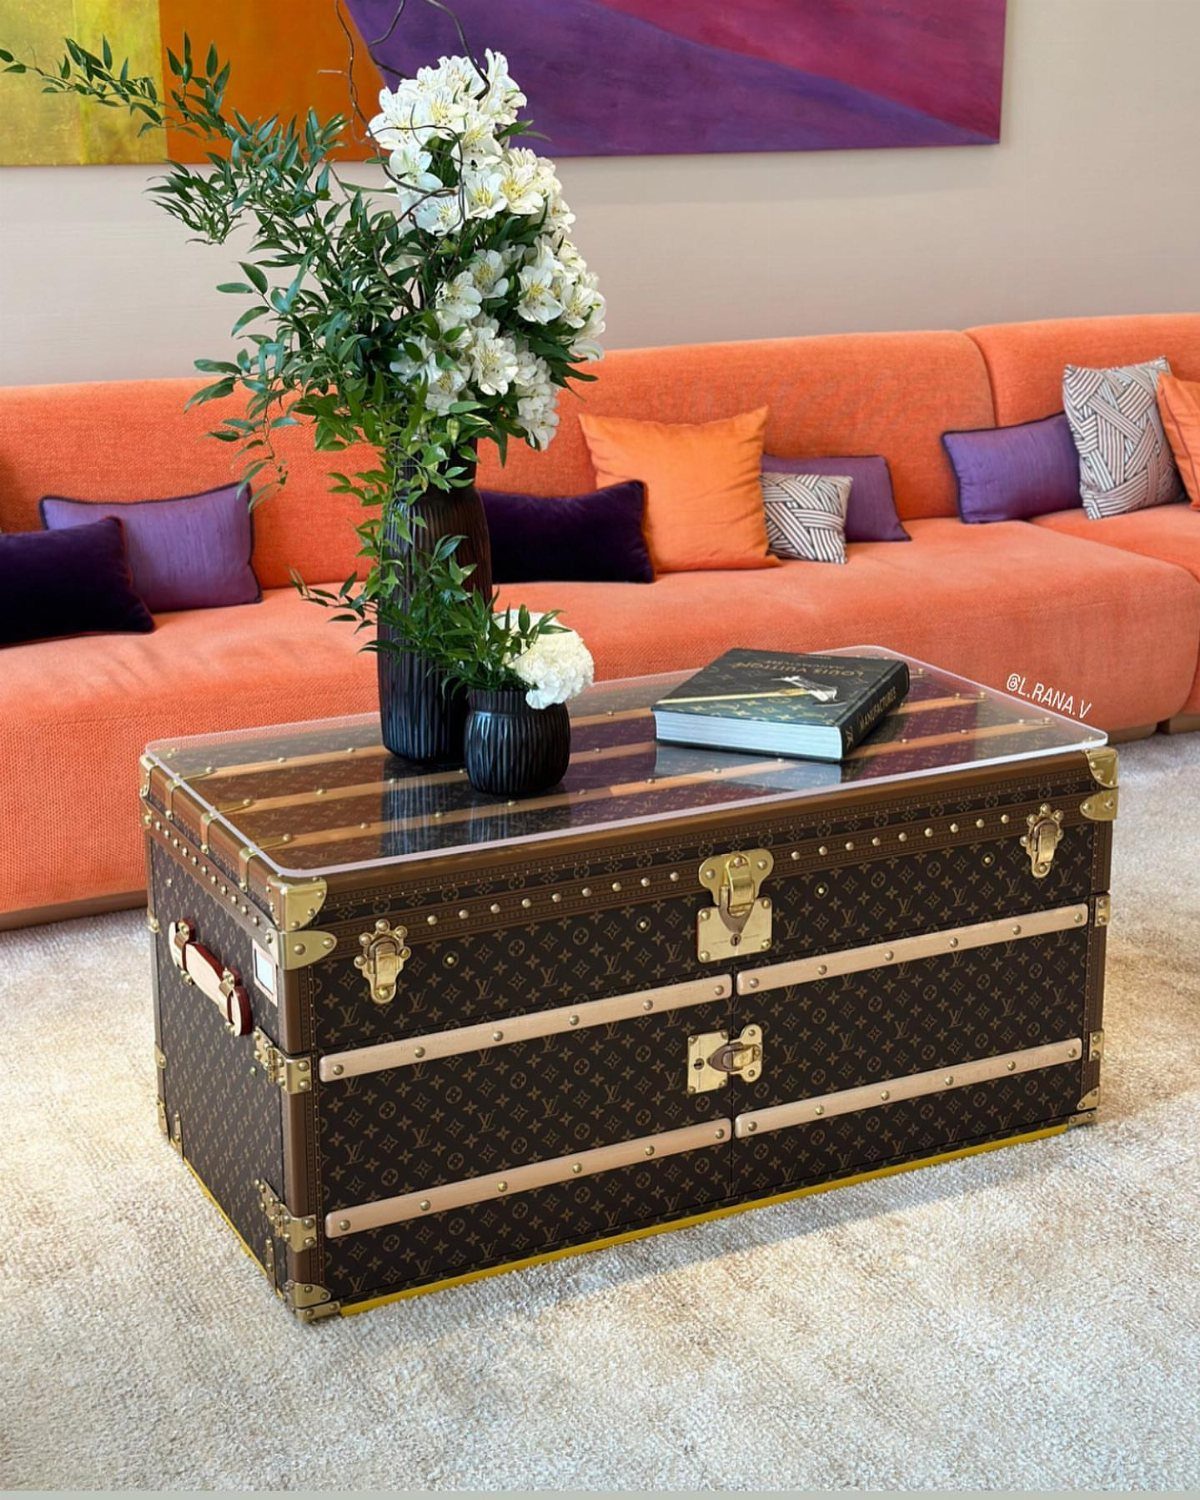
An old trunk makes a coffee table with built-in storage, and a glass top keeps the patterned exterior visible while giving you a flat surface for flowers and books. Cut or order the glass to fit the lid.
Pick a trunk with a sturdy, level lid.
Put felt pads or small risers underneath to protect the floor. The cost of the glass may exceed the trunk itself, so get a quote first.
7. Bookcase Pantry Storage
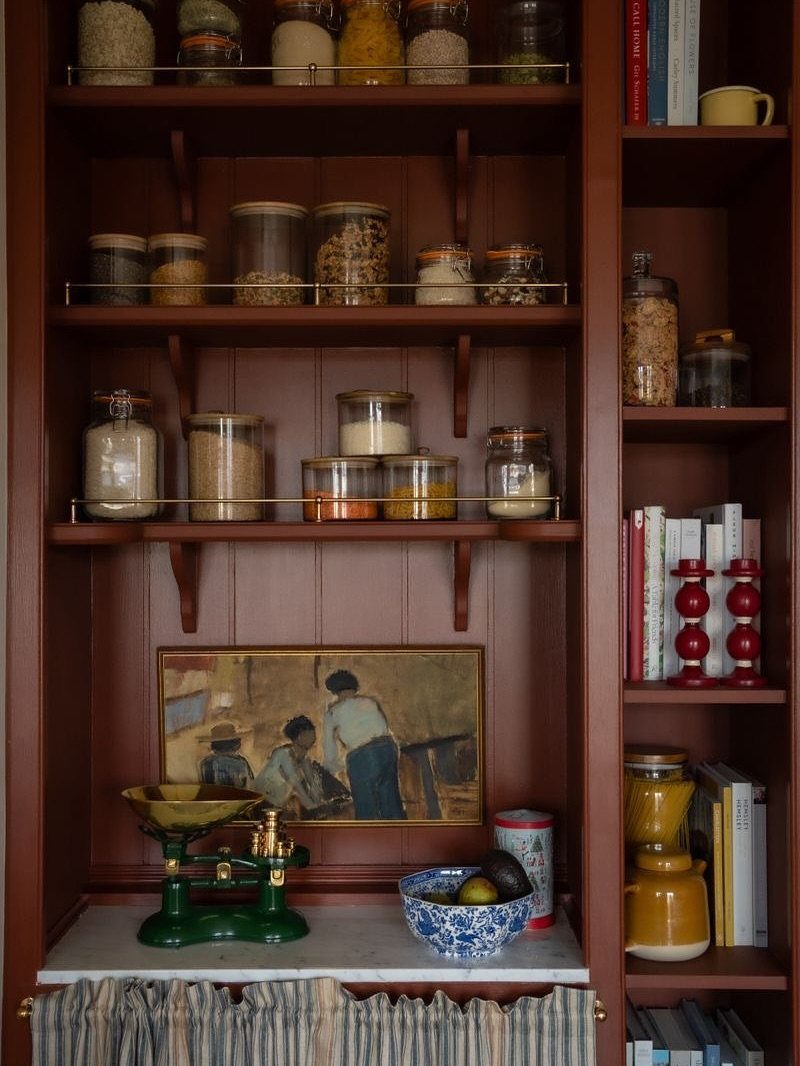
A bookcase already has the shelf depth a pantry needs, and open shelves keep everything in view. Glass jars hold dry goods like rice, oats, and lentils well, and a dark stain behind them makes white labels easy to read.
Mix in a few books so the shelves still look like a bookcase, and keep the heavy jars on the lower shelves.
Keep heavy jars on the lower shelves and lighter items higher up. Decant only what you use weekly, so the shelves stay readable instead of crowded.
8. Chalk Paint Matte Finish
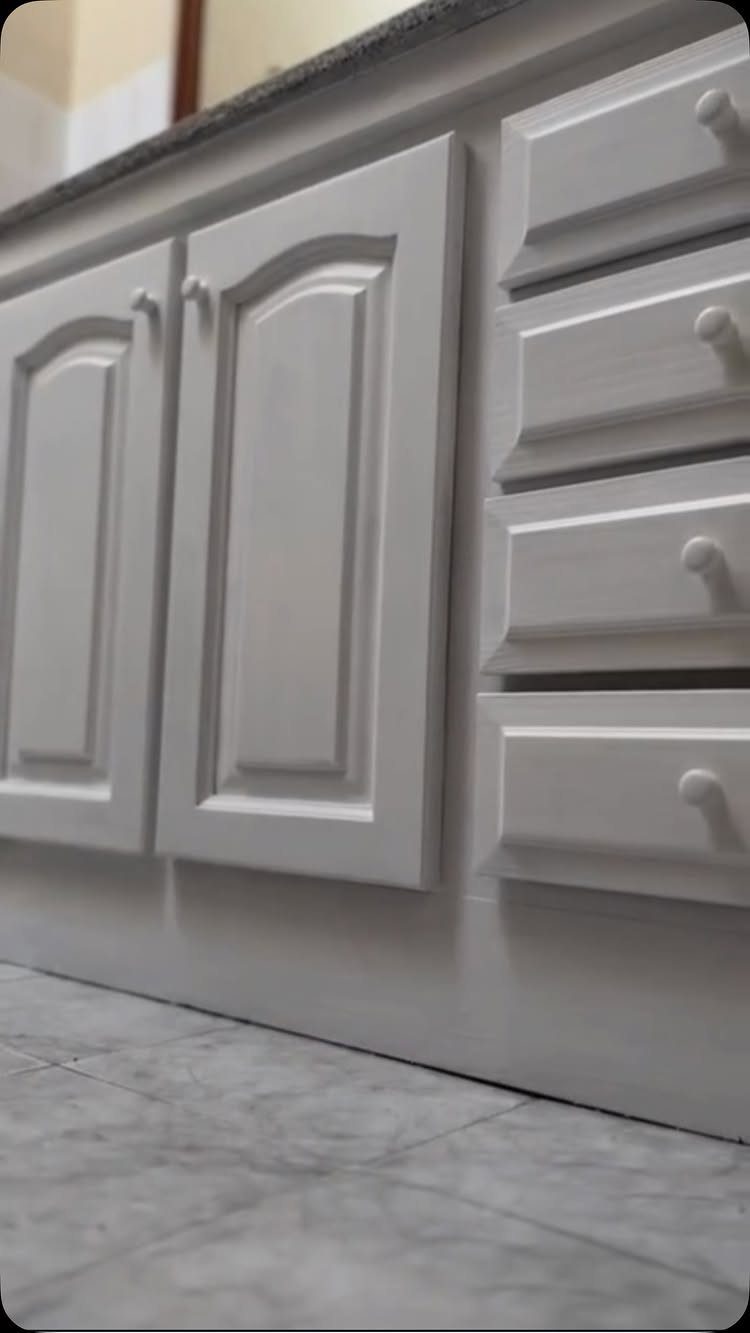
Chalk paint is the forgiving choice for cabinets and drawers, which is why white with a matte finish is so easy to live with. Light scuffs and brush marks disappear into the flat surface instead of catching the light.
Clean the pieces well, then paint thin coats and let each one dry. Small round knobs finish the look and cost little to swap in.
9. Distressed Vintage Furniture Look
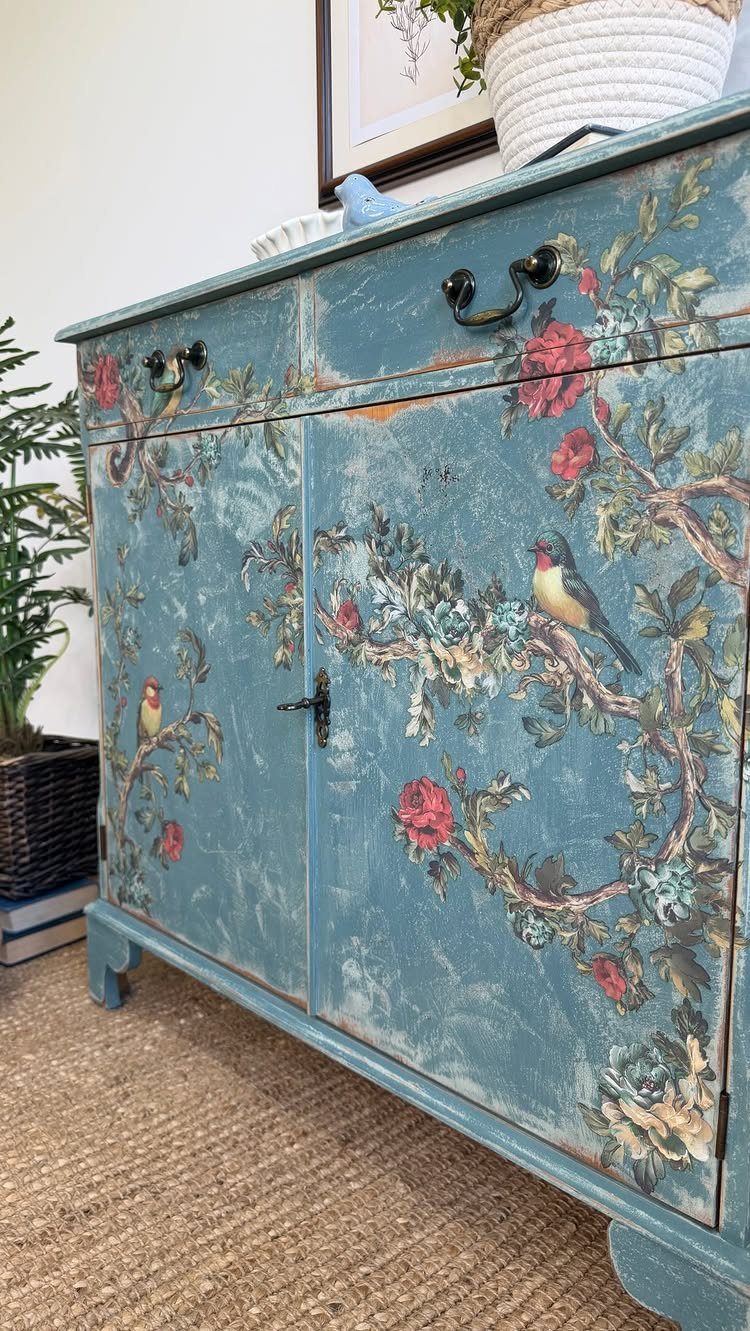
Distressing gives a plain cabinet a lived-in history, and blue paint with worn edges does it well. Dark metal handles and a keyhole add to the old-piece feel, while painted flowers and birds give the doors a folk-art charm.
Sand lightly along edges, corners and around the hardware, where real wear would show. Stop sooner than you think; you can always take off more, but you can’t put wood back.
10. Painted Armoire
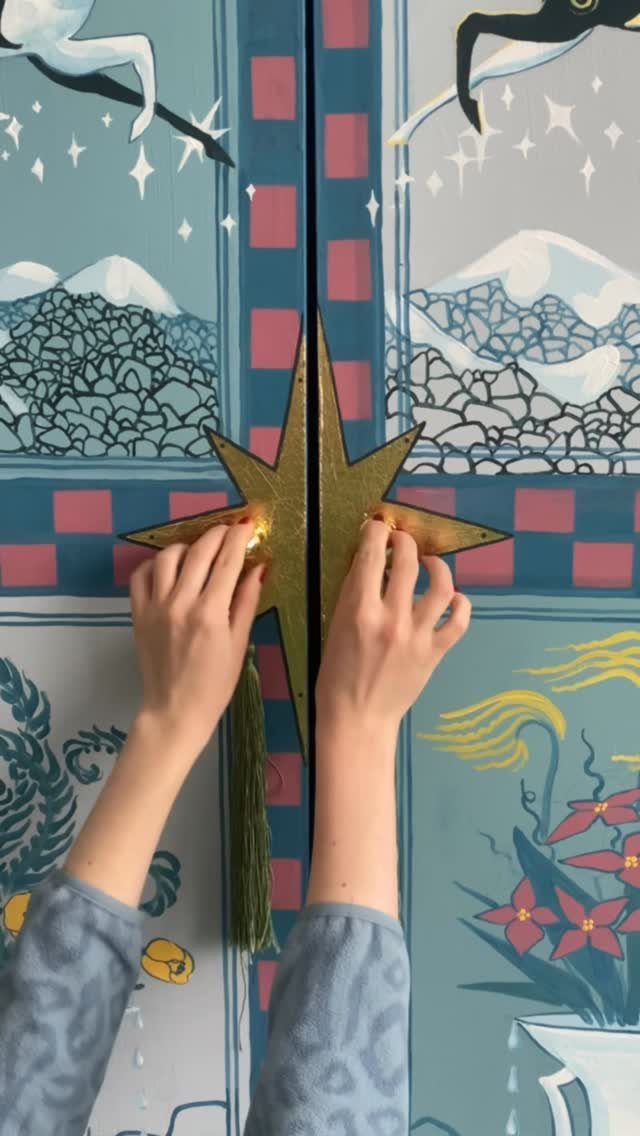
Thrift stores hold armoires that are sturdy but dated, and a painted scene of mountains and flowers on the doors gives one a second life.
Swapping the original pulls for a single statement handle, such as a gold star, gives a painted armoire a small bright accent.
Check the screw spacing first, since a new handle may need a fresh hole drilled and the old one filled.
Sketch the design in pencil first, then fill it in with small brushes.
Paint a test panel before committing to the doors. Expect this to take longer than an afternoon, so split it into stages.
11. Peel-and-Stick Wallpaper on Drawer Fronts
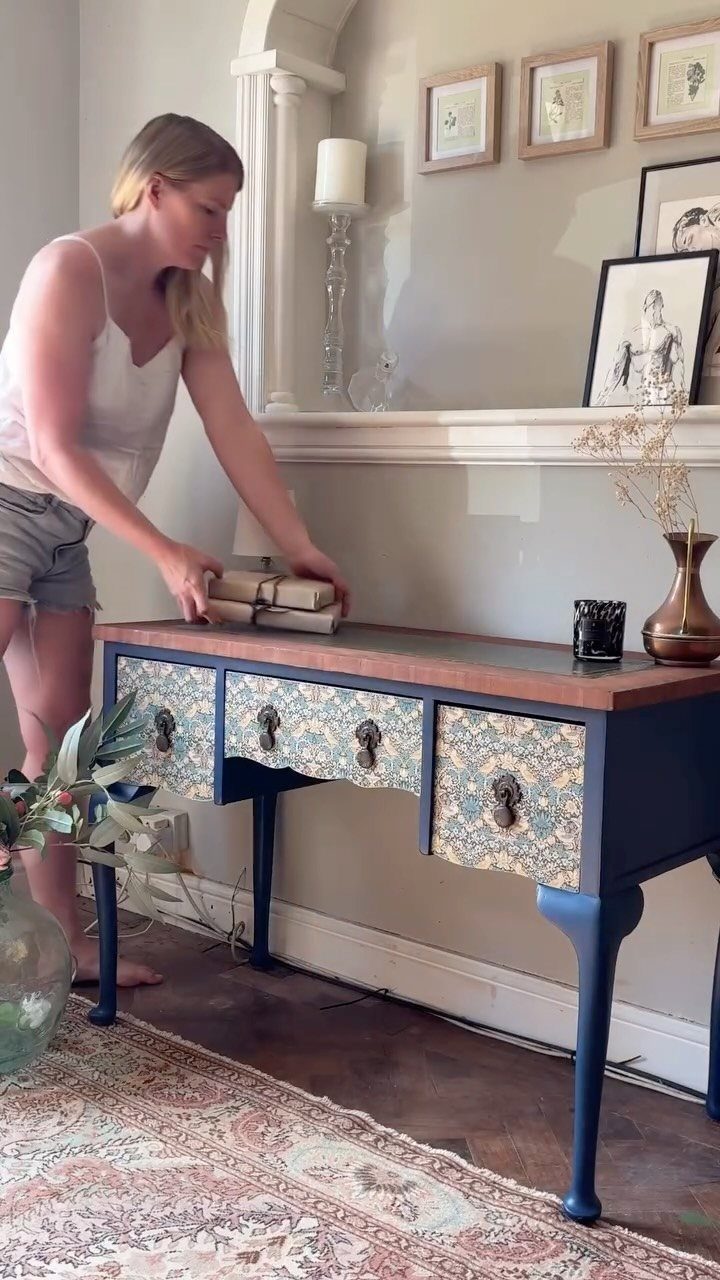
Peel-and-stick wallpaper on drawer fronts gives a blue console a patterned face without any paint or glue. The maker of this piece chose a paper with built-in primer, which makes it easy to use.
Measure each drawer front separately, then cut the paper slightly oversized.
Smooth it from the center outward and trim the edges with a sharp blade. It’s a good afternoon project.
12. Mosaic Table Decoration
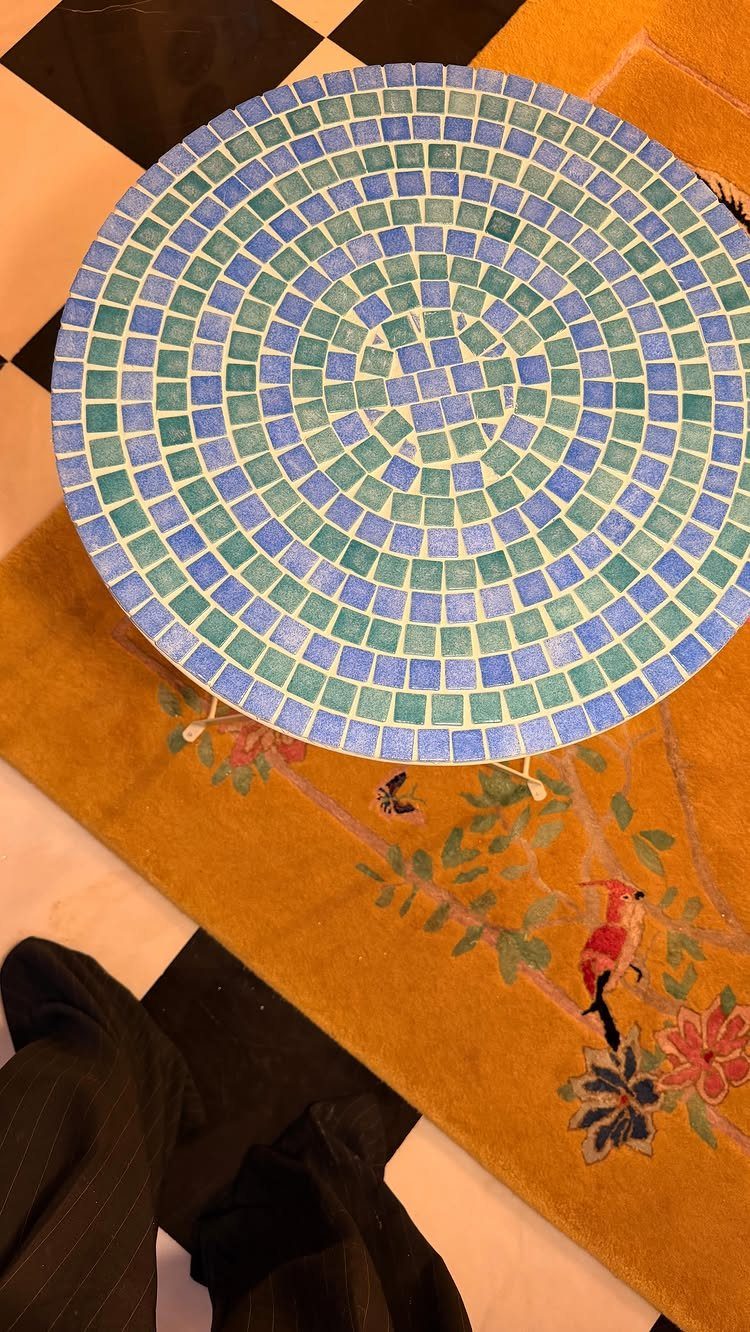
A mosaic top turns a plain round table into the centerpiece of a room, and blue and green tiles feel cool against a warm yellow rug. Small tiles follow a round edge better than large ones.
Lay the tiles out dry first and adjust the spacing before gluing anything down.
Grout fills the gaps and locks the pattern in place. Clean the haze off the tile before it dries hard.
13. Stencil Design on Furniture
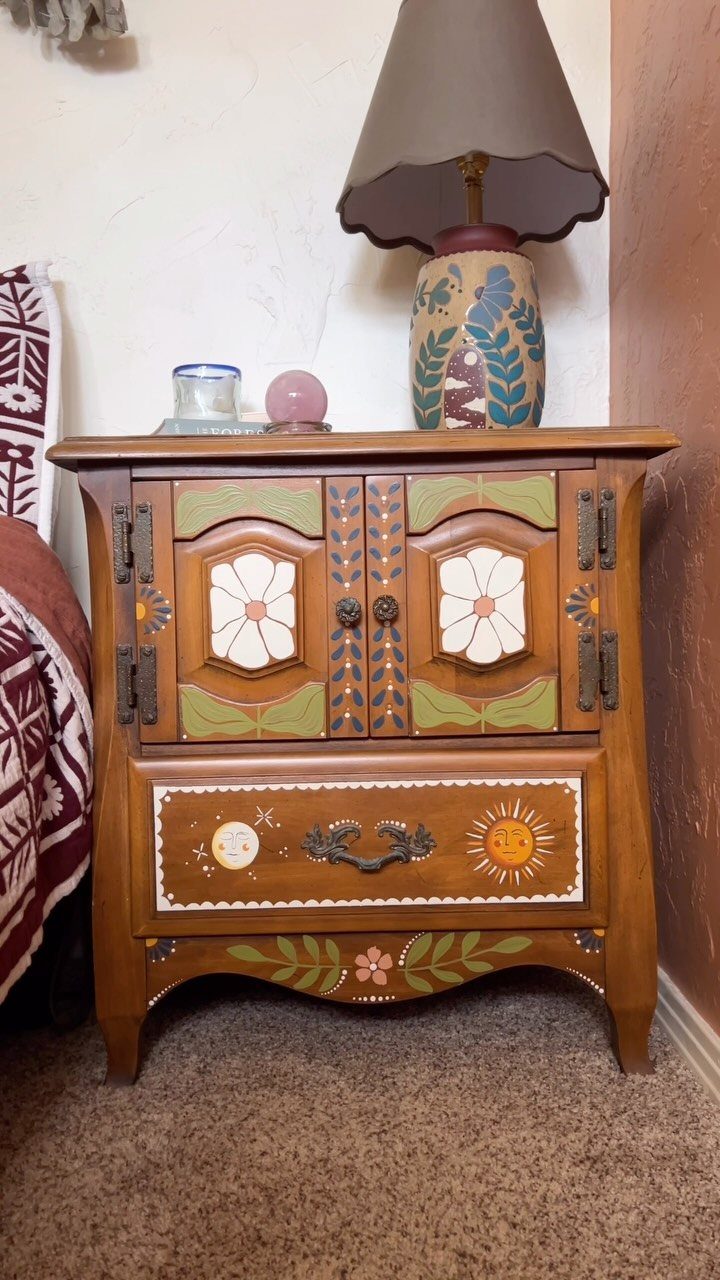
Stencils let you put a repeating floral or celestial pattern on a plain wooden nightstand without any painting skill.
Tape the stencil down so it can’t shift, and dab the paint on with a mostly dry brush or sponge so it doesn’t bleed under the edges.
Sand and wipe the surface first, then paint one color at a time. Let each color dry before you add the next, or the layers will smear.
Colorful designs on a small piece like this are an easy afternoon project.
14. Two-Tone Painted Furniture
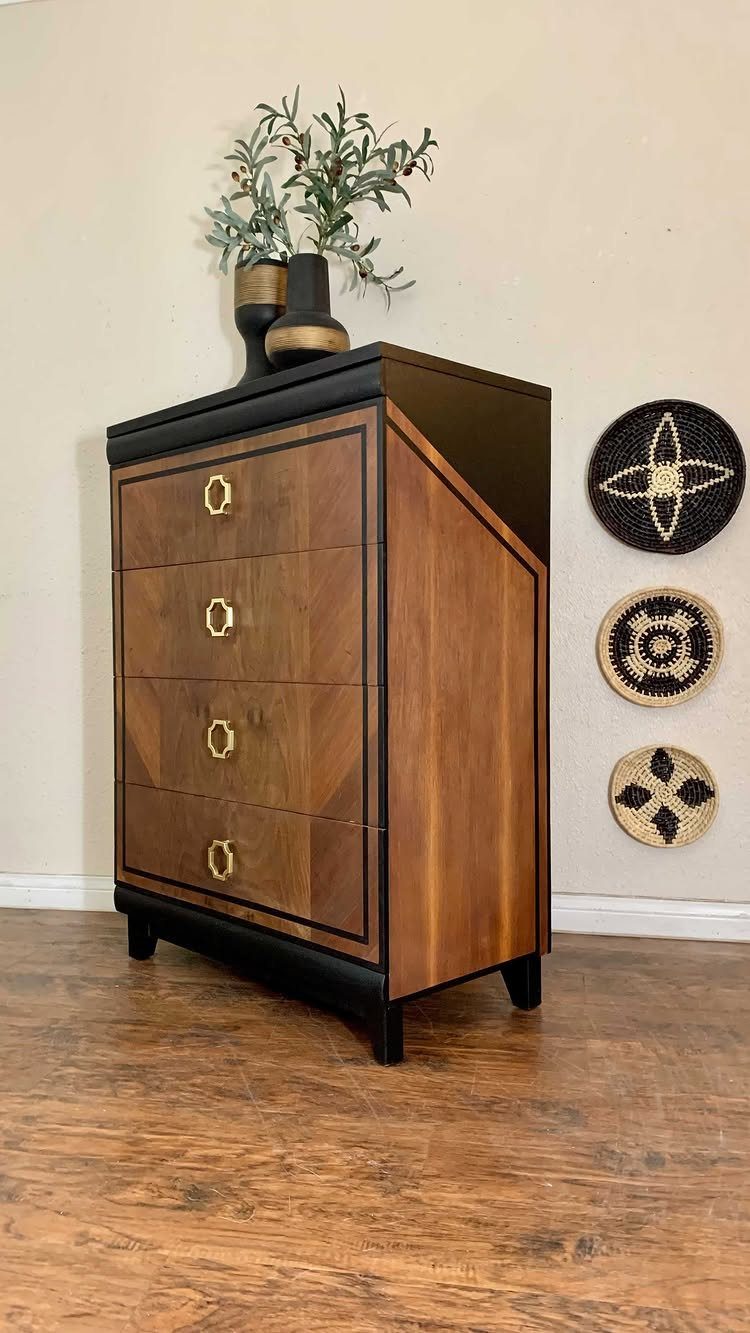
Black paint on the trim and top, with the wood left showing, gives a dresser a sharp outline. Gold hexagonal knobs finish it, and the metal stands out against the dark paint.
Tape off the wood edges before you paint, and press the tape down firmly so the black stays crisp. Paint the top last, since it takes the most wear.
I like this combination because it looks bold but needs only a few supplies. Check the existing hole spacing before buying hardware, since pulls and handles are sold by center-to-center measurement.
15. Use Old Doors for Furniture Tops
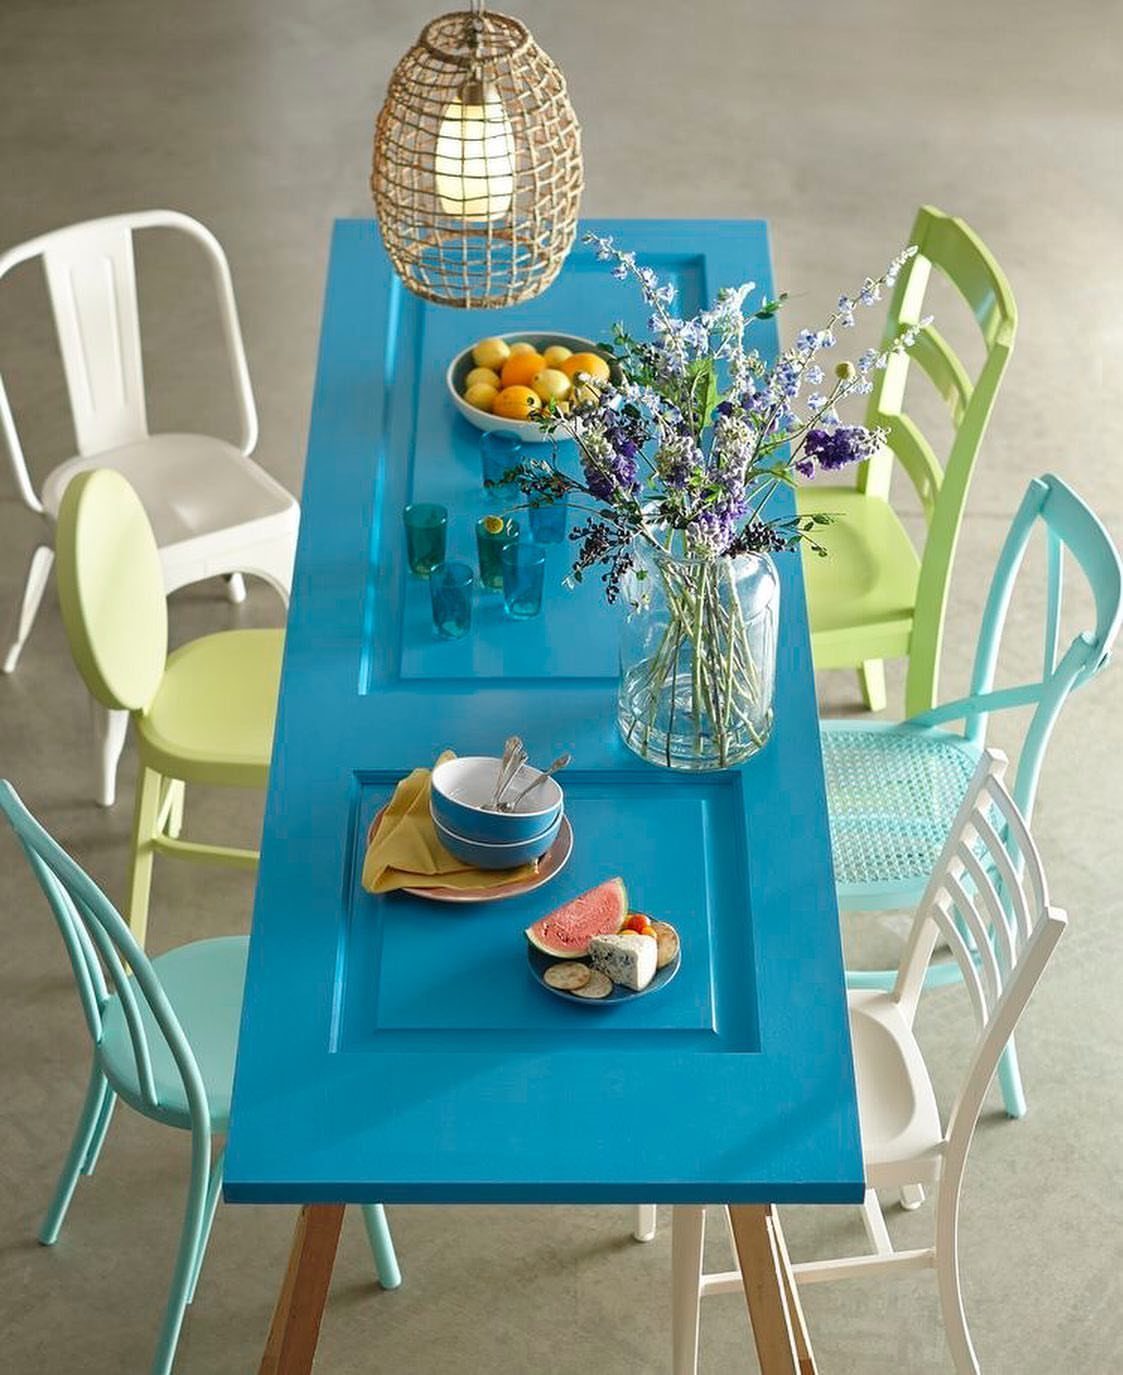
An old door becomes a dining tabletop with a flat, solid slab that most stores charge a lot for.
Painting it a bright blue makes it the center of the room, and mismatched chairs in other colors keep it from feeling too matched.
Sand the surface smooth, then wipe it clean before you paint. Support the door on a base that is sturdy and level, since a door is heavy.
Hardware holes can be filled before painting, so the top stays smooth for plates.
16. Tiled Dresser Makeover
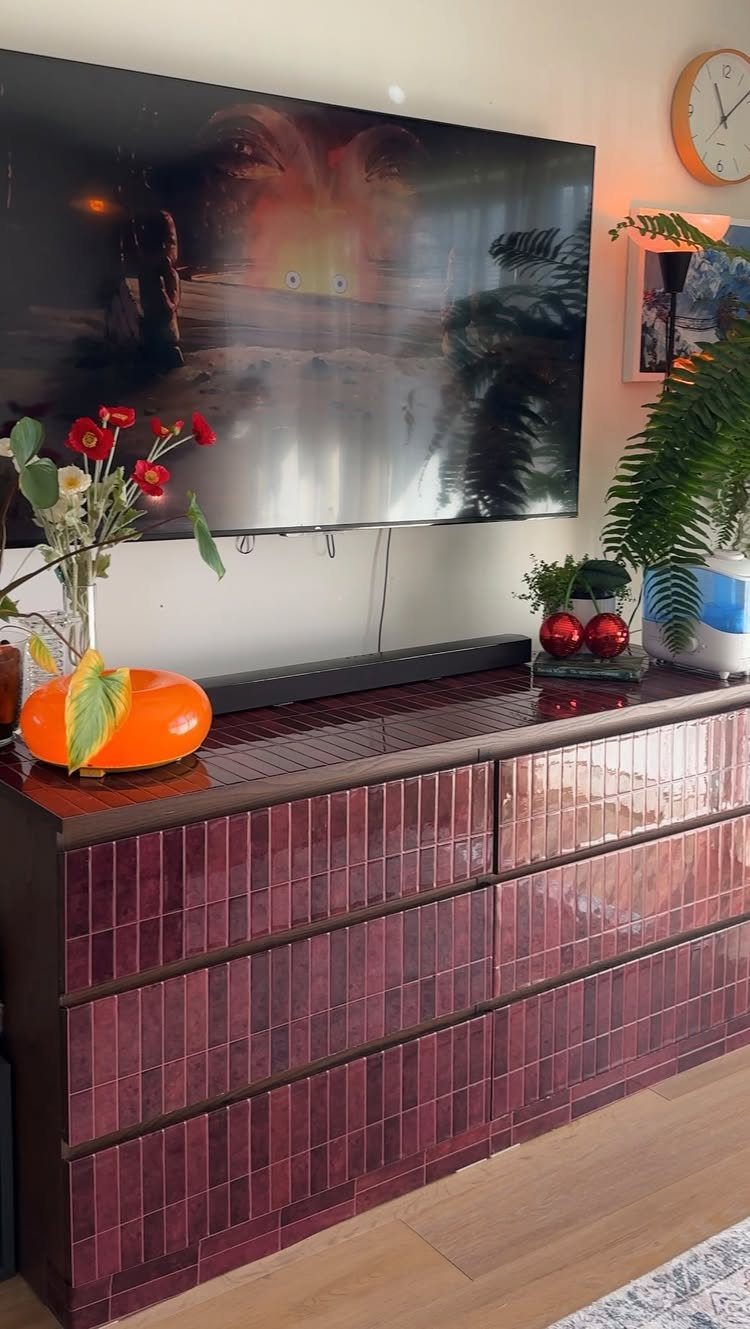
Covering a whole dresser in small glossy tiles gives it a textured, jewel-like finish that paint can’t copy.
Deep burgundy suits a living room, and a dresser finished in it is sturdy enough to hold a TV and a few decorative pieces on top.
Lay out the tiles dry first, then glue them down and fill the gaps with grout. Wipe the haze off before it hardens.
It takes more time and money than a paint job, so I would save it for a sturdy piece worth the effort.
17. Repurposed Car Rim Table
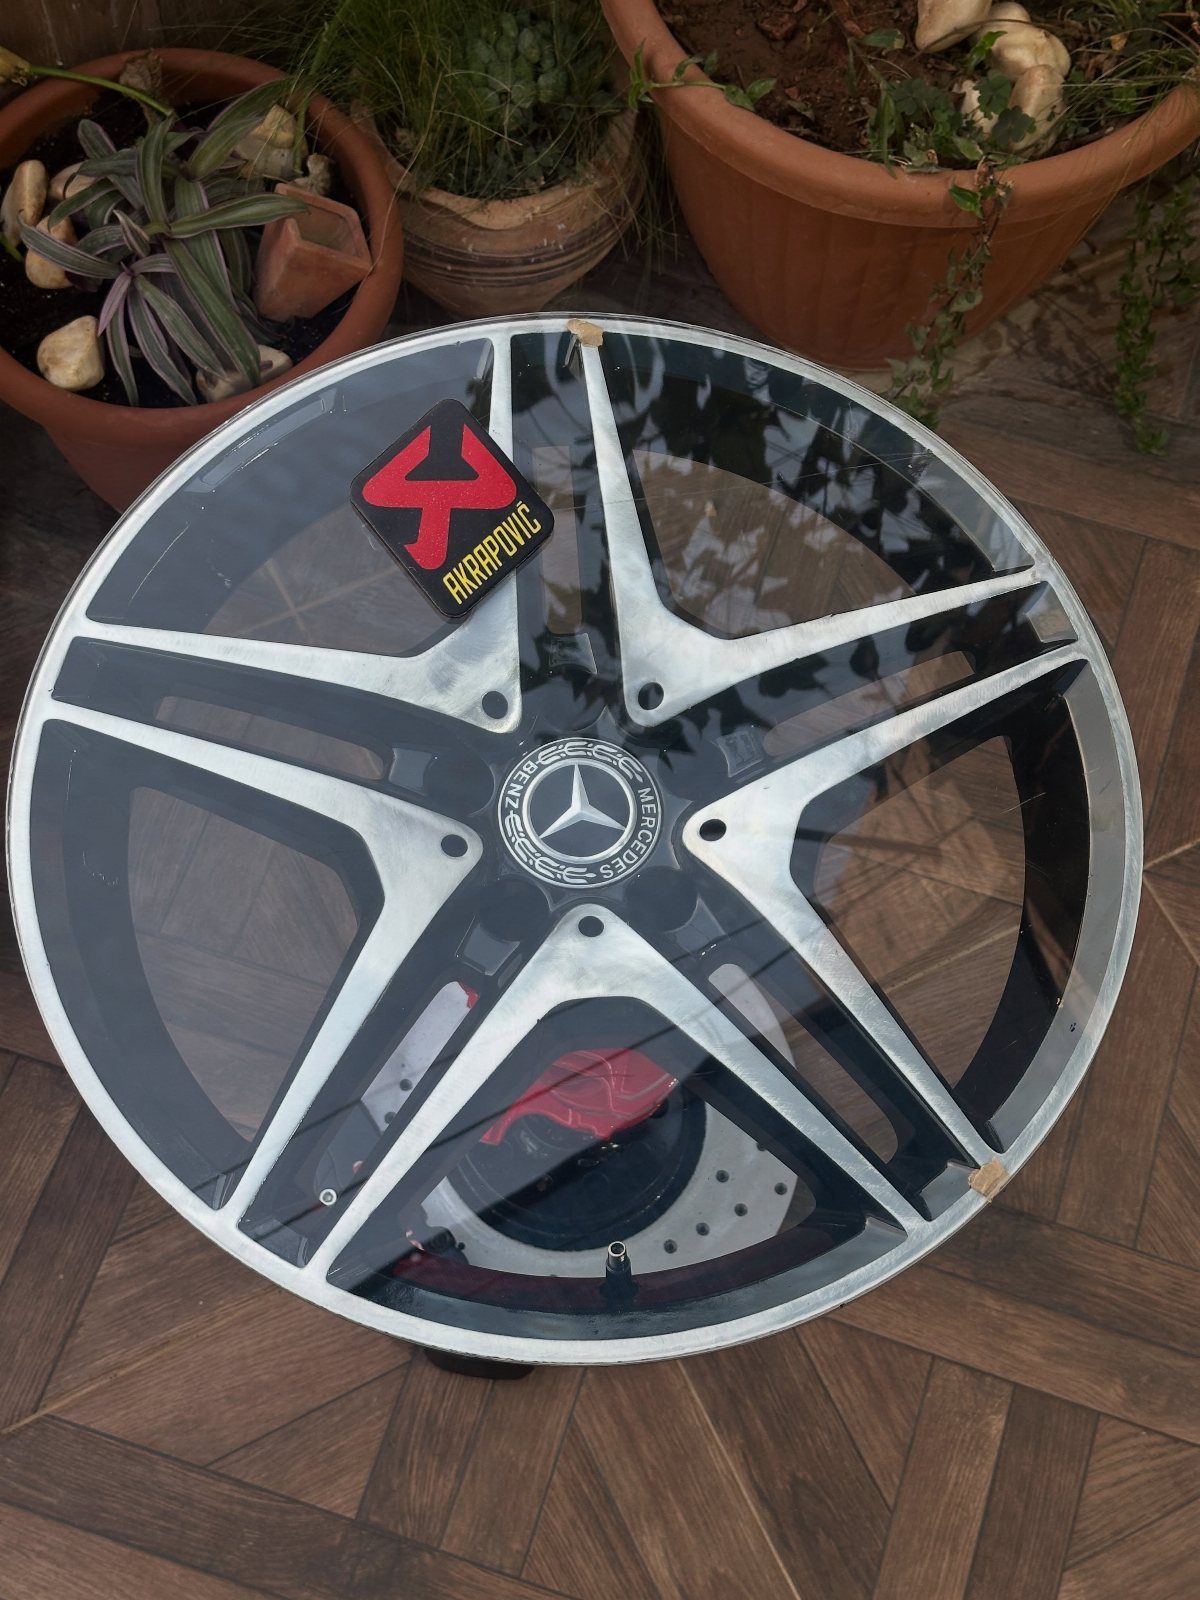
A car rim with a round glass top makes a coffee table that is unusual and heavy enough to stay put. A five-spoke design leaves the wheel’s shape visible through the glass.
Clean and degrease the rim well before you set anything on it. Order the glass to fit the rim’s diameter, and add small rubber pads between the metal and the glass so it doesn’t slide or scratch.
On a deck, it suits an outdoor spot.
Basic DIY Skills Needed
For a first makeover, pick sanding and repainting, a wax finish, a color wash, or a simple mosaic tabletop; each one needs only basic materials and a few tools.
They need basic materials and few tools, and most of what you need is probably in the house already.
Sanding is the skill that pays off on every project, so practice it on a scrap board or the back of a drawer before you touch the visible surfaces. Wear a dust mask and sand with the grain.
If a technique is new to you, search for a video tutorial first. Watching someone else sand, wax or lay tile before you try it saves more frustration than any amount of guessing at the bench.
Start with the technique that matches the tools you own. Build up to the fussier ones after a first piece is done.
Cost-Effective Solutions
New furniture is expensive, and a refresh often costs only a coat of paint, a can of wood varnish, new hardware or a roll of peel-and-stick wallpaper. That is a small spend next to a replacement piece.
Before you buy anything, take stock of what you already own. Leftover paint, brushes, sandpaper and a screwdriver cover a surprising number of makeovers.
Spend on the step that shows most. A good brush or a proper varnish will do more for a piece than a pile of extras.
If a project does call for supplies you lack, price them out against a new piece first. When the numbers get close, the makeover has lost its advantage.
Monique Valeris, home design director at Good Housekeeping, recommends refinishing old wood furniture to give it new life. “With a little elbow grease and the right stain color, you can turn a drab piece of furniture into a stunner,” she says.
Sustainability in Furniture Upcycling
Furniture is a real waste problem.
Every solid piece you refinish instead of discarding keeps a little of that out of the pile. Wood is the best candidate, since it sands, patches and repaints well.
Keep the footprint low in the rest of the process too. Use up the paint you already have, and dispose of rags and leftover finish according to your local rules rather than tossing them in the trash.
Frequently Asked Questions
What are some ideas for updating old furniture?
Paint is the biggest change for the least money, and new knobs or pulls are the smallest change that still gets noticed. Chalk paint with a matte finish is forgiving because scuffs and brush marks vanish into the flat surface.
Peel-and-stick wallpaper on drawer fronts adds pattern with no paint or glue. Whatever finish you pick, a scuff sanding with 120–150 grit and a coat of bonding primer underneath will do more for the result than the paint itself.
What is it called when you revamp old furniture?
It is commonly called upcycling or repurposing. Both terms mean taking a piece that has seen better days and making it feel custom and unique, whether that is a repaint, new hardware or a whole new use.






