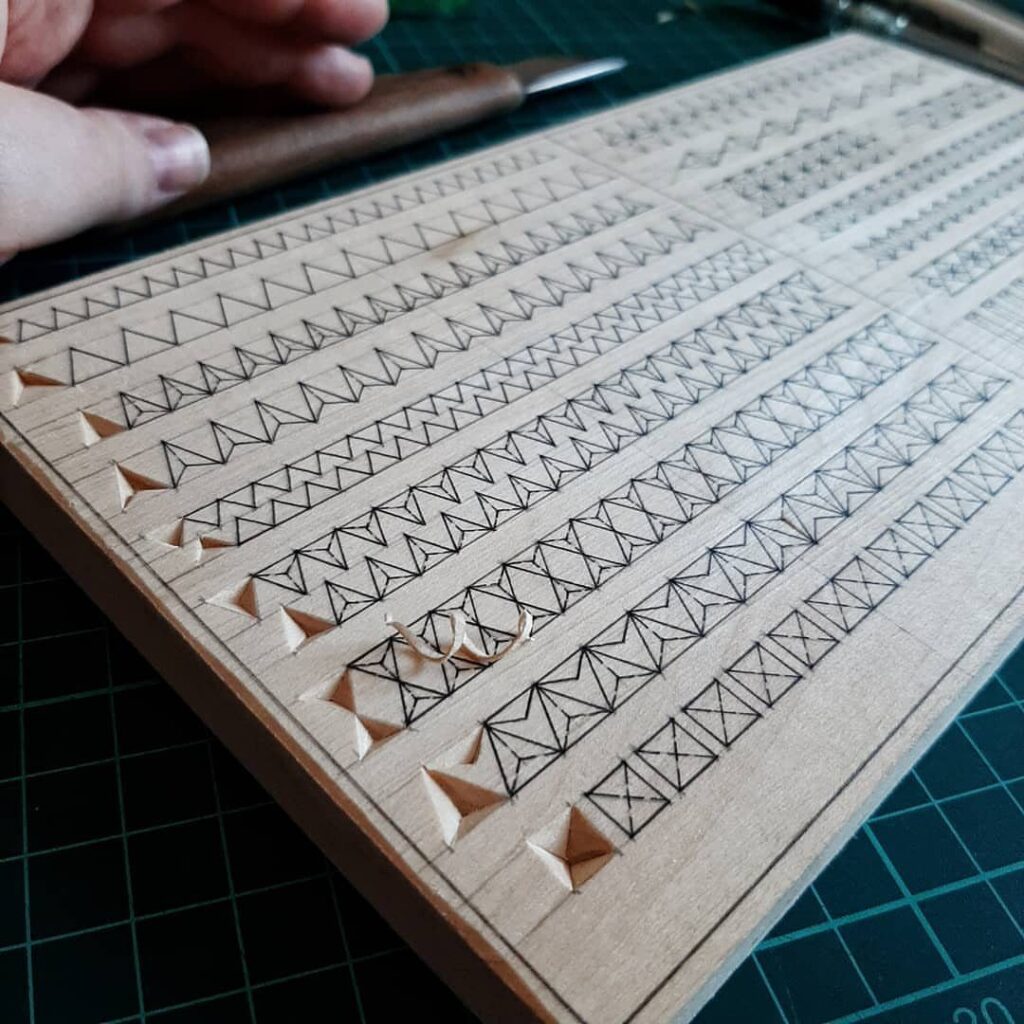
Which carving style fits depends on how much patience and how many tools you have today: a knife and a block of softwood is enough for whittling, while relief carving and chip carving ask for a flat board, a few more blades and a steadier plan for each cut.
The ideas run from tiny geometric chips and little evergreen trees to relief work on a flat board, and basswood, soft with fine, even grain, suits nearly all of them.
If you own one sharp knife and nothing else, start with whittling and one of the simple projects, since a small piece of softwood teaches you blade control faster than anything else.
1. Relief Carving
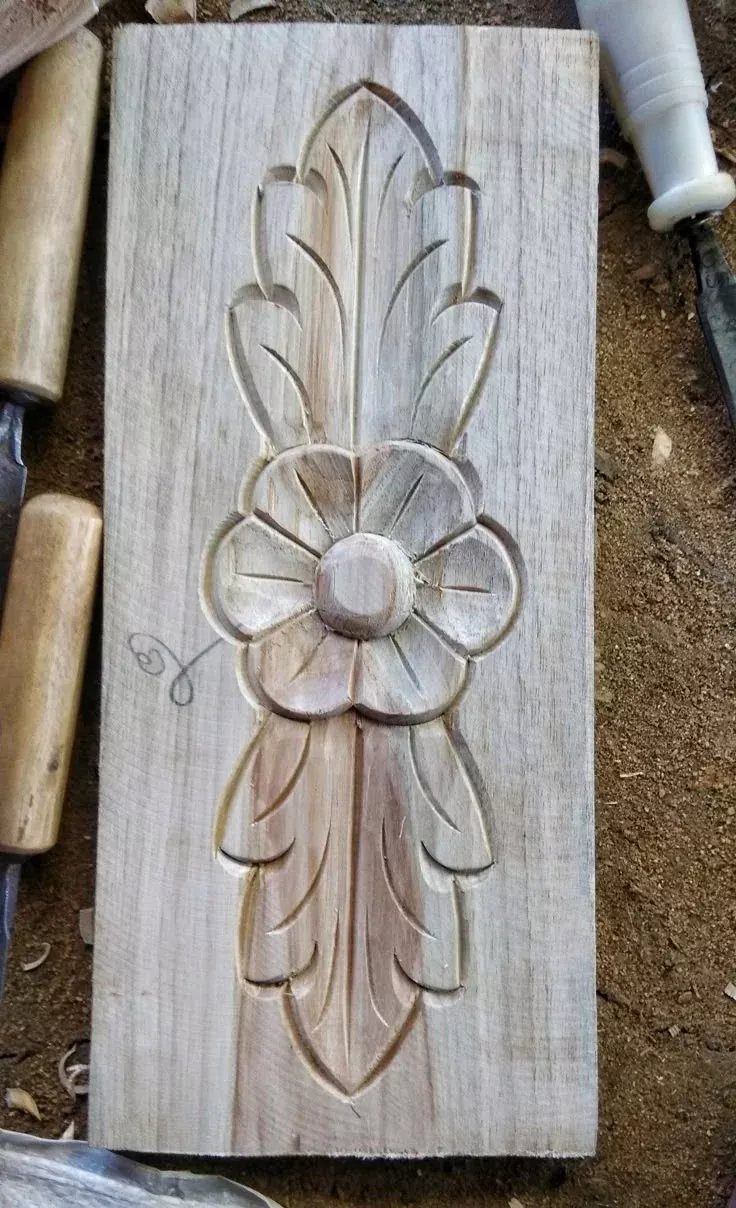
Relief carving leaves the design standing up from a flat board, so the wood itself becomes the canvas. Start with a flat piece of light-colored wood, since the cuts read clearly against a pale surface.
Pick a simple floral shape with open petals and sketch it on the board first.
Outline it, then lower the background around it so the flower rises. Work in small passes rather than one deep cut, and keep your free hand behind the blade.
2. Chip Carving
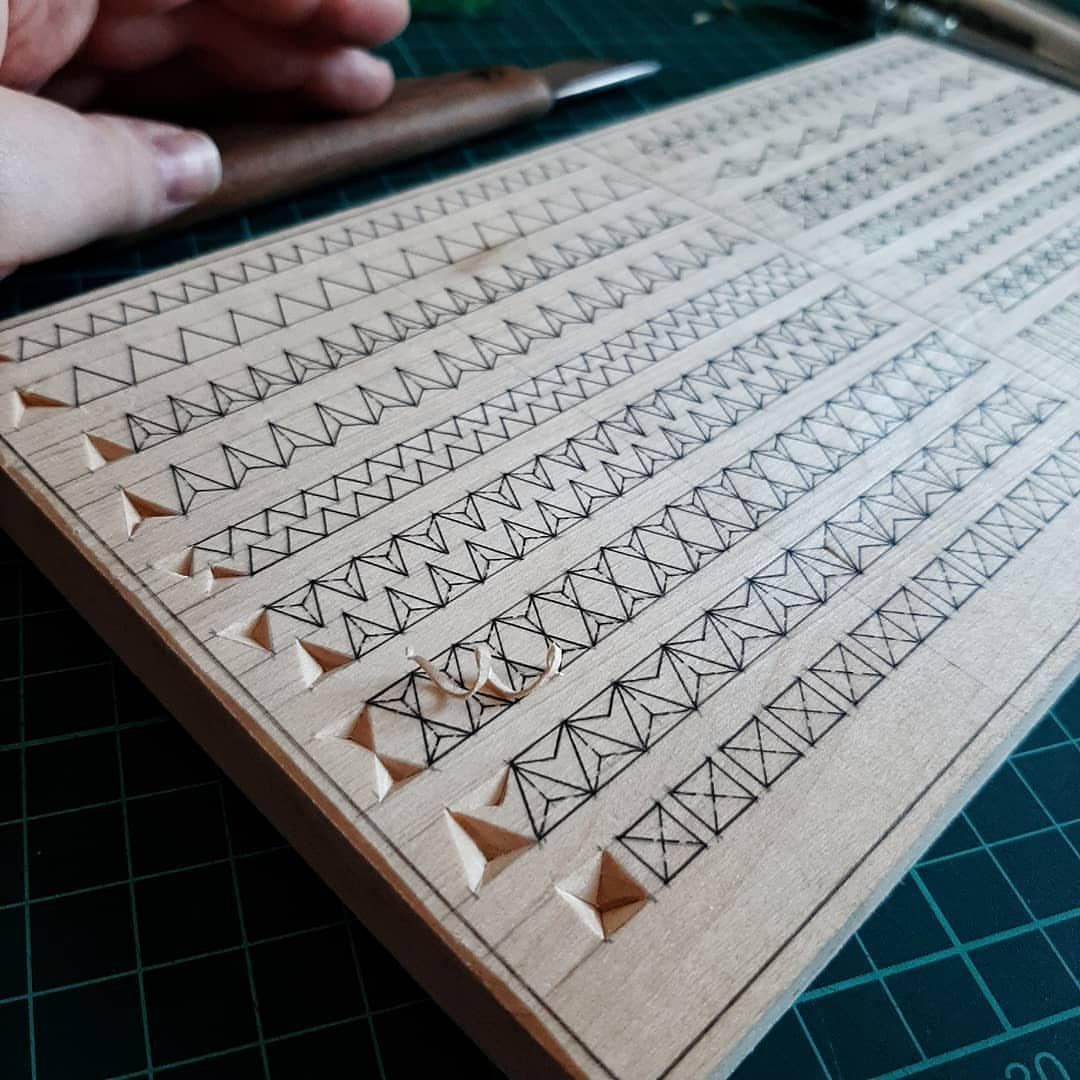
Chip carving is a pattern made of tiny removals: each small chip lifts out of the surface and leaves a clean geometric facet.
Triangles and squares are the easiest shapes to learn, and a board full of them is good practice.
Rule your pattern in pencil before you cut. Set the block on a cutting mat so it stays put, and keep the cutting hand moving away from the one holding the wood.
Go slowly. Clean, matching chips matter more than speed.
3. Simple Projects
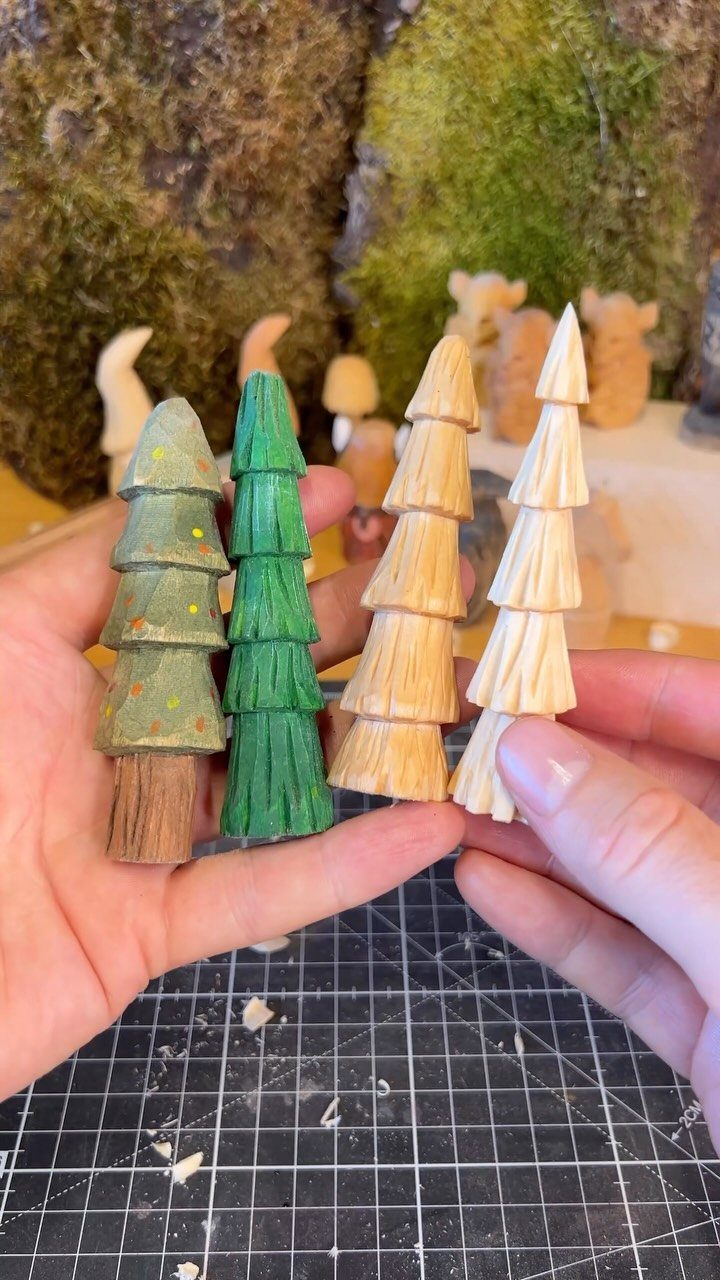
A small, forgiving shape beats an ambitious one for a first carving. Little evergreen trees are a good example: a tapered cone, a few angled cuts, and you have a finished piece.
Make several in one sitting. Each one teaches you something, and the fifth will look better than the first.
Rough edges still read as charm on a tree, which keeps early mistakes from feeling like failures. Save intricate projects for later.
4. Whittling
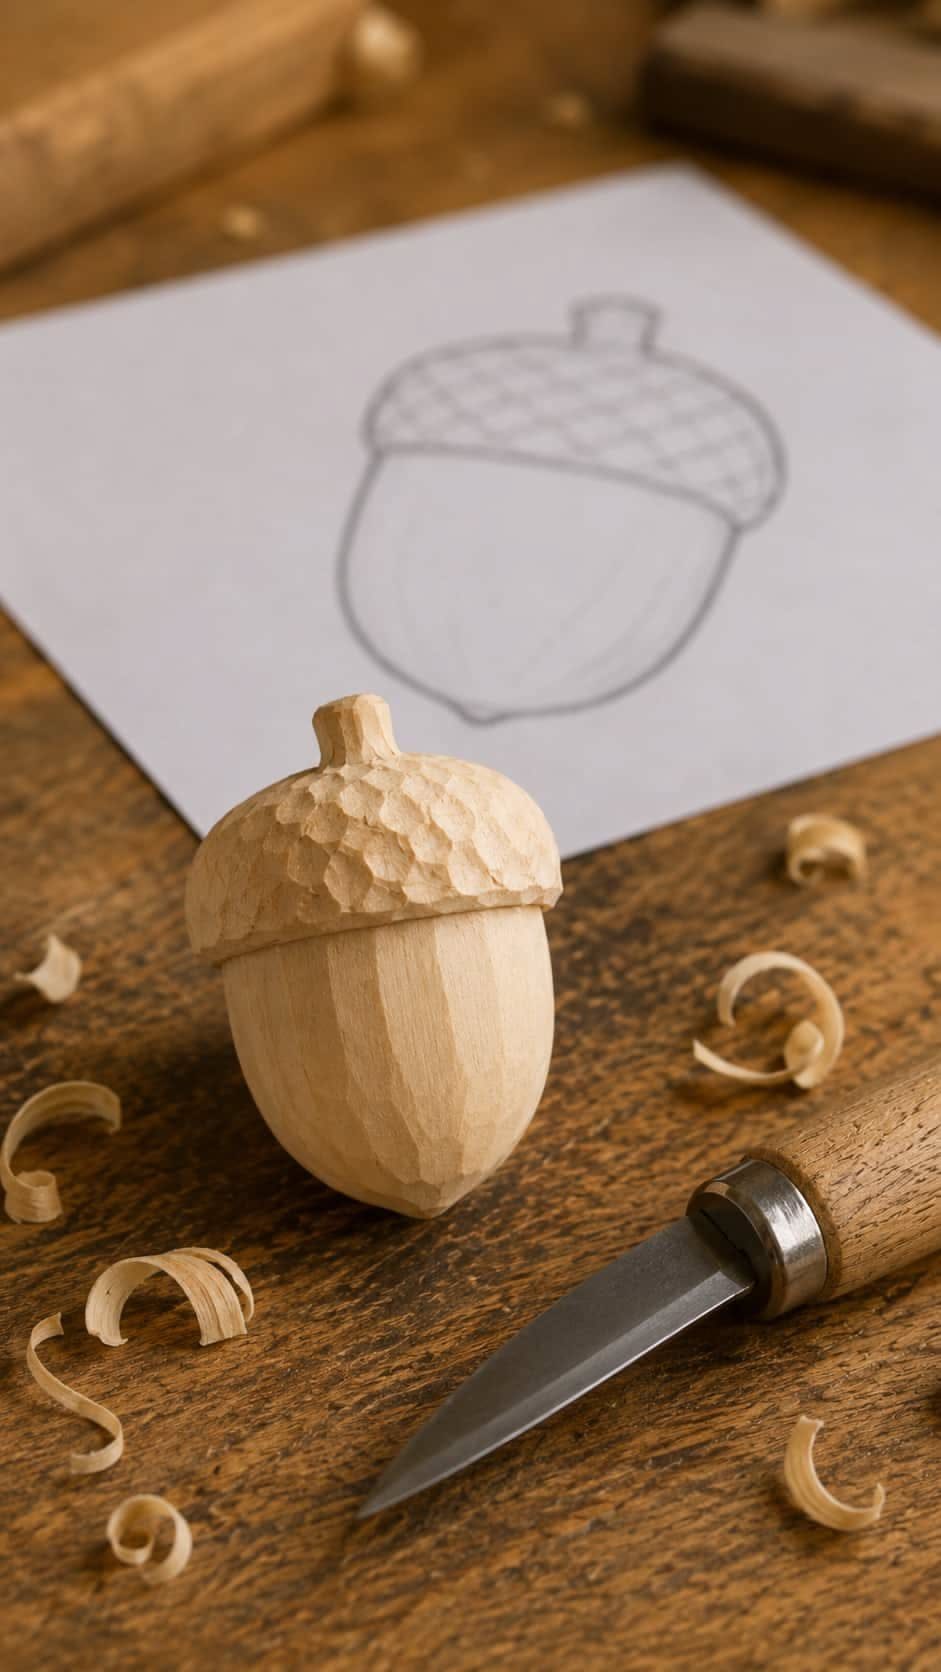
A sharp knife, a small block of softwood like basswood or pine, and a bucket or tarp for the shavings cover everything you need to start whittling.
Of all the carving styles, whittling asks the least of you, and that is why I’d start there before touching a gouge or a mallet.
An acorn makes a lovely first subject. Draw it on paper beside you, then shave the wood down toward that outline with short, controlled strokes.
Cut away from your body, and take off thin curls instead of forcing thick ones. A sharp knife is safer than a dull one, because it asks for less pressure.
Choosing the Right Wood
For a first project, basswood gets my vote every time. It is soft, the grain is fine and even, and it holds detail well once you get to smaller cuts.
A craft store is a fine place to buy your first pieces.
Once carving sticks, look for kiln-dried basswood from a dedicated supplier. Ordering online adds shipping, but a bulk order of basswood usually still comes out cheaper than buying small craft-store blanks one at a time.
Check the board before you buy. Clean, consistent grain is what you want.
Dark streaks and spalting (those gray or black lines from early decay) cause headaches, because the wood cuts unevenly around them. Skip woods that are very hard too, since they tire your hand and punish a dull edge.
Carving Techniques
Carving in the round is the one style the list leaves out, and it asks the most of you.
The piece has no front or back, so you view it from every side. People, animals, and plants are the usual subjects.
Start by removing big chunks to find the basic form, and save the small cuts and fine detail for last.
Turn the piece often and check proportions from different angles as you go, because a mistake you cannot see from the front shows up from the side.
Leave extra wood where details will go. You can always remove it later, but you cannot put it back.
Depth control matters in relief work too. Think in layers, and set each level before you move to the next.
Common Mistakes
Read the grain before you cut.
Cut against it and the blade resists, and even when it goes in, the surface comes out rough. Look at how the grain runs, then plan the piece around it.
Dull tools cause the same frustration.
A dull edge forces you to push harder, which is when slips happen. Strop often.
Mistakes are rarely final.
Wood can be shaved again, so a bad eye can be carved off and redone, or painted on later. If a nose snaps off, glue it back on.
Resist the urge to toss a piece. You learn more from that than from a perfect first try.
Frequently Asked Questions
What is easy to carve?
Basswood is the easiest wood to start with. Its grain is tight and even, it cuts like firm cheese, and fine details still hold their edges when the cuts shrink.
For a first subject, whittling a small shape like an acorn or a tapered evergreen tree asks the least of you, and rough edges on a tree read as charm.
What is chip carving?
In chip carving, you knife small wedge-shaped pieces out of a flat board, and the angled walls left behind form a crisp geometric pattern. Start with simple triangles and squares, since they teach the knife angles faster than anything else.
Draw your layout with a pencil and ruler before the blade touches the wood, then take slow cuts and keep the knife hand traveling away from the hand that holds the piece.
What are the types of wood carving?
The main types are relief carving, chip carving, whittling, and carving in the round.
Whittling is shaving a small block with a knife, and carving in the round makes a piece you view from every side. I’d start with whittling, since it asks the least of you.






