Before you pick a build from this list, check the wall: where the studs land, how much weight the shelf has to carry, and whether the spot stays dry, since a bathroom wall calls for different choices than a bookshelf wall.
The builds run from decorative L brackets, the cheapest and easiest of the bunch, to hexagonal shelves that depend on precise miter angles, with hidden-bracket shelves in between that suit light loads.
1. Decorative L Brackets
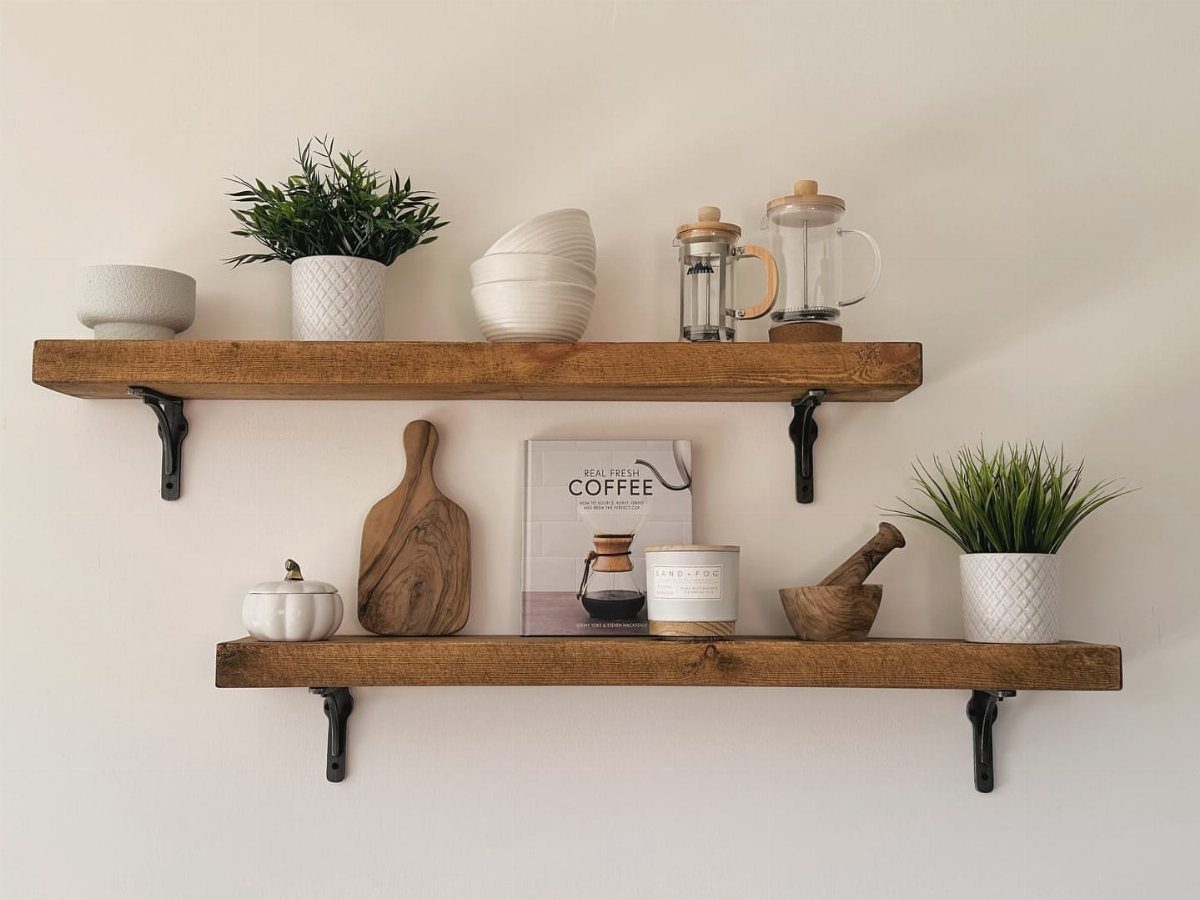
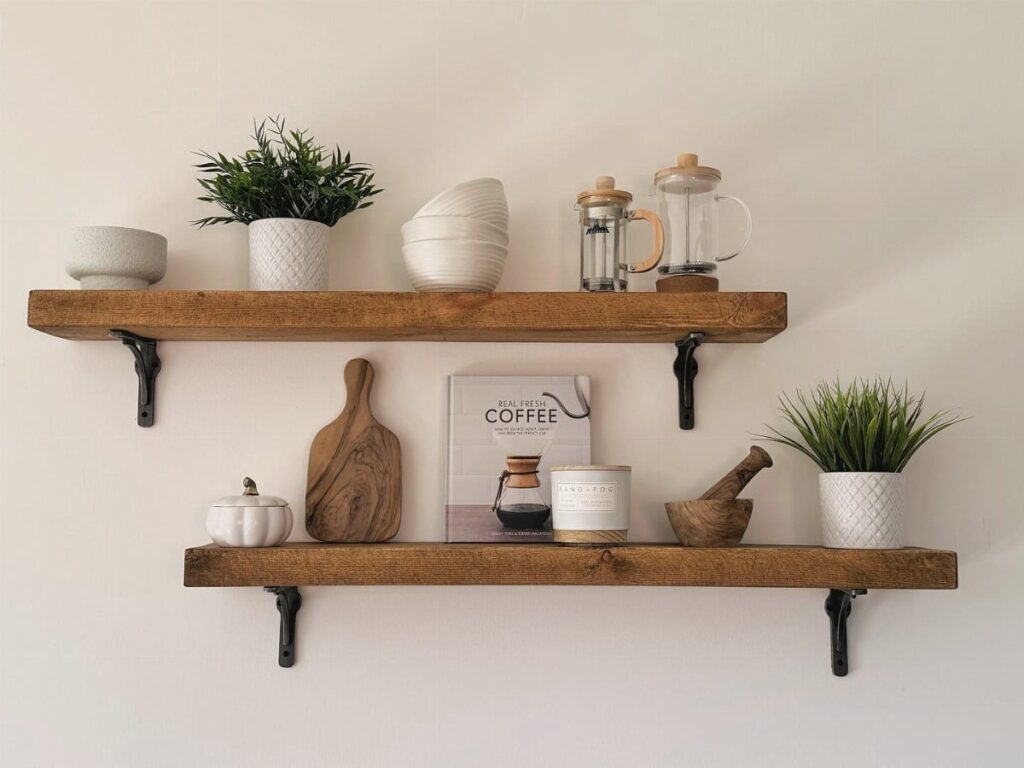
Black metal L brackets read as a design choice instead of hardware, and that is why I like them on a white wall. Against rustic wood they give the shelf a clear edge.
This is also the easiest build in the list.
Cut a board to length, sand it, stain it, and screw the brackets into the wall under each end. Drive screws into studs where you can, since kitchen shelves end up holding heavy things like cutting boards and glass jars.
Not truly floating, but it costs the least.
You can buy floating shelves in stores or online for $20 to $80 each. But before you do that, consider building your own.
2. Shelves with Hidden Bracket
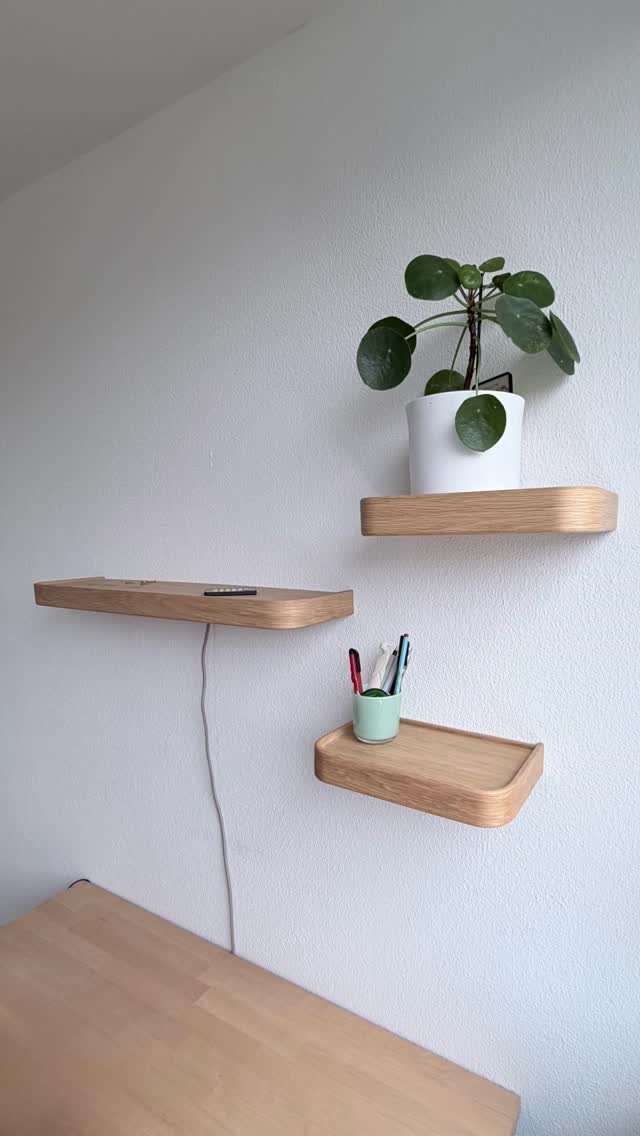
A hidden bracket leaves nothing but a clean slab of wood on the wall, which suits light woods like maple, birch, or pine.
The hardware slides inside the shelf, so the board has to be thick enough or hollow enough to hide it.
One maker built the outer frame from bent oak veneer, shaped into a smooth curve. That’s a harder build than a solid board, so I’d start with a plain slab if this is your first one.
Hidden brackets hold light loads best, so stick to pens, a small plant, or a gadget.
3. Scrap Wood Floating Shelf
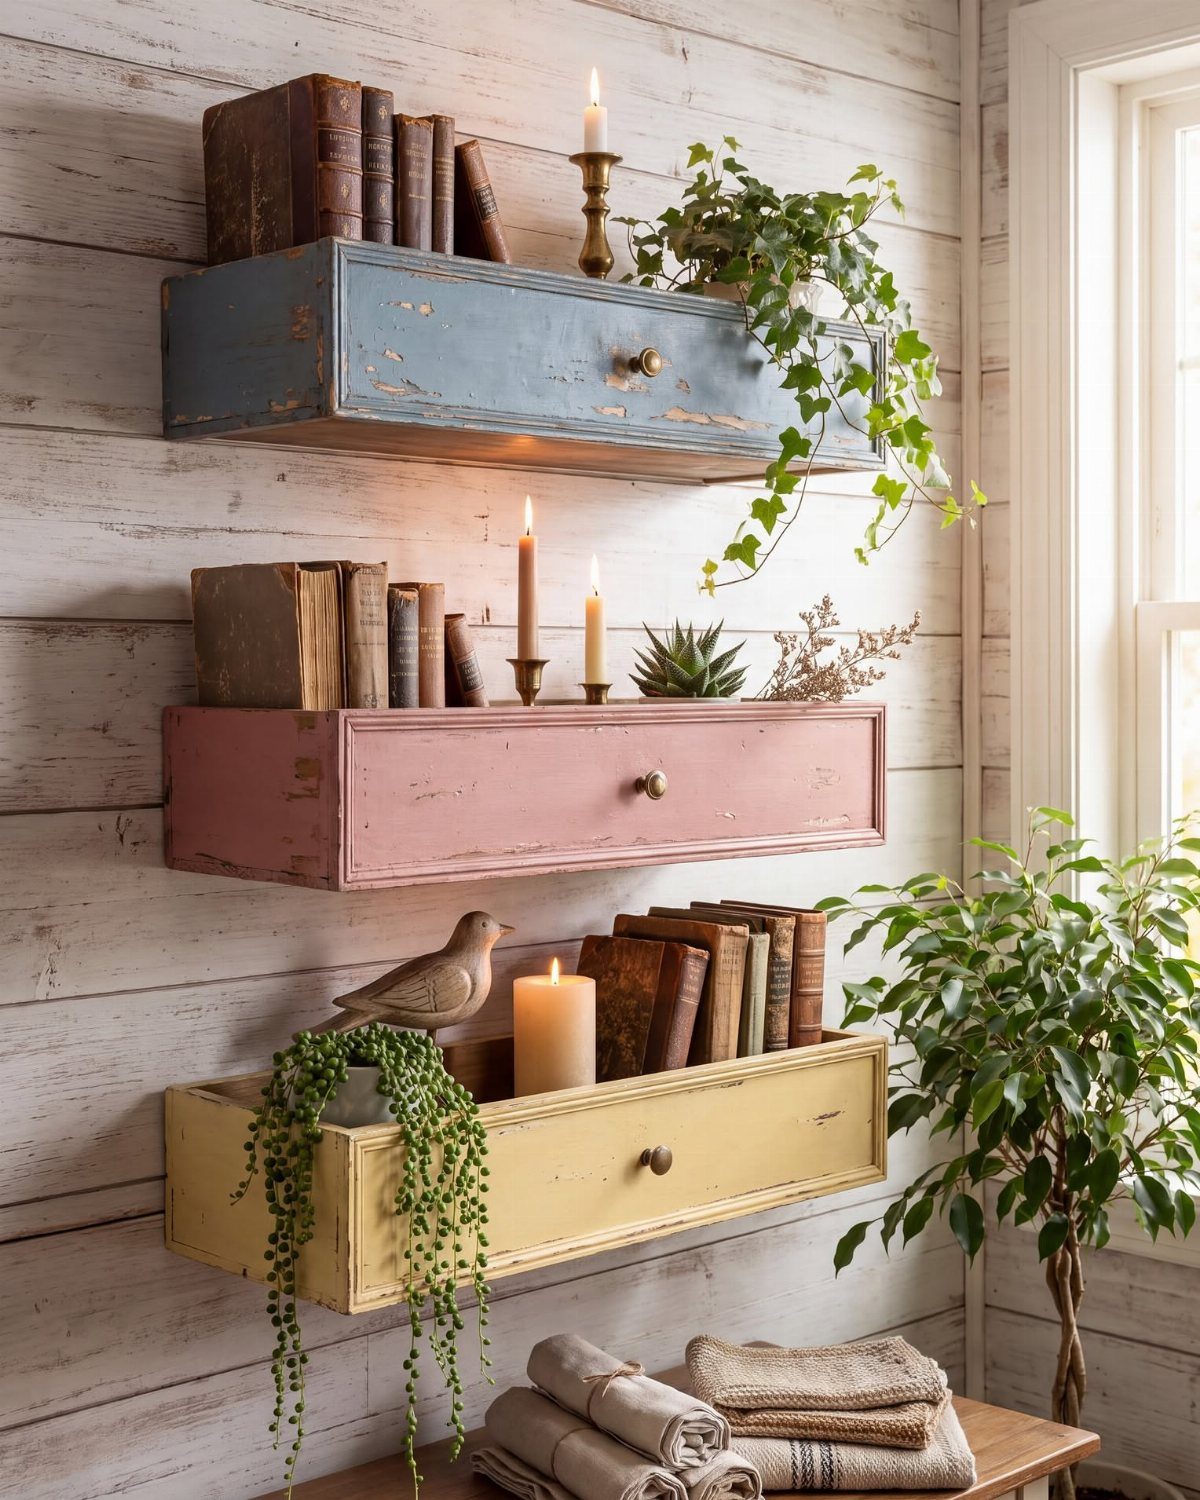
Leftover boards make a shelf that costs almost nothing, and painting hides any mismatch in the grain. Drawer-style boxes take the idea further, since each one is just scrap pieces framed into a small cabinet.
Pick a different color for each box and the set looks planned, not salvaged. Sand the edges first so the paint grips, and wipe the dust off before the first coat.
I’d mount them on paneled walls like this one, where the lines of the wall echo the lines of the boxes.
4. Asymmetrical Shelf Design
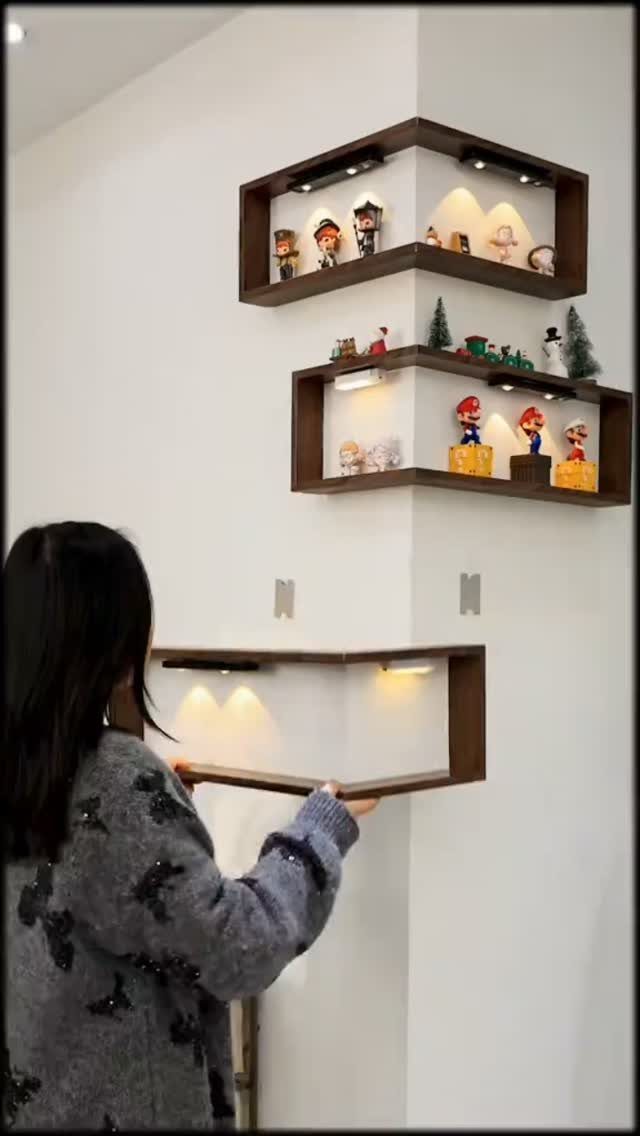
Three shelves, three different positions: that’s the whole trick to an asymmetrical layout. Corner L shapes like these wrap 2 walls at once, so the arrangement feels built into the room.
Before drilling, cut paper templates and tape them to the wall.
Shuffle them for a few minutes, step back, and move them again. I find this beats measuring, because uneven spacing only looks intentional when the gaps are chosen by eye.
Built-in lighting is a good add-on if you want the figurines to glow.
5. Thick Dark Wood Floating Shelves
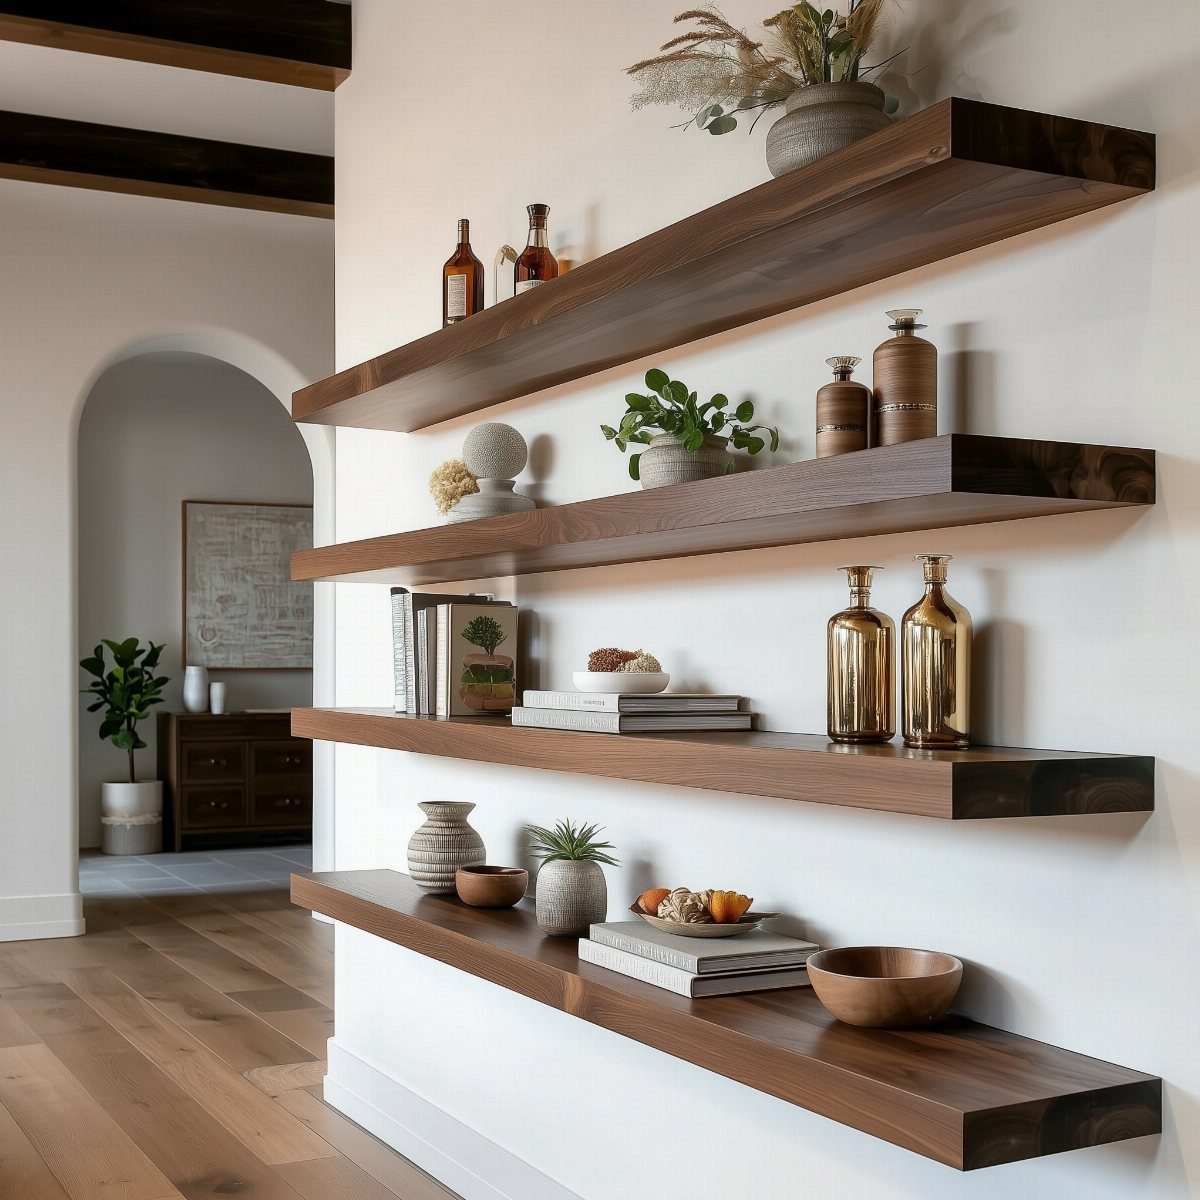
Thickness does the heavy lifting here. A chunky dark board looks like a solid beam coming out of the wall, and against white paint the contrast is hard to beat.
Dark stain also forgives imperfect lumber, because it hides color variation between boards. Apply it in thin coats and wipe off the excess so the grain stays visible.
Weight is the cost of a thick board: it needs solid mounting, so find studs before you plan the spacing. A stack of four, like this one, suits a tall wall best.
6. Front Guard Rail Bookshelves
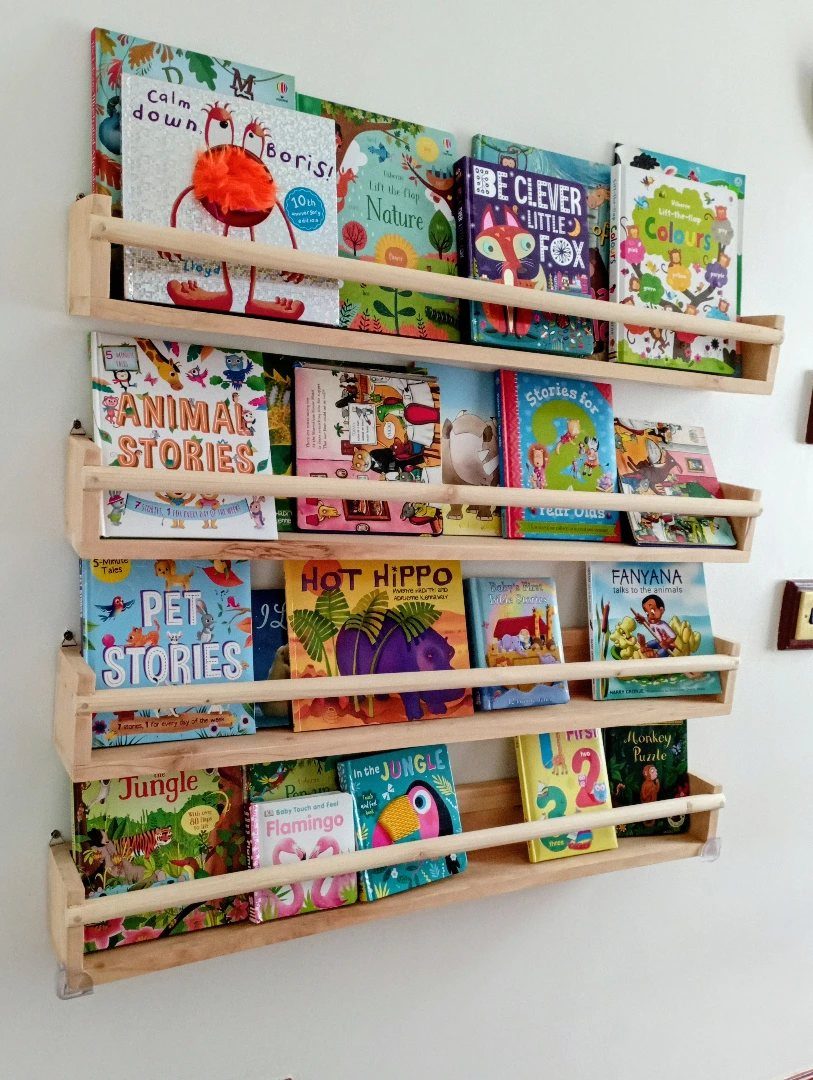
Kids’ picture books slump and slide off a plain board, and a thin front rail fixes that.
Glue and nail a narrow strip of wood along the front edge, leaving the rail low enough that little hands can still grab a cover.
Match the rail to the shelf wood, as in this light-toned set, and it looks like part of the design. Sand the joint smooth, since small fingers will run across it daily.
I’d hang the shelves low enough for a child to reach, and keep the heaviest books on the bottom one.
7. Floating Shelf with Built-in Drawers
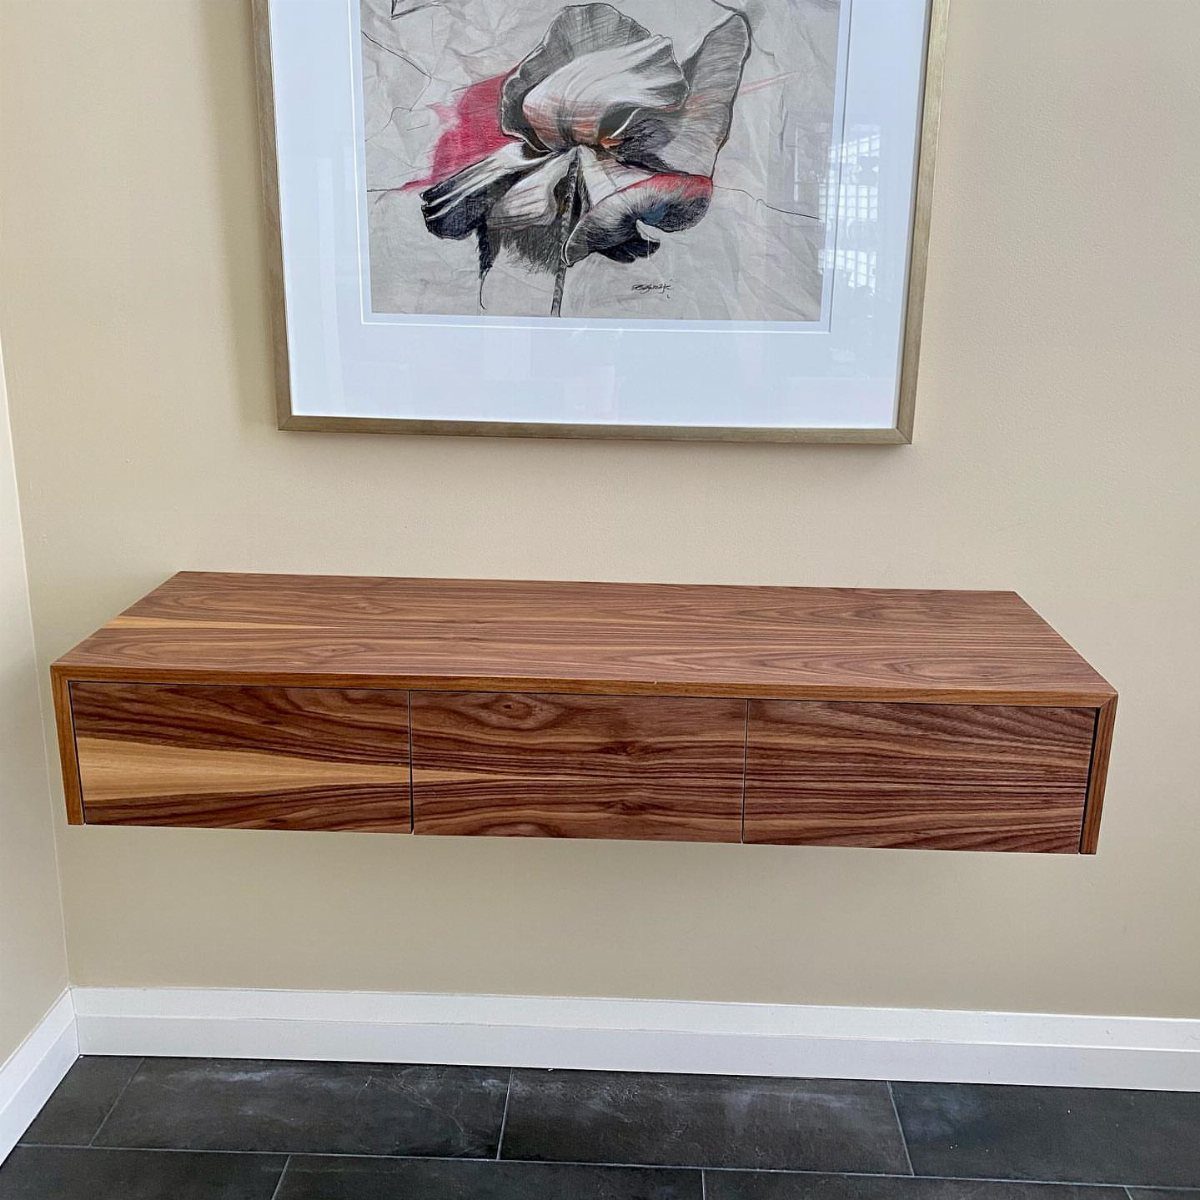
Drawers tucked under a floating walnut slab give a wall shelf a second job, holding the small things you would rather not see.
Three drawers across one board keep the front looking clean, and the dark grain stands out well against a beige wall.
A drawer box adds weight, so the shelf needs strong mounting into studs. I’d build one drawer first and test the fit before making the other two.
Hang it low enough that you can pull each drawer out fully.
8. Hexagonal Floating Shelves
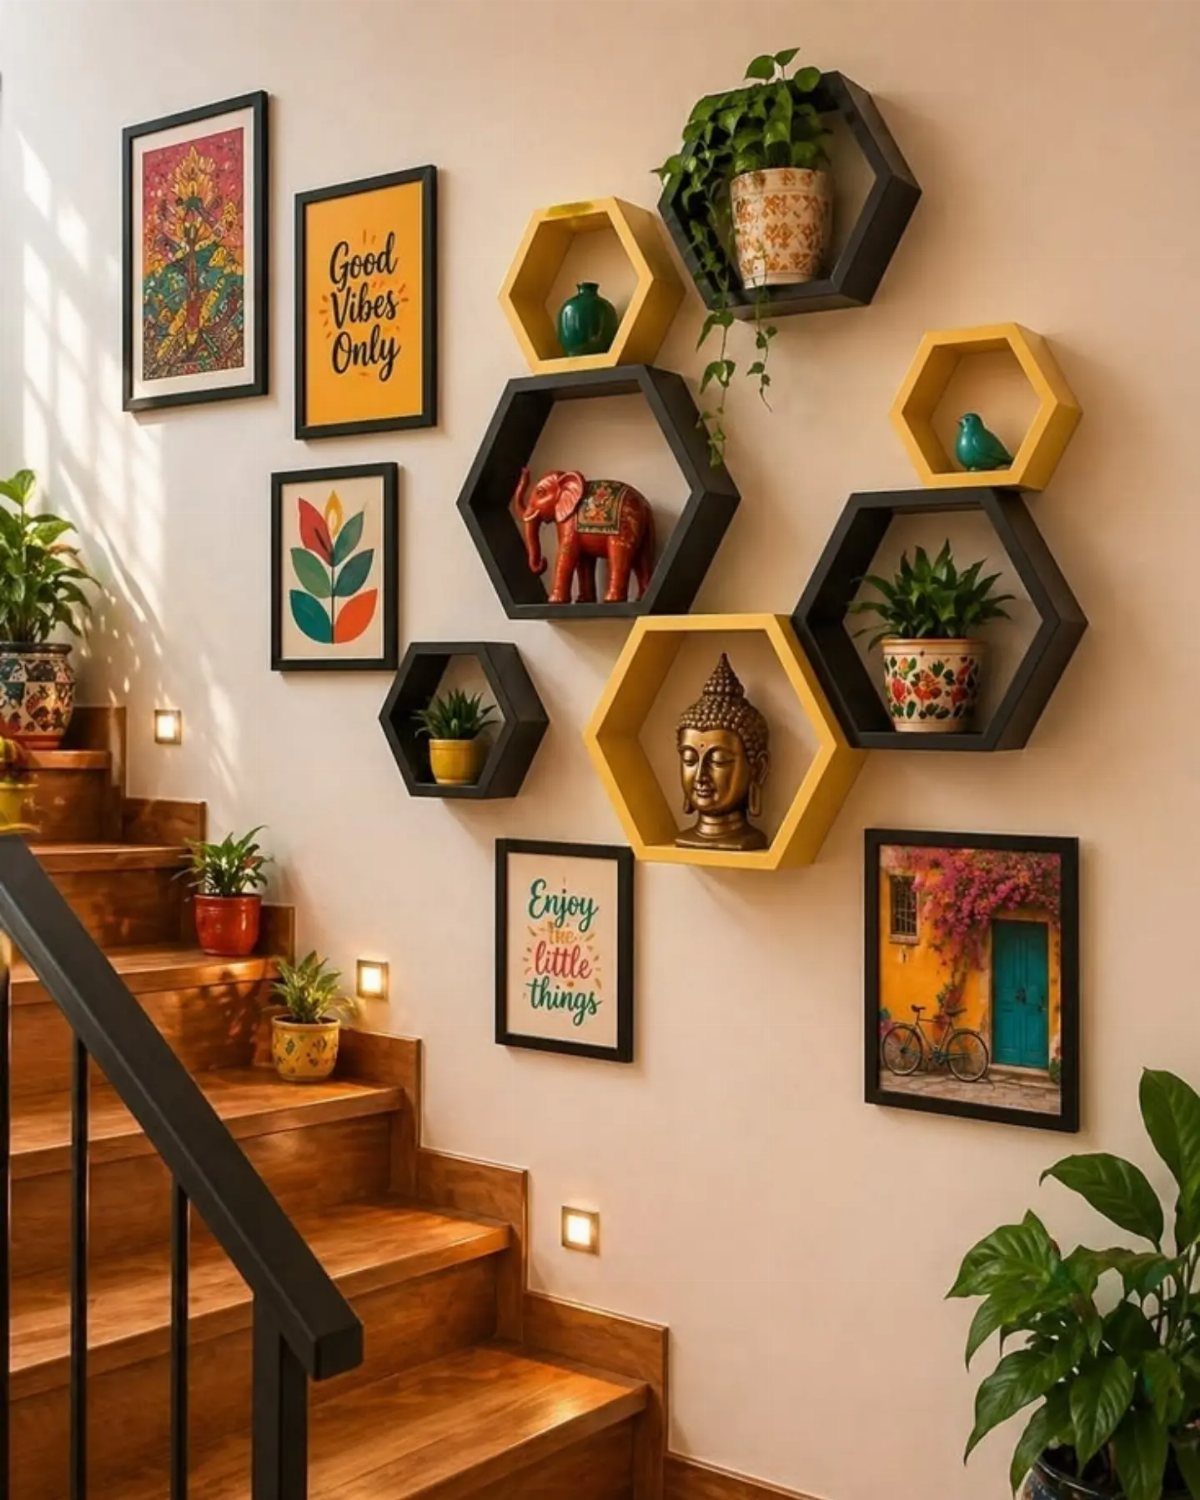
Six-sided boxes fit together like honeycomb, so a cluster of them reads as one piece of wall art instead of separate shelves. Each cell holds a small plant or figurine and nothing larger.
Hexagons depend on precise miter angles, so test your saw on scrap before cutting good boards. Dry-fit every side first, then glue them.
Honeycomb layouts look best when the gaps between cells stay even, and a stairwell wall gives you room to let the group grow.
9. Lighted Floating Corner Shelves
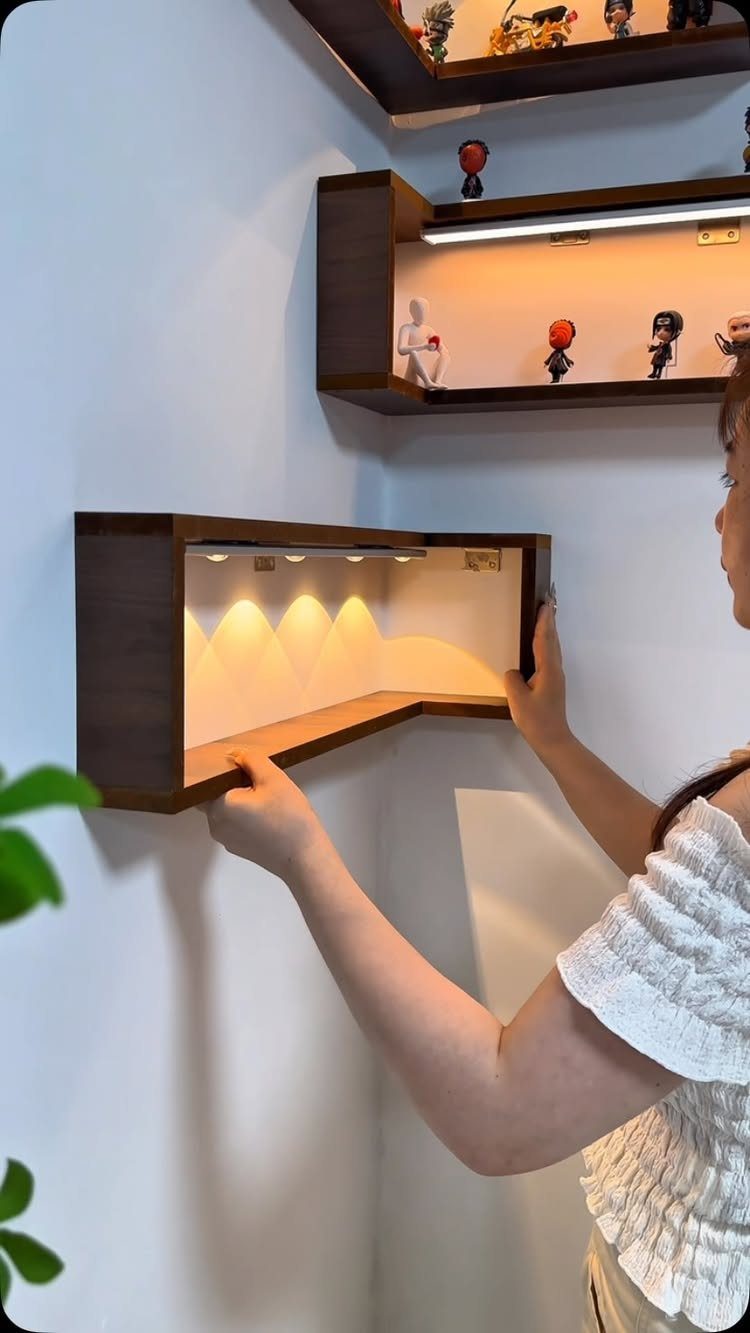
Light tucked under a dark corner shelf makes the figurines on it glow against a blue wall. Run the LED strip along the underside, where the board hides it and the glow washes down the paint.
Route the cord before you hang anything, since a wire trailing across a finished wall spoils the effect. Battery strips avoid the problem, though plug-in ones stay brighter, in my experience with small shelves.
Corner shelves also stack well, so a few in a column make a display.
10. Light Wood Floating Shelves
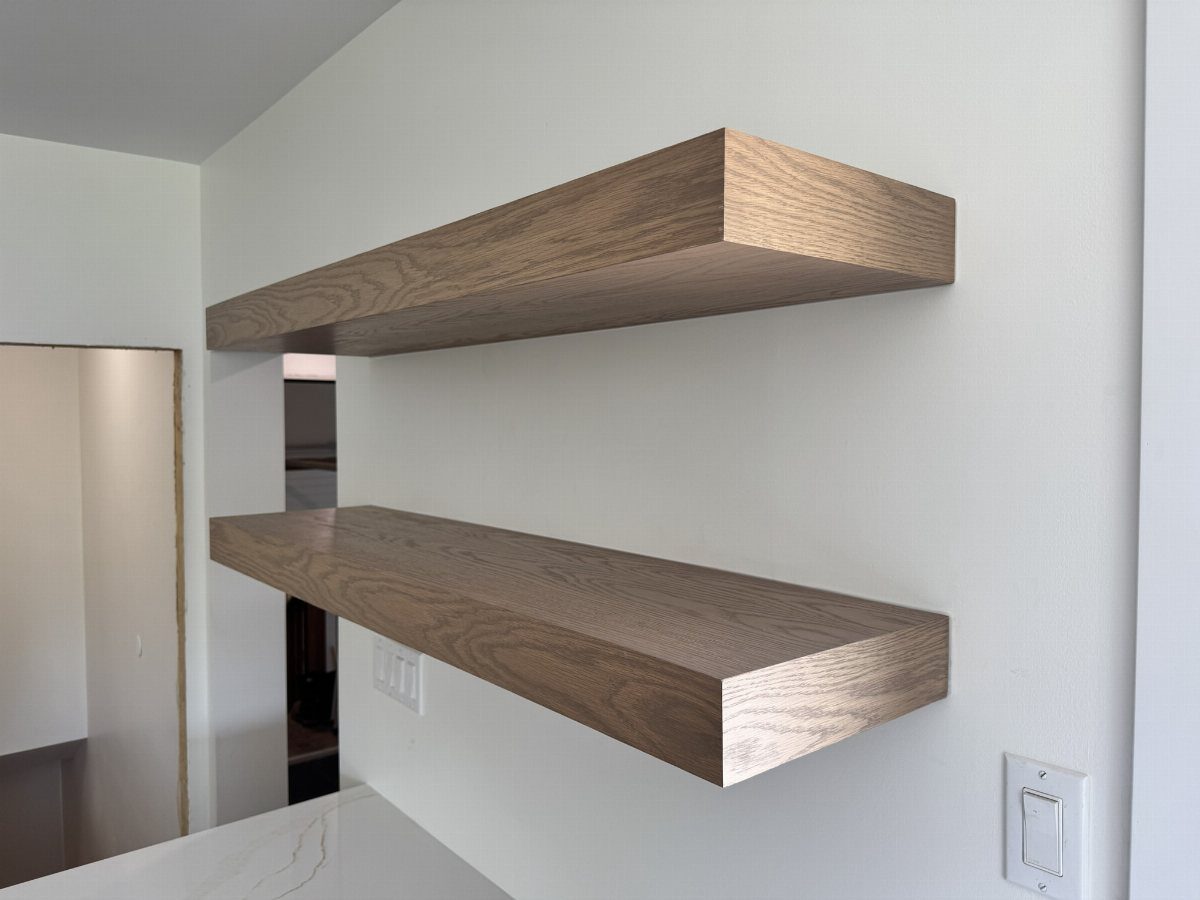
2 thick boards in natural light wood, stacked on a white wall, look calm and uncluttered. A pale finish keeps the grain visible, so choose boards whose figure you like the look of at the lumber rack.
Use a clear finish or a light stain, and sand until the surface feels smooth under your palm. Thickness is what makes the shelf look expensive, so a chunky board beats a thin one.
Keep the spacing even, and put them where a countertop gives you something to style above.
11. Black Floating Bathroom Shelves
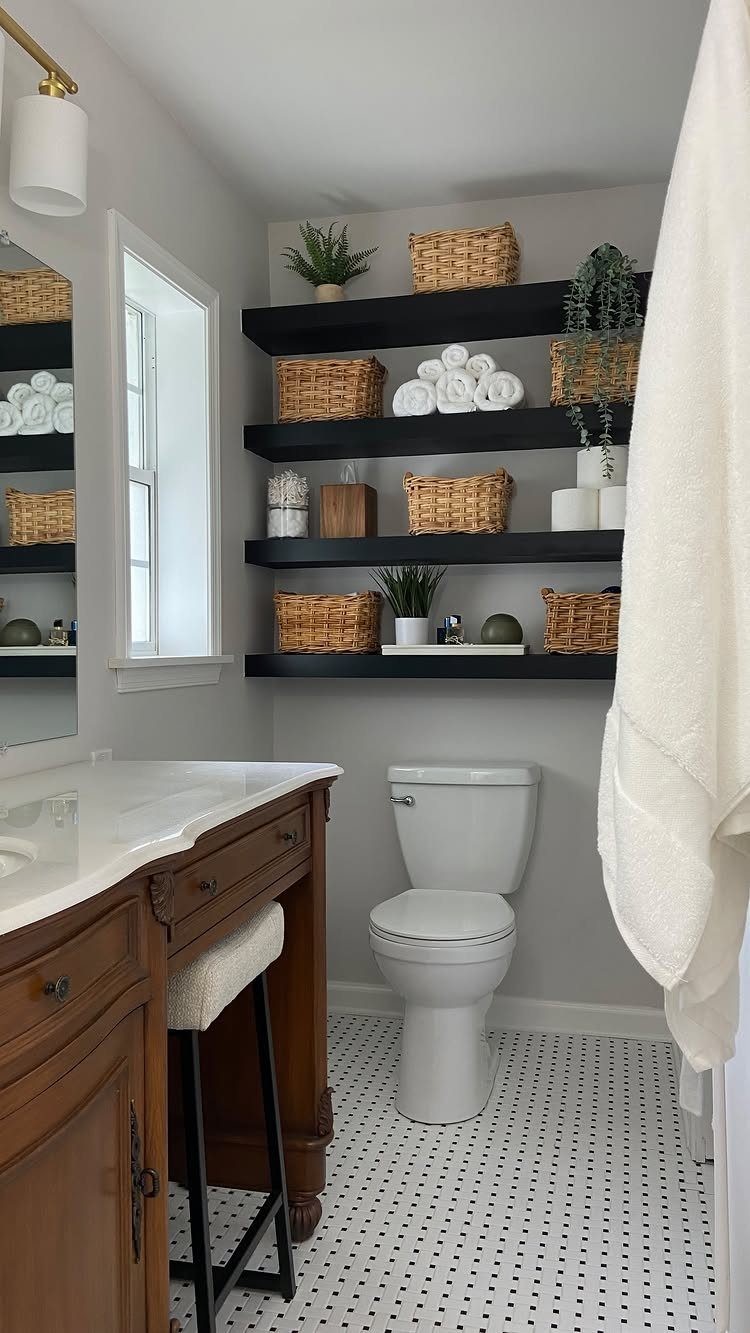
Above a toilet is wasted wall in most bathrooms, and two black floating shelves turn it into storage. Black wood against a grey wall looks sharp, and it hides the water spots that pale shelves show.
Seal every surface, including the underside and ends, with a water-resistant finish, because bathroom humidity gets into raw wood. Baskets hold the small items and rolled towels fill the rest.
I’d keep the lower shelf high enough to clear the tank lid.
Tools and Materials Needed
A miter saw, a drill, and a Kreg jig cover most of these builds, and a nail gun with wood glue speeds up the box-style ones.
A circular saw works for rough cuts if you don’t own a miter saw. Add a level, a stud finder, and a few clamps to the pile.
Scrap ¾" plywood and 2x2s are the usual materials. For one small box, 8" x 24" pieces of plywood and about 75" of 2×2 total is a workable amount.
Keep 1¼" and 3" wood screws on hand: the short ones join the pieces, and the long ones reach into the wall.
If you plan to paint, a sprayer and a spray tent give a smoother coat than a brush, though a paintbrush still works.
A 90-degree drill attachment helps in tight spots inside a frame.
Finding Wall Studs
Mark every stud before you pick a shelf position. Run an electronic stud finder along the wall and put a strip of painter’s tape at each hit, then transfer those marks to your board or cleat.
Where a stud lines up, use it.
Studs hold far more weight than drywall, and the screws need to be long enough to reach them. Anchors are the fallback, only when no stud lands where the shelf has to go.
If you do use anchors, drill their holes first, then attach the brackets. Brackets with slotted holes give you a little side-to-side wiggle room, which makes lining up two of them much easier.
For a cleat, predrill the holes slightly smaller than the screw shanks, then hold it on the wall and use it as a drilling guide for the pilot holes.
Drive one lag screw at one end and check level. Set the screw at the far end of the shelf next, and only then go back to fill in the ones between.
Sanding Techniques
Hand sanding with fine-grit paper and power sanding with an orbital sander both leave a surface smooth enough that the stain goes on evenly.
Sanding between coats does give a smoother result, but go gently so you don’t rub off the color you just built up. Either 180 or 220 grit will do the job, though 220 leaves a softer, smoother surface.
If you’re building a framed shelf, start coarser.
Use 100 grit on a random orbit sander to bring the rails and panels flush with each other. Any step left at an edge will show through a veneer, and the veneer won’t stick well there.
Frequently Asked Questions
What kind of wood can I use to make floating shelves?
Scrap solid wood and plywood both work, and ¾" plywood with 2x2s is the usual combination for box-style shelves.
Maple, birch, and pine are my picks for a slab shelf with a hidden bracket, since all three are light, easy to cut, and take stain evenly.
For a chunky shelf, start with a thick board, because the bracket or dowels need room to disappear inside the body of the shelf. Sand every edge smooth before finishing.
What are the downsides of floating shelves?
Weight capacity is the main one.
Anchors hold less than studs, so a shelf that isn’t hung into studs can be less stable. Decorative L brackets cost the least but aren’t truly floating.
Can you put floating shelves in a bathroom?
Yes, as long as you seal the wood well.
A black stain has another perk: it camouflages the water spots that show up on light shelves. Hang the lower shelf high enough to clear the toilet tank lid.
How do you hang a floating shelf so it holds weight?
Screw it into wall studs wherever one lines up. Find them with an electronic stud finder and mark each hit with painter’s tape before choosing the shelf position.
Drywall alone holds little, so use screws long enough to bite into the studs, which carry far more weight. Save wall anchors for the case where no stud falls within the shelf’s footprint.






