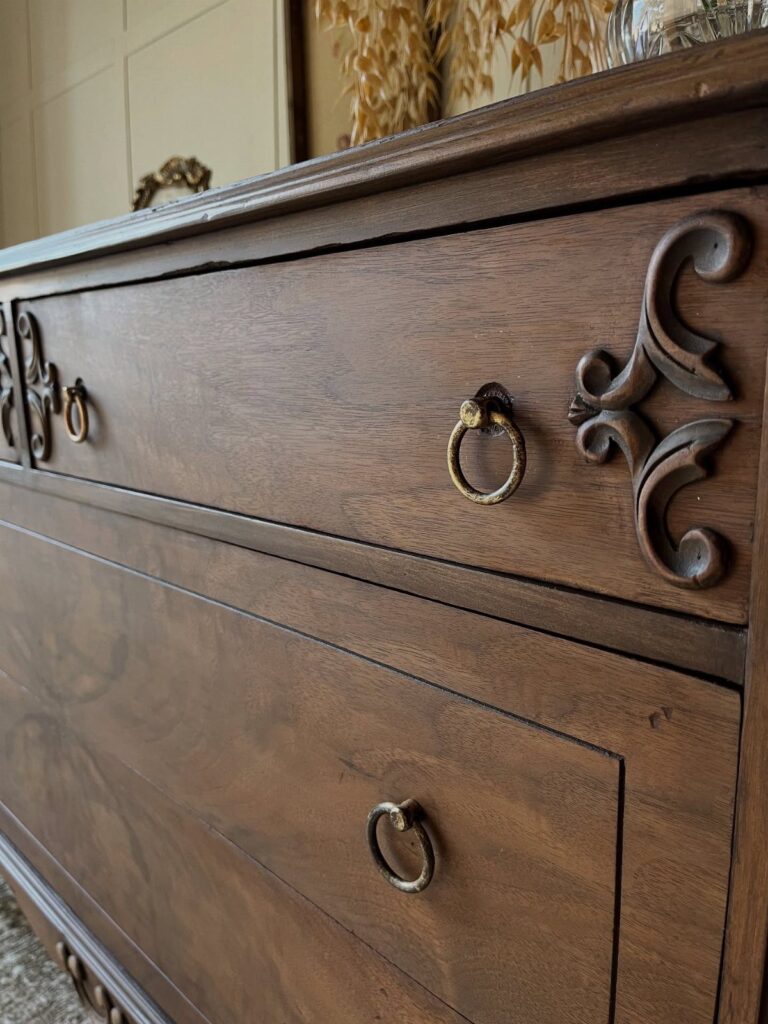
Wear can be as light as a sanding block run over a painted dresser, or as bold as scraping through chipped, peeling paint, and the piece in front of you decides how far to go.
A carved drawer front or a thick stained shelf needs the lightest touch, since heavy sanding flattens the detail, while flat panels and nightstand tops can take much more.
Crackled Paint Finish is the technique to try on a scrap board first, since the crackle pattern changes with how thick the coat goes on.
1. Sanding Edges and Corners
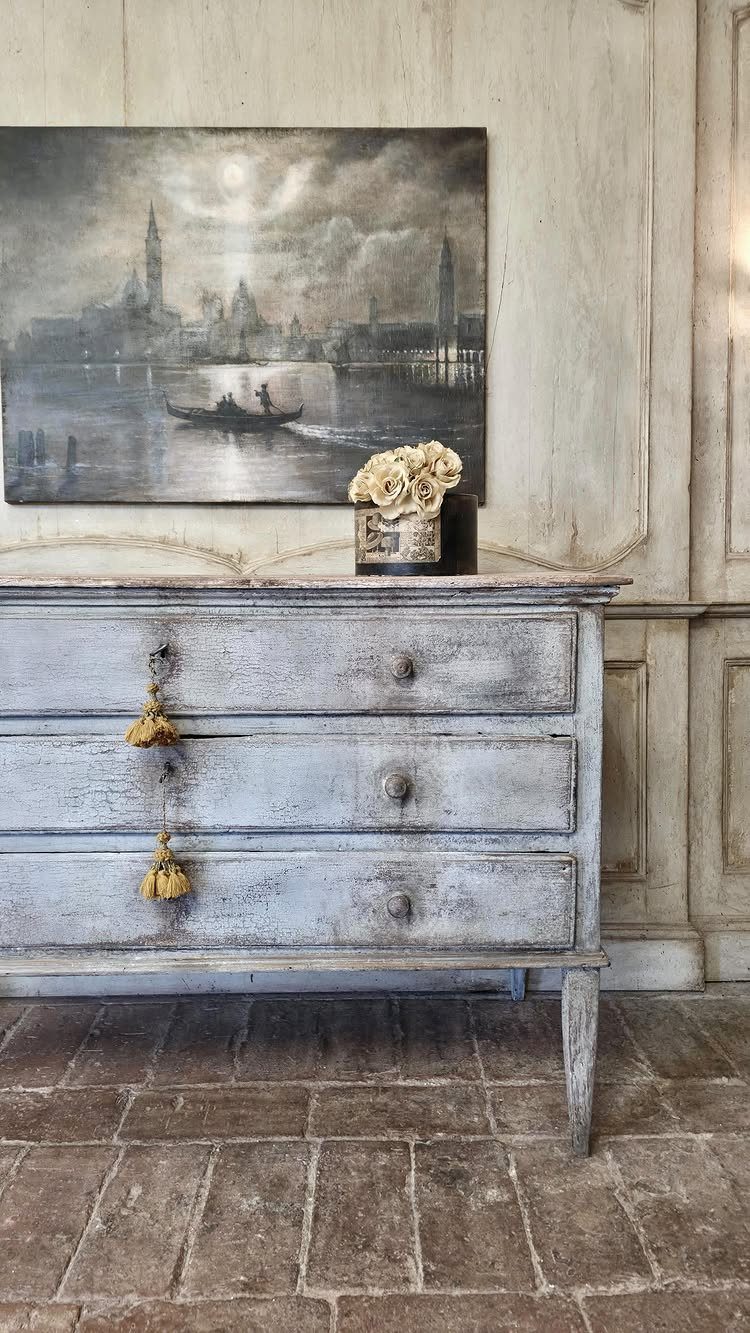
Sanding does the quiet work of distressing: paint comes off where hands and hips would have worn it, and the bare wood shows through. Edges, corners and the rims of drawer fronts are the places to hit.
A sanding block gives you more control than a loose sheet of paper. Press harder on the corners and ease off as you move toward the flat panels, so the wear fades out instead of stopping in a hard line.
On a painted piece like a light blue or grey dresser, I would sand less than feels right at first. You can always take off more, but you cannot put paint back without touching up the whole spot.
2. Chipped and Peeling Paint Finish
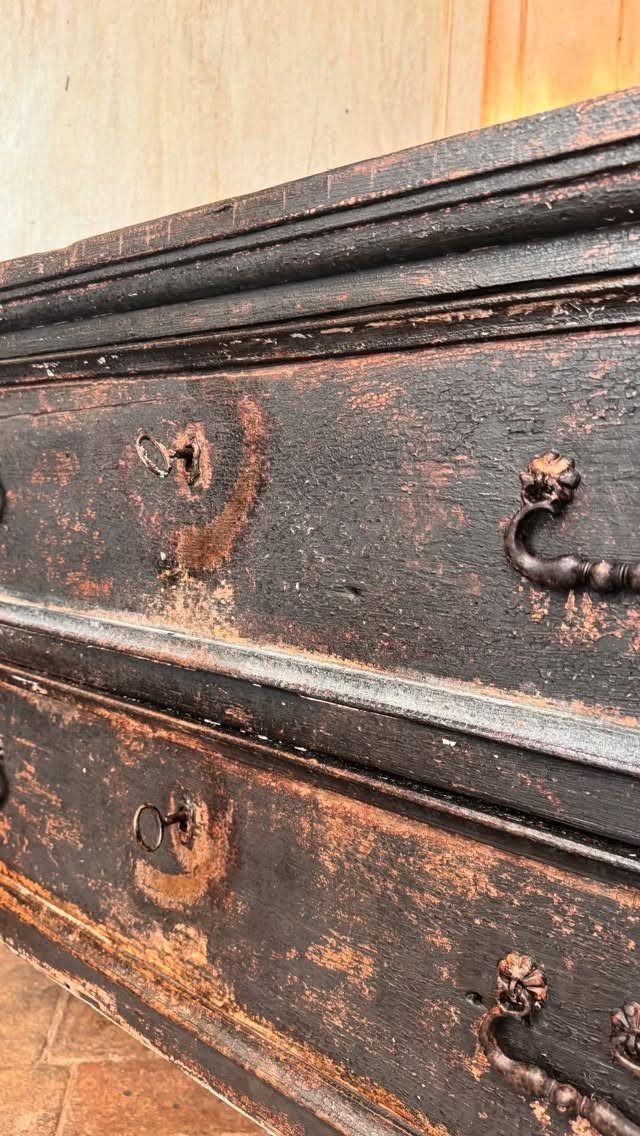
Peeling paint over dark wood is the loudest version of distressing, and the contrast is what sells it. Where the top coat lifts away, the dark wood underneath shows, so the piece reads as decades old.
Ornate metal hardware suits this finish well, because the detail holds its own against the rough surface. I would leave the pulls alone rather than polish them.
This look needs a bolder hand than light sanding.
Expect to scrape and scuff in patches, not an even pass, since uneven loss is what makes peeling believable. It is a forgiving style for a beginner, because mistakes read as character.
3. Weathered Grey Wood Finish
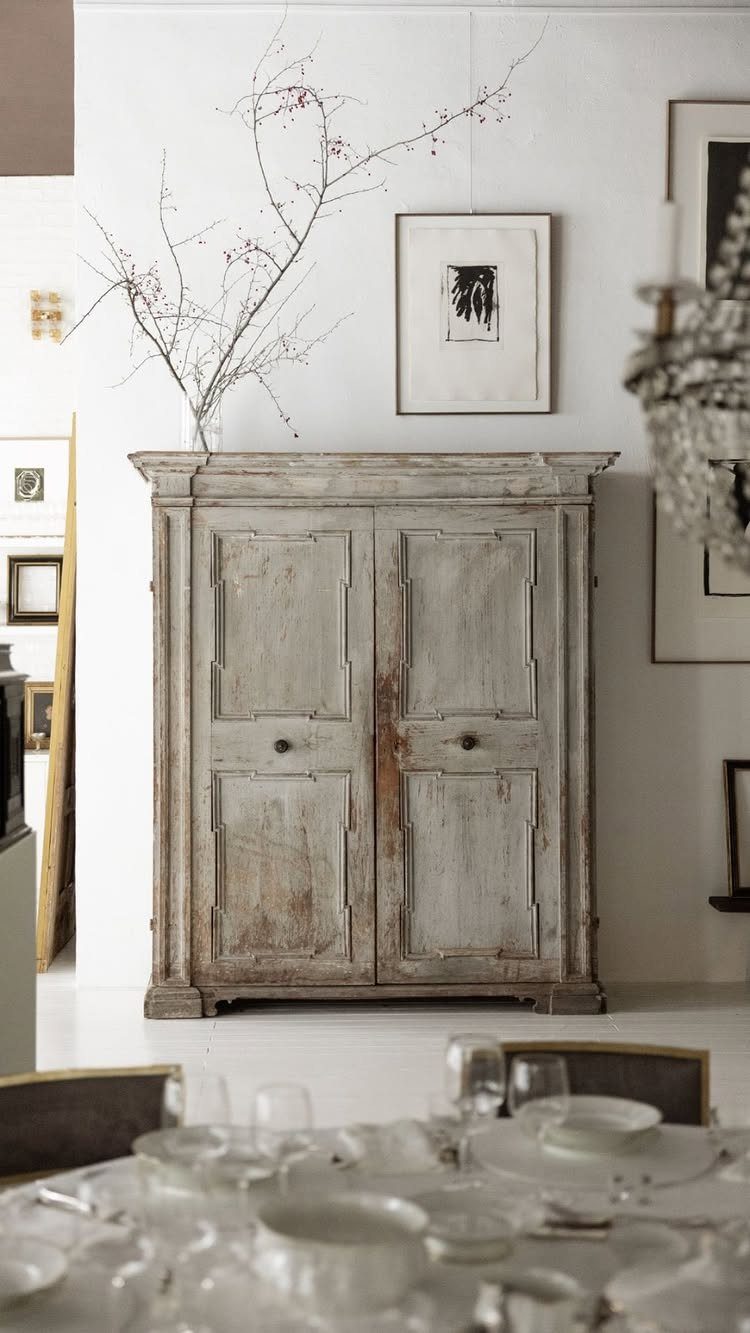
A light-grey weathered finish lets a big piece like an armoire sit quietly in a dining room instead of dominating it. Against a white wall it reads soft and calm, and the wood grain does the decorating.
I like this one for rooms that already have a simple look, since the finish adds texture without adding color.
Pick a grey with a bit of warmth if your wall is bright white, so the piece does not look cold.
Because the surface is so even, keep any wear light and spread out.
4. Crackled Paint Finish
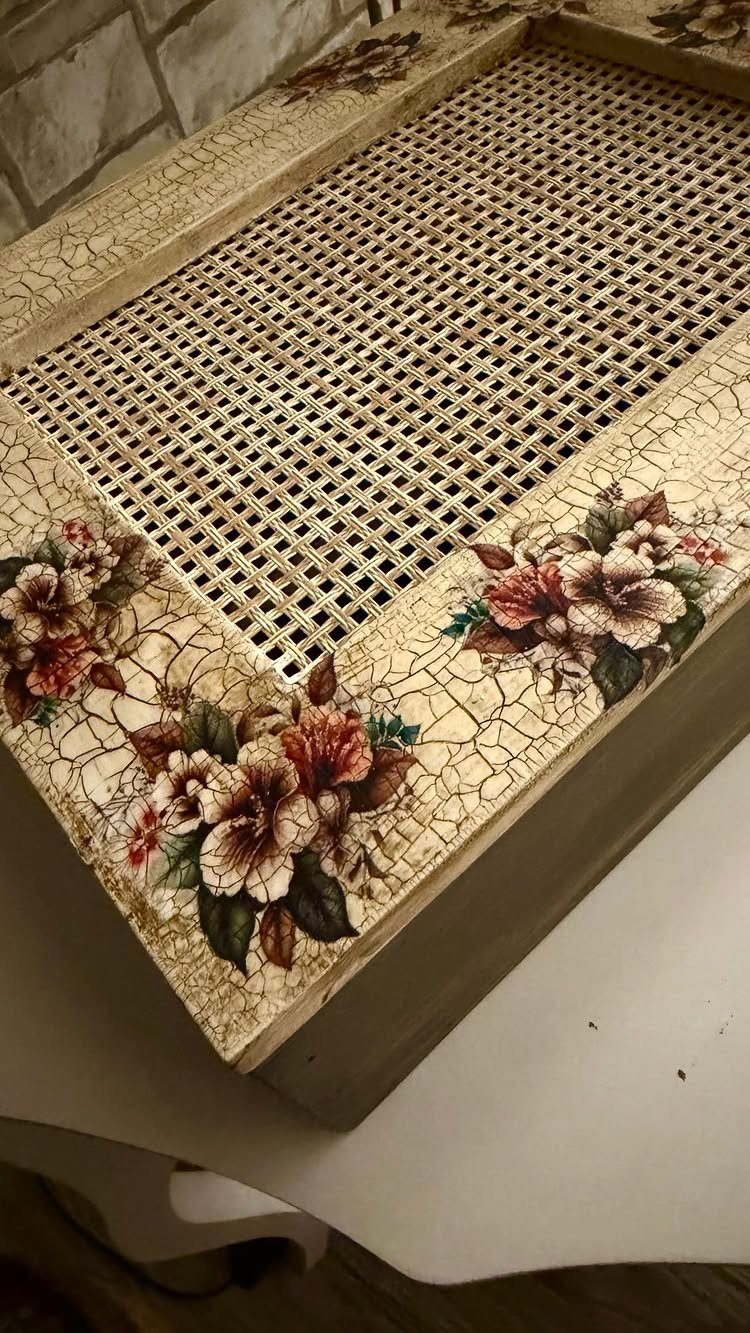
Crackle finish gives you a web of fine cracks across a painted surface, and cream is a classic base for it. The cracks show an older layer beneath, which is why it looks like paint that has aged for years.
It suits flat panels best, like the center of a piece framed by cane or corners with decorative designs.
Start on a table, and mask off any woven cane before the crackle medium goes on, since that finish is hard to clean out of the weave.
Test on scrap wood before committing. Crackle depends on how thickly you apply it, and a trial board saves a ruined drawer front.
5. Worn-Down Natural Wood Tops
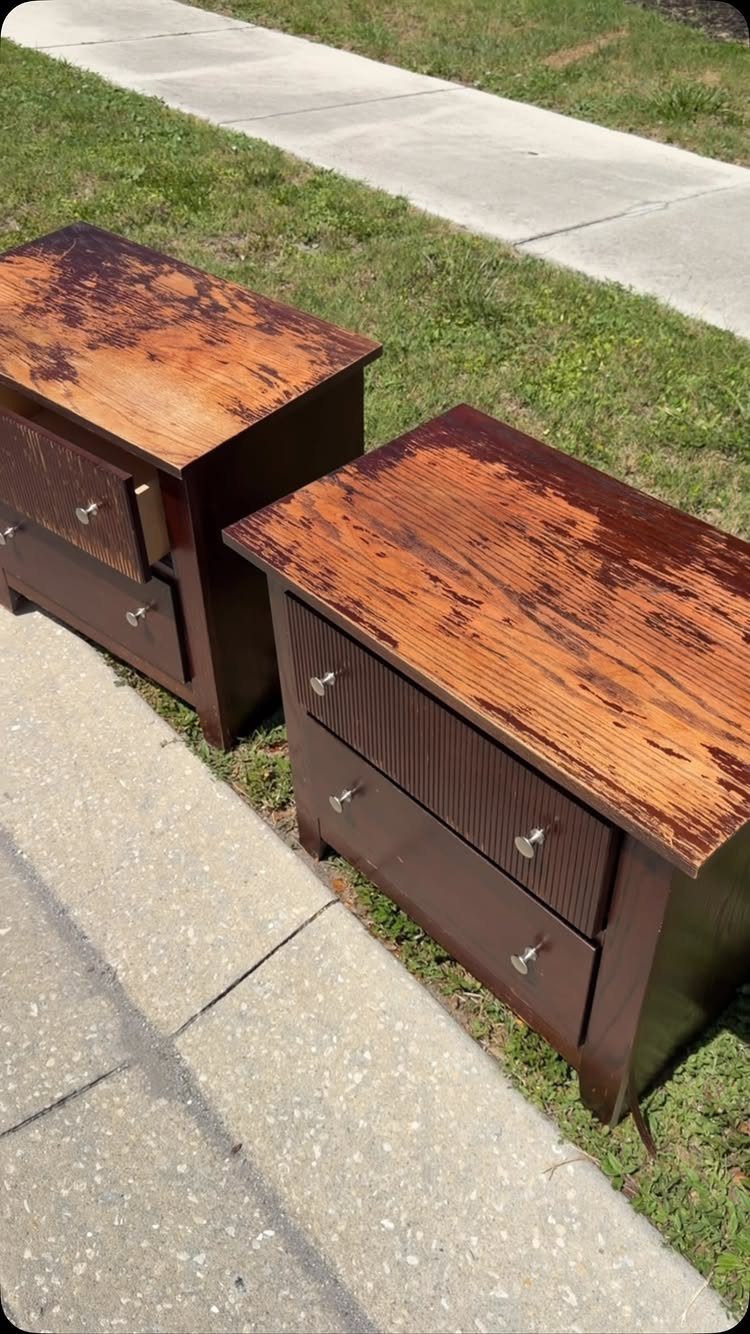
Nightstand tops take daily abuse anyway, so a worn, scrubbed look there feels honest. Heavy distressing on the top alone, with the rest of the piece left calmer, lets the grain show through where it matters most.
Scrubbing and sanding along the grain, not across it, keeps the wear looking natural. Go hardest near the edges and the center where a lamp or a cup would sit.
I would pick this for a matched pair, since both tops can share the same level of wear and look like they aged together.
6. Carved Dresser with Subtle Wear
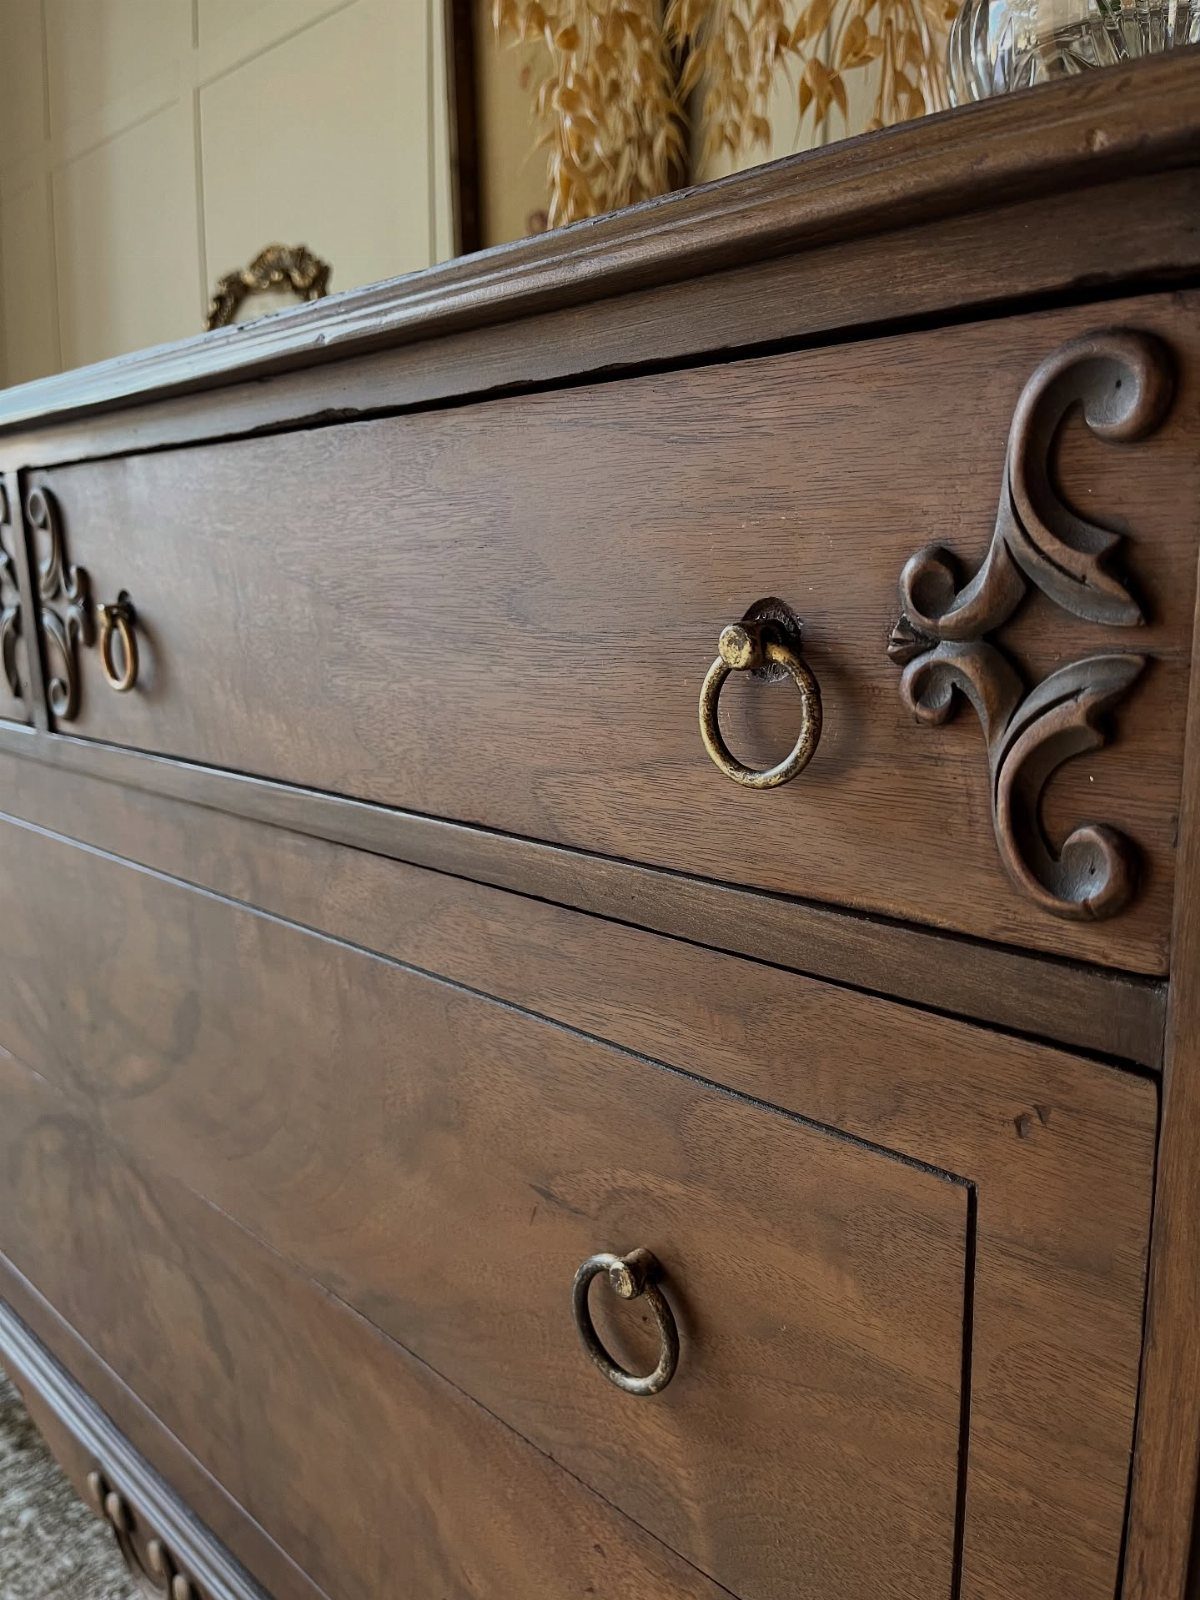
Carved drawer fronts already carry plenty of drama, so a dark dresser like this needs only the lightest distressing. Rubbing along the wood grain lets the carving stay crisp while the surface looks lived in.
Brass ring pulls fit that restraint. A little wear around the pulls and raised carved edges is enough, and it is where real use would show first.
My advice is to stop sooner than you think. Heavy sanding flattens carved detail, and that detail is the reason to choose this piece at all.
7. Rustic Distressed Floating Shelf
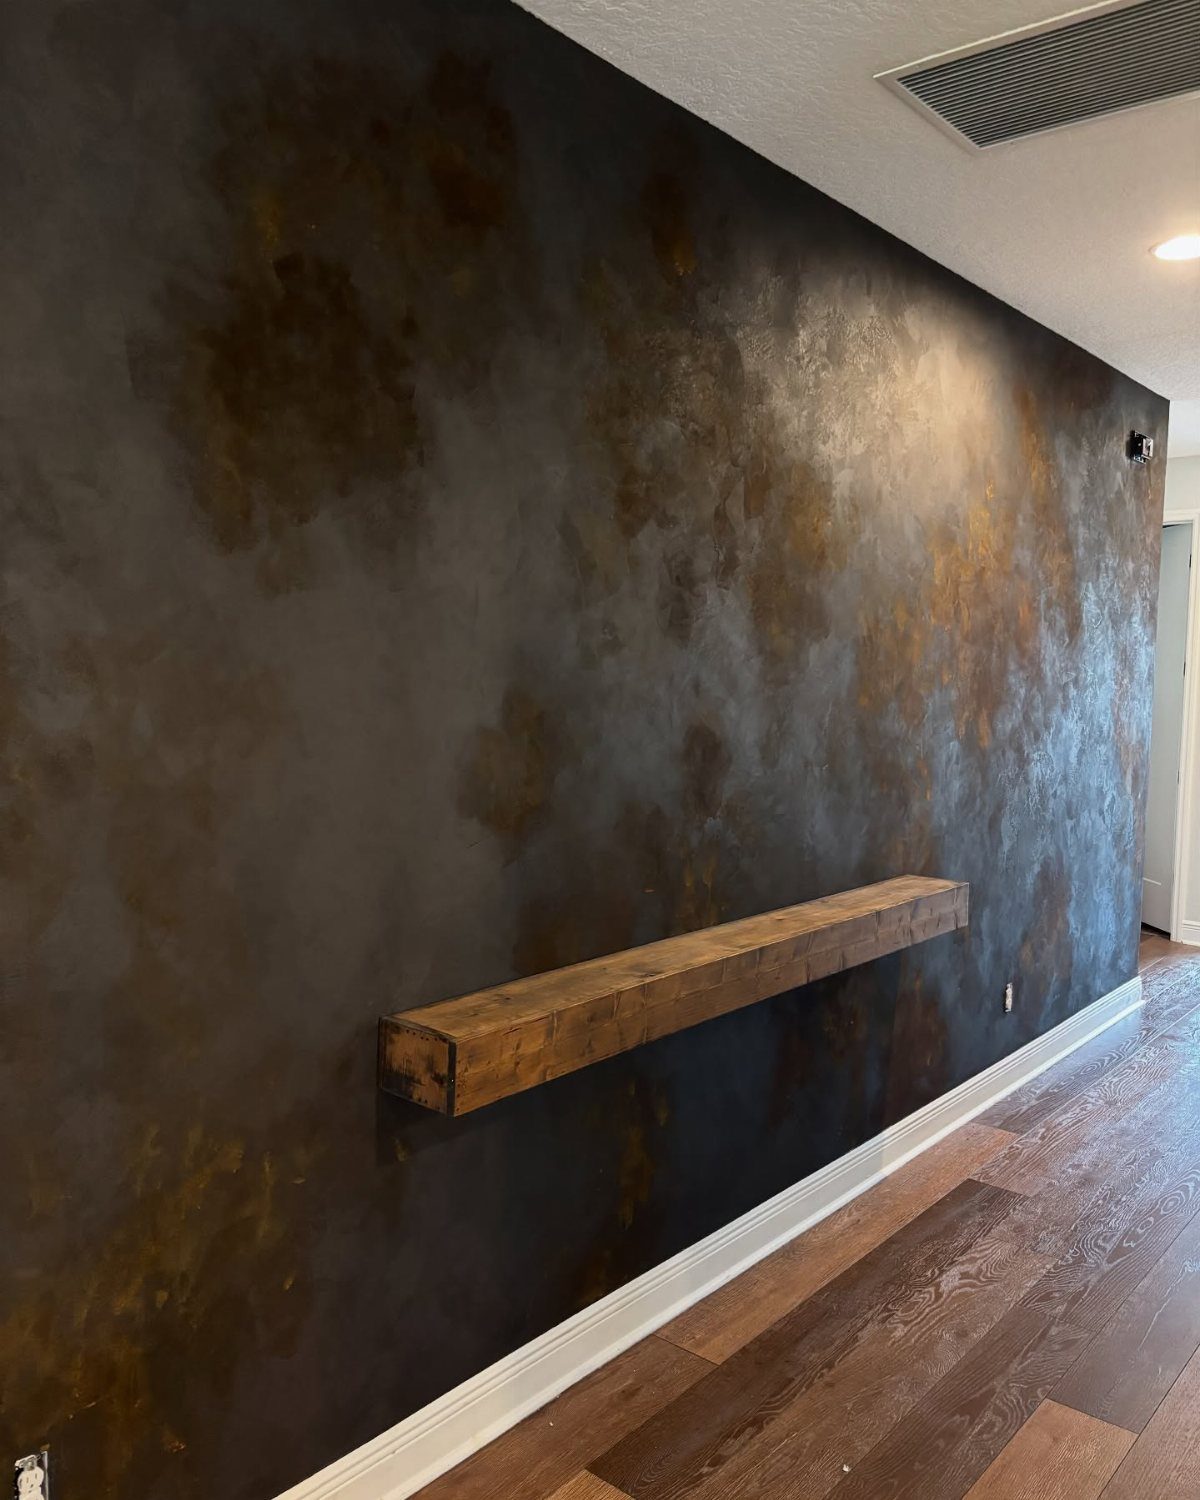
A thick timber shelf in a dark stain turns a plain wall into a feature, and the heavy edge is what gives it presence. Against a dark textured wall, the grain and rough surface read as depth instead of clutter.
Keep the distressing on the shelf itself. Rub along the grain with sandpaper, then work the front edge and corners a bit harder, where a hand or a passing bag would wear it first.
Any bare patches will lighten the stain, so go easy if you want the look to stay moody.
I would skip heavy decor on top. A few simple objects let the thick profile do the talking.
Care for Distressed Furniture
Dust distressed pieces with a soft, dry cloth on a regular schedule. Rough, sanded edges and chipped spots catch dust, so a quick pass every week or 2 keeps the texture looking intentional instead of grimy.
Skip harsh chemical cleaners. They can dull or lift a worn finish, and the bare patches are the most vulnerable spots.
Polish now and then with a wood-safe product. It protects the finish and brings out the texture, but use it sparingly so it doesn’t build up in the worn areas.
If a spot wears down further than you like, a light sanding with a sanding sponge brings back the look. Work around the edges, handles and feet, where wear would naturally show first.
Distressed Vs. Reclaimed Wood
The difference is where the age comes from. Reclaimed wood was once something else, like planks, flooring, walls or furniture, and it picked up its stains, sun bleaching and other flaws on its own over time.
Distressed wood gets its look from a person. Techniques are used to copy aged wood, so the weathering is a finish choice, not a history.
That makes distressing the better route if you want control. You pick how worn the piece looks and where, and you can do it on new wood in an afternoon.
Reclaimed wood gives you whatever its past left behind. Check the label or ask the seller, since a "weathered" tag alone doesn’t tell you which one you’re buying.
Complementing Décor Styles
Distressed wood isn’t limited to farmhouse rooms. In a modern space, one worn piece adds warmth and texture next to clean lines, and the contrast keeps the room balanced and inviting.
I’d keep the rest of a modern room simple and let the distressed piece be the single rough surface. Too many textured items compete.
If you want to try the look yourself, you have several methods to choose from:
- Strike the wood with a hammer or steel chain to mark it.
- Bang a shop rag filled with a handful of nails to make small dents.
- A wire brush chucked into a drill will rake out the soft grain on pine or cedar and leave a weathered, driftwood-like texture.
- Stain the surface, since stain darkens divots and flaws. Let it soak longer for a stronger effect.
Frequently Asked Questions
What is distressed furniture?
Distressed furniture is a piece finished to look older and worn, with a weathered, lived-in feel.
The age comes from finishing techniques applied by a person, not from real history. That makes it a style choice you control, and you can do it on new wood in an afternoon.
How do you distress wood furniture?
Sanding is the easiest place to start: rub the edges, corners and drawer rims where hands would wear paint away, and let bare wood show through.
For more texture, try a hammer or a length of steel chain on the surface, a rag stuffed with nails for small dents, or a wire brush chucked in a drill, which works best on soft pine or cedar.
Staining afterward darkens the divots and flaws, and a longer soak makes the effect stronger.






