Square footage decides which of these woodshop design ideas fits, more than budget does: a bar clamp rack or overhead lumber storage costs almost no floor, while a standalone router table or an L-shaped corner workbench claims its own footprint.
If your shop is tight, start overhead and on wheels, and spend floor space only on the tool you use most.
1. Bar Clamp Racks
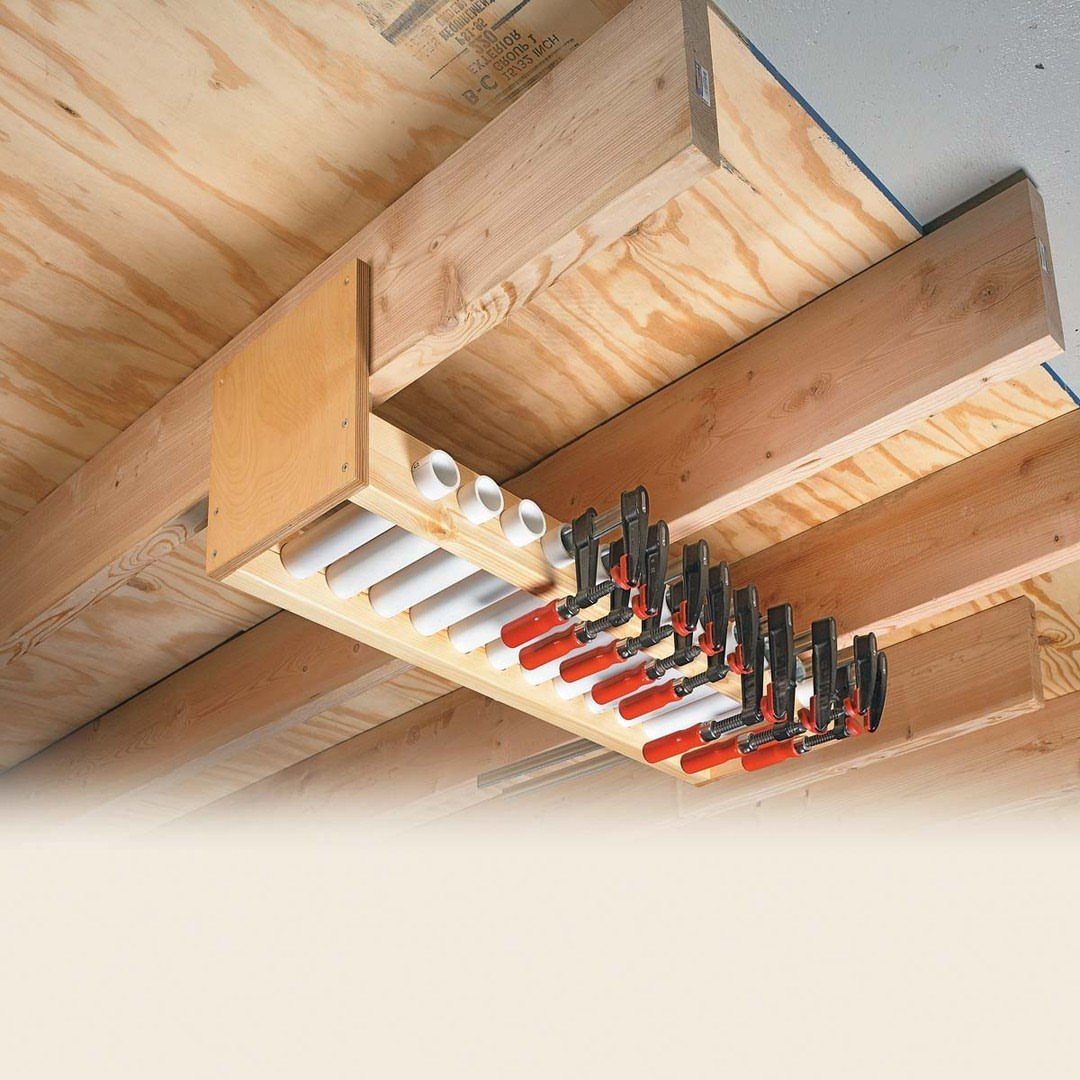
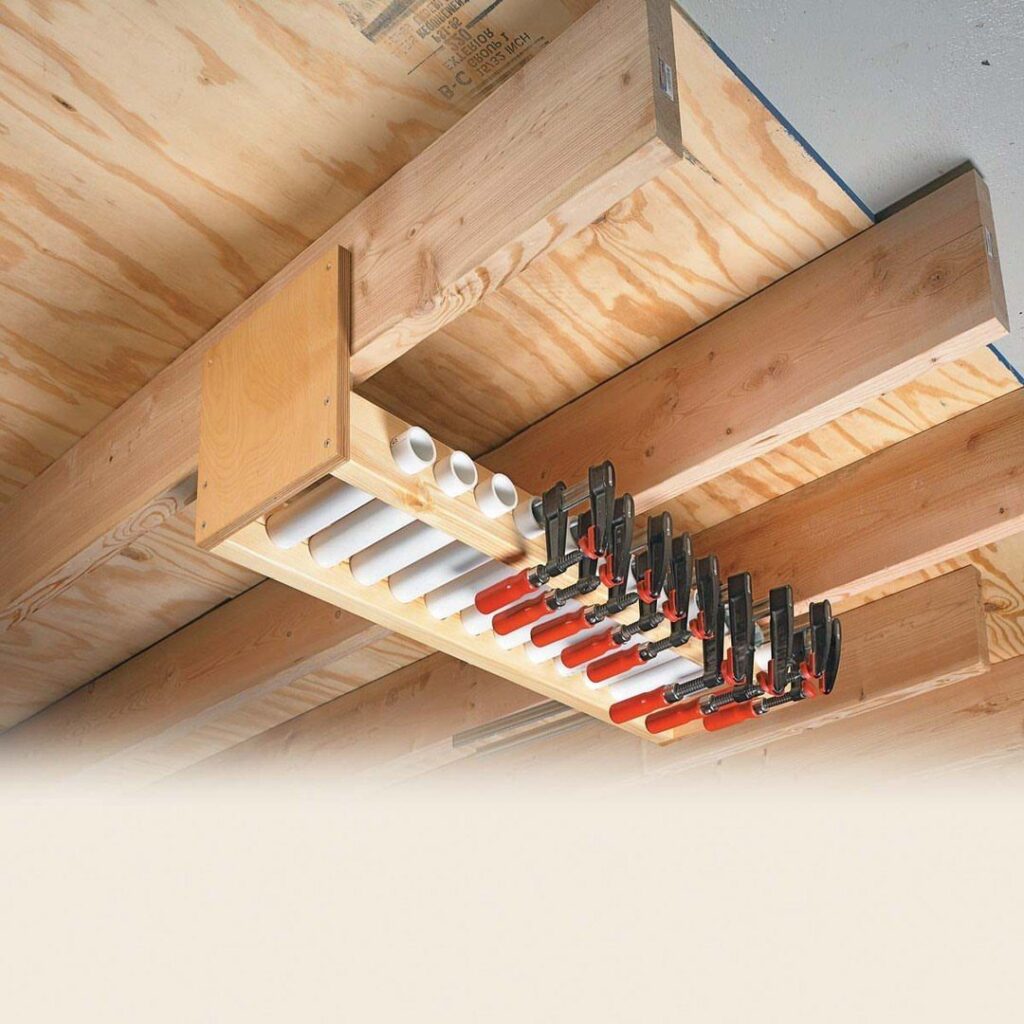
Clamps eat bench space faster than almost any other tool, and a ceiling rack gets them off every surface you work on. Bar clamps hang well from joists because their length is the problem, not their weight.
Short lengths of PVC pipe make cheap, tidy holders, and a wooden rack ties them together.
Screw the rack into the joists themselves, not just the ceiling surface, since a full set of clamps adds up. Keep the ones you grab most often at the front, where you can reach them without a stepladder.
2. Overhead Lumber Storage Racks
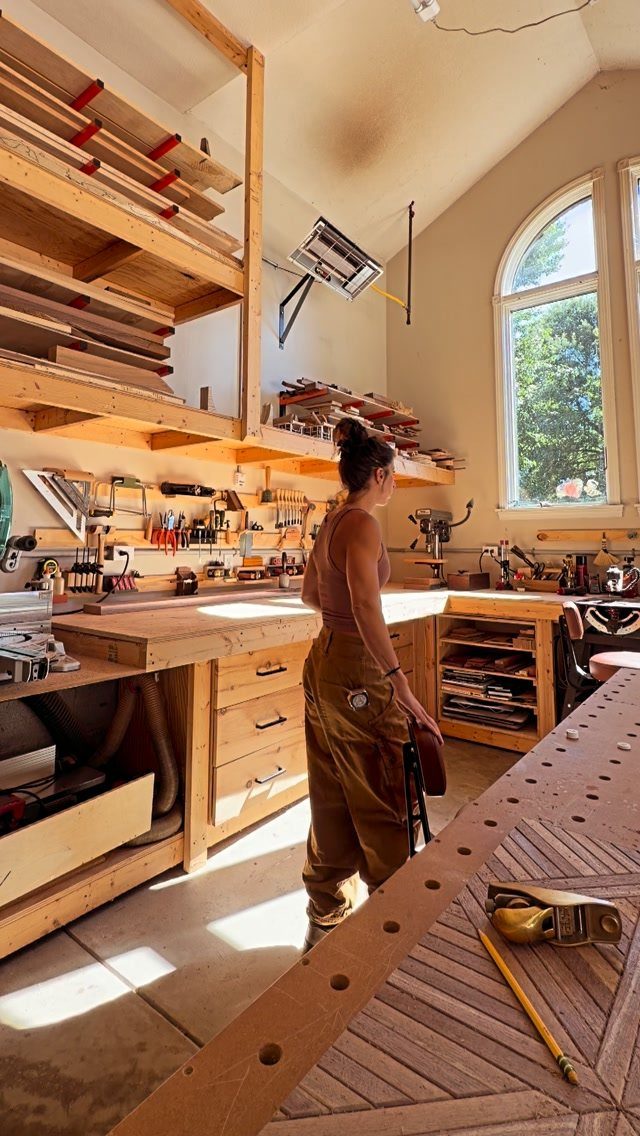
Boards stacked against a wall or lying on the floor take up room you need for work, so I would lift them overhead. A rack above head height puts that lumber in air space nobody uses.
Build the rack from sturdy wood and anchor it into joists, because long boards pile on weight quickly.
Run the supports across the shop’s narrow dimension so each board rests on several arms. Sort the stock by length so you can slide out the board you want without disturbing the rest.
A window and some open wall beneath the rack leave a good spot for a bench, so the lumber stays out of the way.
3. Dedicated Air Filtration Unit
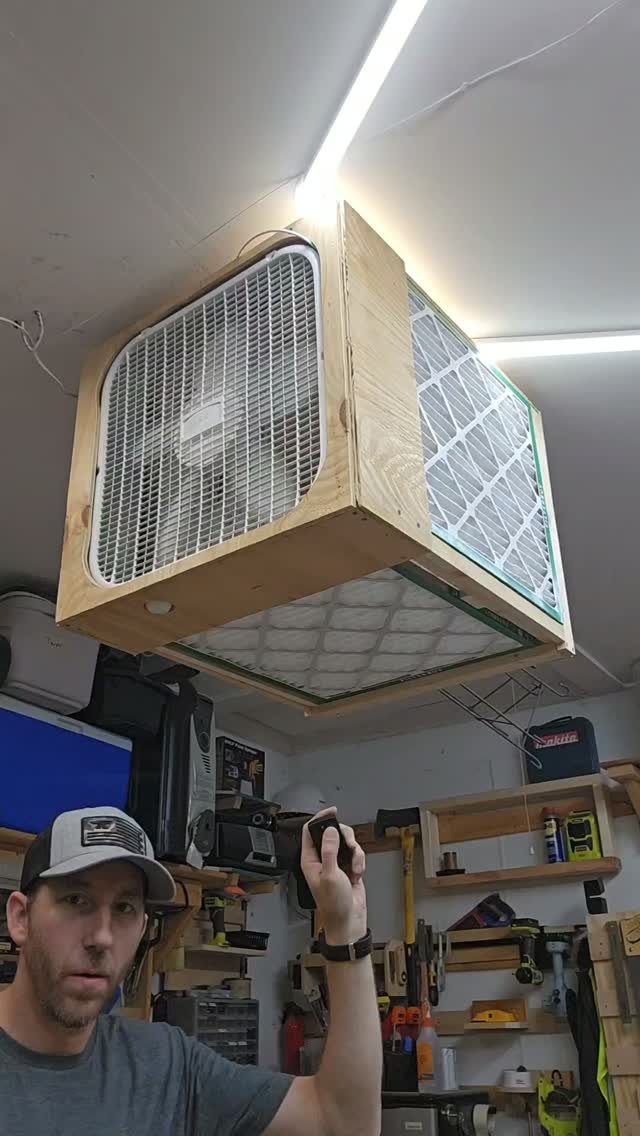
Dust control belongs in the plan from day one, and a ceiling-mounted air filtration box is the version I like for a small shop.
A fan pulls room air through filters, so fine dust that never reaches a collector gets caught before you breathe it.
A plywood box with a fan and a filter on the face is a simple build.
Hanging it overhead costs no floor space and no bench space. Pick a spot away from walls and corners so air can circulate across the whole room.
Filters clog, so mount the box where you can reach it to swap them out.
4. Mobile Platforms with Wheels
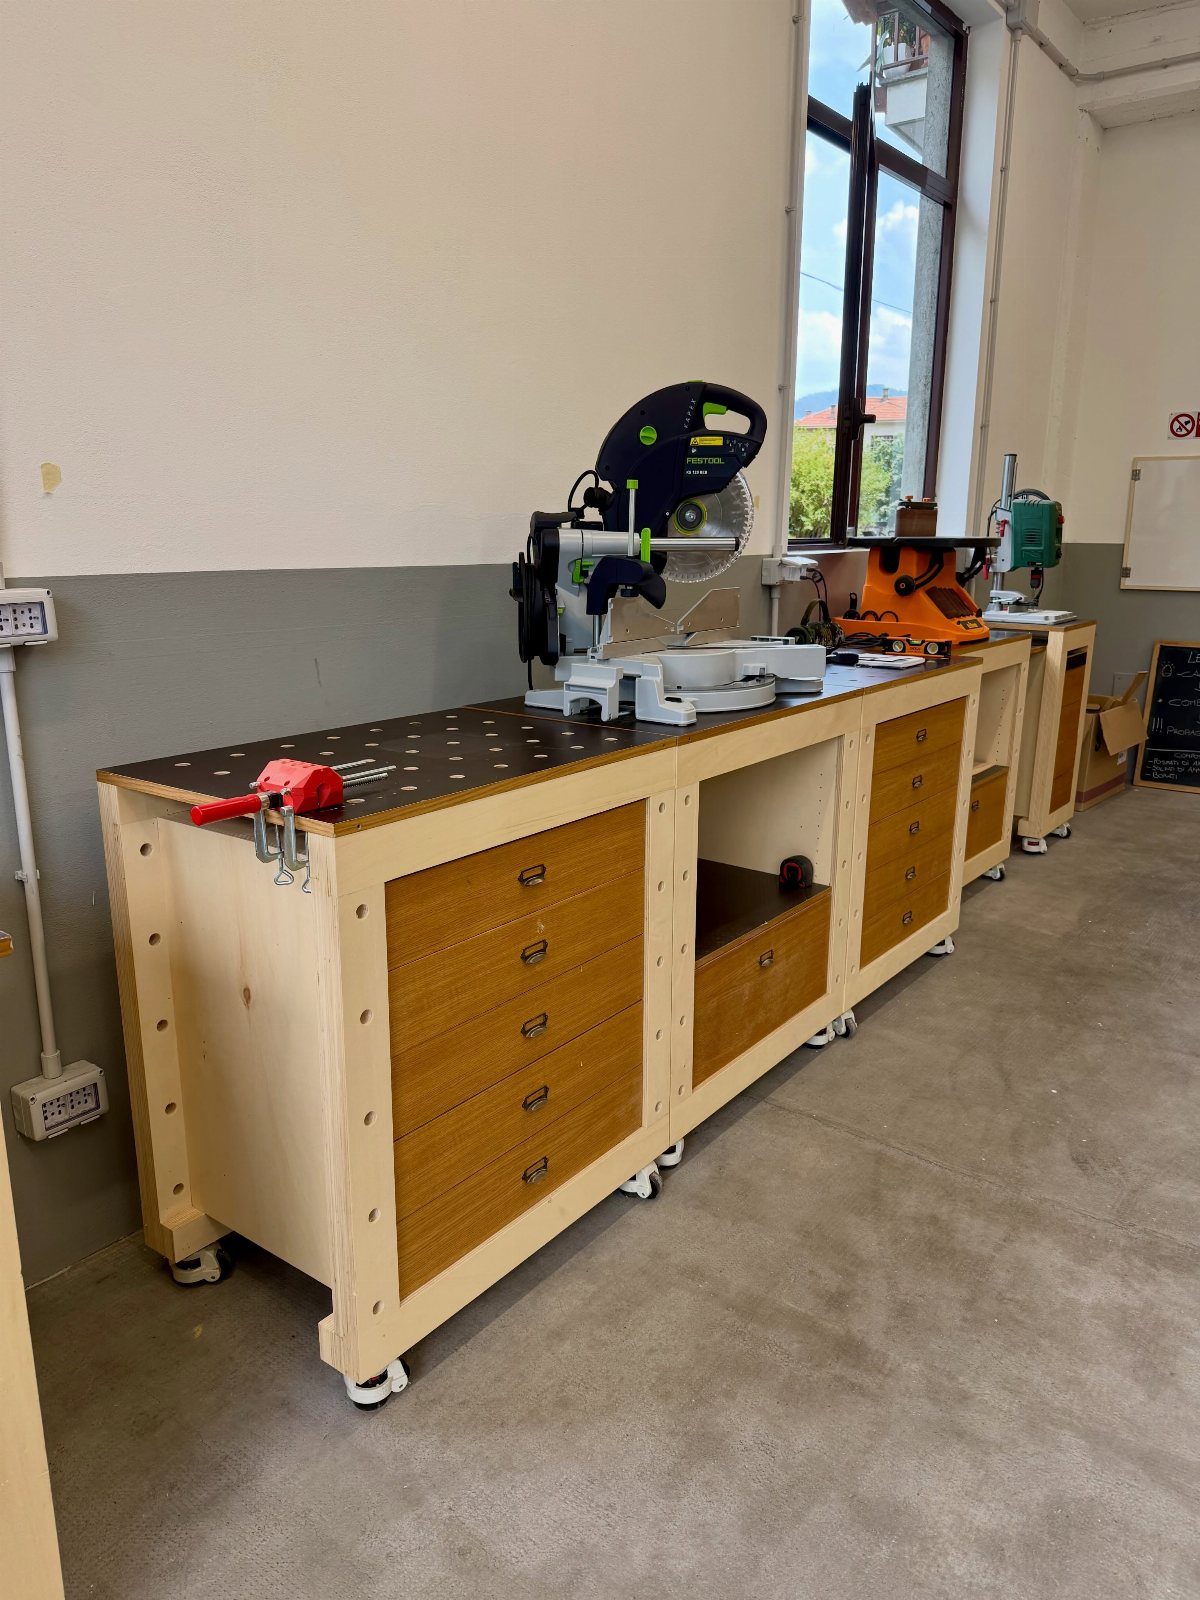
Casters turn a fixed bench into something that follows the job.
A long cabinet base with drawers, topped with a miter saw, can roll out to the middle of the shop when you cut and tuck back against the wall afterward.
Choose locking casters, and lock every wheel on the base so it stays still under a heavy cut.
Drawers below give the saw’s accessories a home right where you use them. A base this long also gives you a bench surface on either side of the saw for supporting boards.
5. Workbench with Pegboard Wall Storage
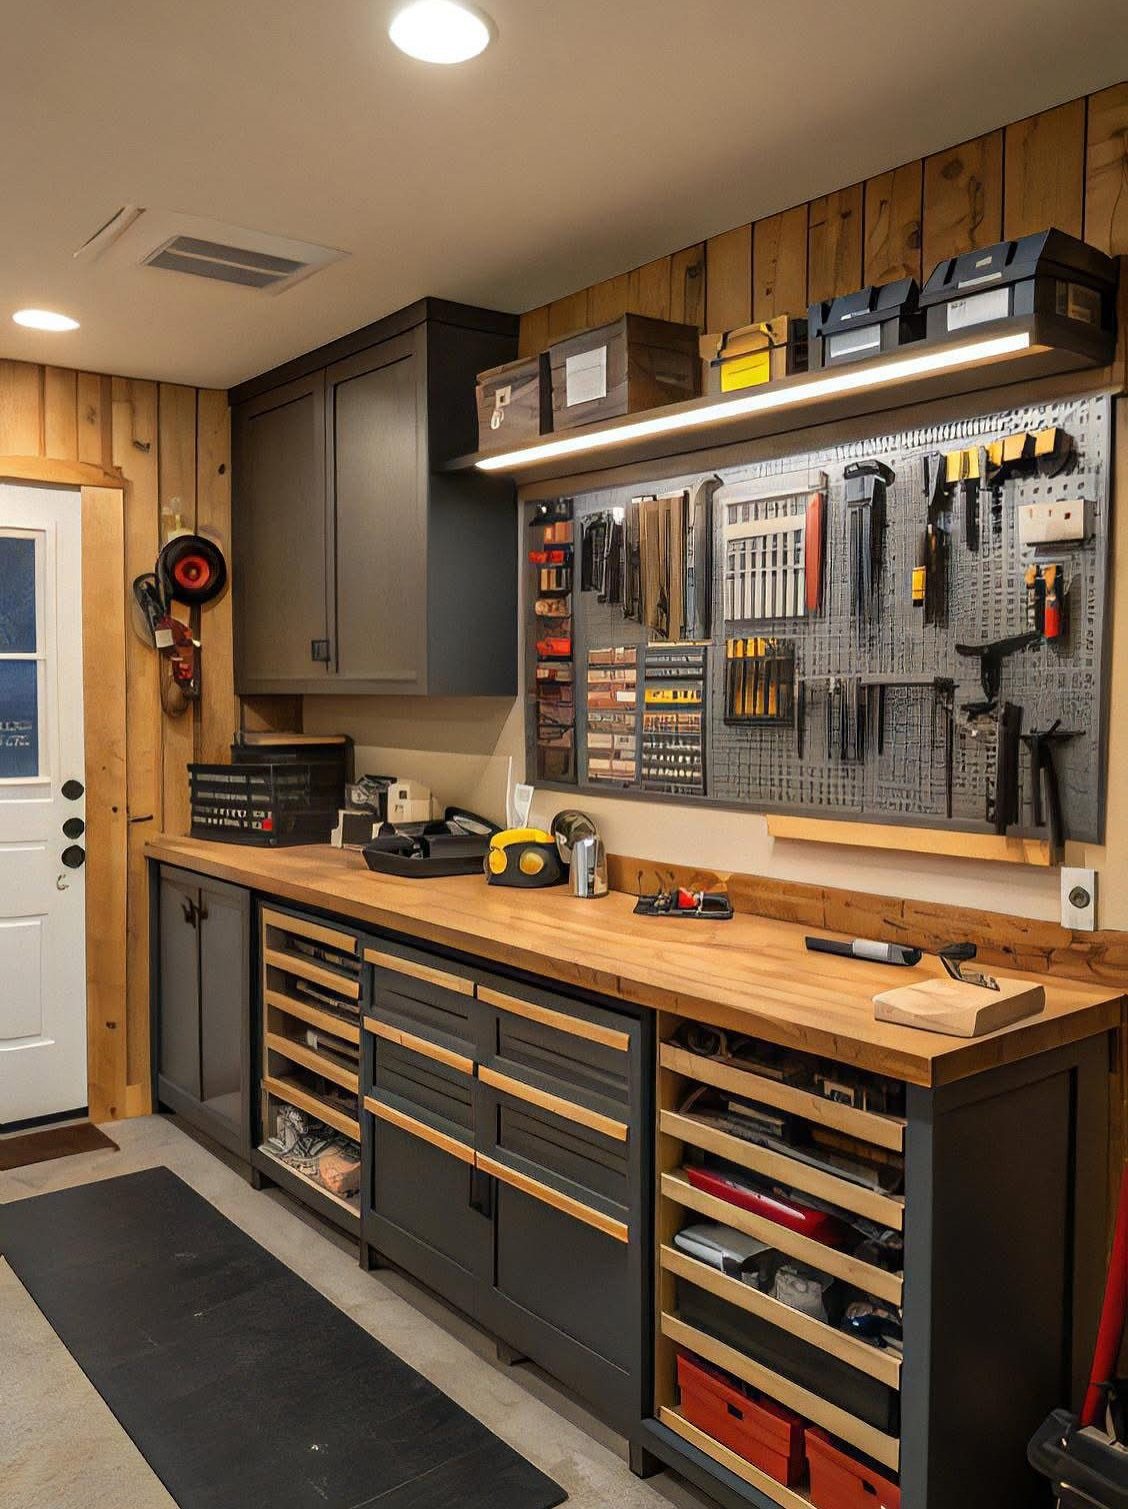
A long drawer bench with a pegboard above it puts nearly every hand tool within one arm’s reach. Upper cabinets add closed storage for the things that don’t need to be on display, like glue, finishes and small hardware.
Hang the pegboard on a wall you can fasten into, and set it just above the bench so tools hang at eye level.
Arrange them by task, keeping the daily ones closest to where you stand. Drawers underneath hold the items too small or too heavy for hooks.
Trace each tool’s outline in marker so you notice when something goes missing. Overhead lighting matters too, because a bench is only useful if you can see the work.
6. Integrated Miter Saw Dust Station
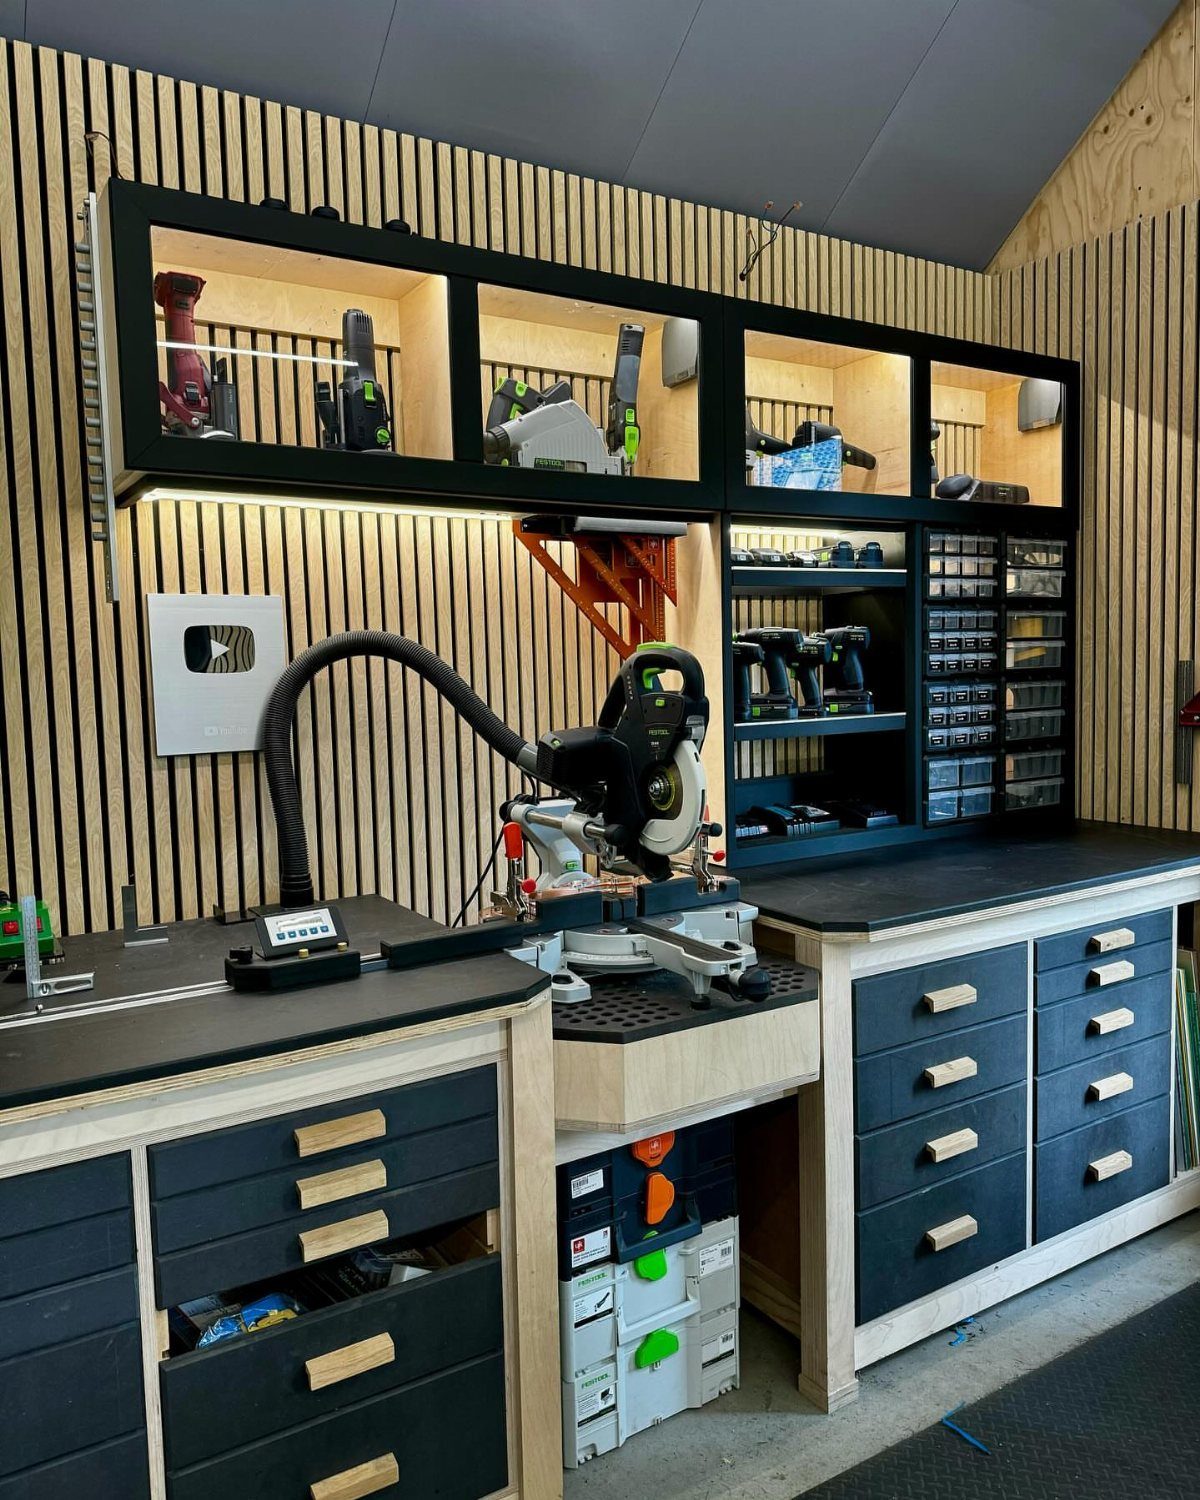
Built-in cabinetry around a miter saw does 2 jobs: it holds the saw at a steady working height and gives every cut a home for its mess. Add dust extraction at the saw, since this tool throws chips everywhere.
Slatted walls beside it keep frequently used items on display and within reach.
Black drawers below swallow blades, stops and measuring gear. Lighting on the wall storage lets you find a small item at a glance.
Plan the cabinet around the saw you own, leaving room on both sides for long boards. A station like this costs more time than a rolling cart, but it stays put and stays tidy.
7. L-Shaped Corner Workbench
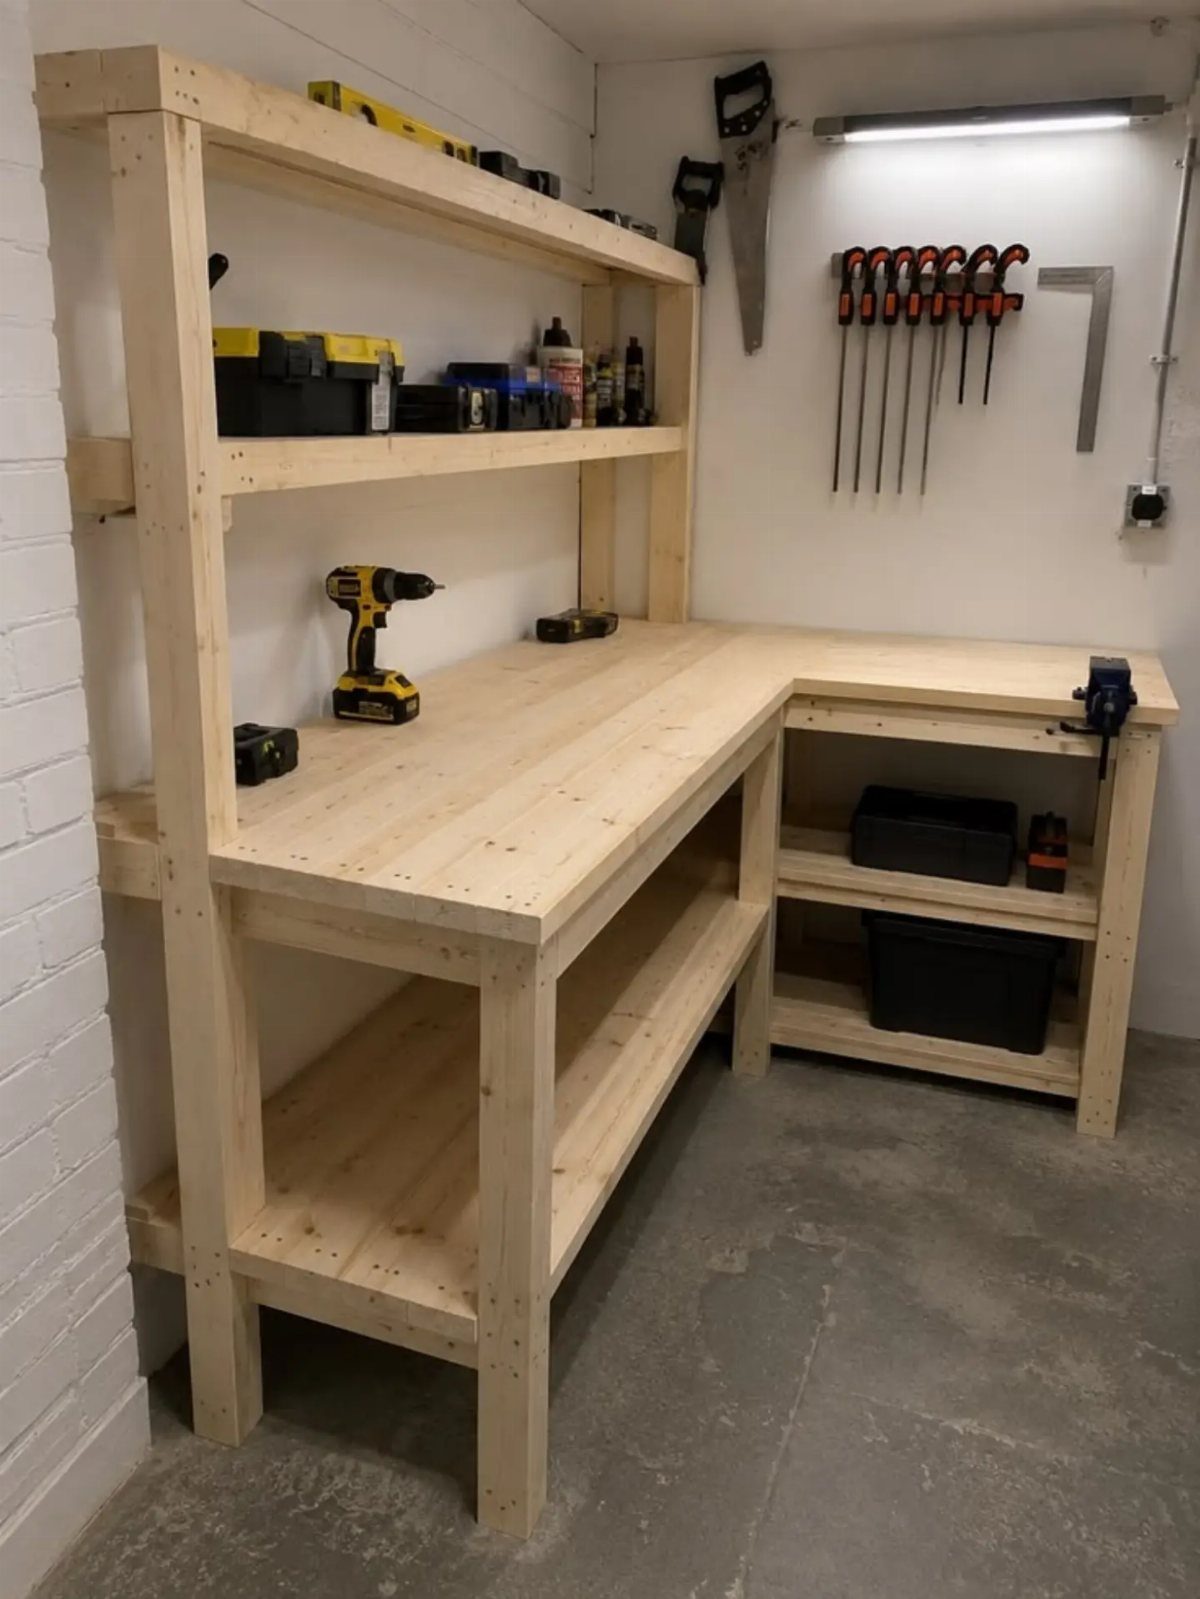
A corner wastes the most floor in a small shop, and an L-shaped bench turns it into the best work area you have.
An L-shaped bench gives you a long run for layout and assembly, plus a spot to clamp a project without leaving your position.
Light pine keeps a tight corner from feeling dark, and it is easy to cut and fasten with basic tools.
Corners are awkward to reach into, so keep the deep back area for items you grab rarely. Check that the room walls are square before you cut anything, since the 2 legs have to meet cleanly.
8. Dedicated Standalone Router Table
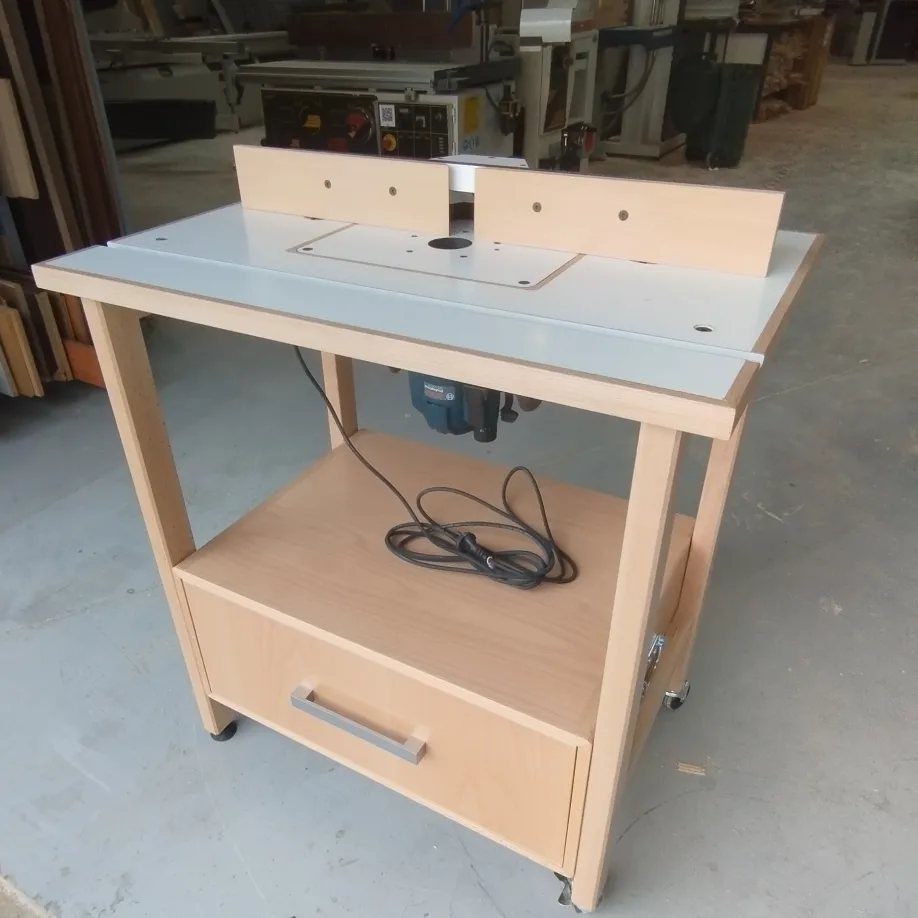
A router table earns its own spot because a router mounted upside down under a flat top behaves like a different tool.
Standalone beats a bolt-on wing for me: it stays put, so the fence and setup don’t get bumped around.
Build the cabinet from wood with a smooth white top, which shows pencil marks and makes it easy to see where a cut will land.
Mount the router to the underside so only the bit rises through the top. A lower shelf holds bits, wrenches and the fence, so nothing wanders off.
Make the table a comfortable working height, and leave clear floor around it for long boards.
It does take up its own footprint, which is the cost in a tight shop. Build it with casters if floor space is short.
Space Optimization Tips
Mobile bases earn their cost on the heaviest, bulkiest machines, so start there. A table saw or planer that rolls can sit against a wall most days and come out only when you need infeed and outfeed room.
Give every tool a fixed home, and put the home where the tool gets used. Anything that lives on a bench top will eventually be in the way of the next job.
Before buying a single bin or shelf, pull everything out and sort it by how often you reach for it. What you touch weekly stays within arm’s reach; what you touch twice a year goes high or far back.
Walls and ceilings are free square footage. Use them before you give up any floor.
Layout Considerations
Lay out the shop by following a board’s path: rough stock in, cut to size, assembled, finished, out the door. If the lumber rack sits at the opposite end from the saw, you will walk that distance on every project.
Draw the floor plan on paper first, with each tool as a scaled rectangle. Slide the rectangles around until the path runs in one direction without doubling back.
Power matters as much as space. Put the tools that draw the most current near the outlets that can handle them, and avoid stretching extension cords across walkways.
In a small shop, check that you can open doors and drawers fully and swing a long board without hitting anything.
Efficiency and a modest budget go together: moving paper rectangles costs nothing, and moving a cabinet bolted to the wall costs a weekend.
Dust Management Strategies
Buy dust collection before you need it, and size it to the tool. A shop vacuum with a hose on a sander is a fine start; a larger collector makes sense once a table saw or planer is running regularly.
Collection only works when the hose is connected. Keep fittings and adapters stored next to the machines so hooking up takes seconds, not a hunt.
Sweep and vacuum at the end of every session, not just when the floor gets bad. Fine dust settles on shelves and lights, then floats back up the next time you work.
Wear a respirator or dust mask rated for fine particles whenever you cut, sand or empty a collector. Sanding hardwoods and MDF puts the finest dust in the air, so those jobs deserve the most protection.






