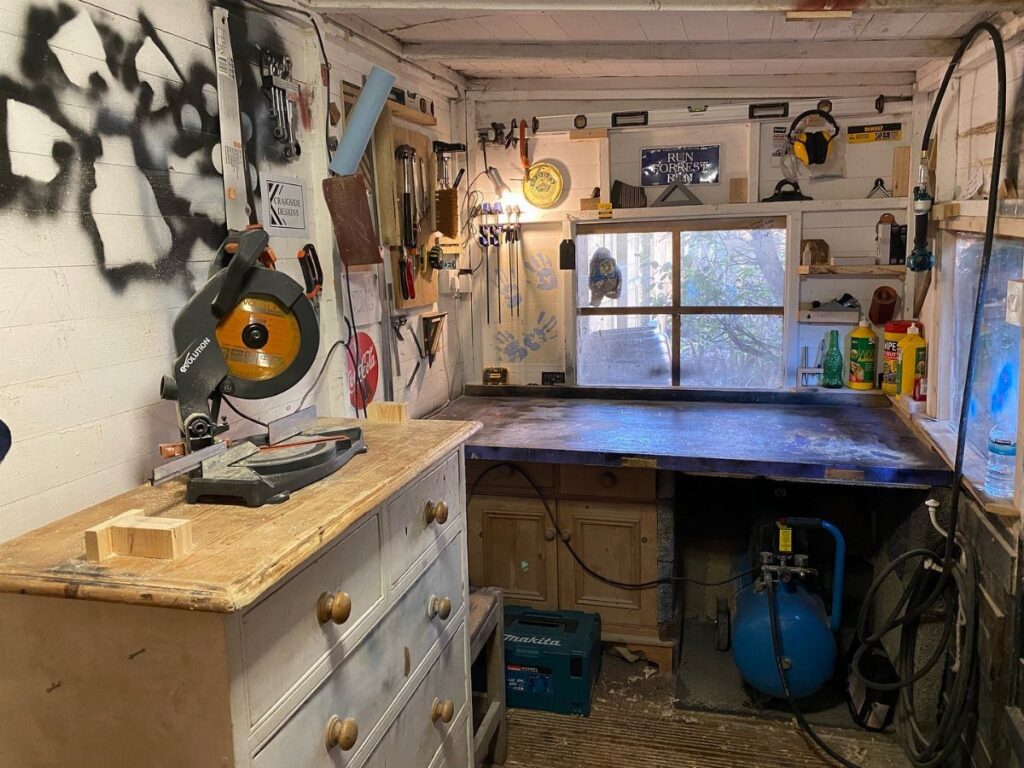
If machines clog the middle of the room, mobile tool bases and a tidy, open layout fix it; if loose hardware and tangled chargers crowd the bench, wall-mounted storage and a battery charging station do.
Light the room first, since good lighting pays off in a shop of any size, and it costs less than most tools.
1. Wall-Mounted Storage
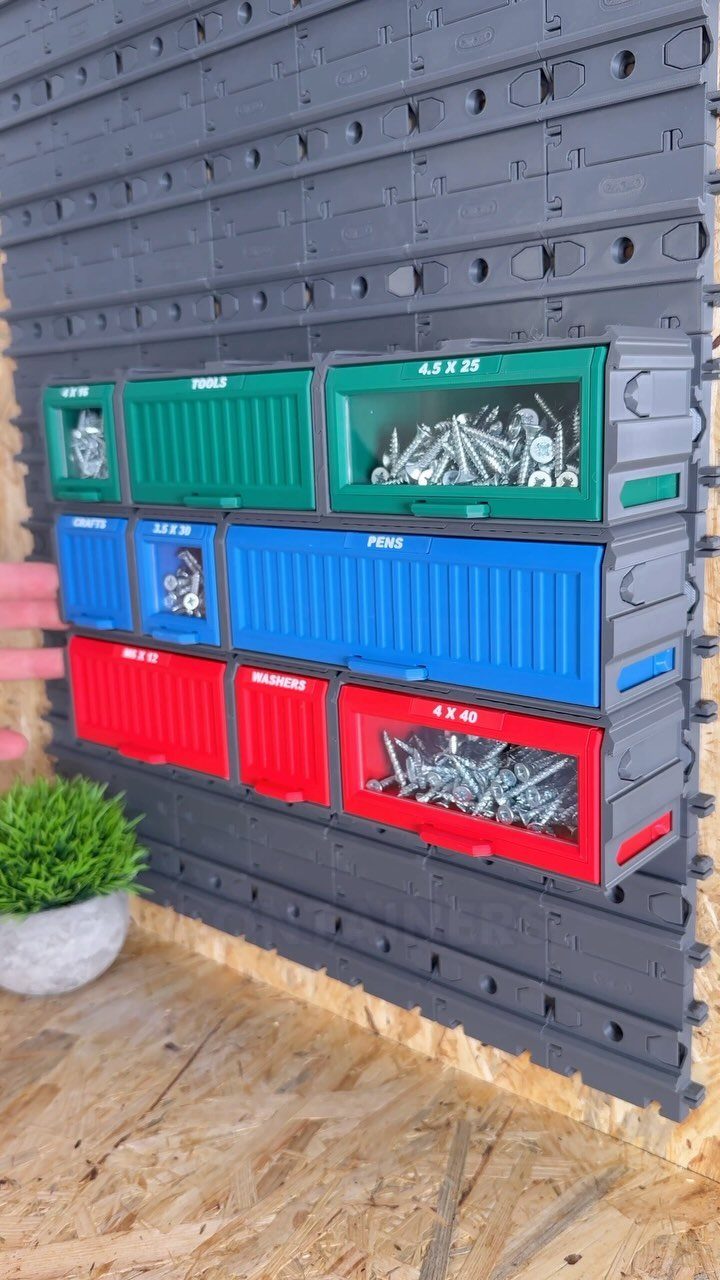
Bins mounted on a wall cost you no floor space, and in a small shop that is the whole appeal. A modular grid like this one lets you rearrange as your hardware stash grows, which a fixed shelf never will.
Label every bin, the way "TOOLS," "PENS," and "WASHERS" are labeled here. Mixed colors help too: assign one to screws, one to washers, and one to small tools, and your eye finds the right bin before you read a word.
Mount the grid at arm height, near the bench where you reach for fasteners most.
Pegboard is the master of all workshop organizational tools. You can buy full sheets (4×8) at any big box store, but most also sell smaller, more manageable sheets.
2. Rolling Bench
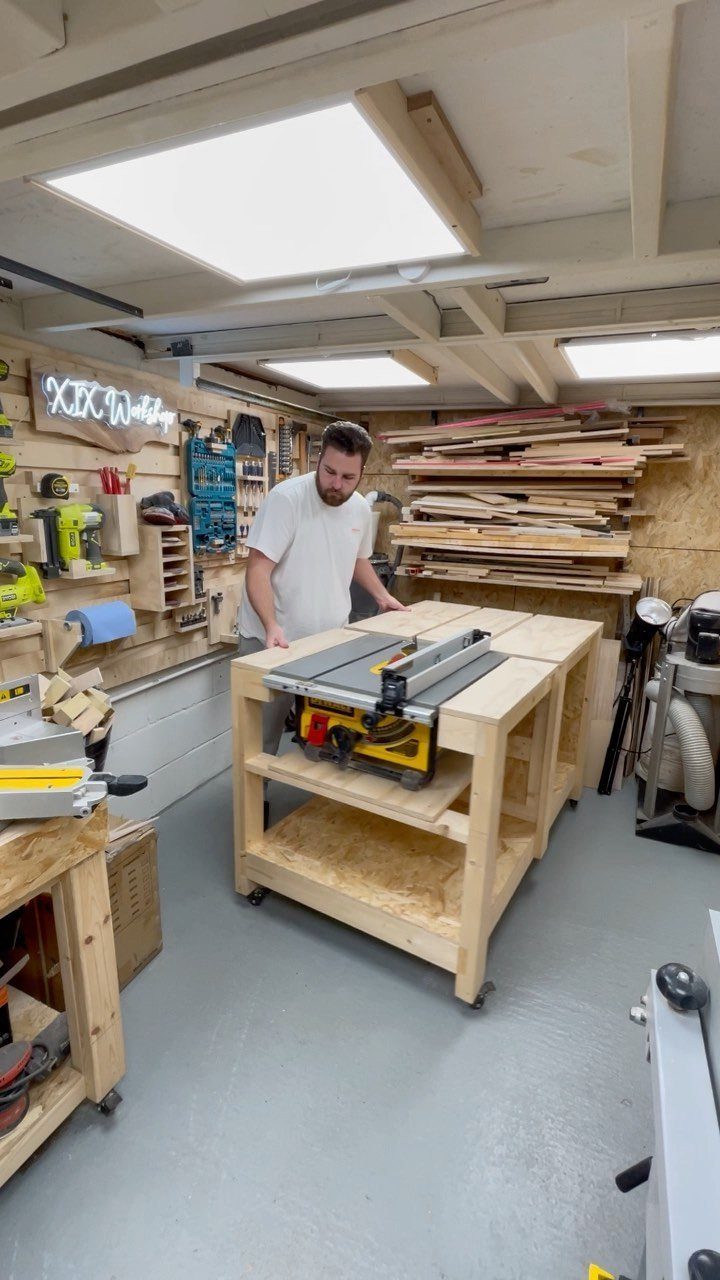
A bench on casters turns one patch of floor into two jobs. Roll it out when you need to cut, then push it back against the wall when the project is done.
I like the version with a table saw built into the top, because the saw stops eating its own footprint. Wood storage underneath keeps boards and offcuts within reach of the blade.
Pick locking casters, and put them on every corner. A bench that creeps while you cut is a problem you only want to have once.
3. Mobile Tool Bases
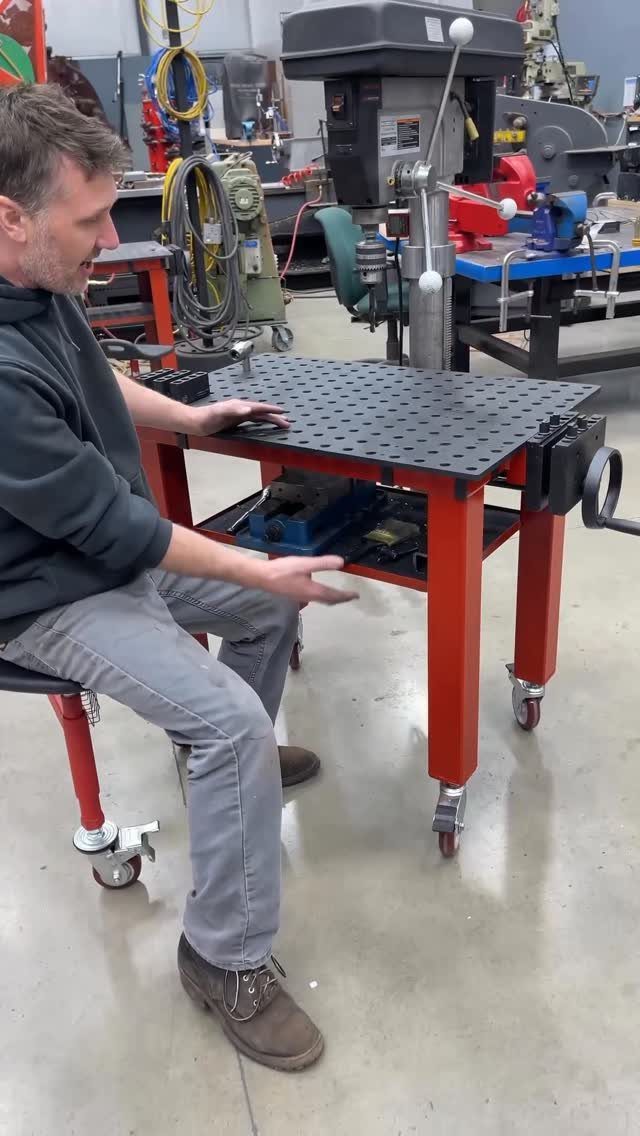
Wheels under a tool change how a small shop works: nothing has to live in the middle of the floor. A perforated top, like the one on this red base, also gives you holes for clamps and other accessories.
Build or buy a base for each stationary tool, then park them along the walls and pull out only what the day’s project needs.
Heavy tools need heavy-duty casters, and I prefer locking ones so the base stays put under load.
4. Outfeed Table
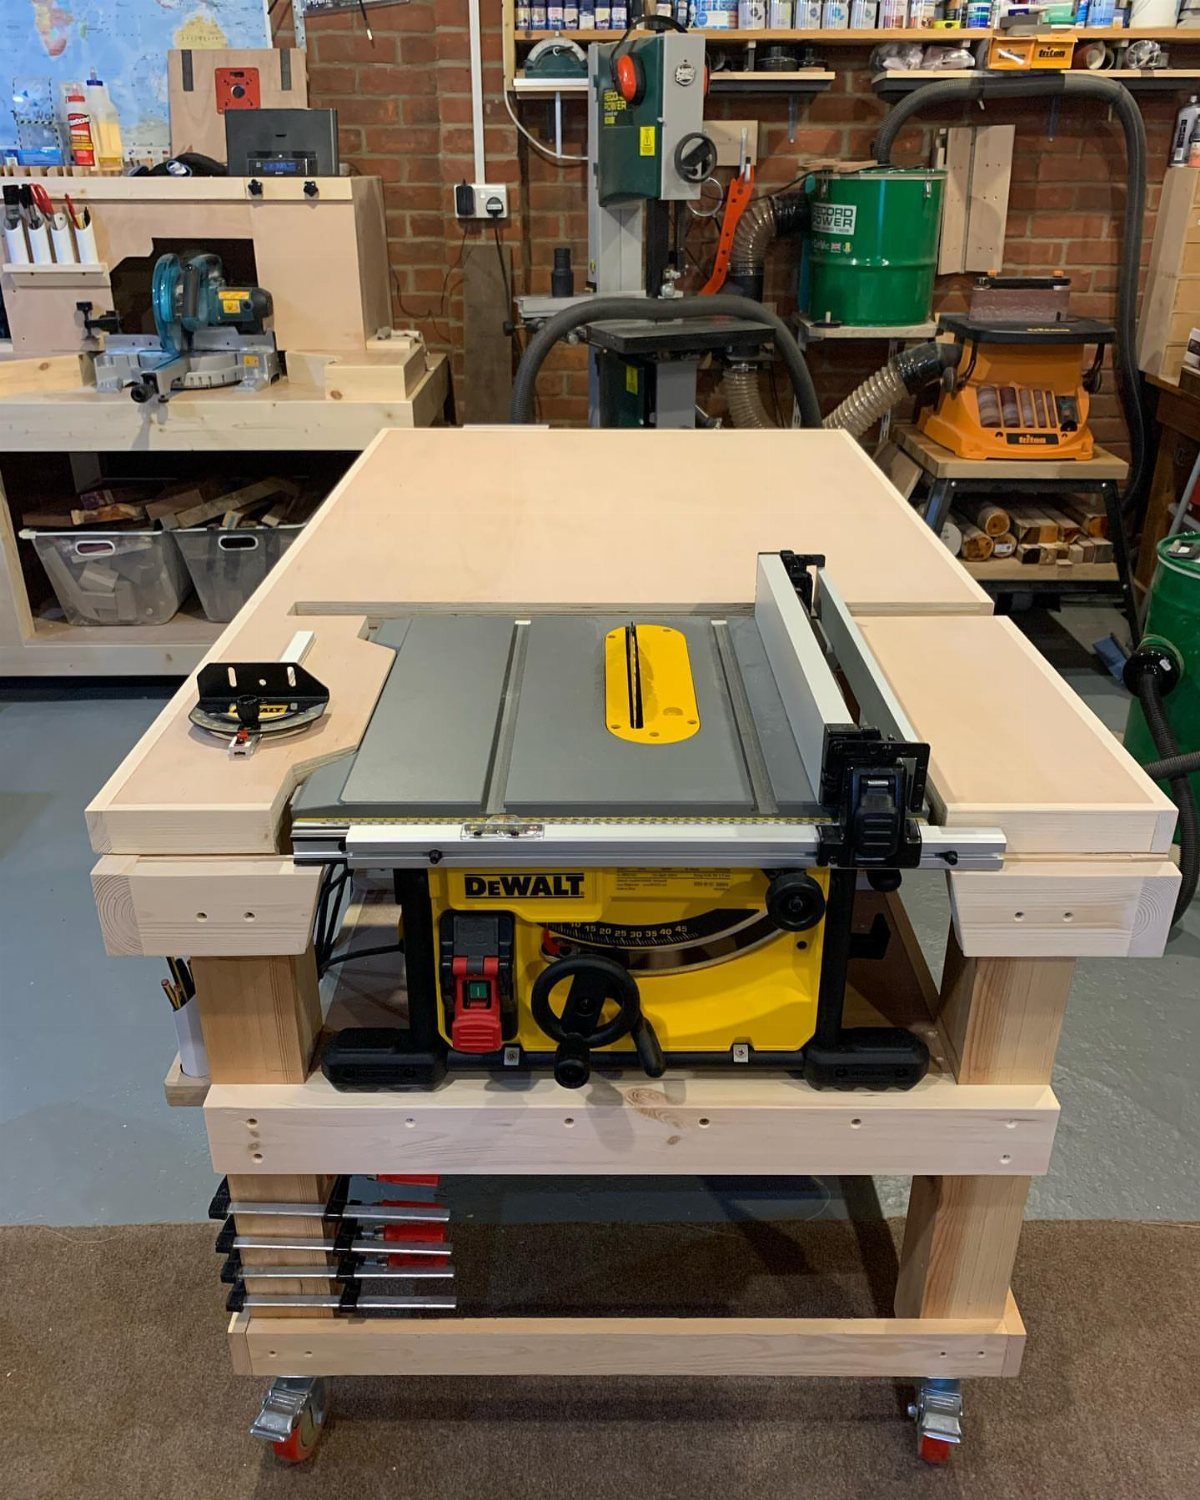
Behind the saw is wasted space in most small shops, and an outfeed table puts it to work.
Cut boards slide onto a flat surface instead of falling to the floor, and the same surface works as an assembly area when the saw is off.
Building the saw into a larger wooden table adds storage underneath, and the cabinet space is just the right size for blades, a crosscut sled and a few jigs that would otherwise crowd a shelf.
Match the table height to the saw top so long boards travel level.
Keep the surface clear while cutting; an assembly table piled with clutter defeats the purpose.
5. Dust Collection System
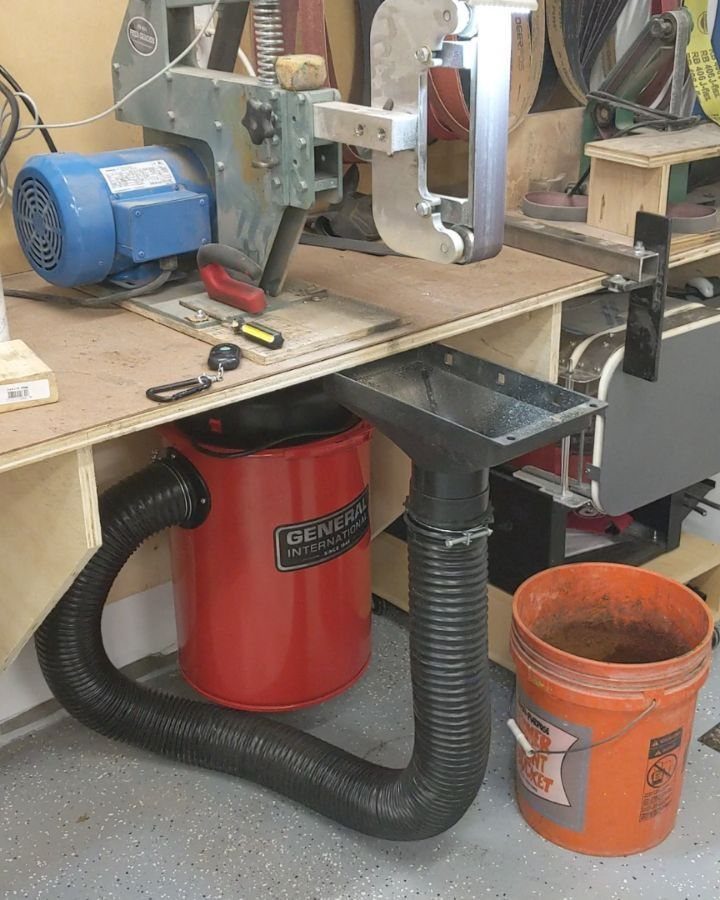
Sawdust hides in small shops, and a compact collector with a flexible hose keeps it from settling on everything. Connect the hose to the tool producing the mess, and the canister catches it at the source.
Tuck the collector under the bench, as in this setup, so it uses space you already have. A bucket at the bottom makes emptying quick, so you will actually do it.
A wood shop with no dust control is miserable to work in, so I would buy the collector before the next tool.
6. Battery Charging Station
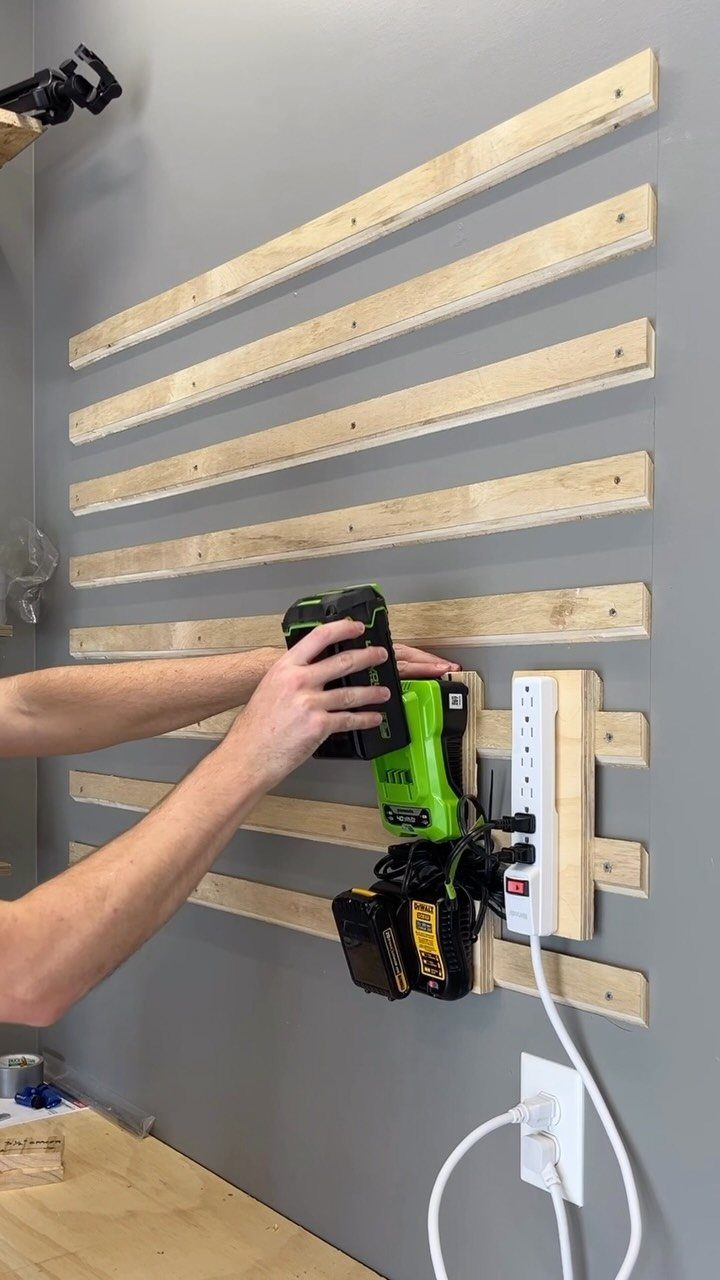
Dead batteries and tangled cords eat bench space faster than almost anything. A slat wall with a power strip fixed to it lifts chargers up and out of the way, and every battery gets a home.
Mount the strip first, then set each charger where its cord reaches without stretching. Wood slats let you hang the chargers on screws or hooks.
I would place the station near the door of the shop, so a battery goes on the charger the moment you walk in.
7. Under-Stair Hardware Jars
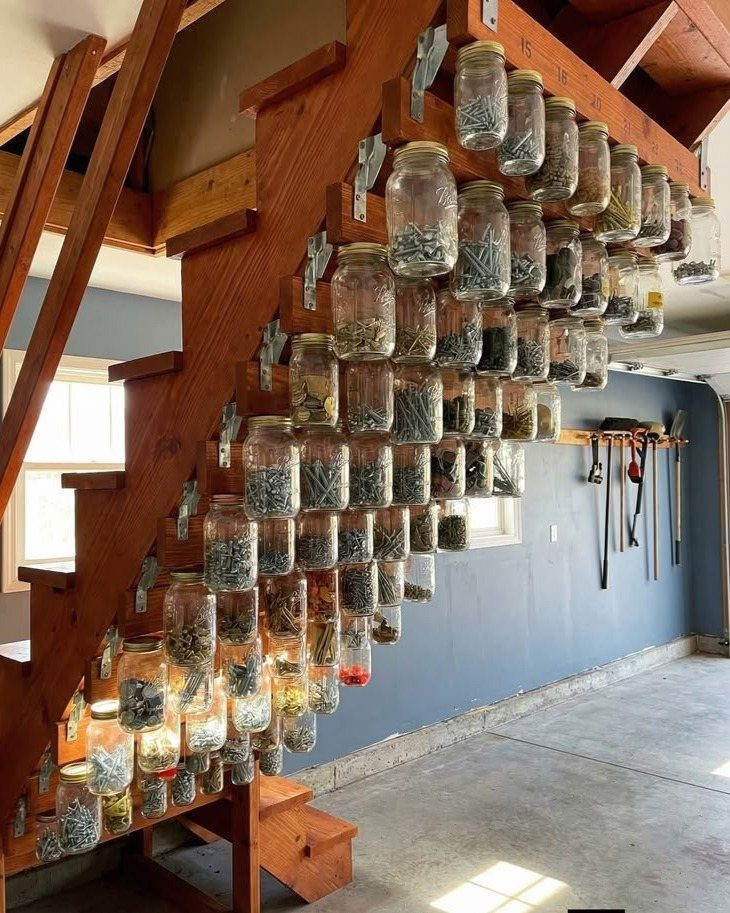
Dead space under a staircase can hold a whole hardware library. Glass jars with metal lids screw up into the underside of the stairs, so nails and screws hang overhead and the floor and bench stay free.
Clear glass lets you read the contents at a glance. Sort by type and size, one kind per jar, so you never dump out a pile to find one screw.
Mount the metal brackets to the wood first, then set the filled jar into them. Refilling takes seconds, and nothing has to be unscrewed from the framing.
Keep the heavy ones, like big nails, to the jars nearest the stair stringers where the wood is sturdiest.
8. Compact Workshop Layout
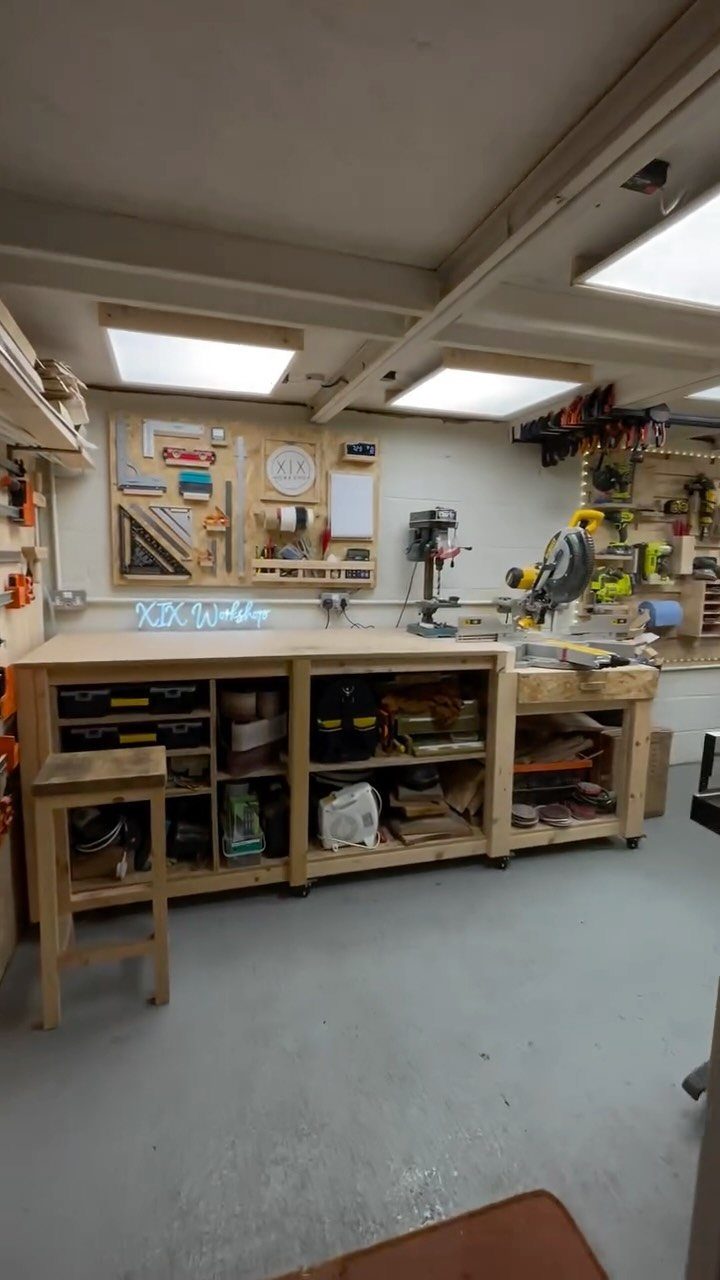
A small shop works when bench, tool wall and machines sit within a step or two of each other. Packing them tight means you turn rather than walk, and every trip across the room disappears.
Start with the bench, since most of your time happens there. Hang the hand tools on a wall right beside it, and keep the power tools you use daily within reach of the same spot.
I would give the bench the longest wall and park machines at the ends, so nothing blocks the path between them.
A sign on the wall is optional, but a shop you like looking at gets used more often.
Maximizing Floor Space
Keep the center of the shop empty and treat it like a race track. A clear middle lets you swing a full sheet of plywood around without bumping a machine, and that matters more than any single storage trick.
Line the walls with the big stationary tools and cabinets: planer, jointer, drill press, bandsaw. Because tools parked along the perimeter stay out of the way, the floor stays open for whatever the day’s project needs.
A wall of cabinets and tools also works as a map.
When each thing has a spot at the edge, you stop hunting for the chisel or tape measure, and in a busy shop that hunt eats a surprising amount of time.
Test the layout by walking a sheet of plywood through the room before you bolt anything down. If it clears every machine, the plan works.
Lighting Considerations
Overhead light comes first. In a small shop every detail counts, and a single dim bulb leaves shadows exactly where you are marking a line or reading a tape.
Then add task lighting at each station. A clamp-on or mounted light at the bench, the drill press and the sharpening spot puts brightness right on the work, so you are not leaning over your own shadow.
I would light the room before buying another tool. Good light costs little, and it makes every cut and every layout mark easier to get right.
Tool Investment Strategy
Buy the machines that do the bulk of your work first. A good one lasts for years if woodworking is more than a passing hobby, so the first price tag is worth the wince.
Buy tools as projects call for them, one at a time, rather than stocking the whole shop on day one.
Start with the essentials, then add a tool when a project calls for it. That way each purchase solves a real problem instead of sitting unused.
Before checking out, look over what you already own. A second tool that does the same job takes up shop space and money you could put toward the one you are missing.






