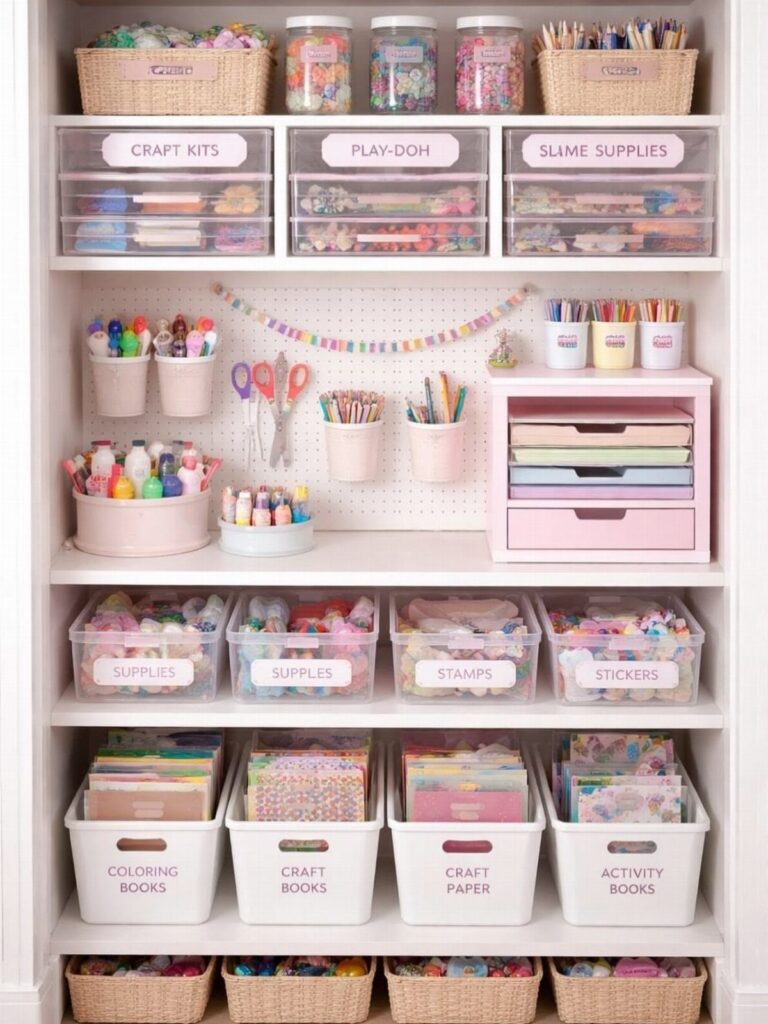
The ideas here run from a $3 Ikea bag organizer and Dollar Tree foam board shelving to matching glass-front cabinets and a custom-built craft table, so the price and effort gap is wide.
What picks yours is the shape of your room: floor space points you to tall units and carts, a bare wall points you to pegboard, and a few spare afternoons make the built pieces worth it.
If you only have a shoebox of supplies and a small corner, start with the cheap fixes and add to them.
1. Pegboard Storage
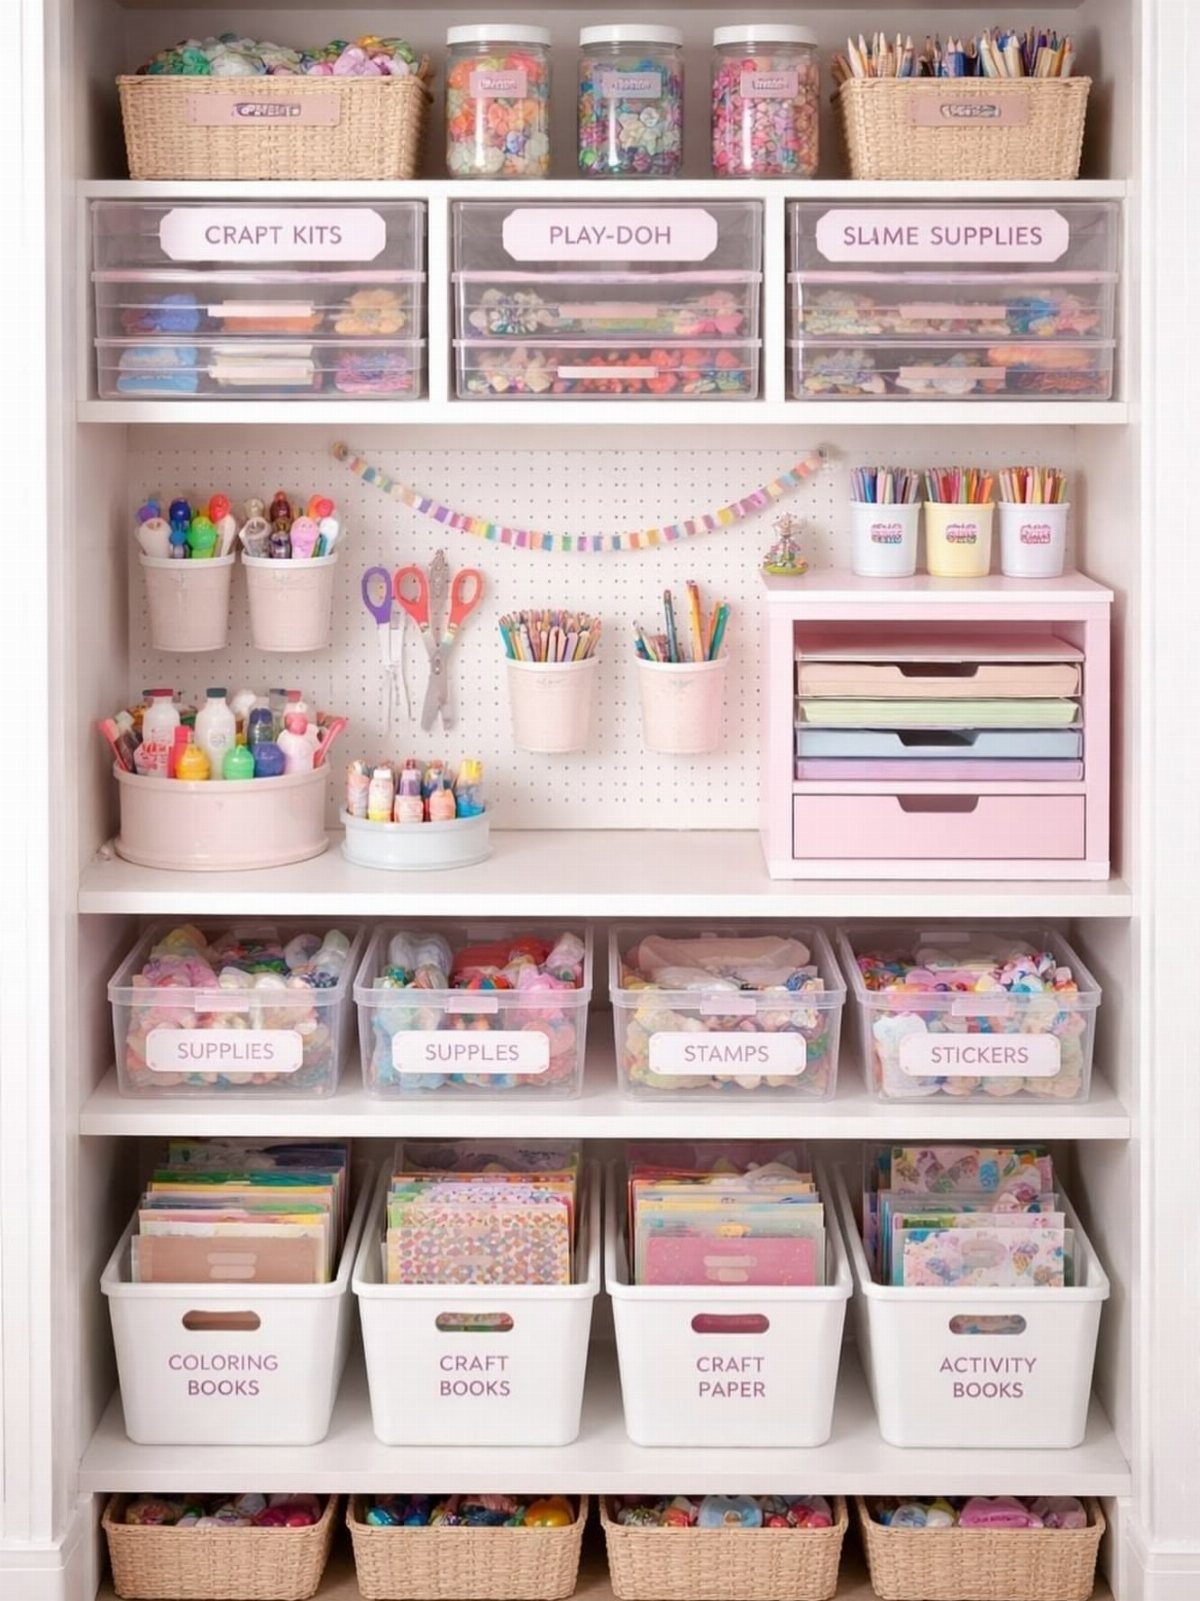
A pegboard turns a blank wall section into storage you can rearrange in minutes. Cups hold scissors and pens, hooks take tools, and a small drawer unit can hang right alongside.
Group items by how often you reach for them. Daily tools go at eye level, and seasonal kits sit on the shelves around the board.
White keeps the board quiet behind busy supplies. Labels on the shelves, like the ones for stamps and stickers, save you from hunting through every bin.
2. DIY Paint Storage
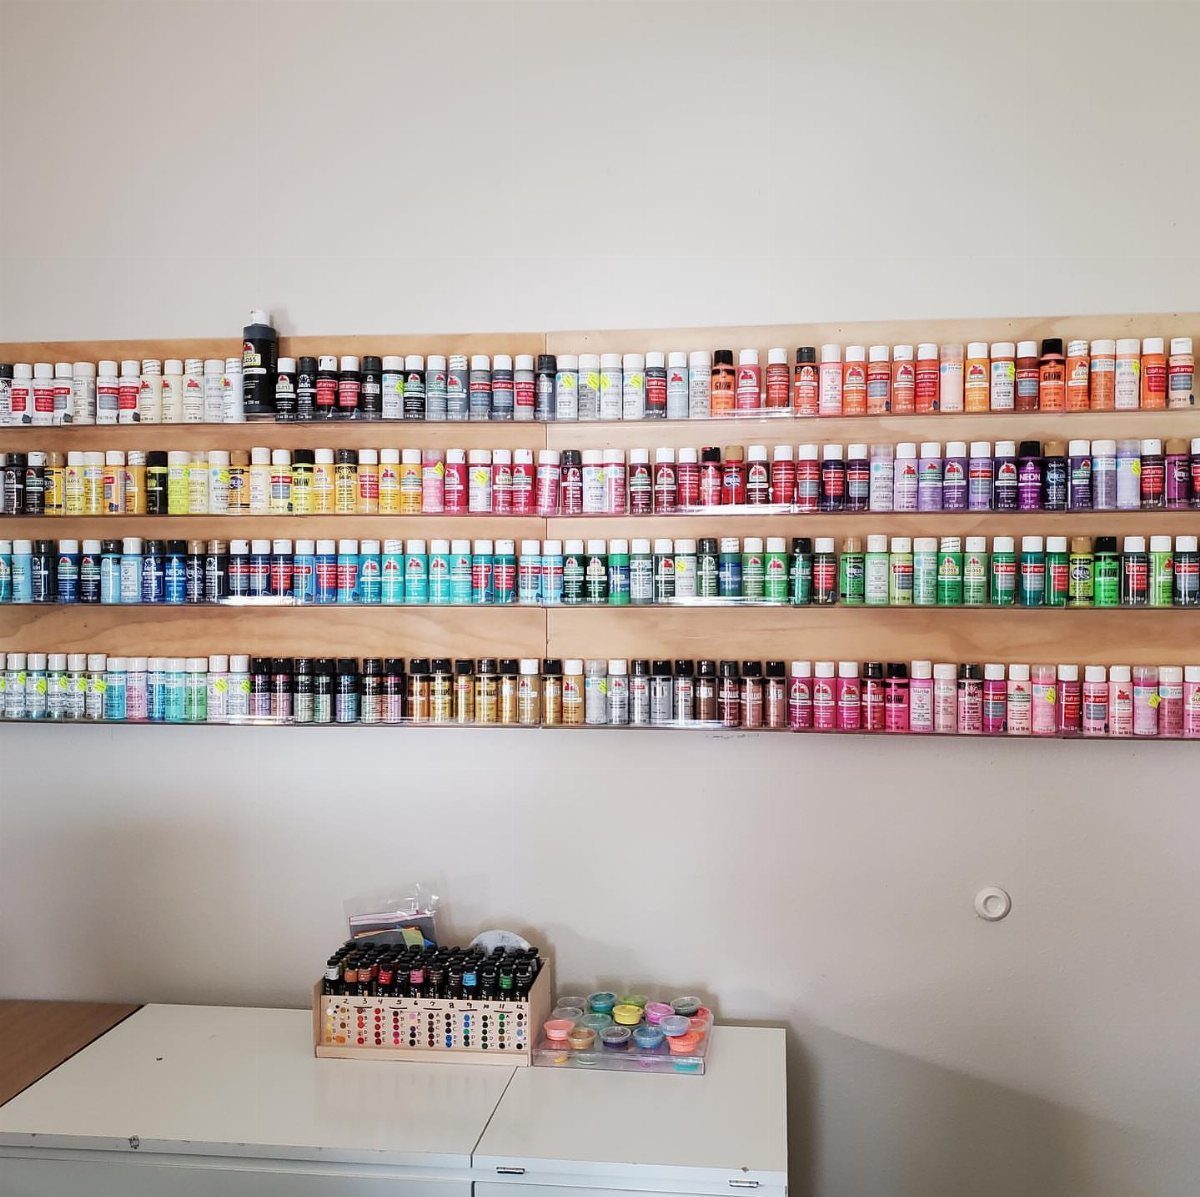
Paint bottles stay easy to scan when they sit in rows on open wall shelves, sorted by color. You see the exact shade without lifting a single lid.
Pick shelves shallow enough that bottles sit in one or two rows. Deeper shelves hide the back row, and you will forget what is there.
A small wooden organizer on the cabinet below can hold the pots and daily-use bottles. That keeps the wall for the full color run.
3. Chalkboard Wall
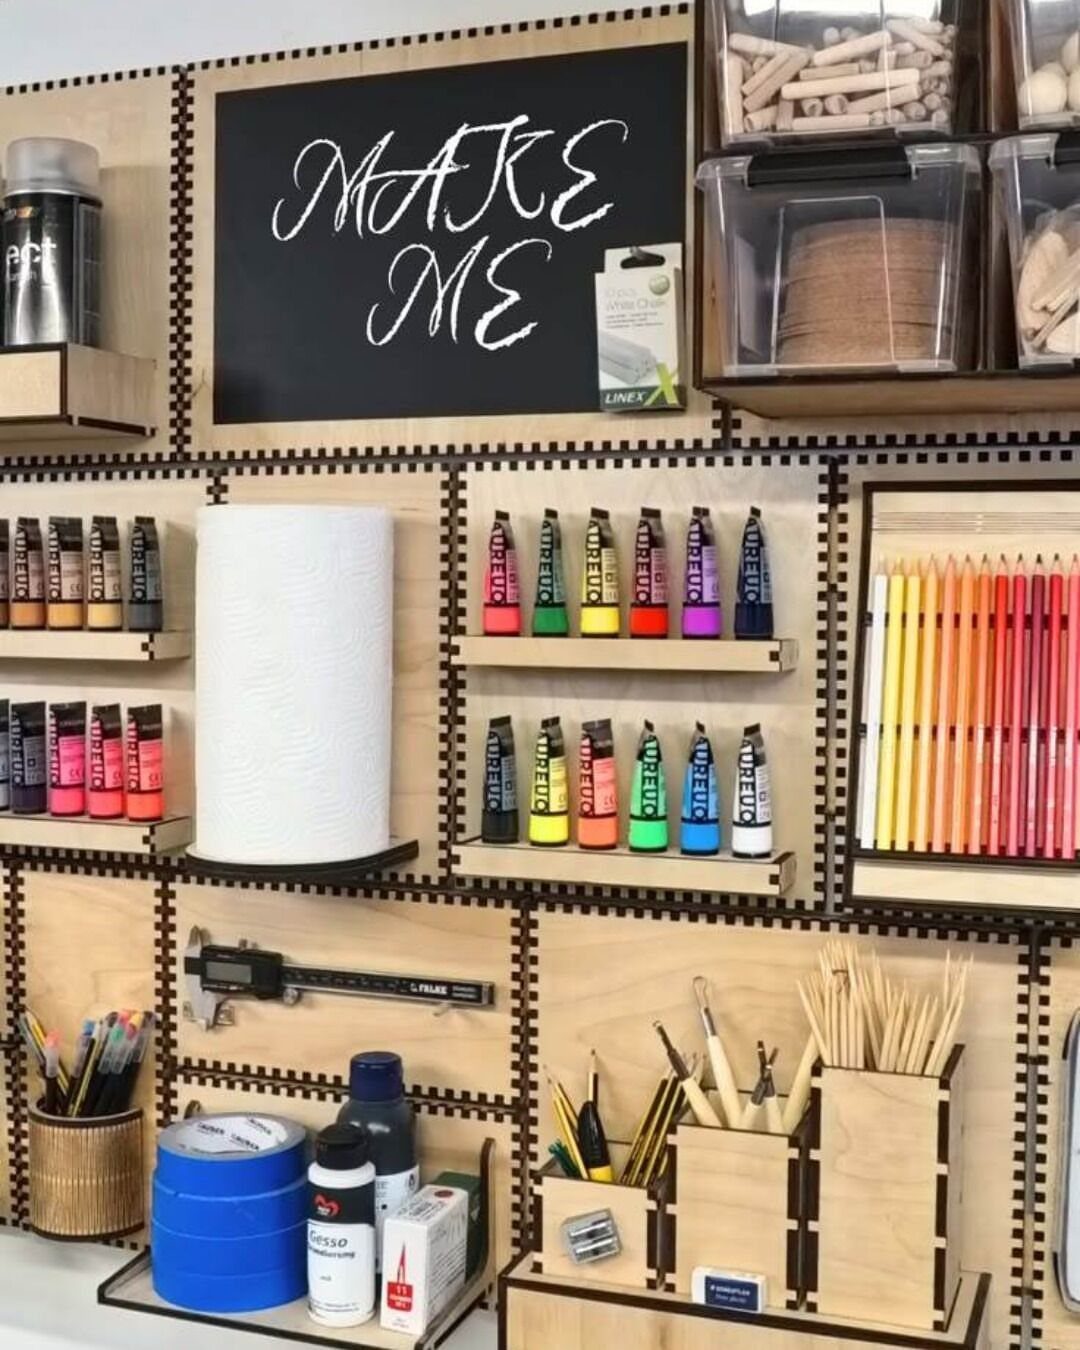
Mounting a small chalkboard above your work zone gives you a spot for the project you are on, a supply list or a quick sketch. A short prompt like "MAKE ME" works as a nudge too.
Put it at the top of the wall, where it does not eat into shelf space.
Clear bins mounted above keep overflow visible. Wipe the board clean between projects so it stays useful.
4. Tall Storage Units
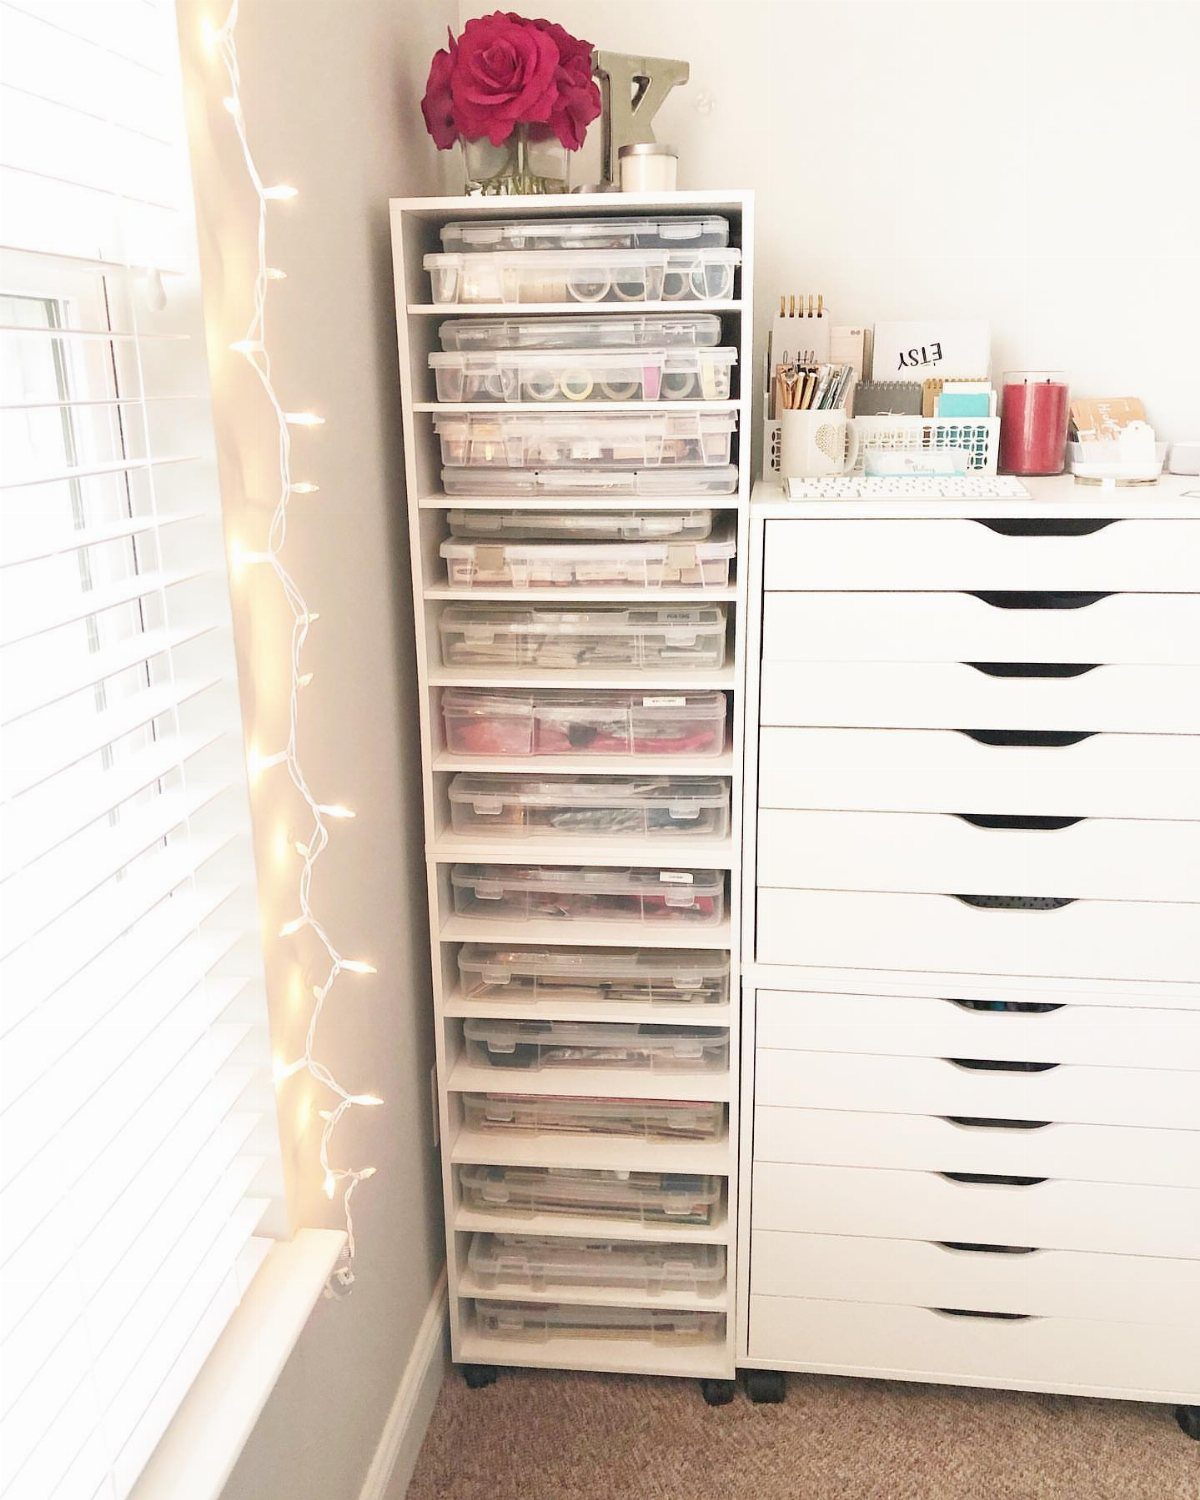
Floor space runs out long before wall height does, so go up. Tall units with drawers and clear bins hold a surprising amount in a small footprint.
Clear drawers let you see the contents without pulling anything out. Keep heavier supplies low, and use the top for things you grab often or want to look at, like a jar of pencils.
2 matching units side by side look tidy and double the capacity. Leave room beside a window so the light can reach the shelves.
5. DIY Fabric Filing
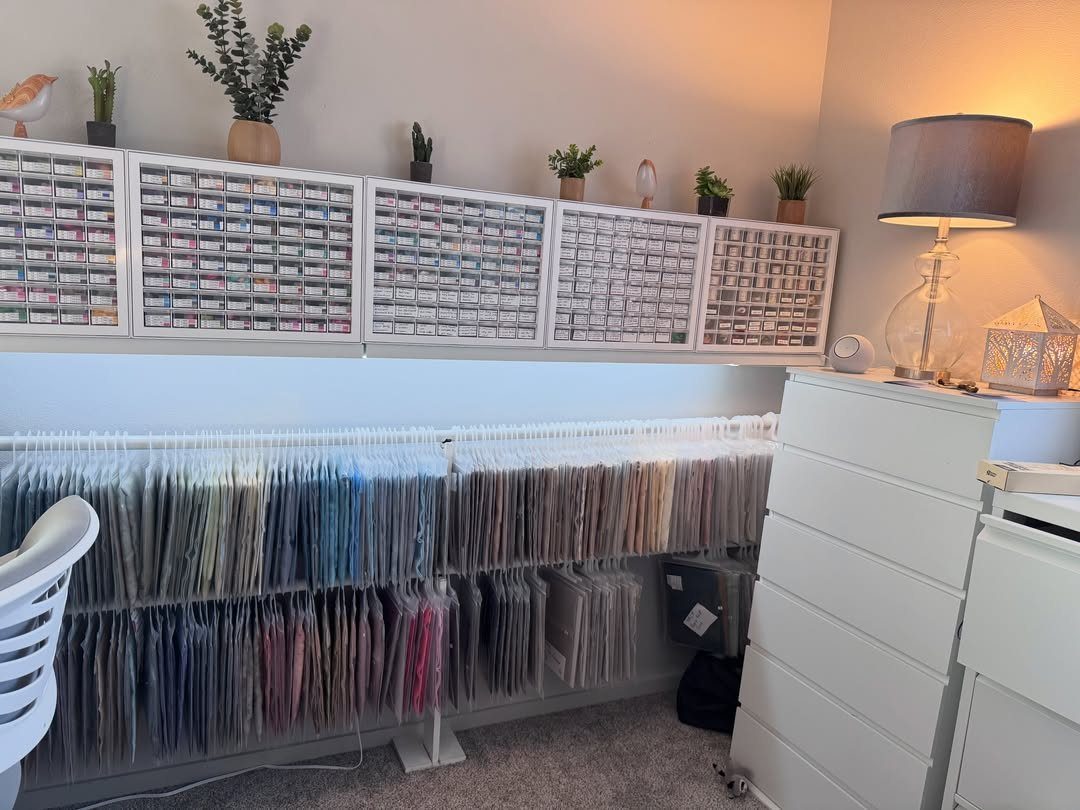
Fabric stays flat and findable when you file it like paperwork. Hanging folders or clear sleeves hold remnants upright, so you flip through them instead of digging through a pile.
Sort by color or by project type, and pick one system. I would label each folder, since scraps of the same print blur together fast.
Small plastic drawers above can take beads and notions. Everything for sewing then lives in one vertical stack.
6. DIY Wrapping Paper Holder
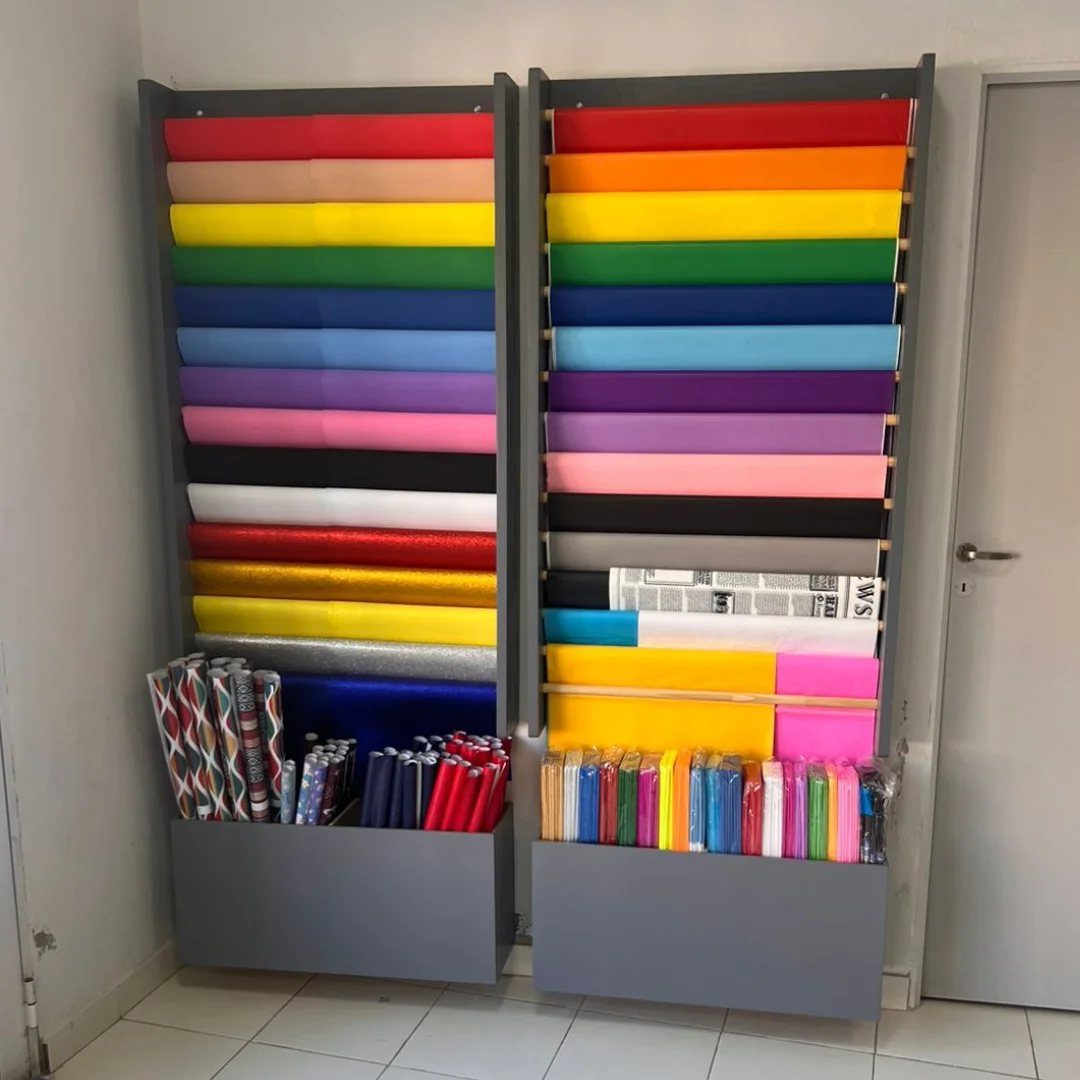
Wrapping paper rolls belong on their sides, stacked horizontally in a tall wall-mounted unit, where you can pull one out without unrolling the rest.
Grey shelving keeps the colors of the paper as the main event. A bin at the bottom takes the overflow and the shorter rolls.
Mount the unit near the door or a work surface so wrapping stays a quick job. Fill the shelves by size, longest rolls at the top.
7. Craft Room Decor
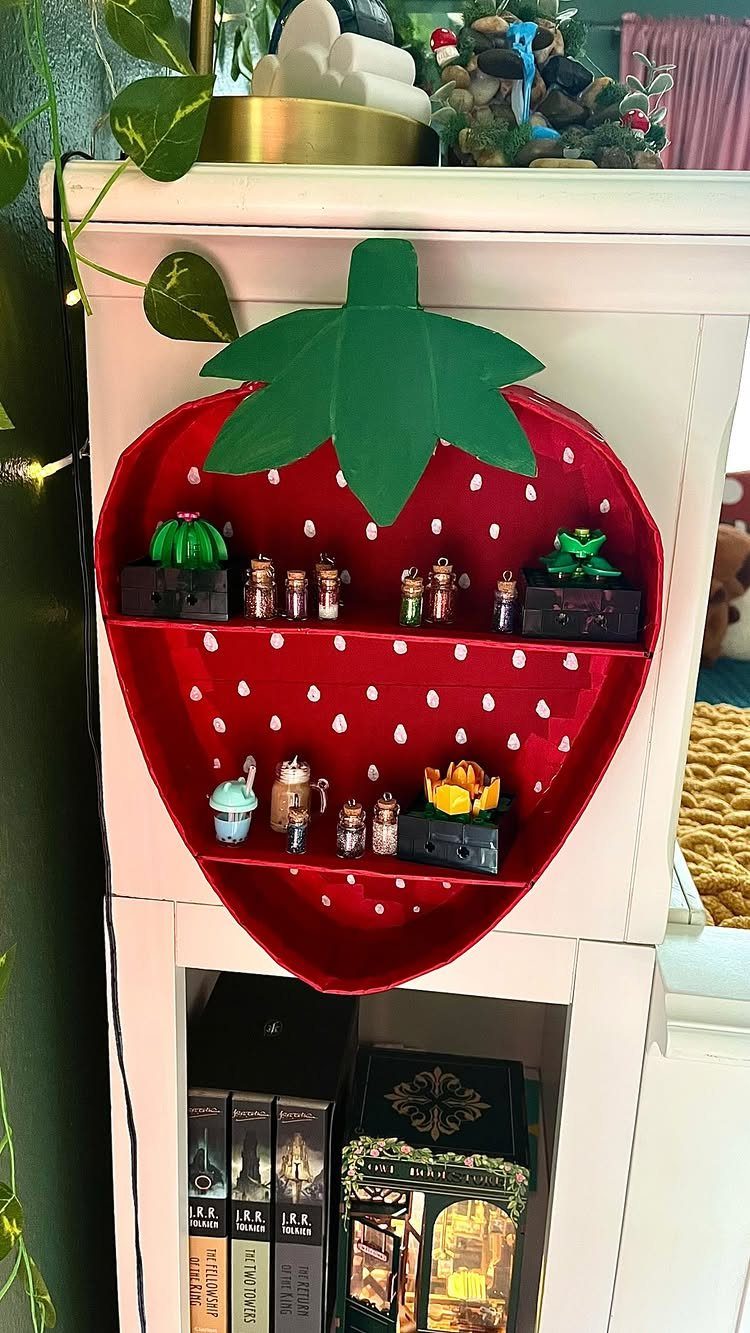
Small plants, vials and figurines fit on it without crowding the wall.
Red against a white cabinet is a strong pairing, so I would keep everything around it quiet. One bold piece per wall reads as a choice; three start to look like clutter.
Mount it where it catches your eye from the work chair, not behind a door.
8. DIY Ribbon Storage
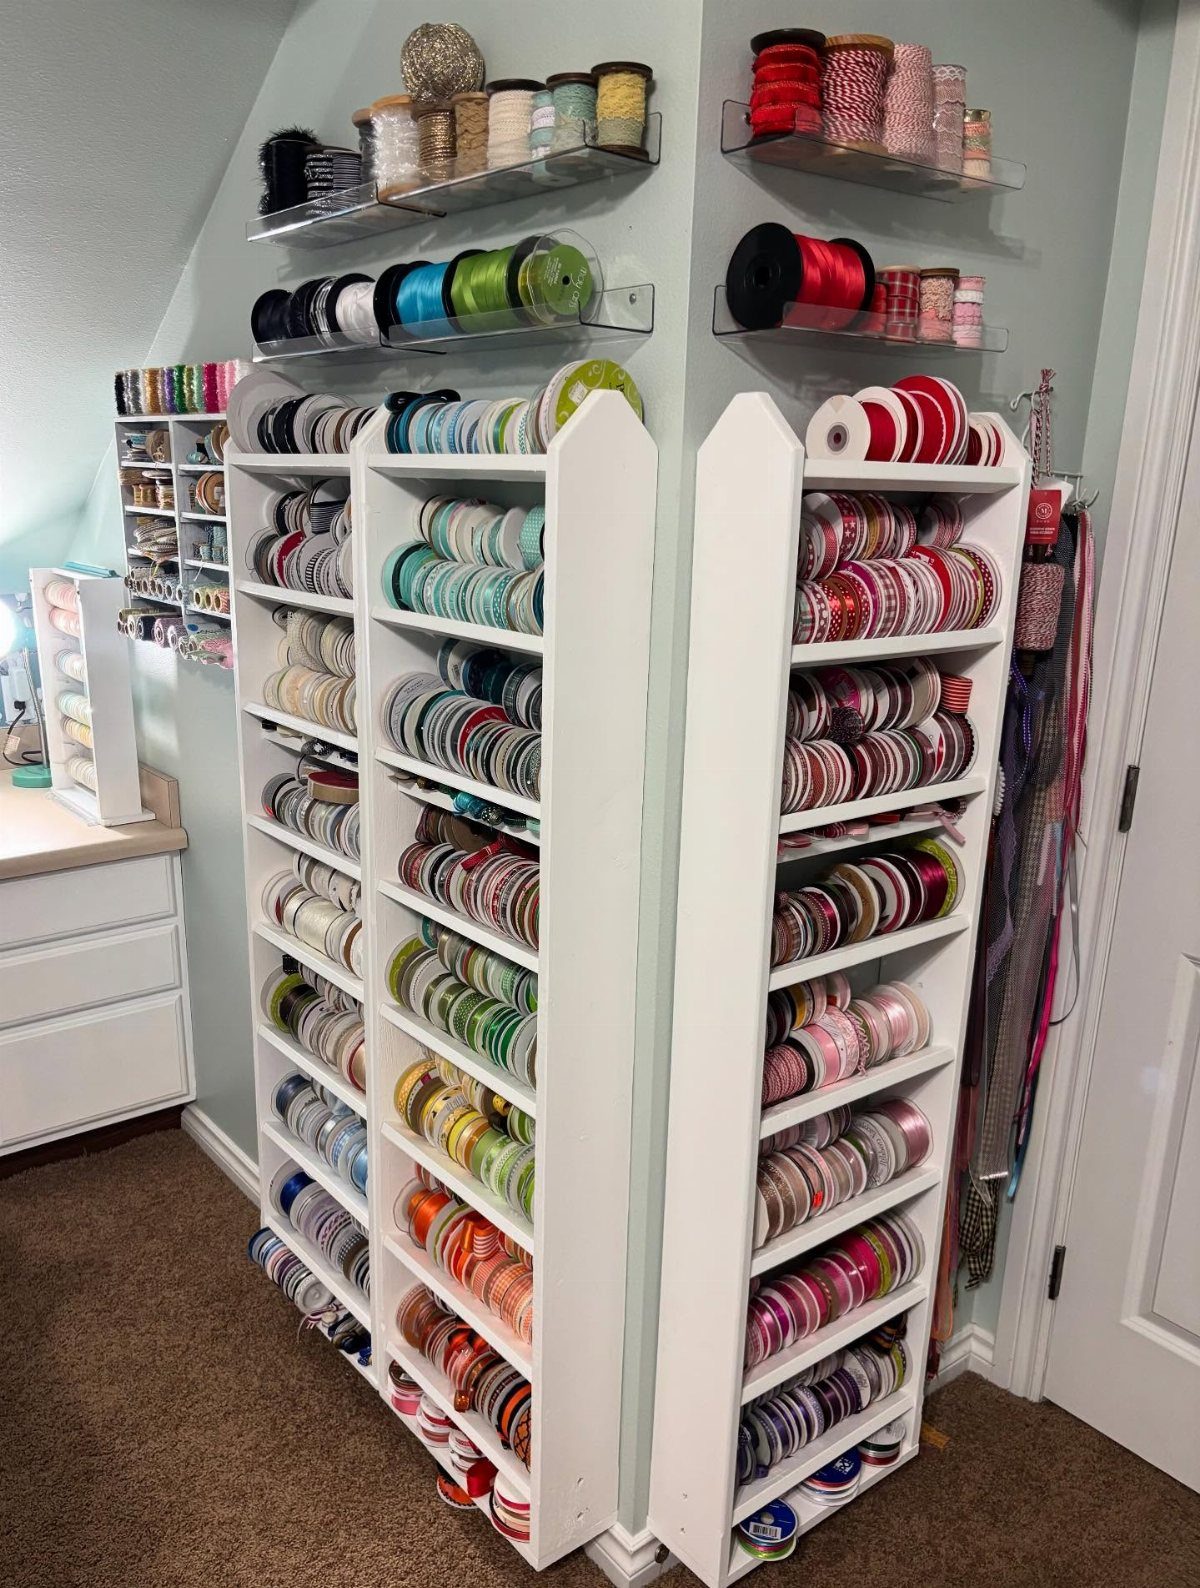
Spools of ribbon tangle and fade when they sit loose in a drawer, so give them a wall or shelf of their own. Open shelving shows every color at a glance, and a spool lying on its side unrolls cleanly.
I like white wooden units for the bulk of the collection and acrylic wall shelves for the overflow, since clear shelves let the ribbon stay the color on the wall.
A dispenser near your cutting spot saves you from pulling spools off the shelf for a short length.
Sort by color, and keep wide ribbon apart from narrow.
9. DIY Tool Organizer
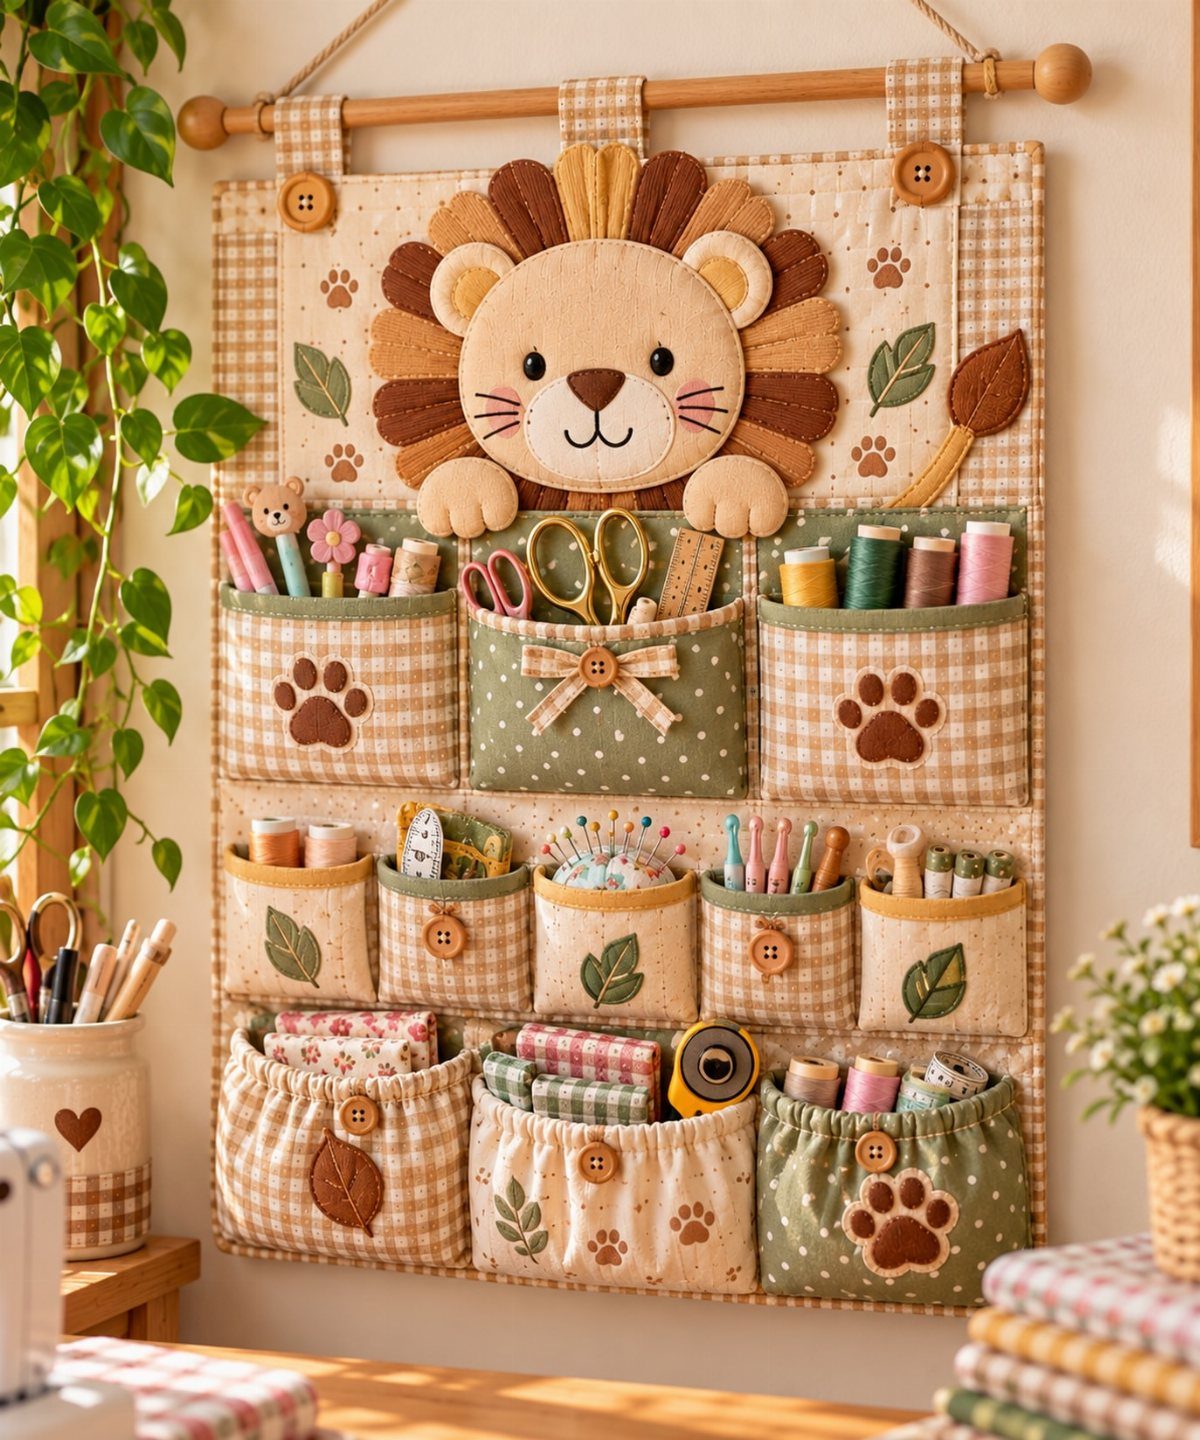
A fabric wall organizer with pockets keeps scissors, rulers and sewing tools off the table and within arm’s reach. The lion face on this one makes a tool holder double as wall art.
Hang it from a wooden rod so you can lift the whole thing down and carry it to another spot. Sew it from sturdy fabric, since pockets holding metal tools sag fast in thin cloth.
Make the pockets narrow for pens and wide for scissors. A pocket that fits its tool means nothing slides to the bottom.
10. DIY Craft Table
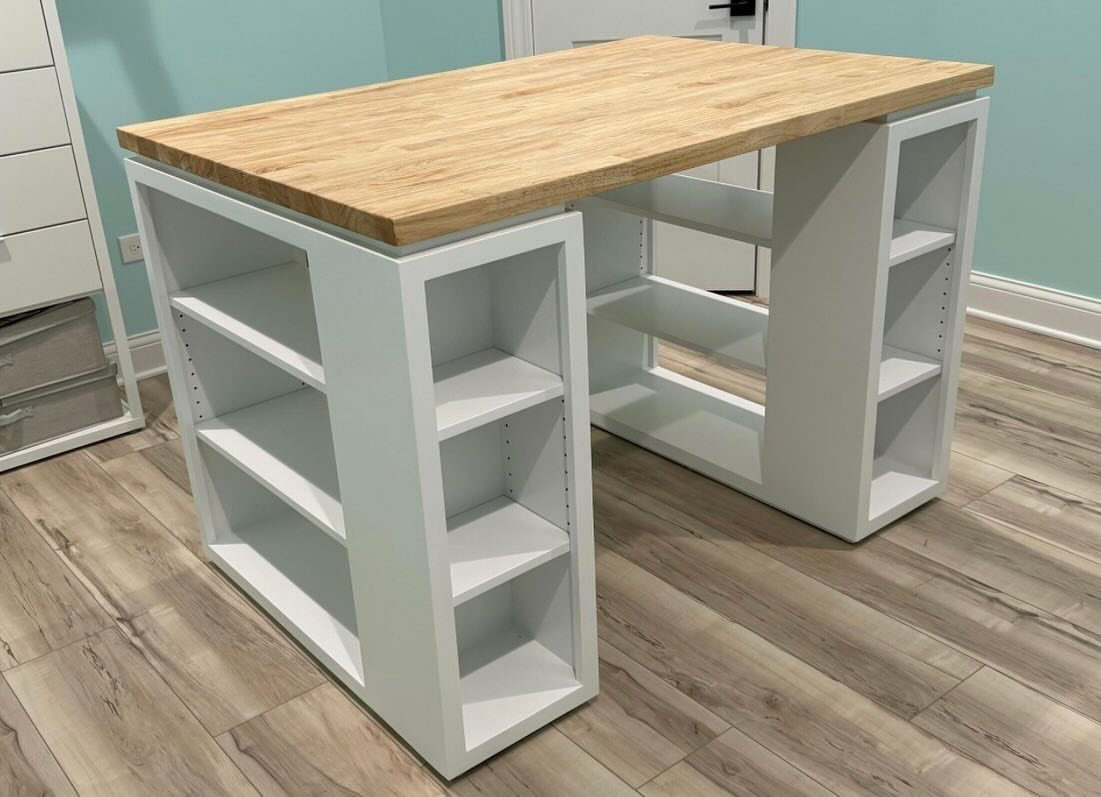
A custom table lets you size the top to the room instead of settling for whatever a store sells. Light wood for the top and white for the base is an easy pairing that stays bright against a pale wall.
Built-in shelving under the surface is what I would add first. It puts paper, paint and bins at knee height, so the top stays clear for working.
Plan the height around how you sit. Standing projects want a taller table, and sewing or sketching wants a lower one.
11. Craft Room Flow
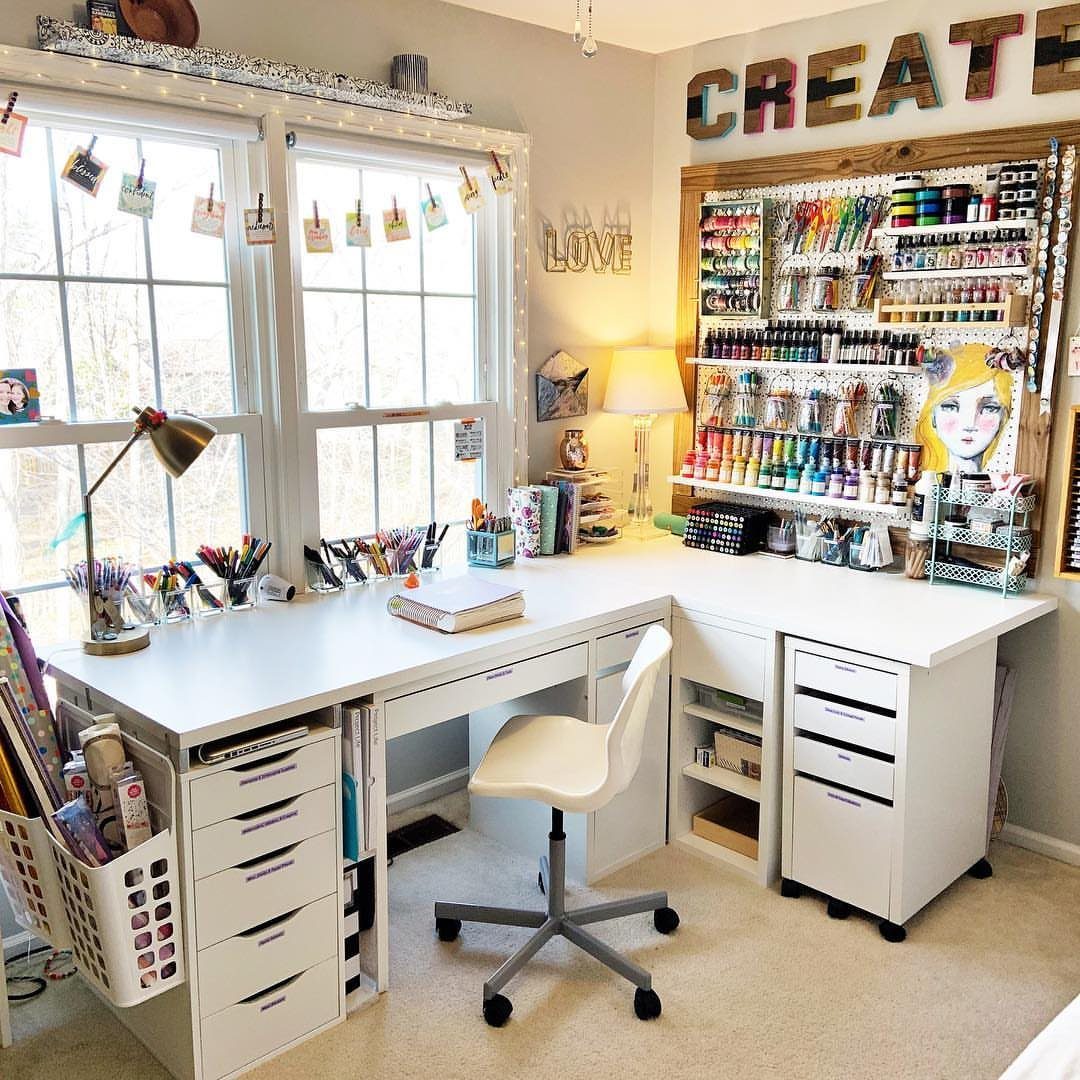
Flow means the things you grab most sit closest to where your hands already are. An L-shaped desk helps, because one leg can hold the main project and the other can handle cutting or gluing without you leaving the chair.
A pegboard wall behind the desk keeps daily tools in view, so nothing needs a drawer opened. Seasonal supplies can sit farther off.
Before you buy anything, walk through one project and note where you stop to look for something. Those stops show you where storage belongs.
12. Clear Storage Bins
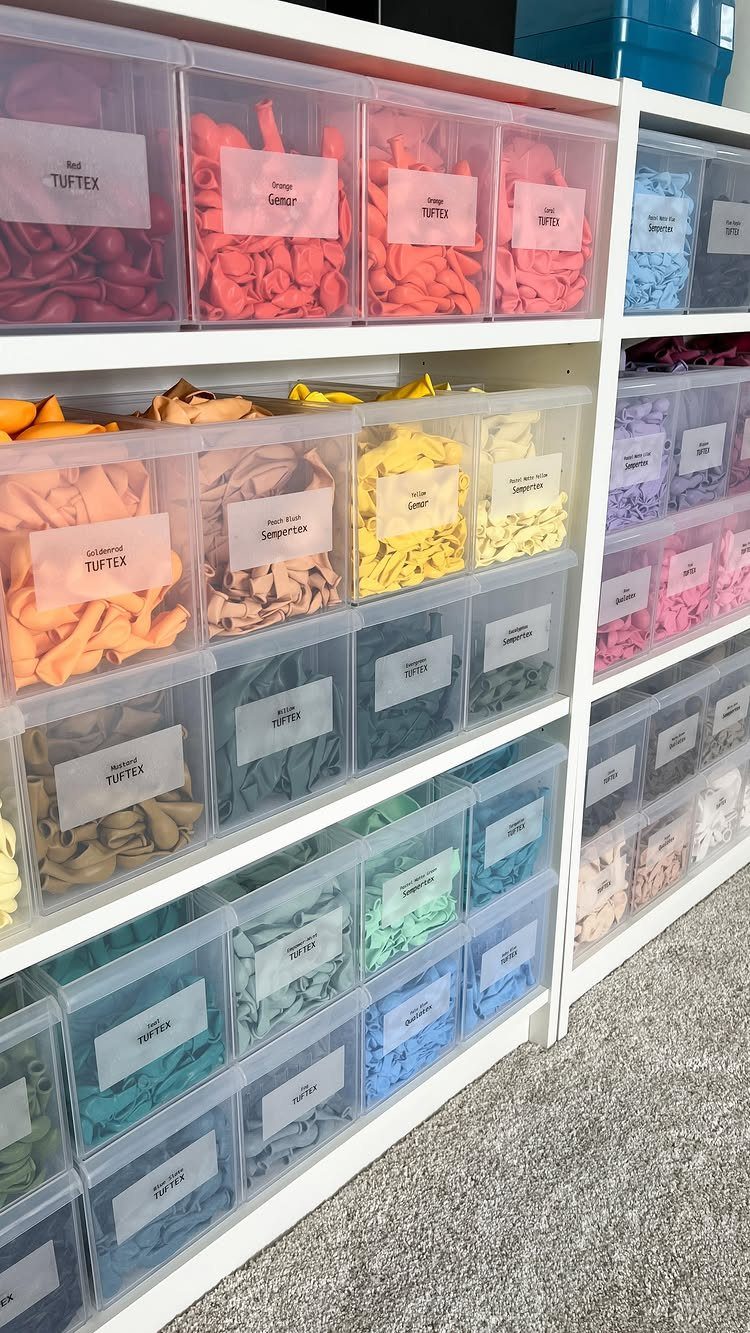
Clear bins let you read the contents from a few steps away, which makes them my pick for anything small and colorful. Balloons are a good example: sorted by brand, each bin is findable at a glance.
Still add a label.
Choose bins that fit your shelf depth with little wasted space. Stacking ones save floor room, and a lid keeps dust off supplies you use only now and then.
13. Tilt Bins
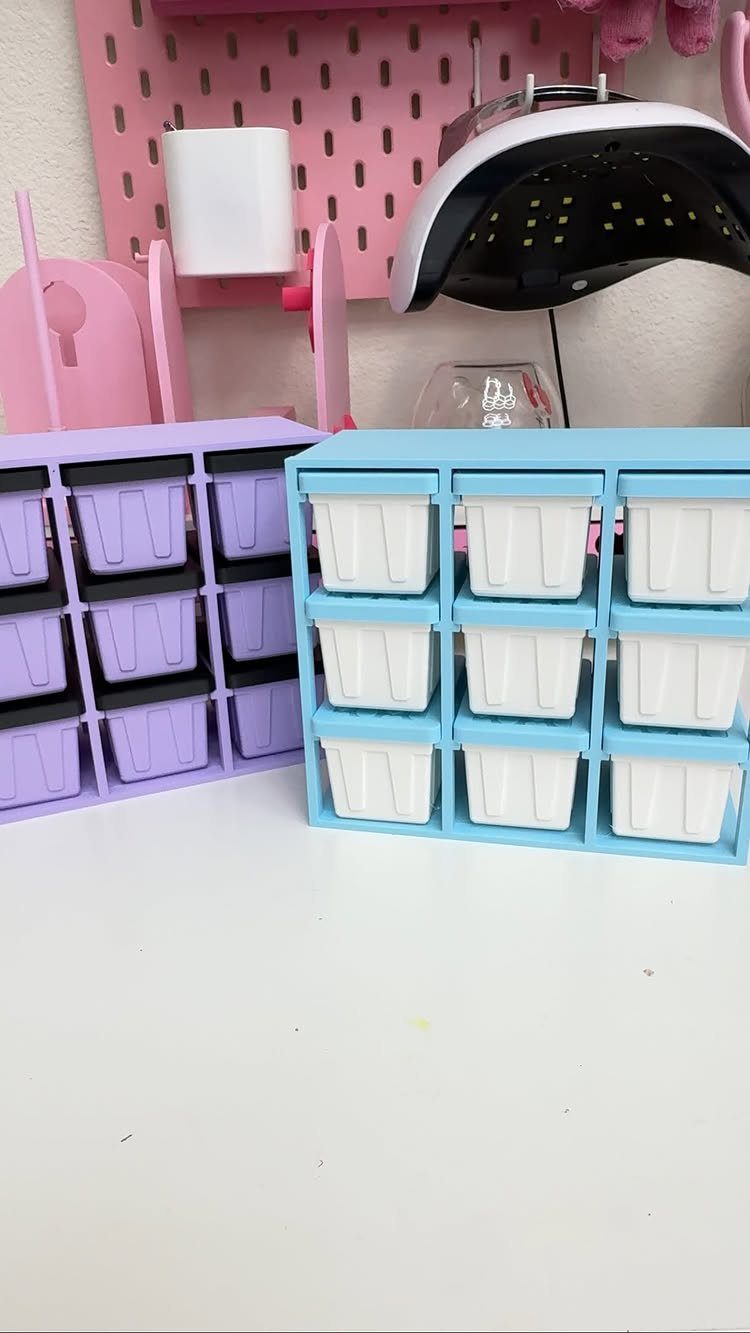
Small embellishments like buttons, sequins and beads get lost in a drawer, and tilt bins fix that. Each bin sits at an angle, so you see the contents and scoop them out without lifting anything.
Stack the bins by type, one category per bin, and keep them on the work surface where your hands already are.
Purple and blue stay easy to tell apart, so I would give each color its own job, say one for metallic bits and one for natural ones.
A pegboard behind them can hold the tools that go with the small stuff.
14. DIY Paint Brush Holder
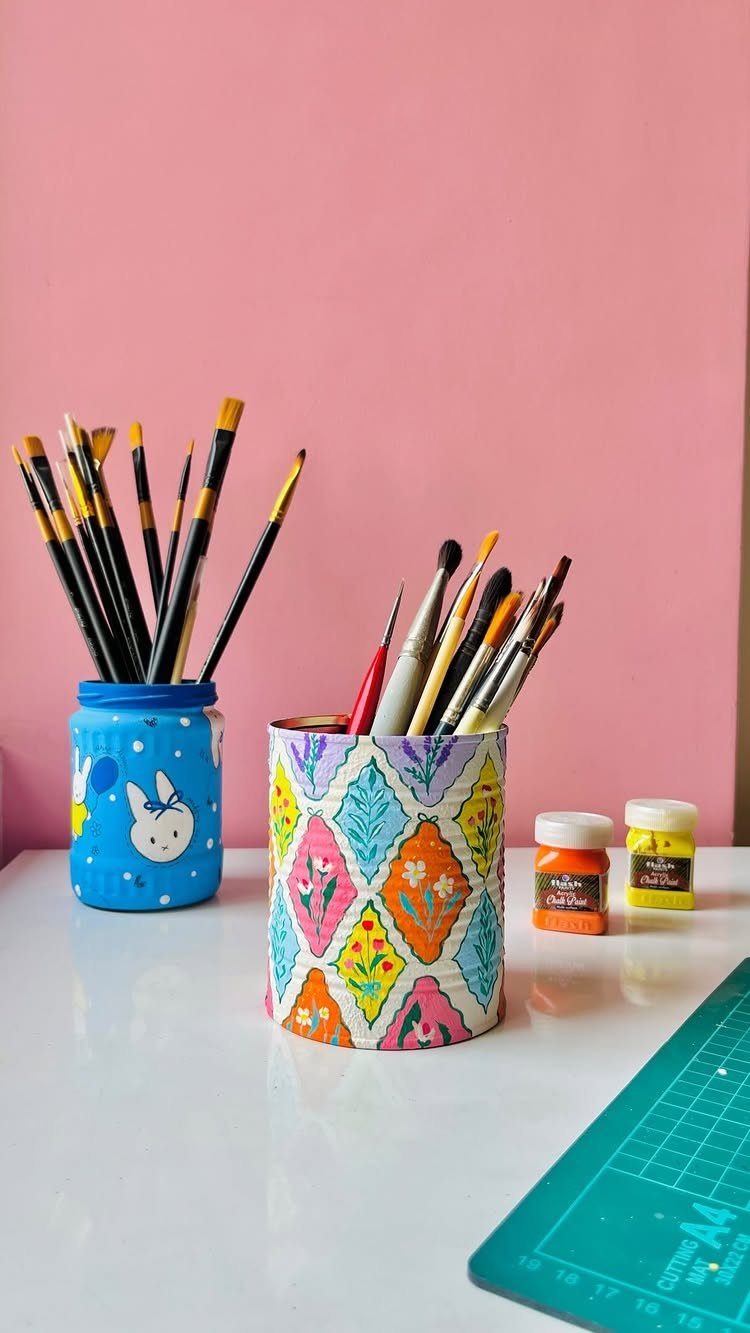
Paintbrushes last longer and stay easier to grab when they stand bristles up in a jar. Decorated jars do the job, and a plain glass one painted or wrapped in paper costs almost nothing.
Use two or three jars and sort brushes by size or by job, so fine detail brushes never get lost among the wide ones. Choose a jar heavy enough that it will not tip when you pull a brush out.
Set the jars next to your paint pots, on the side of your dominant hand.
15. Craft Room Makeover
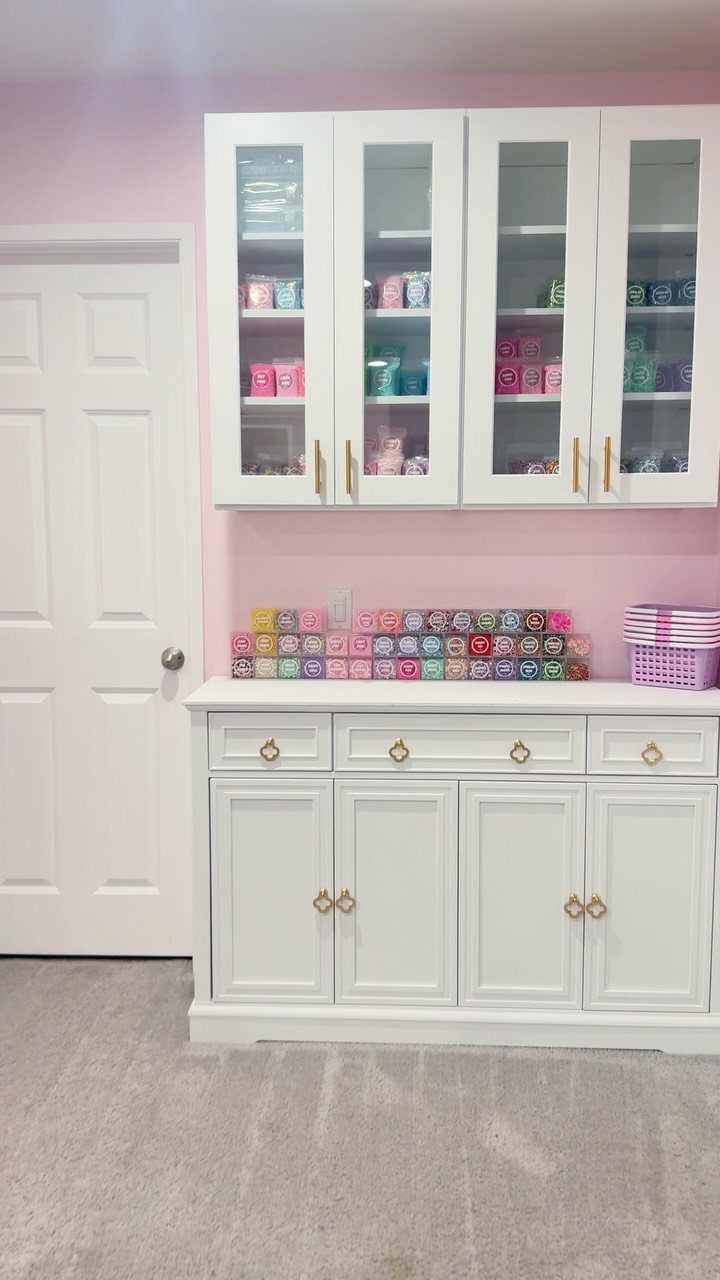
Matching cabinets do more for a craft room than any single organizer.
Solid doors on the base cabinets hide the bulk stuff like batting, paper packs and fabric bolts, while glass-front uppers keep the things you grab every day in plain sight.
Put the supplies you reach for daily behind the glass, sorted by color, and the overflow in the base cabinet. Glass doors make you tidy up, since a jumble shows, and I think that is a good thing.
A pale wall color keeps the room from feeling smaller than it is.
16. Craft Room Inspiration Layout
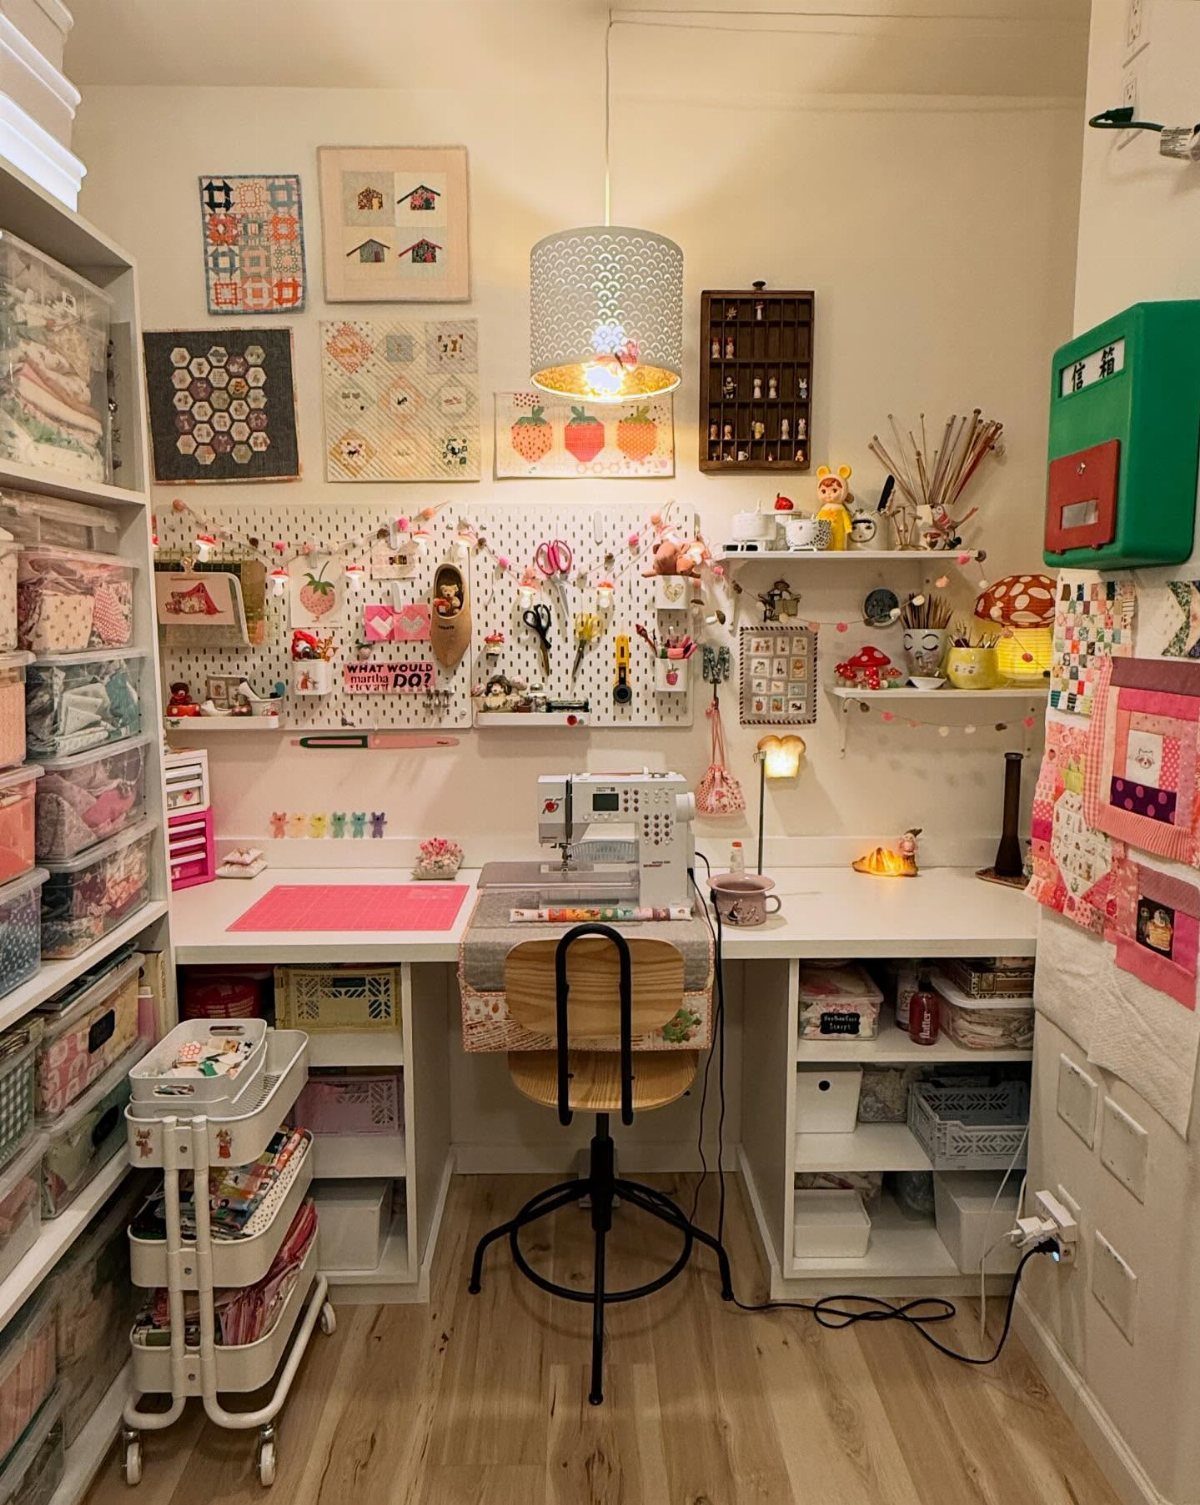
A good layout starts with one zone for each kind of work.
Put the desk, a pegboard above it and a rolling cart beside it within arm’s reach of the chair, so the tools you use most never make you stand up.
Use the cart for whatever the current project needs, then roll it away when you finish. Fabric art and supplies on the walls fill the space above the work area without costing floor room.
Sketch your own room on paper first, marking the door and window. Then copy only the zones you will actually use.
Use Vertical Space
Walls hold more than most people use, and a pegboard is the cheapest way to claim them. Hooks take the bulky items like wrapping paper and craft paper, so rolls stay off the floor and out of drawers.
Add baskets and bins to the board for the small stuff. Buttons, thread and yarn all sit well in them, and the board keeps working as a flexible system instead of a fixed shelf.
Before you drill, measure the wall section and decide which items will hang there. Weigh the heavy ones first, since a full basket of yarn pulls harder on a hook than a roll of paper does.
Consider Budget-friendly Options
Craft storage does not have to be bought as storage. Look at what is already in the house first, then shop at stores like Dollar Tree, Michaels and Ikea for what is missing.
A cardboard shipping box can be cut down to fit a narrow gap, then fitted with cardboard strips glued inside as dividers.
A coat of paint in the room’s main color or a layer of plain wrapping paper will hide whatever the container used to be.
For custom paper shelving, cut Dollar Tree foam board to size with a metal ruler and a sharp utility knife, then join the pieces with hot glue. The cost is under $10, while similar shelving retails for over $60.
Ikea’s plastic bag organizer works for vinyl rolls and costs $3. A bookcase can also hold a printer and cutting machine; measure both first so it fits.
Twist ties or zip ties bundle extra cord length and keep cables from hanging loose.
Frequently Asked Questions
How do I start organizing my craft room?
Pull every supply into one spot and take a rough inventory, tossing what you no longer need. Seeing everything together shows you what you own and how to group it.
Pick one project, work through it start to finish, and mark every spot where you stop to look for a tool or supply; each of those pauses points to where a bin or shelf should go.
How can I maximize space in a small craft room?
Wall height is the space most small rooms leave unused, so shelves and racks that climb the wall beat anything that spreads across the floor.
Tall units with clear drawers and a rolling cart beside the desk add capacity without eating floor room.






