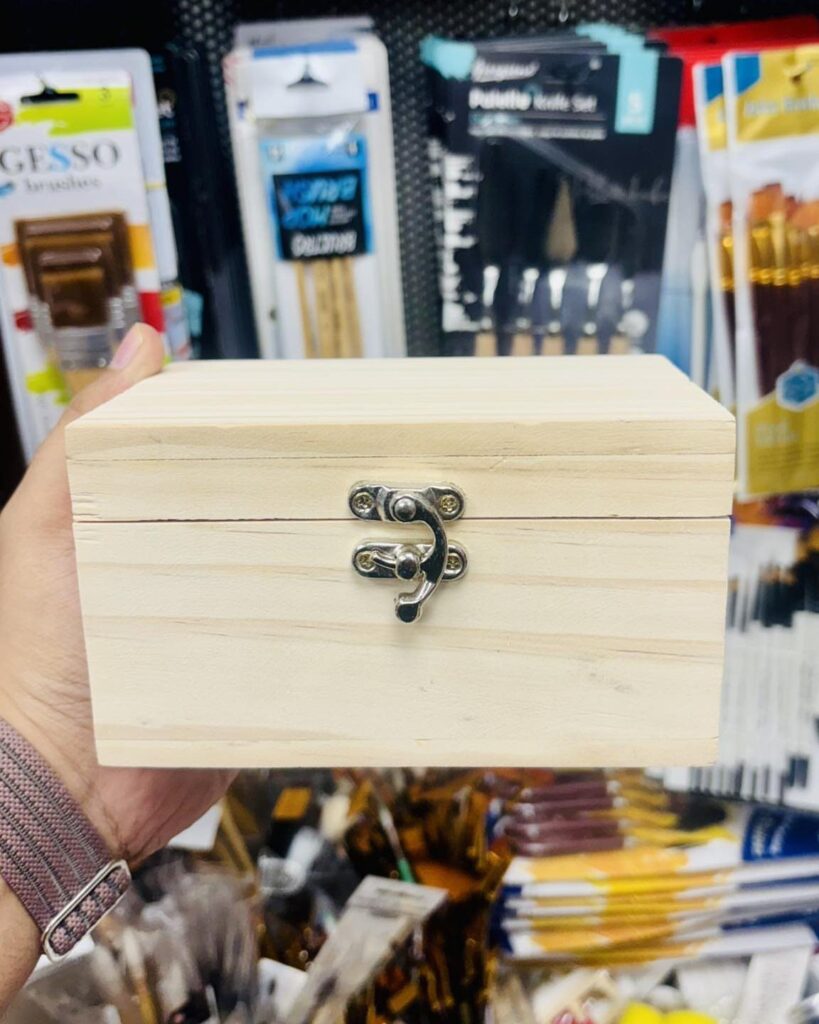
Effort runs from the Unfinished Pine Jewelry Box, which needs only sanding and a coat of stain, to the Carved Floral Wooden Box, where the carving sets how many hours you will spend.
Pick by what you can finish in an afternoon: a drawer that slides or a painted lid fits that window, while carving takes sharp tools and patience. Compartments, engraving and painted finishes sit in between.
1. Handmade Wooden Jewelry Boxes
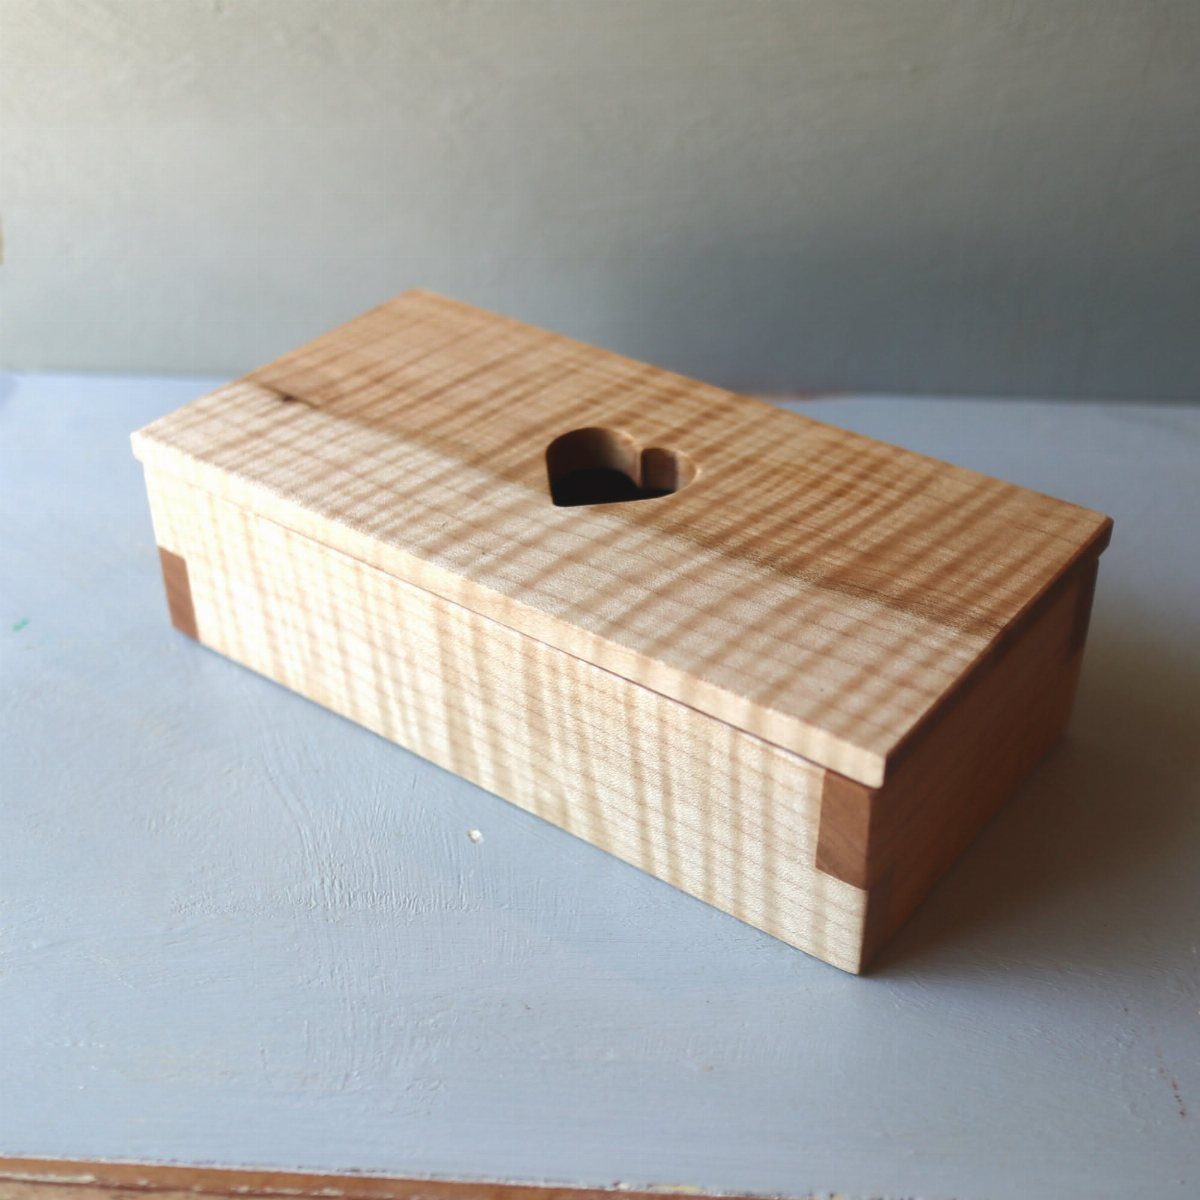
A heart cut into the lid is the detail that makes this box feel made by a person rather than a machine.
Light wood lets the cutout read clearly, so I would keep the finish clear instead of staining it dark.
A cutout also means the lid no longer seals flat, so I would save a box like this for pieces you wear often, not heirlooms you want shielded.
For a gift, the shape does the personalizing before any engraving is added.
2. Simple Wooden Jewelry Boxes
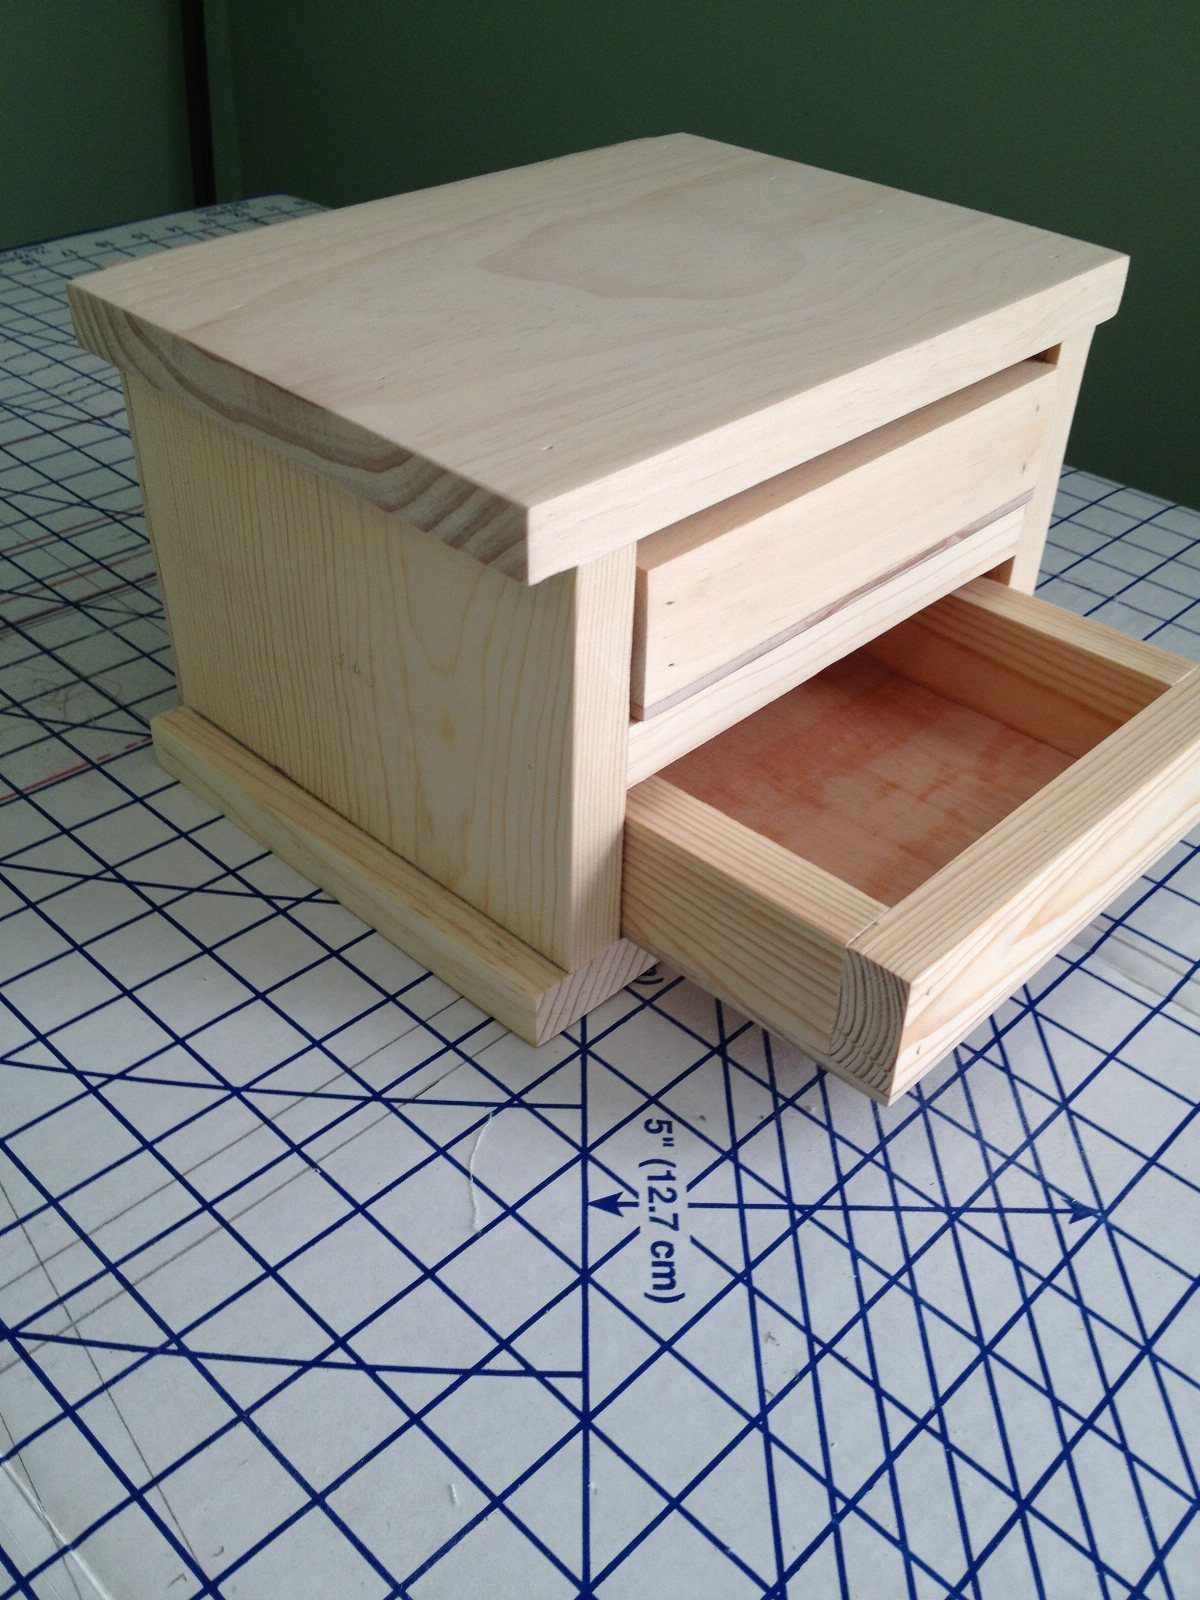
Plain light wood, square corners and a drawer that slides: that is all a simple box needs.
Simple suits a first build, since fewer parts mean fewer places to go wrong. A drawer that fits snugly is the one detail worth slowing down for.
Leaving the wood unfinished keeps it easy to stain or paint later.
3. Wooden Boxes with Personalized Engraving
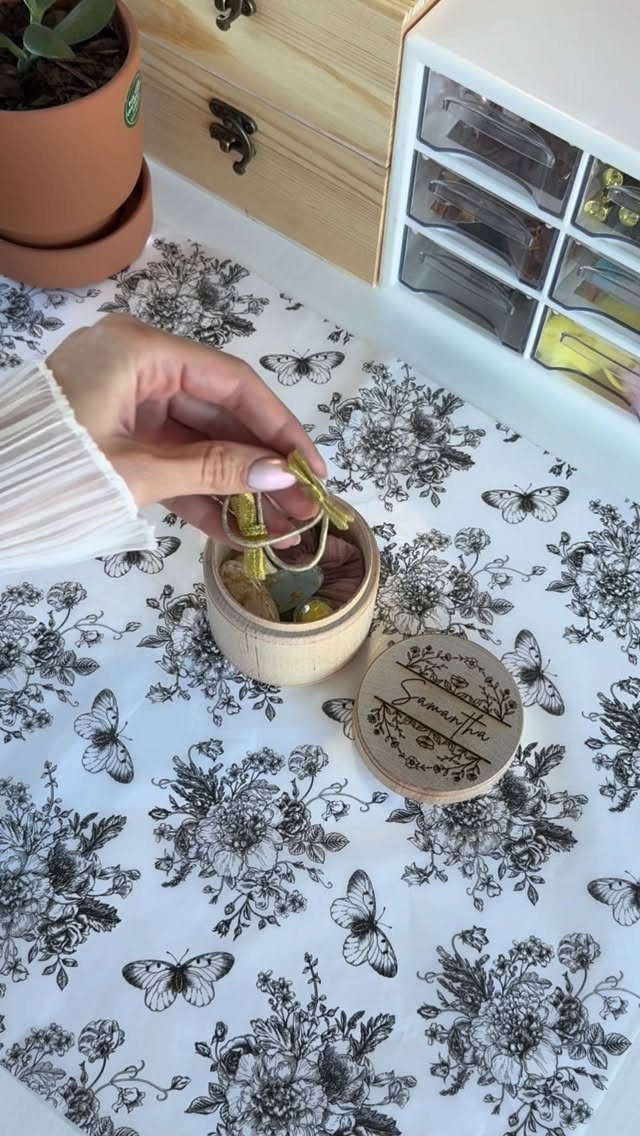
A name across the lid turns a plain round box into a gift nobody else will have. Engraving works best on a smooth, light surface, so sand the lid well before any lettering goes on.
Short names fit most cleanly on a small lid. A longer one needs smaller letters, and that is a limit worth planning for before you commit.
Pick the box first, then the lettering. A round lid gives you a gently curved line to follow.
4. Wooden Jewelry Boxes with Compartments
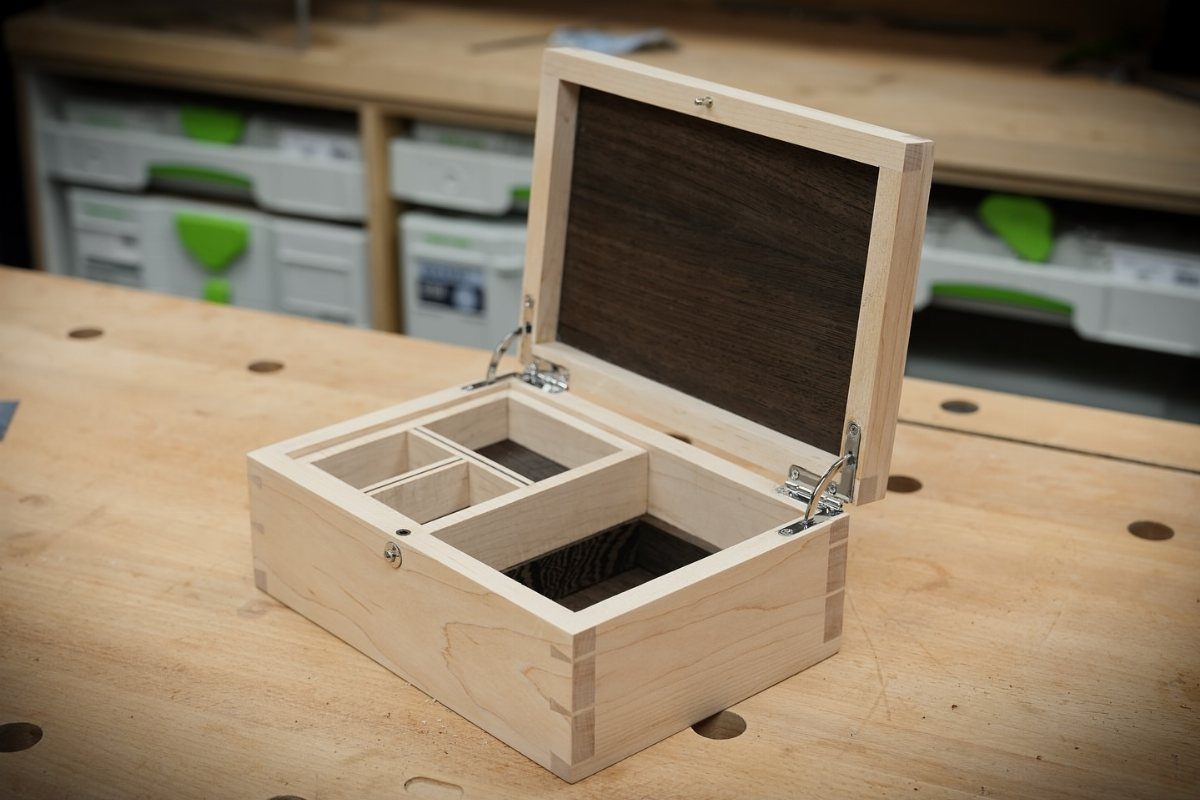
Dividers inside decide whether a box stores jewelry or just holds a tangle.
Small compartments keep rings, studs and chains apart, and I like a light interior under a darker lid because the pieces are easy to spot when it opens.
Plan the layout around what you own before cutting a single divider. Measure your bulkiest piece first, then size the sections to fit.
Thin dividers waste the least space in a small box.
5. Painted Wooden Jewelry Boxes
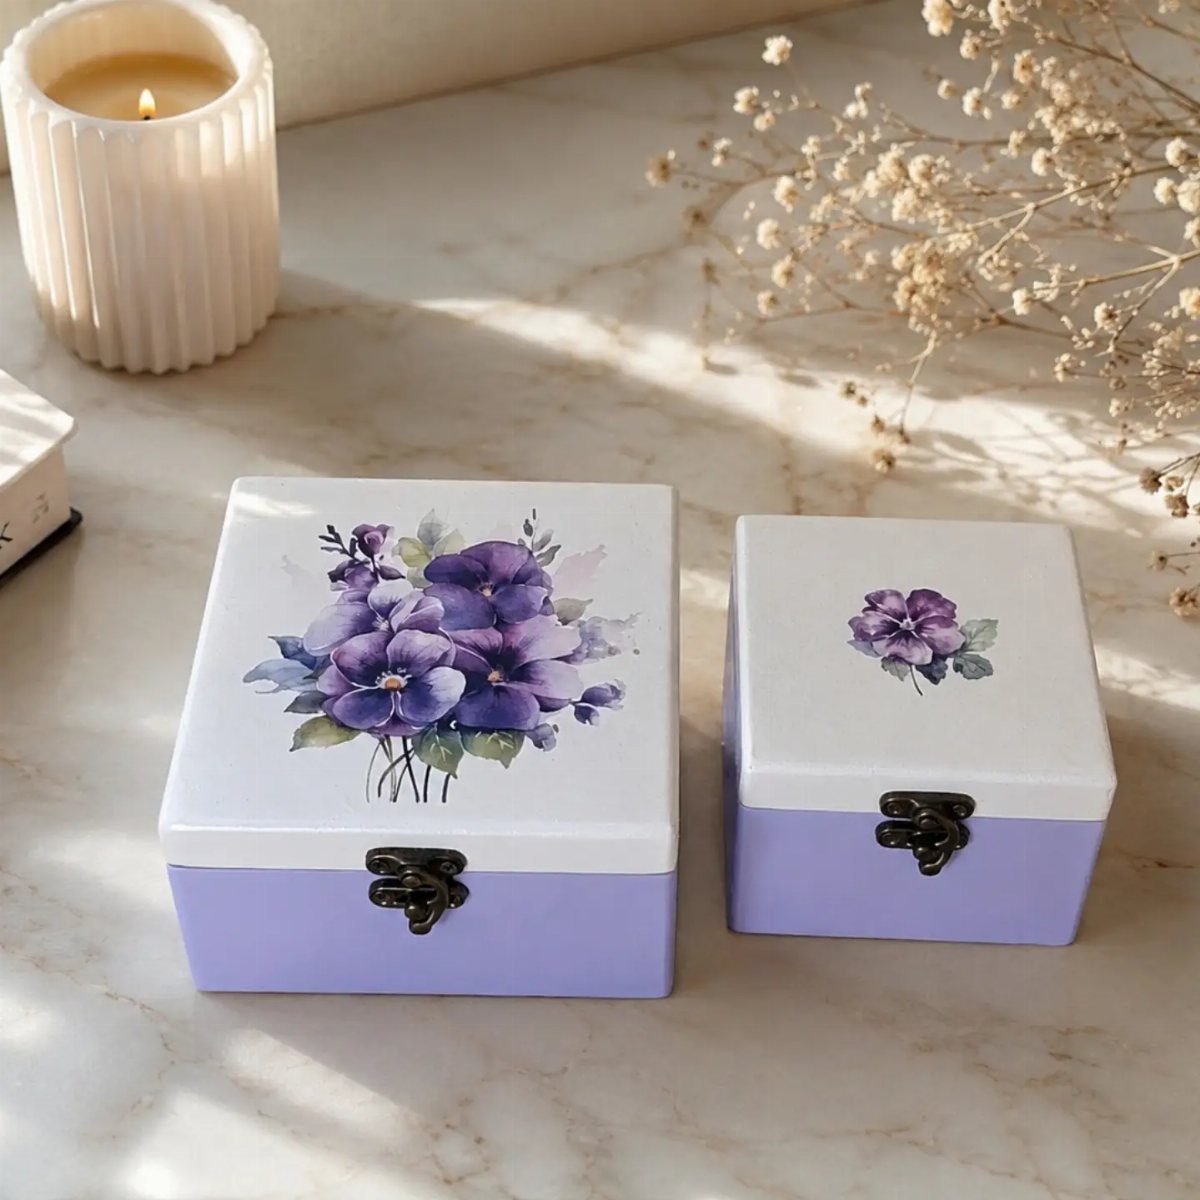
Paint gives a plain wooden box a personality that stain cannot.
Floral designs on the lid, in purple and white, turn a pair of small squares into a matching set, which makes an easy gift for a friend or a sister.
Sand the lid first so the paint goes on evenly, and keep the design on the top so the sides stay clean.
Brushwork takes patience but little money. A few small paint jars and a fine brush cover the job.
6. Carved Floral Wooden Box
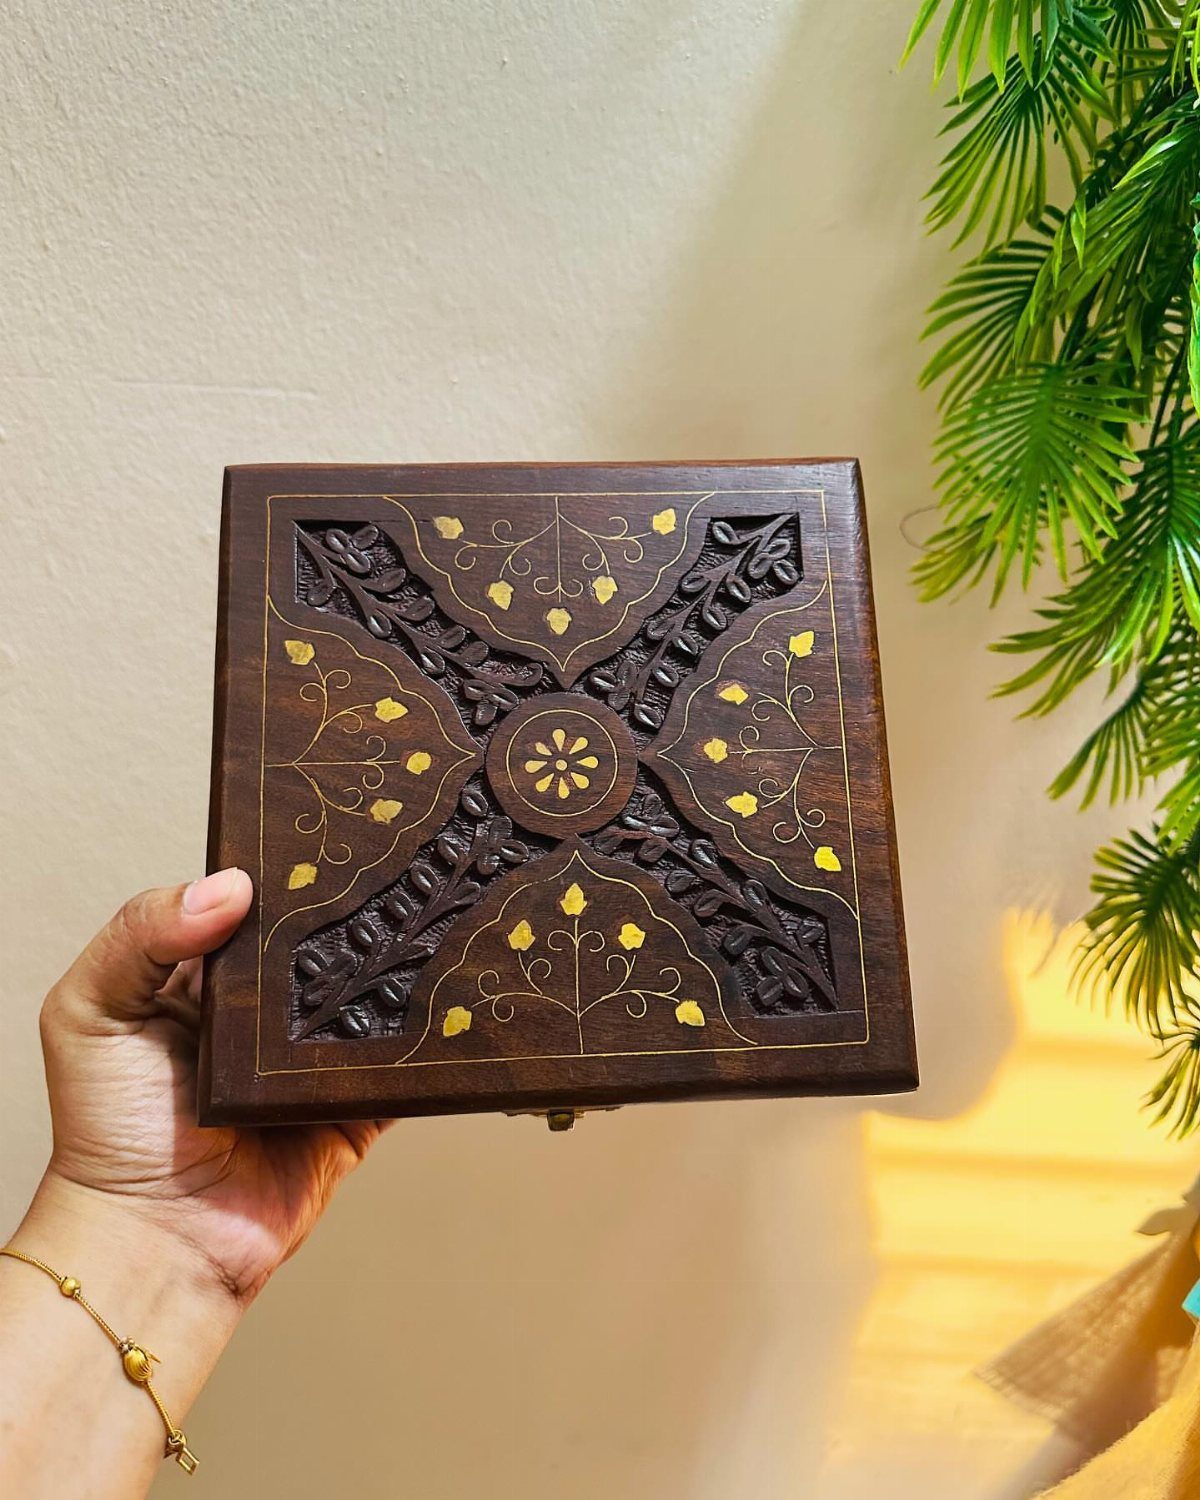
Carving is the slowest route here, and the dark wood and gold accents show why people pay for it. Floral motifs on a compact square lid give the eye plenty to follow without crowding a small surface.
I would only try this with a sharp set of carving tools and some patience. For a gentler version, a shallow design with a single touch of gold keeps the look without hours of work.
7. Unfinished Pine Jewelry Box
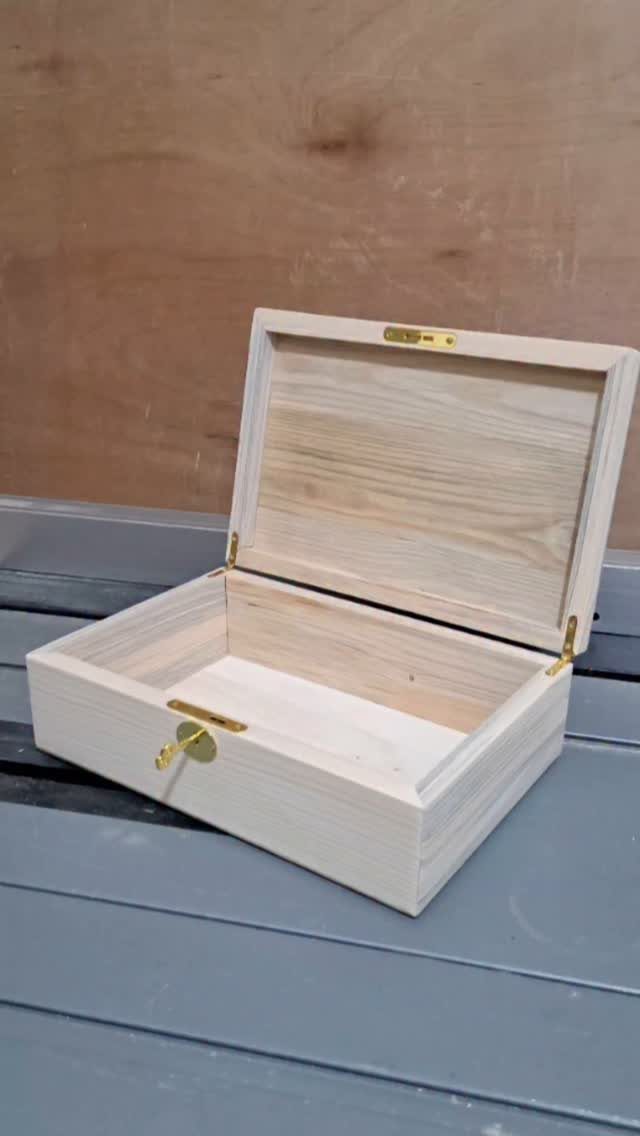
Raw pine with plain gold-toned hinges and a latch is a blank slate that costs very little. Staining it warm, or leaving it bare and sealing it with a clear coat, both suit that bright grain.
Sand the whole box before finishing, lid and inside edges included, so the stain takes evenly. A light coat of paint would also work if you want a color, and the gold hardware will stand out against almost any shade.
Finish it before you hand it over as a gift.
8. Weathered Vintage Wooden Box
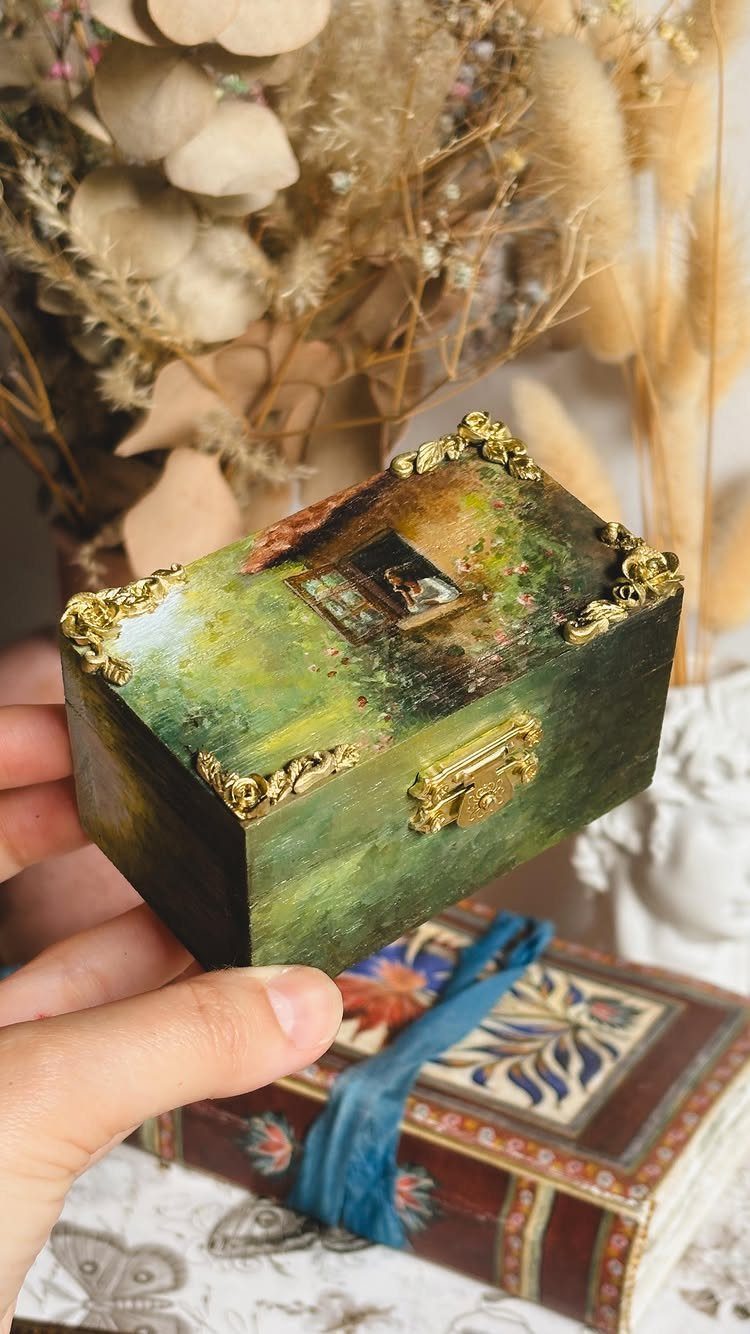
Distressed green paint, brass corners and a small inset picture give this box the look of something passed down. Sanding the edges and corners after painting lets the wood show through where years of handling would have worn it.
I like dark green with brass because the two feel old together. Add the picture last, so the paint does not creep around it.
A box this small suits a few favorite pieces, and the look makes a good gift for someone who loves antiques.
Gift Ideas
Weddings, anniversaries and graduations all suit a wooden jewelry box, because it holds something the person already owns and will keep using long after the day itself.
Match the interior to the recipient. A box with a few compartments of different sizes handles rings and necklaces together, which suits someone with a mixed collection.
Solid oak is a good wood for a keepsake. Choose boards with the best grain you can find, and a Danish oil finish keeps the surface natural and easy to touch up later.
A dark stain with pale accent strips at the corners looks very different from bare, natural wood, so choose the one that suits the person getting the box, even if you’d pick the other for yourself.
Use simple tools and plan the build for an afternoon. A gift you finish early is better than a perfect one that arrives late.
Craftsmanship Details
Hand carving is slow, and floral designs show the skill best when the box is plain around them. Sharp tools and a steady pace matter more than any pattern you choose.
Walnut is worth a look if you want a box that needs little decoration. It is a hardwood with a rich tone, and hand polishing brings out the grain without any added design.
A gold knob on the lid is a small touch that dresses up a simple box.
Pair it with a divided tray for rings and earrings above a deep compartment underneath, so small pieces stay on top and bulkier ones sit below.
Test any carving on scrap first. A slip on the finished lid cannot be sanded out without losing the detail around it.
Frequently Asked Questions
What types of wood are used for jewelry boxes?
Walnut, cherry, curly maple and exotic woods like bubinga all show up in jewelry boxes.
Oak holds up well for a keepsake box, and a coat of Danish oil keeps the grain looking natural while leaving the surface easy to touch up later.
For a first build or a low budget, plain pine is cheap and takes stain well, and its bright grain also looks good under a clear coat.
Can I personalize my jewelry box?
Yes. A name engraved across the lid is the most common way, and many boxes can be engraved for free.
A short name sits cleanly on a small lid, but a longer one forces smaller letters, so measure the space before you commit. Painting a design on the lid or cutting a shape into it also personalizes a box.






