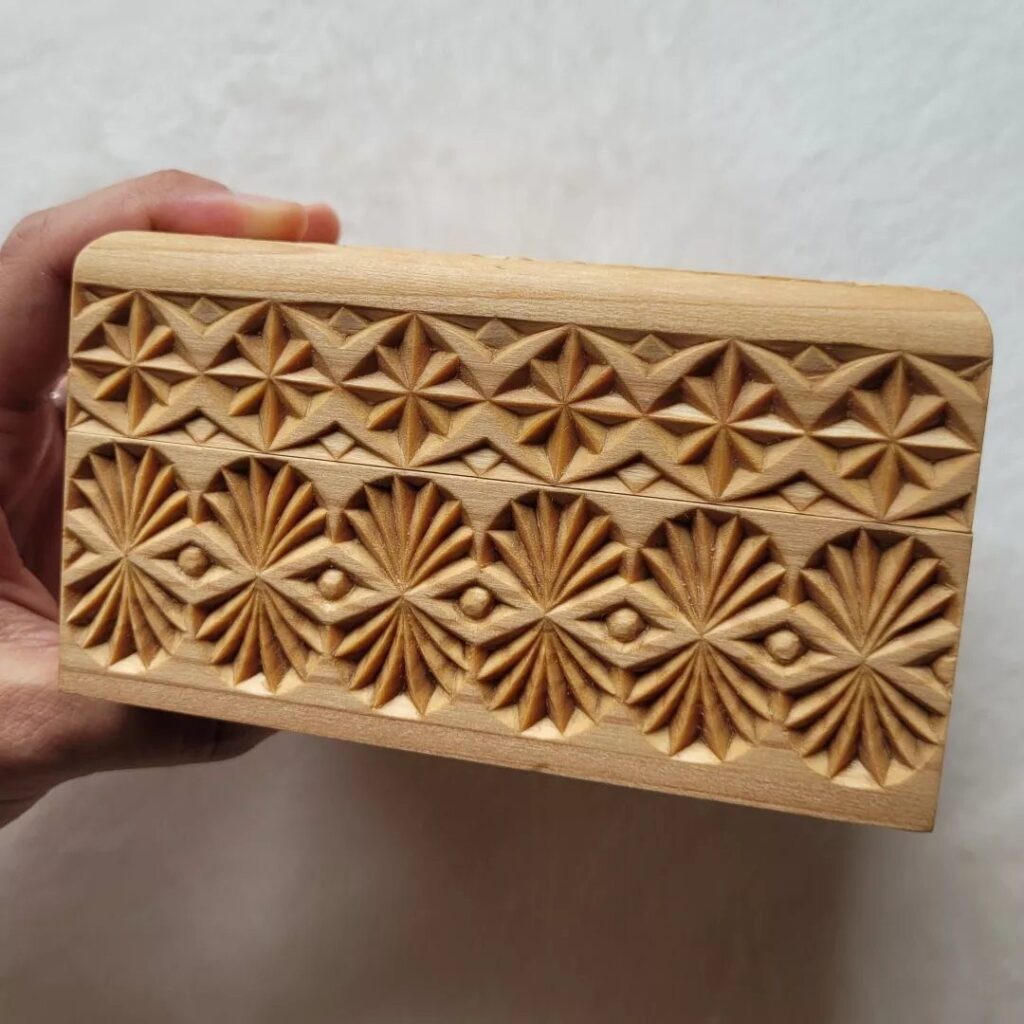
The tool you already own decides which of these relief carvings to start with: a rotary tool points to the landscape panel, a mallet and gouge to the floral piece.
A rotary tool and a kitchen table cover the landscape panel with no mallet involved, while the floral relief asks for a mallet and gouge, and a pencil with a few gouges is enough for the low relief.
The list runs from chip-carved grids to a sampler plank that ends on a Celtic knot, and the choice follows the tools in your hands more than the style you like.
1. Low Relief (Bas-Relief)
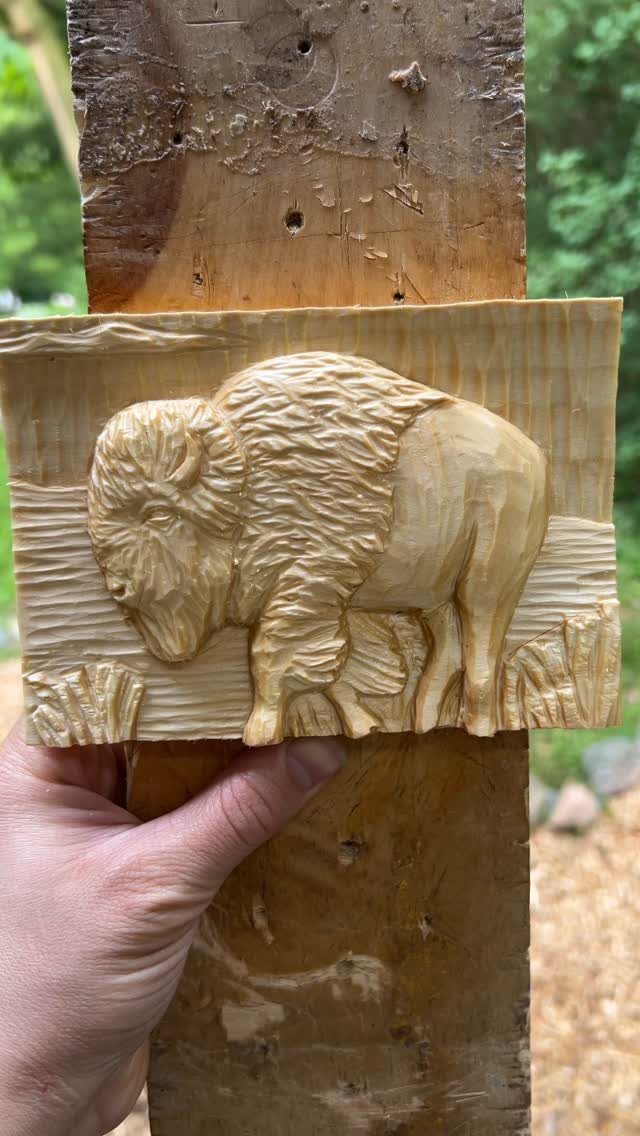
Low relief means the design rises only slightly from the background, so the whole carving stays shallow. That suits a beginner well, because you can work with a few gouges and a pencil sketch instead of a full tool roll.
Start with a simple animal profile like the bison, since a bold outline reads clearly even when shallow.
Trace it, cut a stop line around the edge, then lower the background up to that line. Light-colored wood shows the shapes best.
2. Geometric and Chip Carved Patterns
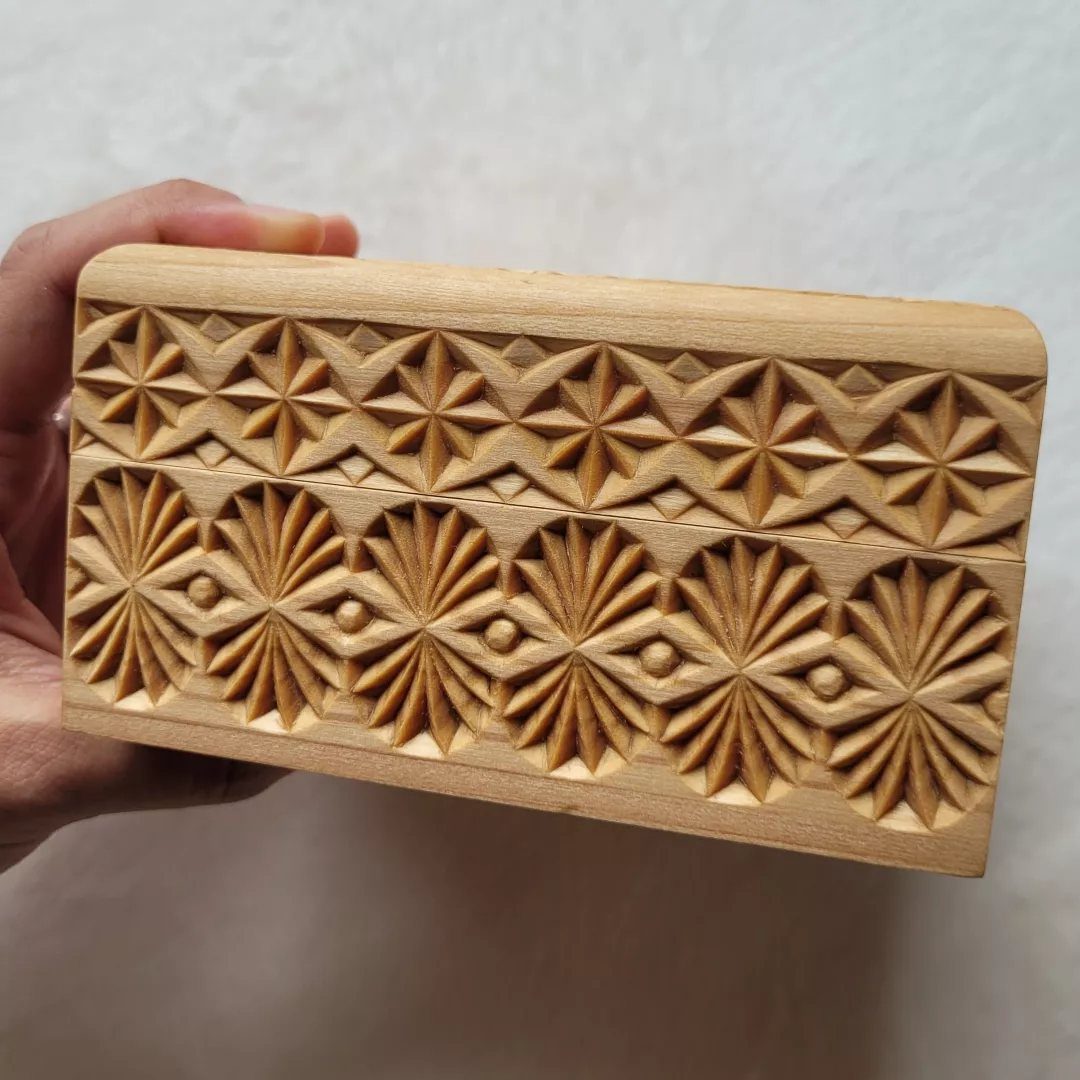
Stars and floral rosettes repeated in rows make a good first pattern, because the same few cuts do all the work. A rectangular block gives you a tidy frame to practice in.
Before any blade touches the wood, mark the grid with a ruler and pencil, and space the lines evenly.
Pattern work forgives small slips, since the eye reads the repeat rather than any single cut. I would carve one row, check it, then match the second row to it.
3. Sampler Plank of Relief Designs
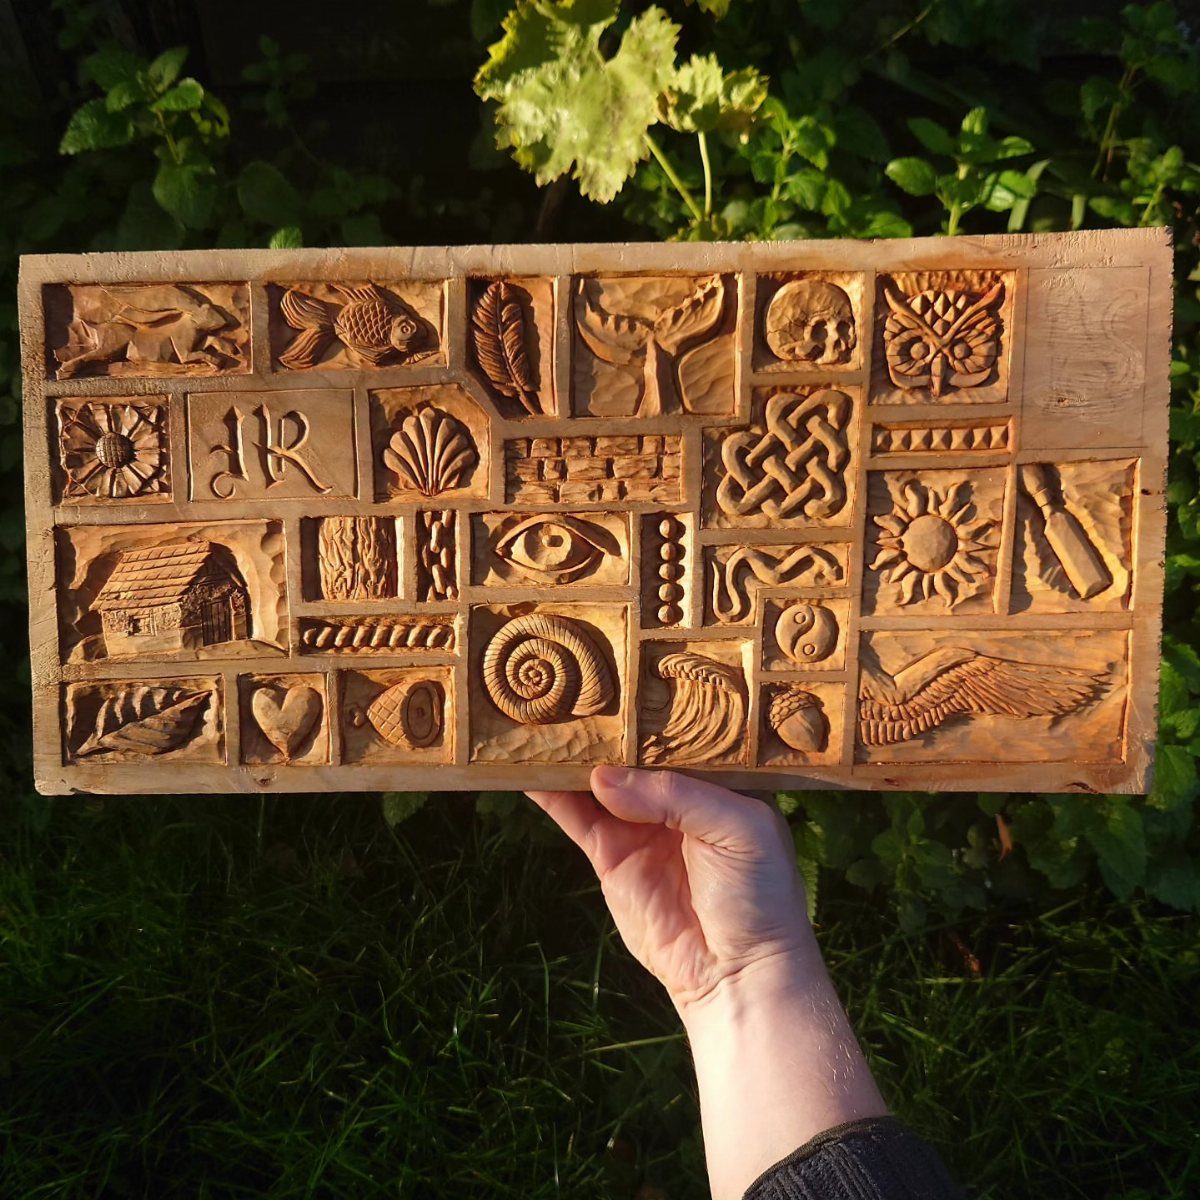
A sampler plank collects several small motifs on one board: an animal, an eye, a Celtic knot. It is my favorite way to practice, since each motif teaches a different cut.
Each design gets its own square of the plank, and sizing the squares about the same keeps the sampler tidy.
Put the easy ones first, like the fish, and save the knot for last, where the over-and-under crossings demand patience. When the plank is full, you have a record of what you can do.
4. Rotary Tool Landscape Relief
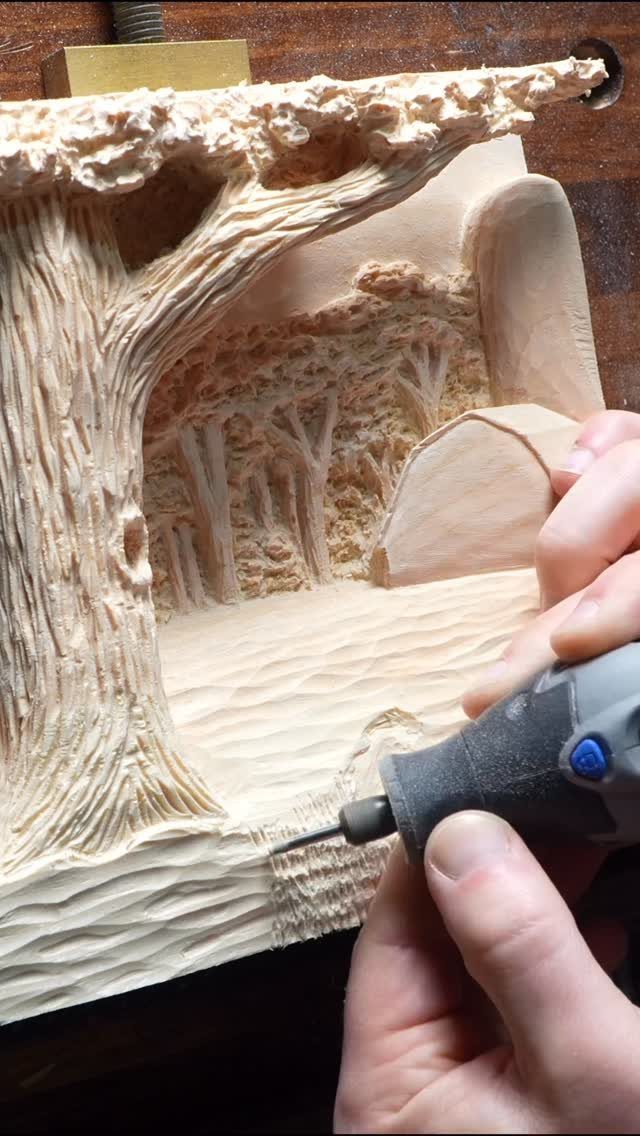
Trees and hills carve faster with a rotary tool than with hand gouges, and no mallet is involved. That makes it a fit for an afternoon at a kitchen table with a basic tool you may already own.
Sketch the hills first, then cut the tree lines with a light touch and let the bit do the work.
Dust is the cost here, so wear a mask and eye protection. Pick a light, fine-grained wood so the small details stay crisp.
5. Floral Relief Carving with Mallet
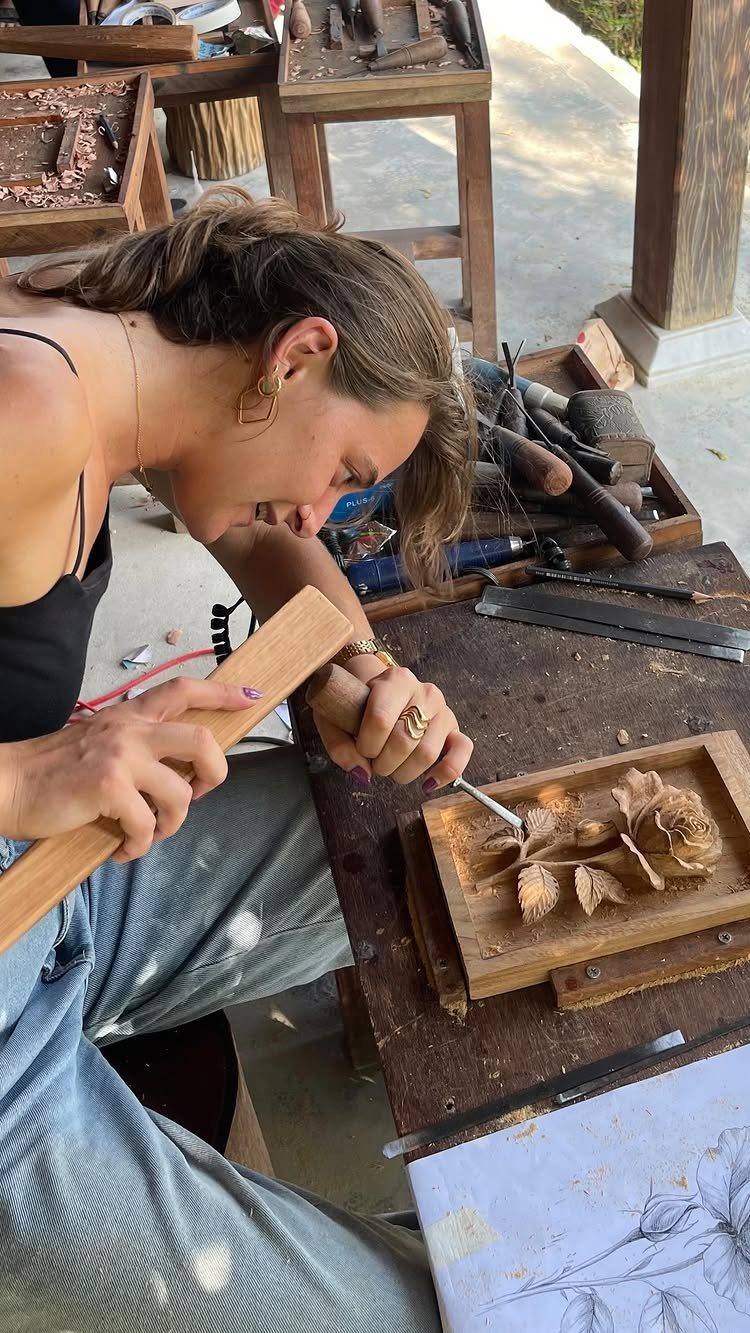
Floral relief is where a mallet and gouge earn their keep. Tapping the gouge gives you control that hand pressure alone cannot, especially across petals and curled leaves.
Draw the flower on paper first and transfer it to the block, as the sketch on the bench suggests. Secure the wood so both hands stay free for the tools.
Cut the petal outlines, then deepen the background around them. Go slowly; deeper cuts are easy to add and impossible to undo.
Benefits of Wooden Relief Carving
A relief carving is one of a kind. No two hands cut the same way, so even two panels from the same pattern differ in small, personal ways, and that is exactly what mass-produced décor lacks.
It also lasts. A hand-carved panel is built to be kept, and it can stay in a family for generations if you treat it well.
Projects range widely: trivets, clocks, signs and mantels are all fair game for relief work. If you want a pattern to start from, adapt an existing one and change a detail or two until it feels like yours.
Carving Techniques
Light does half the work, because shadows gather around the carved edges and sharpen the contrast.
3 habits make that depth look deliberate:
- Make stop cuts first, so the wood you remove later cannot tear past your outline.
- Smooth the cut surfaces with gouges, following the grain rather than fighting it.
- Set each level of the design at its own depth, so the nearest parts sit highest and the farthest sit lowest.
Read the grain before every pass. Precision and patience matter more here than force, and a sharp tool will do more for you than a hard push.
For more advanced carvers, watch where Follansbee intersects V-tool lines, how he chooses and orients gouges to create leaves that flow from bulbous to subtle. For everyone, listen to how hard he hits his dang mallet.
Frequently Asked Questions
What is the art of wood carving called?
Carving a design that rises from a flat panel is called relief carving.
You remove wood in layers so the image stands out while the background stays intact. Shadows gather around the cut edges, which gives the piece its sculptural look without a full 3D figure.
What is the difference between chip carving and relief carving?
Chip carving cuts small, repeated notches in a pattern such as stars or rosettes, laid out on a ruler-and-pencil grid.
Relief carving lowers the background so a whole image, like an animal or a flower, rises from the surface. Chip patterns forgive small slips because the eye reads the repeat, while relief work depends on stop cuts and set depths.
How to do wood carving at home?
A bold, simple shape like a bison profile makes the best first low-relief piece: sketch it, trace it onto a light wood such as basswood, then score a stop line around the outline with a knife or V-tool.
Next, a few gouges can take the background down to that line, working in thin passes so the edge stays crisp.
A rotary tool is the mallet-free route, and it suits landscapes at a kitchen table, though a dust mask and eye protection are not optional with the fine dust it throws.






