Where the rack sits decides which of these you build: a closet floor suits built-in shelves, a small entry with no floor space suits the wall mounted rack, and a porch suits the ladder shelf, as long as you seal it against rain.
The ideas range from a wall mounted rack to a full shoe storage cabinet, and most can be built from plywood or standard 2x4s with basic tools.
Before any cutting, measure your largest pair of shoes: size 9 and up needs 12-inch end boards, and size 8 and below can go down to 10 inches.
1. DIY Ladder Shoe Shelf
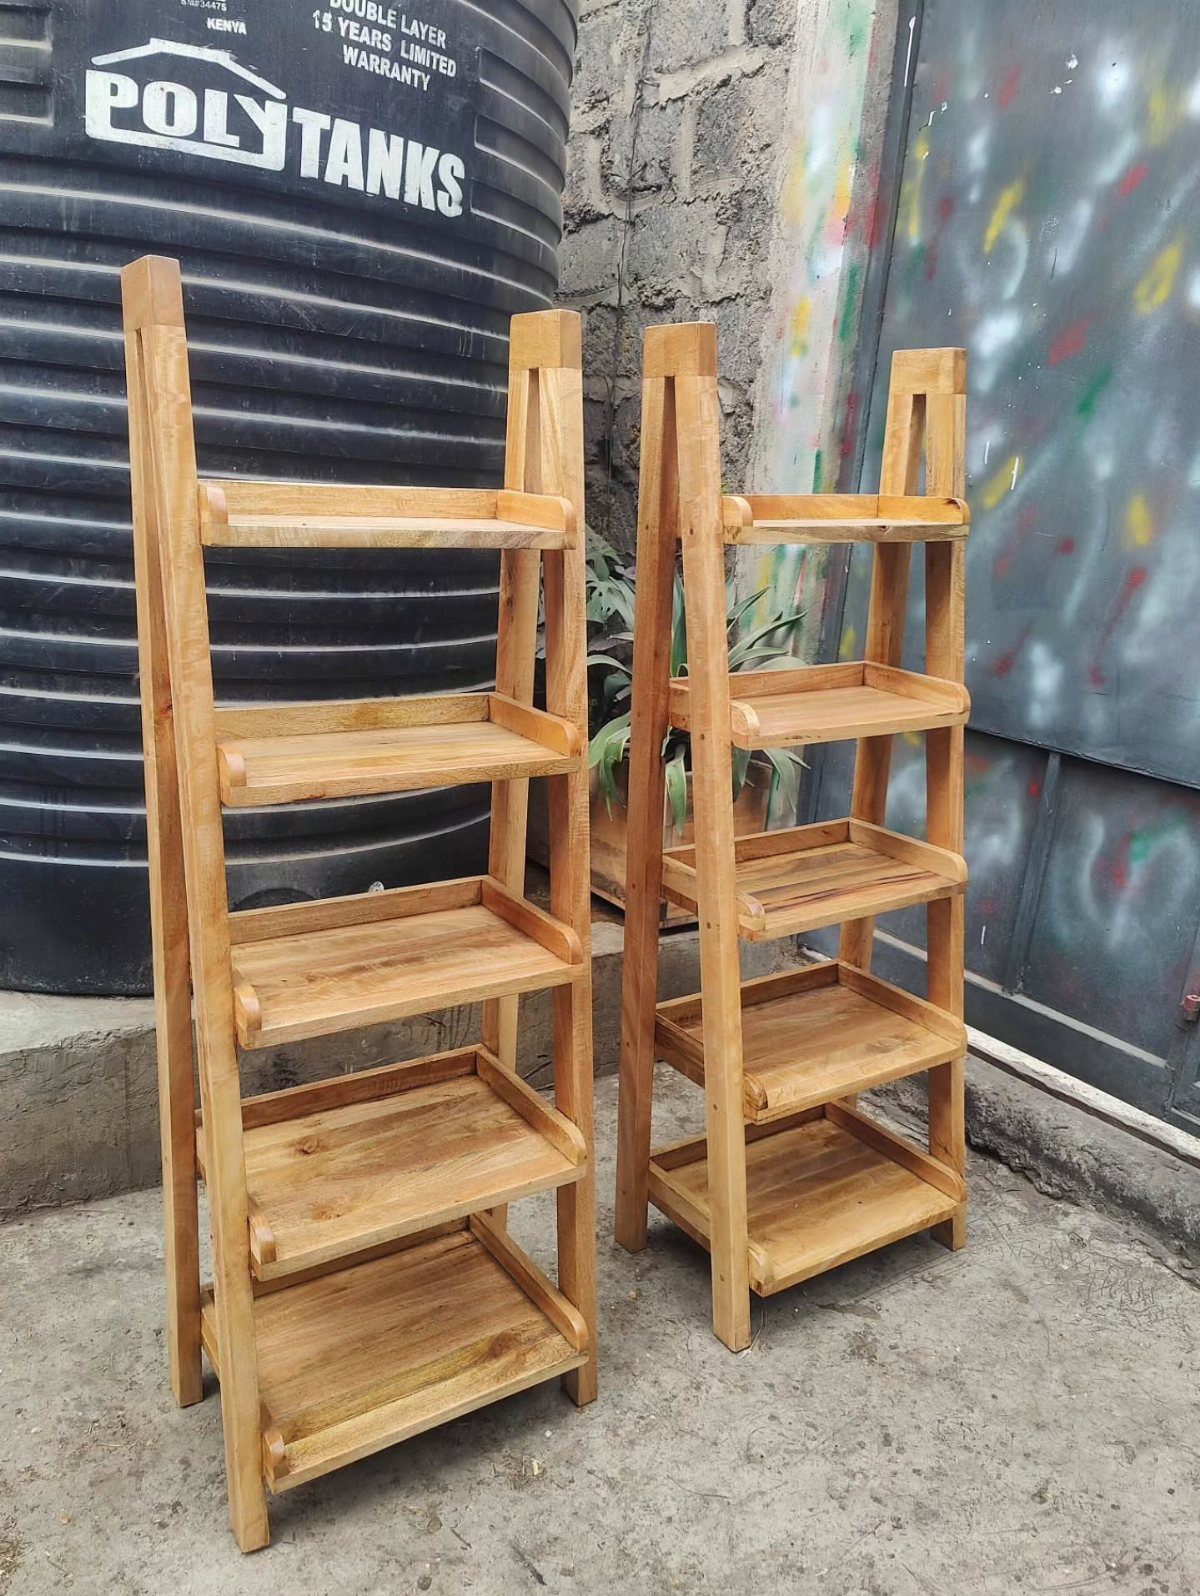
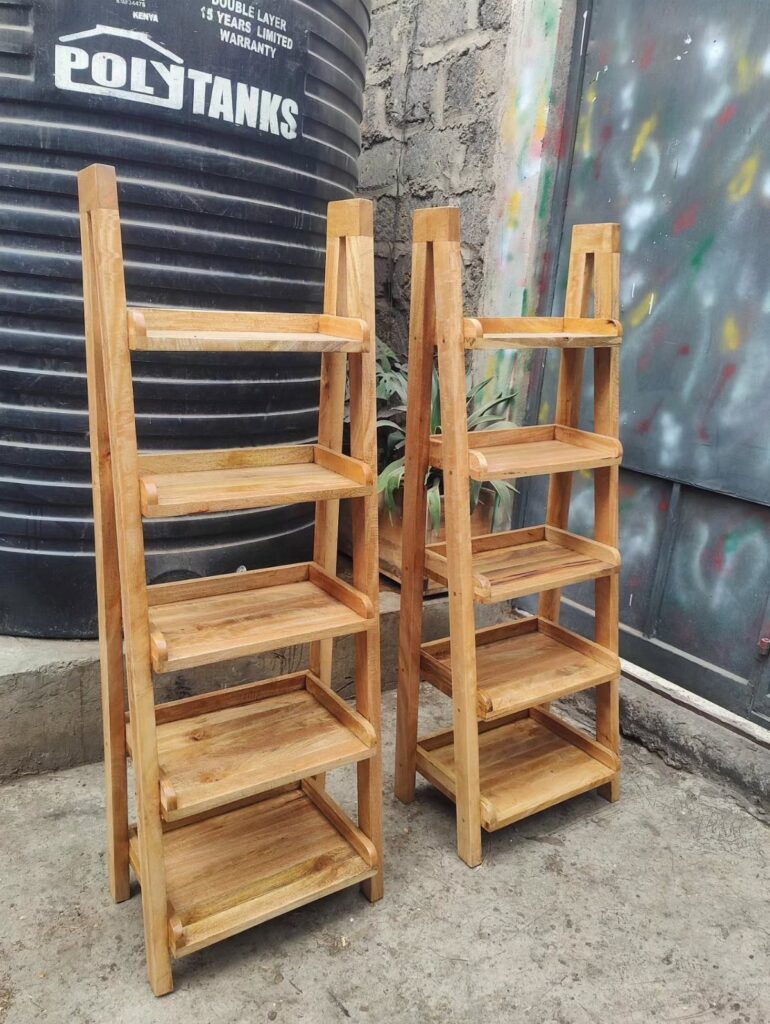
A leaning ladder turns a few rails and rungs into a shoe shelf with almost no wall hardware.
A ladder shoe shelf with 5 shelves holds a lot of pairs in a narrow footprint, and a second ladder beside it doubles the space without eating much floor.
I like building two and standing them side by side.
The stack stays shallow, so it fits a porch, patio or entry wall. Sand the rungs smooth, since shoes slide across them daily.
For outdoor use, seal the wood before the first rain.
2. DIY Built-In Shoe Shelves
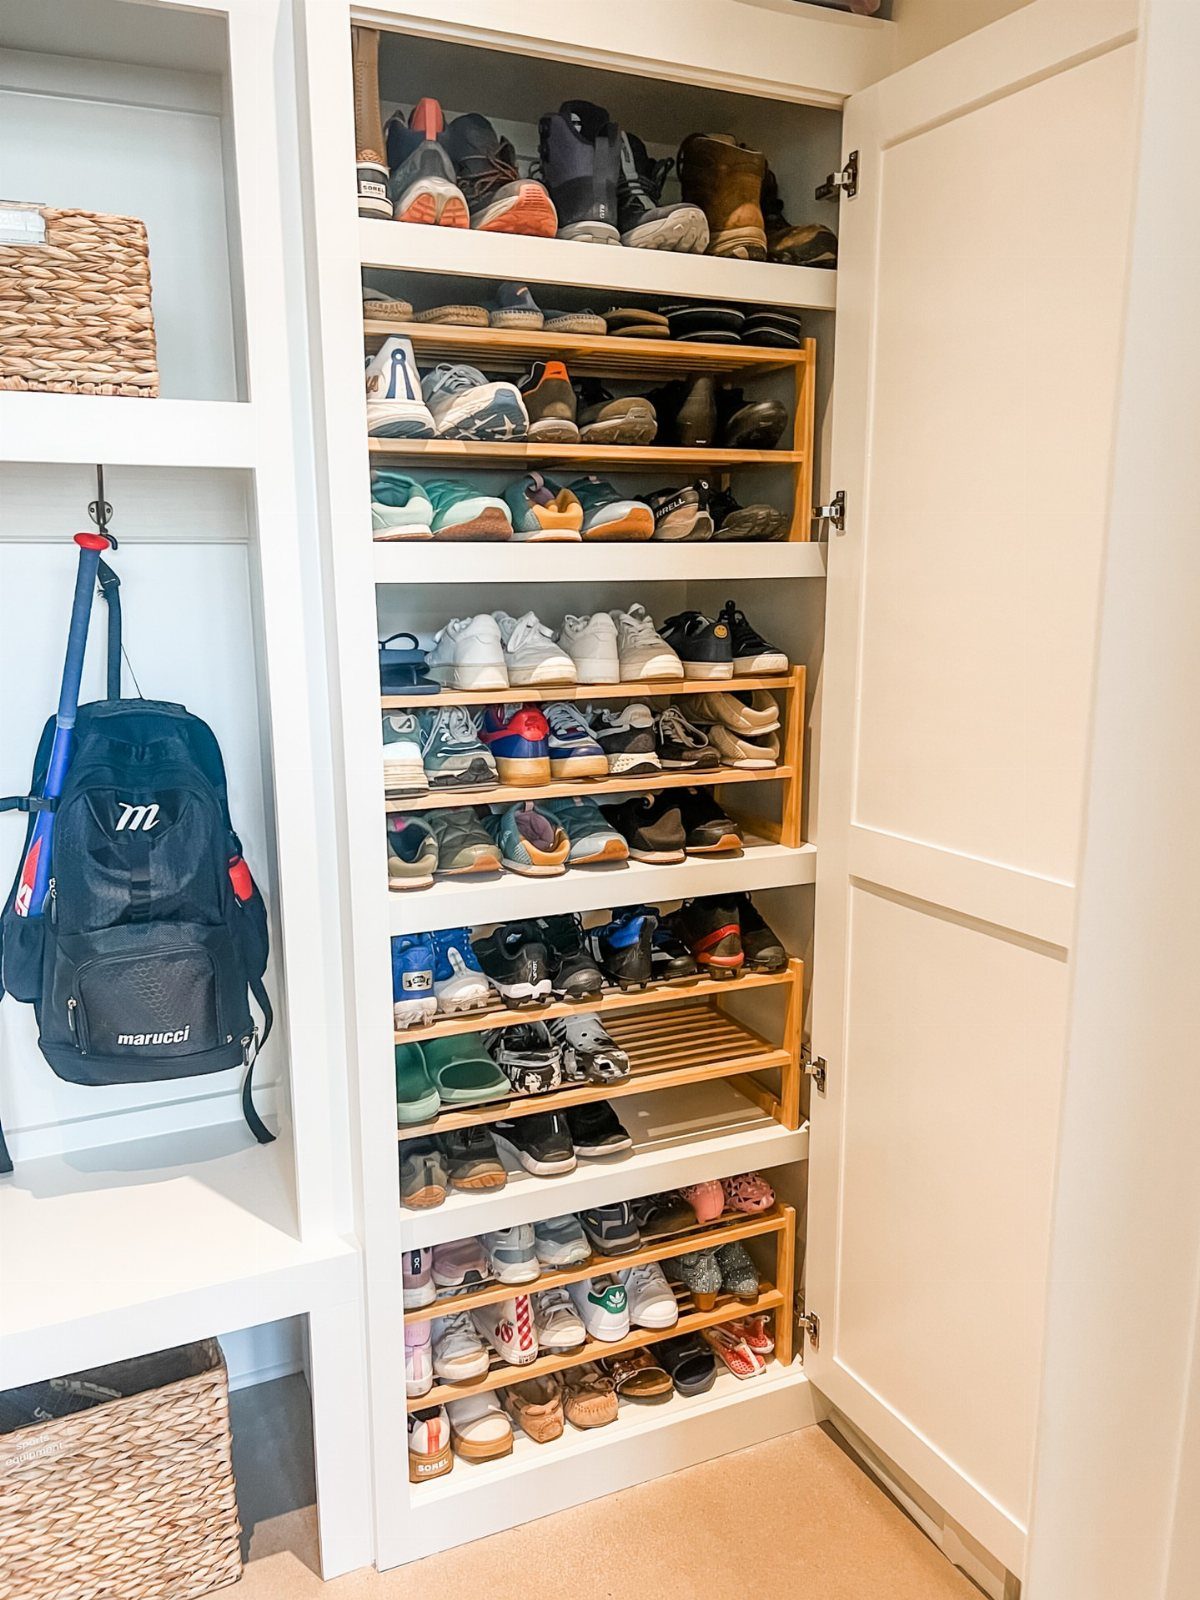
Closet floors usually waste their lower half, and fixed wooden shelves put it to work. Shelves run wall to wall inside a white closet and hold shoes at eye level instead of piling them on the floor.
Measure your tallest boots first and set the spacing around them. Shorter gaps for sneakers and flats let you fit more rows.
Painting the frame white and leaving the shelves in natural wood keeps the closet bright. It takes more cutting than a freestanding rack, but the result looks like it came with the house.
3. DIY Shoe Shelf Bench
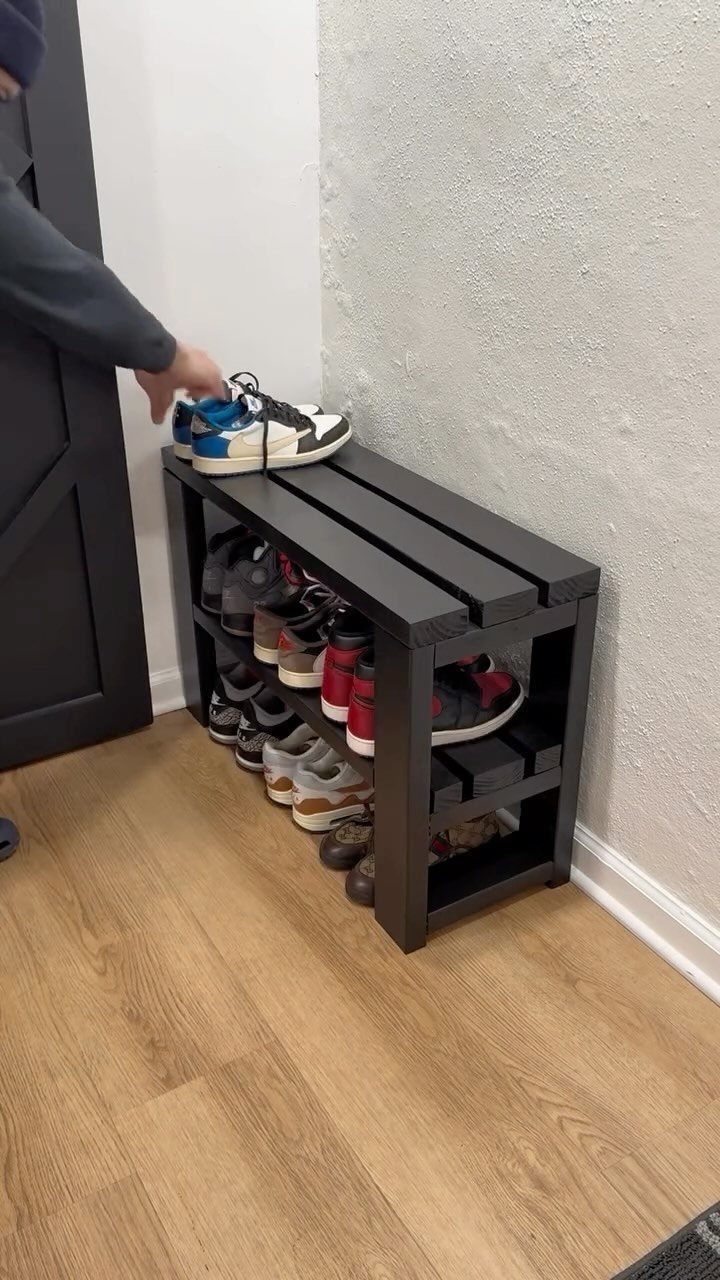
Sitting down to pull on boots is easier than hopping on one foot, and a bench handles that while storing the shoes underneath.
A dark grey bench like this can be built from standard 2x4s, which keeps the lumber bill low and the cuts simple.
A dark stain or paint hides scuffs from sneaker soles better than a pale finish. Add a cushion on top if you want softer seating.
Basic tools and an afternoon are enough for this one.
4. DIY Wall Mounted Shoe Rack
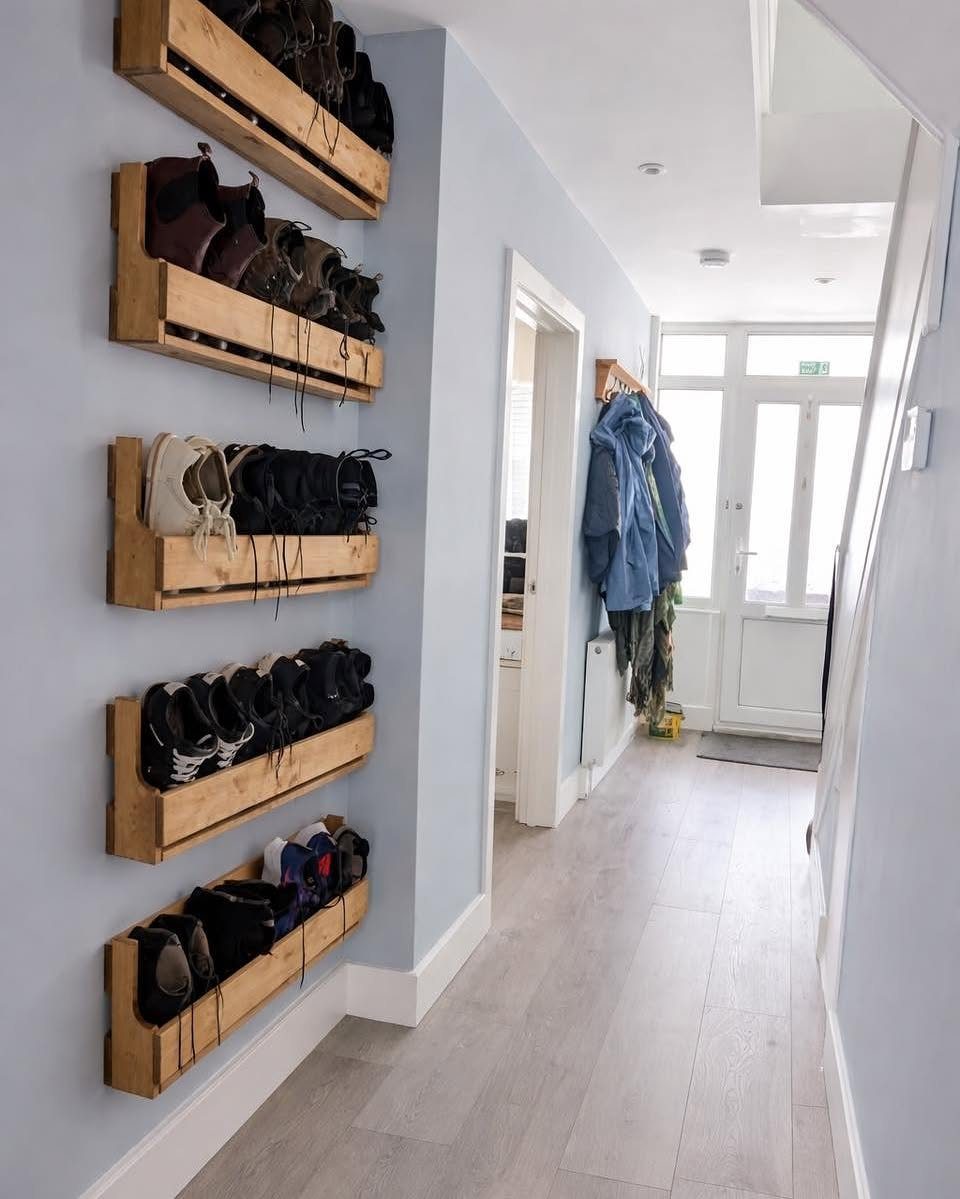
Floor space is the first thing a small entry runs out of, so I would go up the wall. Several short wooden racks mounted in a row hold one or two pairs each and leave the floor clear for sweeping.
Mounting height is your call: low enough for kids to reach, with the top rack still clear of coats. Screw into studs or use proper wall anchors, because a loaded rack pulls hard on the fasteners.
5. DIY Shoe Storage Cabinet
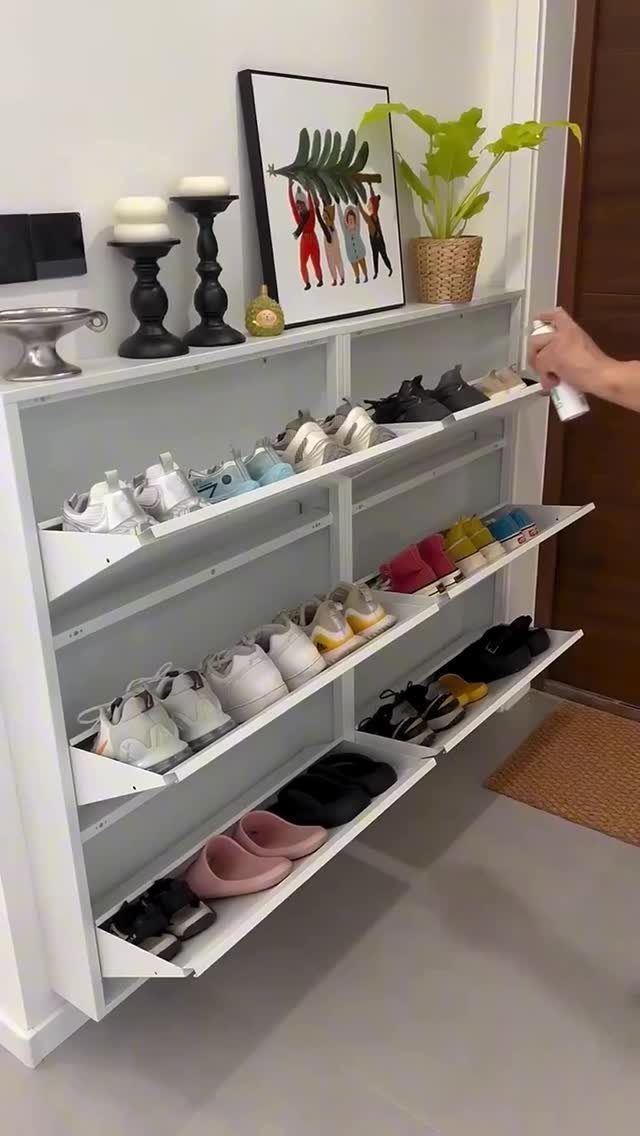
Hiding shoes behind a door gives a tidy look, and pull-out trays make the back pairs as easy to reach as the front ones.
A closed cabinet keeps every pair out of sight, and its flat top doubles as a display surface for a plant, a lamp or a catch-all tray.
Trays on drawer slides cost more than fixed shelves, but they are what makes the cabinet worth building. Choose slides rated well above the weight of a few pairs of shoes.
Paint the inside too, since dirty soles will mark bare wood.
6. Multi-tier Wooden Slatted Shoe Rack
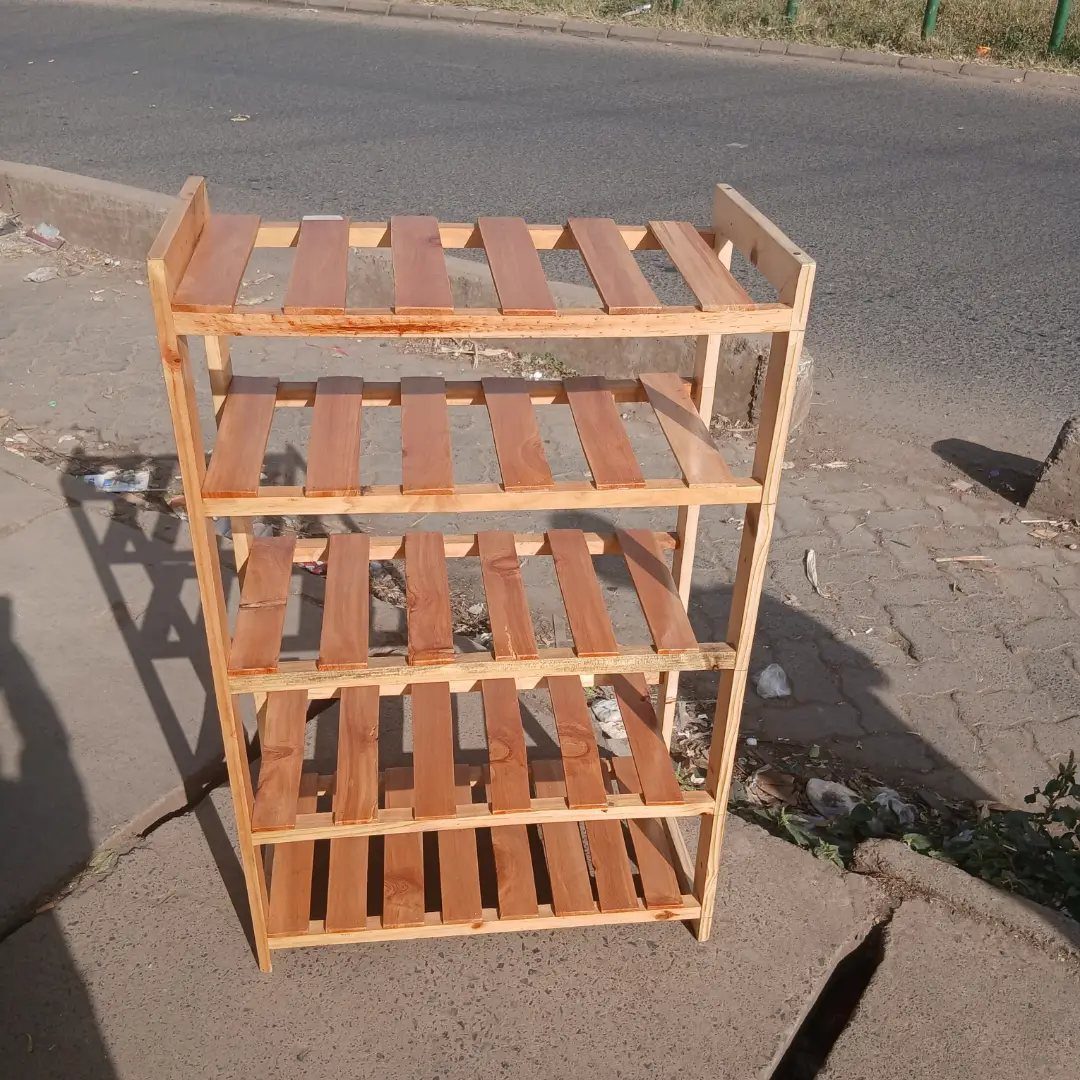
Slats let air move around damp shoes, which is the main reason I favor them over solid shelves. Several tiers of natural wood stack up in a freestanding frame that you can carry anywhere, with no wall mounting.
Leave small gaps between slats so dirt falls through instead of collecting. Rounding the edges with sandpaper keeps shoe soles from catching.
A clear finish keeps the light wood look. It works indoors by the door or on a covered porch.
7. Wooden Shoe Cubby Unit
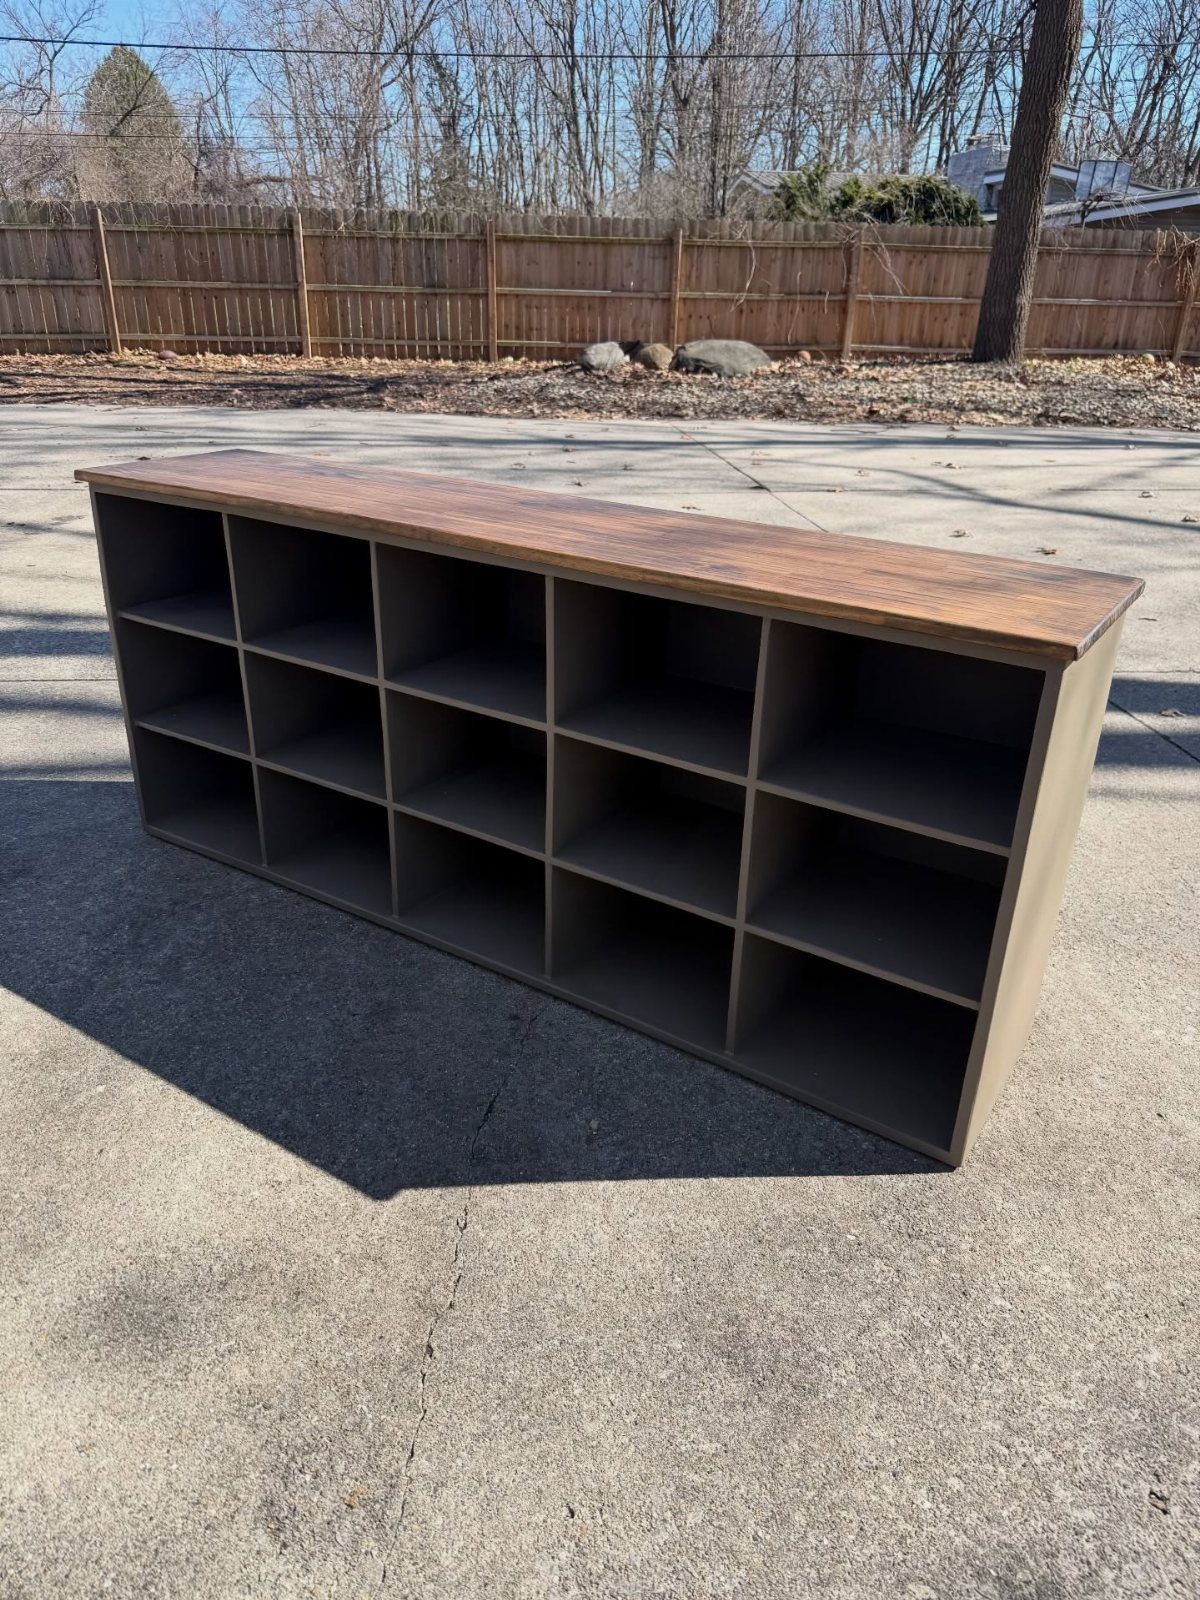
A long, low cubby unit gives every pair its own square, so nothing gets stacked or tossed in a pile.
The flat top is the best part: a solid wood slab on cubbies like these works as a seat for lacing up or a spot for a bag.
Painting the cubbies grey and staining the top a darker brown, as in this build, hides scuffs in the openings and keeps the top looking rich. Sand the inside edges well, because shoes get dragged in and out all day.
Cut all the cubby dividers to one length and the unit goes together fast.
8. Staggered Shelf Wooden Shoe Tower
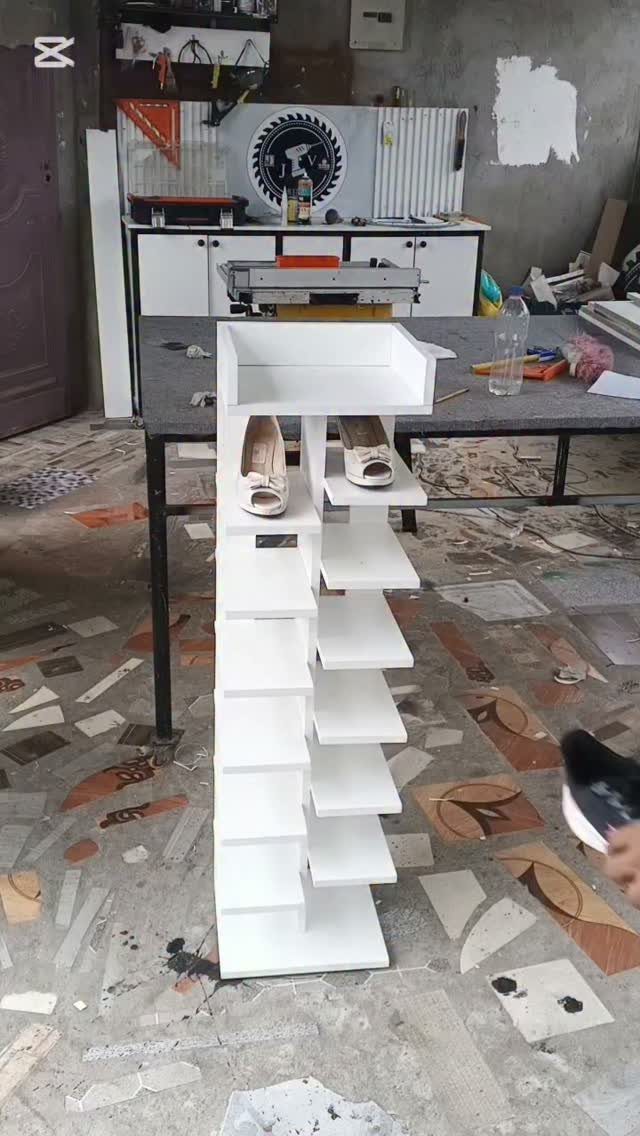
Narrow footprint, tall frame: a staggered shoe tower stacks open shelves in an offset pattern so each pair sits at its own level, and the whole thing takes up little more floor than a doormat.
White paint keeps it light and makes the shelves look clean in a tight corner.
Space the tiers for your tallest pair, since heels need more clearance than they appear to.
Anchor a tall, narrow tower to the wall so it cannot tip.
Materials and Tools Needed
Most shoe racks come from the same short shopping list: plywood, wood glue, screws, and 120 grit sandpaper. A compound saw makes the cuts quick and square, which matters when you repeat the same length several times.
For fasteners, 1-inch staples, 1.25-inch trim screws or finish nails all work for assembling the frame. Wood filler covers the fastener holes before you sand.
A polycrylic finish protects the wood once it is built. If the rack mounts to a wall, pick up 2.5-inch screws for that job and keep them separate from the shorter ones.
Plywood is the material I would buy first. A half sheet of ¾" plywood is a manageable size to carry home, and a cutting guide helps you get every piece out of it with little waste.
Customization Tips
Shoe size sets the dimensions, so measure before you cut. Smaller shoes need less room, and a rack sized for them wastes nothing.
For end boards, shoe size 9 and up calls for 12 inches. Size 8 and below can use 10 inches.
Then check the space where the rack will sit. Adjust the height and width to match, and keep every shelf the same depth so the cuts stay repeatable.
If the household has mixed sizes, build to the largest pair. A rack that fits the biggest shoes will hold the smaller ones too.
Frequently Asked Questions
What are some clever shoe storage ideas for a small house?
Go vertical. For a tight entry, a row of short wall-mounted racks, each holding 1–2 pairs, keeps the floor open, and a staggered tower with offset open shelves covers barely more floor than a doormat.
A ladder shelf that simply leans against the wall is another slim choice, and it takes almost no hardware to hang.
What’s the best way to store boots?
Give boots their own tall gap and keep them dry. Before cutting anything, measure your tallest pair and set the shelf spacing around it, because boots and heels run taller than they look on the floor.
Slats work well for wet or muddy pairs, since air circulates through the gaps and loose dirt drops out.
If you’d rather hide the clutter, a closed cabinet with pull-out trays lets you slide the back row forward as easily as the front.






