
Which of these projects fits your afternoon depends on how much prep and sealing you want to do, since some need little more than a prepared slice and others ask for a protective finish.
Buttons, ornaments and the tic tac toe game are small and quick to finish, while the sign, the house number plaque and the coasters ask for more care, especially at the sealing step.
Whatever you pick, the slice has to be dry first, because green wood cracks, and air drying takes 3–6 months, so for a same-day build I start with slices that are already seasoned or kiln-dried.
1. Wood Slice Centerpiece

3 slices of different diameters give a table height and a base without a single store-bought riser. Candles and a low floral arrangement sit steady on the flat surface, and the bark edge adds a rustic frame to white roses.
Cluster the slices in a loose group rather than a straight line. Pick a thick slice for the tallest candle so it doesn’t wobble.
For a long table, repeat the trio every few feet. Warm string lights behind it finish the look.
2. Wood Slice Tic Tac Toe Game
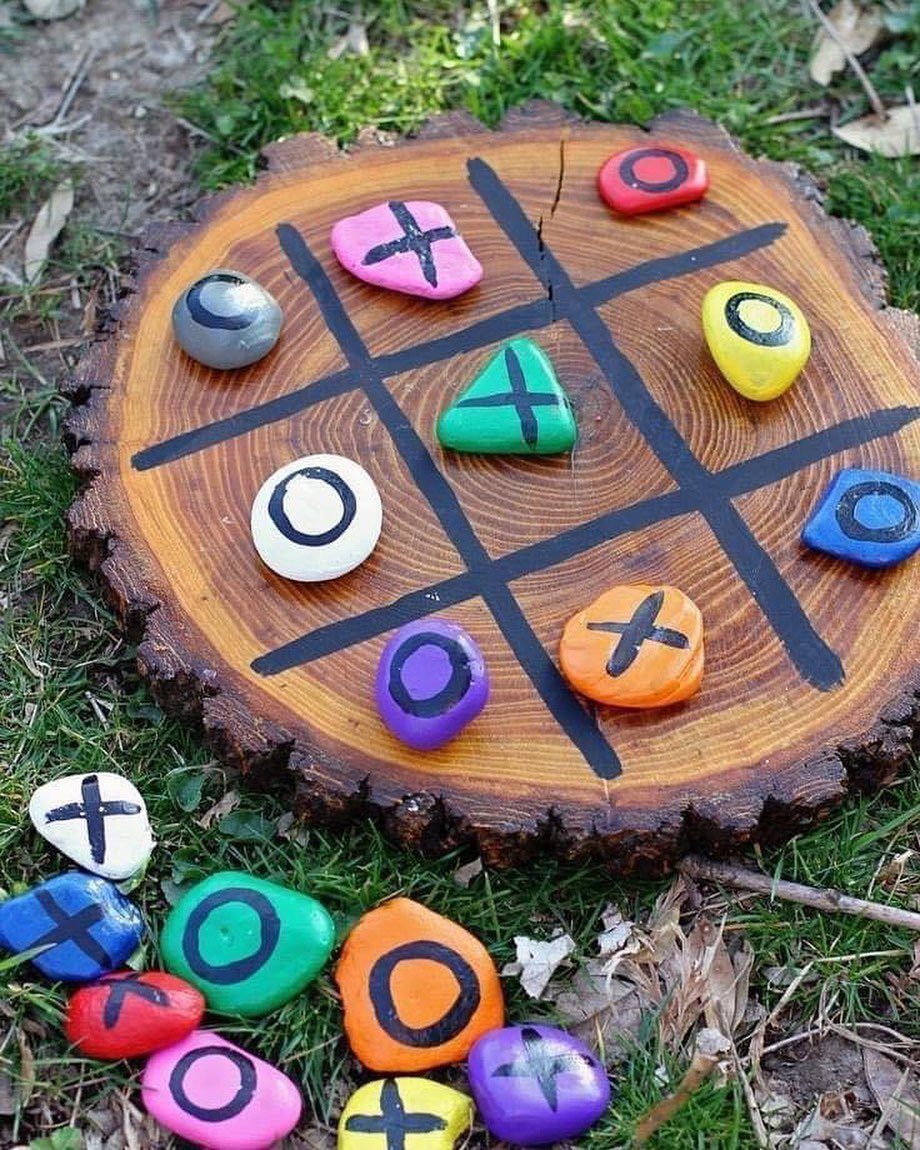
Painted stones are the smart choice for markers here, since they stay put on a slice that isn’t perfectly level.
A black marker or paint pen draws the grid right onto the wood, and the game is ready in an afternoon.
Paint the X stones and the O stones in 2 contrasting colors, so players can tell them apart at a glance. Sand the slice first so the lines come out clean.
A drawstring bag for the stones makes it easy to take along to a picnic or the park.
3. Wood Slice Buttons
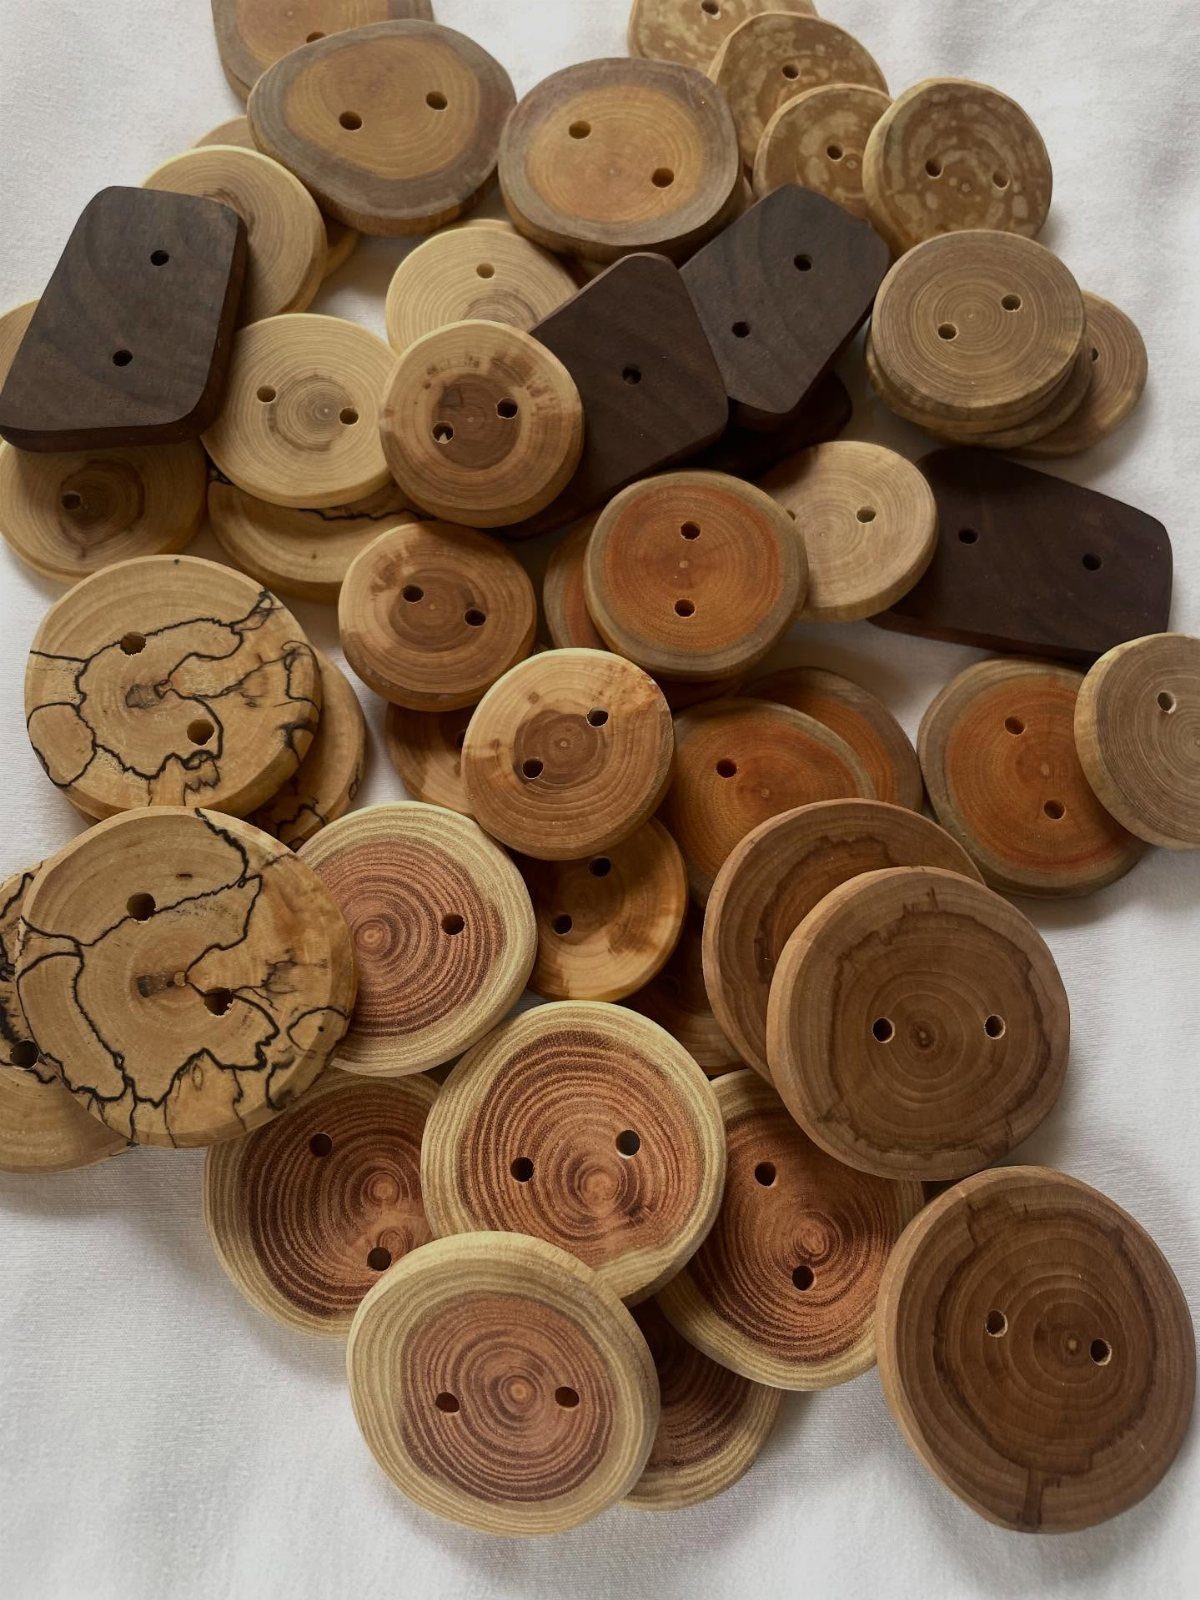
Buttons cut from a slice are best on projects where a plastic one would look out of place: knitted cardigans, tote bags, or a rustic pillow cover.
Cut small rounds or squares, sand every edge smooth, and drill the holes with a small bit, usually 2 or 4 per button.
Thin slices work best, because thick ones sit awkwardly on fabric and snag. Keep a few spares, since wood can split while drilling.
A coat of clear sealer helps them stand up to handling.
4. Wood Slice Sign

A bark-edged round makes a sign that looks finished before any lettering goes on. Engraving or wood burning gives a lasting result, while a paint pen is easier for beginners and costs next to nothing.
Sketch the quote lightly in pencil first and check the spacing, because wood grain pulls the eye off center. A small leaf drawing fills leftover space nicely.
Keep the text short enough that each letter stays readable. A scripture verse, a family name, or a welcome line all fit well, and the same approach works for wedding table signs.
5. Wood Slice Ornaments
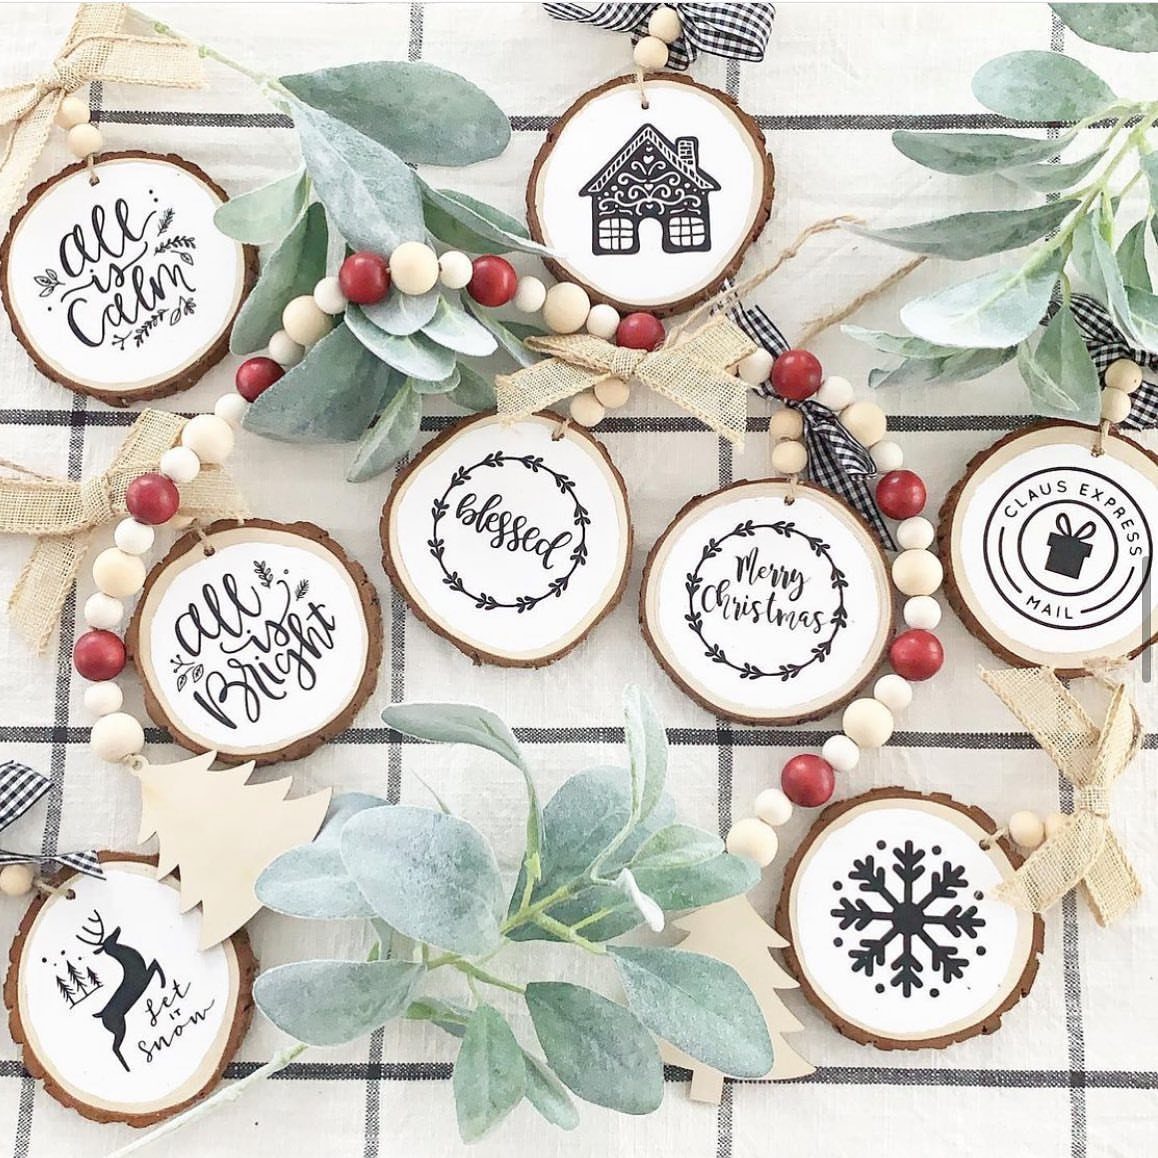
Ornaments are the most forgiving wood slice project, since a small slice hides brush wobble and a short phrase fills it perfectly.
Paint a base coat, let it dry fully, then add words like "Merry Christmas" with a fine brush or paint pen.
Drill a small hole near the top edge before painting, then thread twine or ribbon through it. Make a batch in one evening and tuck a name or year on the back of each one.
They also make cheap, personal gifts and gift-tag toppers.
6. Wood Slice Coasters
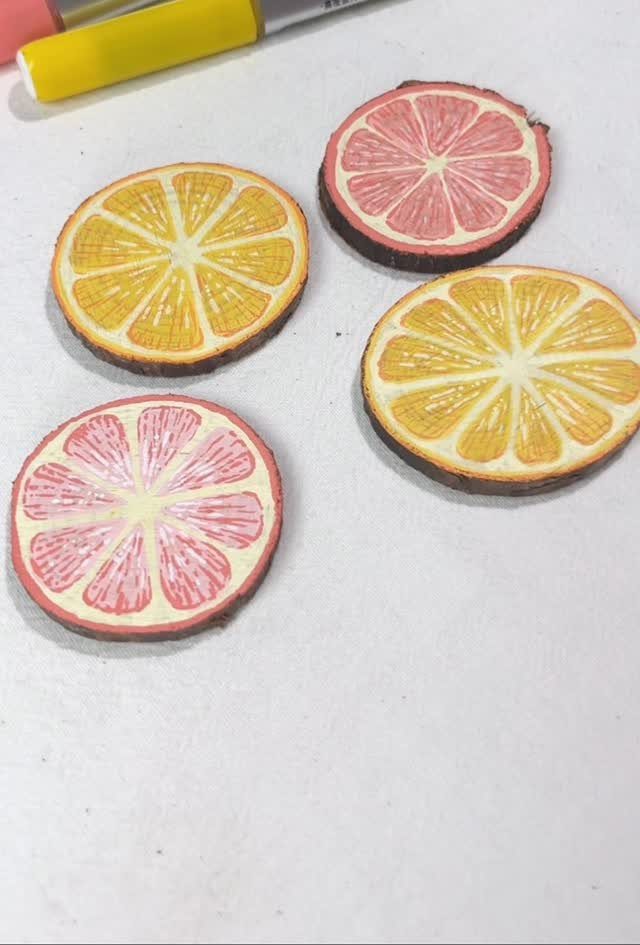
Citrus slices are a smart pick for coasters because a round slice already looks like the fruit. Paint the rind ring in a deeper shade, then add pale wedge lines radiating from the center with a marker or fine brush.
Seal the finished slice with a water-resistant clear coat on top and sides, or damp glasses will leave rings and lift the paint. Glue felt or cork to the bottom so the coaster doesn’t scratch your table.
A set of 4 in mixed colors makes a good housewarming gift.
7. Wood Slice House Number Plaque

A name and address on a bark-edged round reads warmer than a metal numeral set, and it suits a porch with a wooden door.
Wood burning or a paint pen both work. Burning lasts longer, while a paint pen is cheaper and easier to fix.
Pencil the lettering first and center it by eye, since the grain pulls the layout off balance. Seal the slice on the front, back and edges before it goes outdoors, and drill the hanging holes before you paint.
8. Pressed Flower Wood Slices
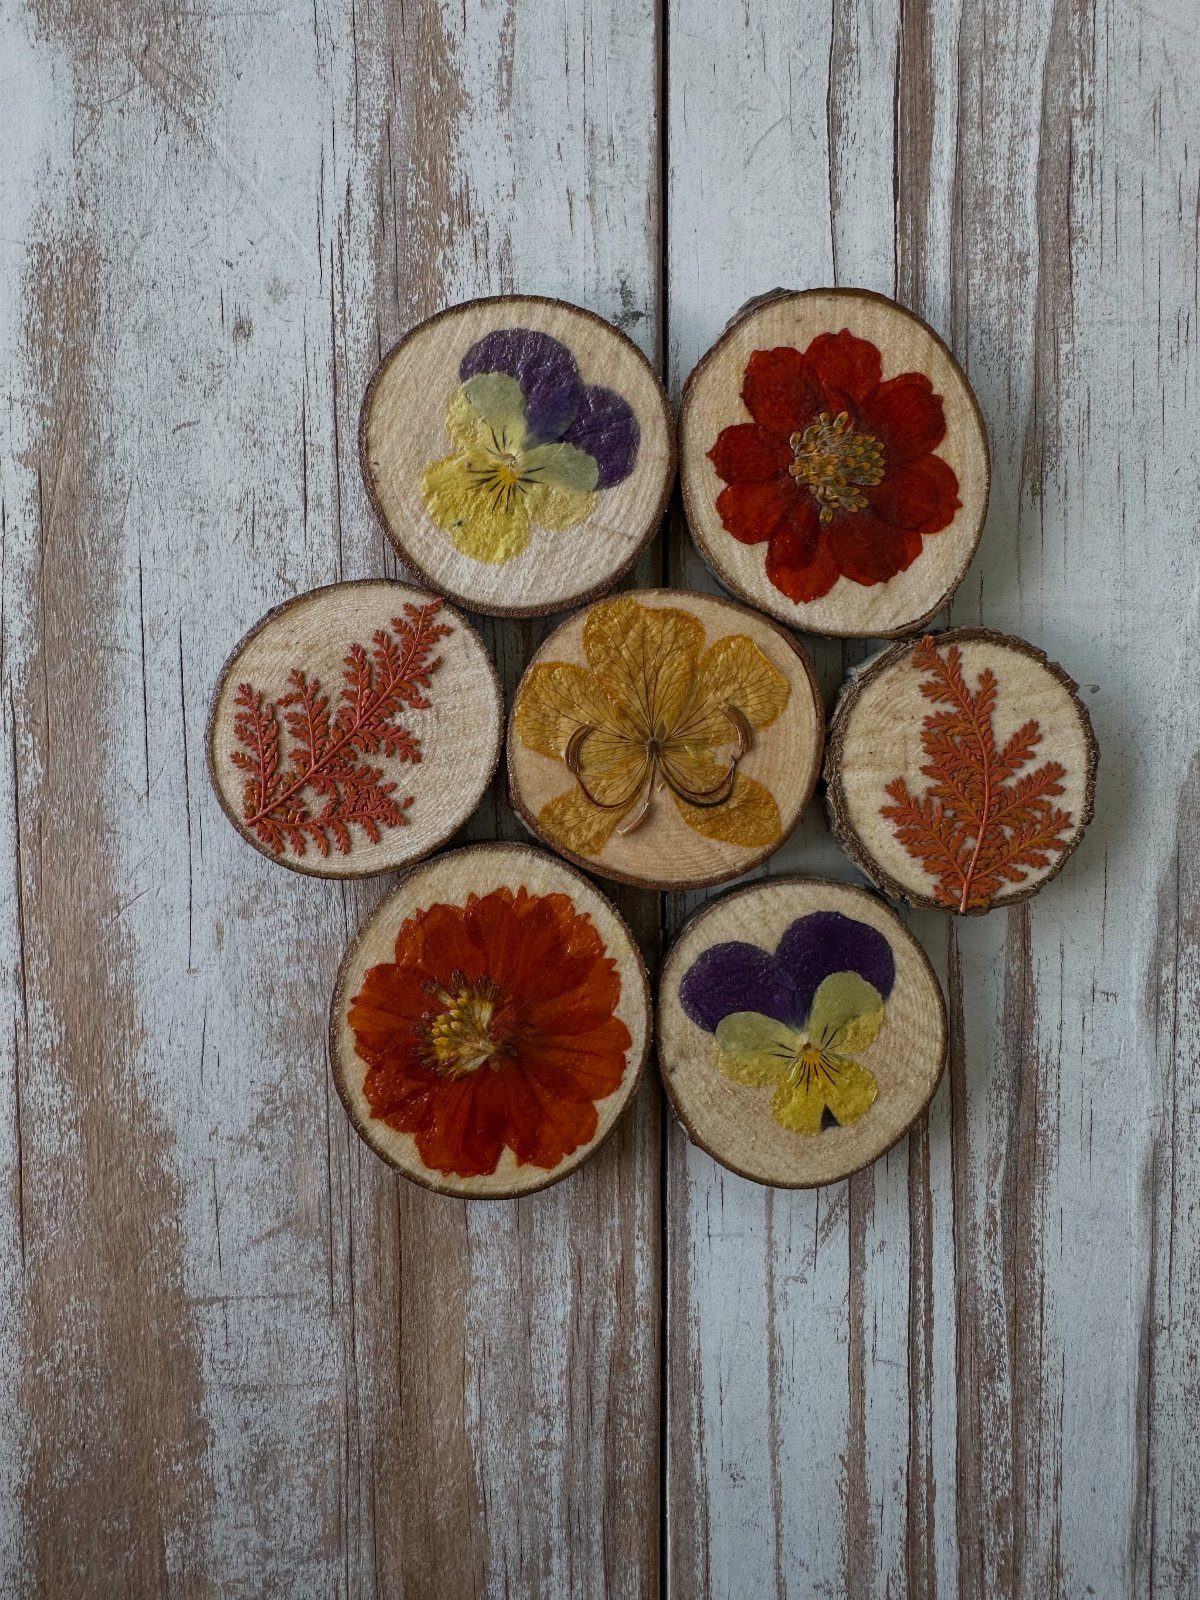
Flat, dry petals and leaves sit best on a small slice, and a set of several in matching size looks like a collection. Arrange the pieces dry first, tallest stem to smallest, then move them one at a time.
Brush a thin layer of clear glue or decoupage medium under each piece. Press gently with a fingertip, then brush a coat over the top to hold the delicate edges down.
Sand the slice first so the surface is smooth. Pressed flowers tear easily, so keep tweezers handy.
9. Wood Slice Keychains

Engraving gives a keychain its detail, which is why a mountain scene with a short line of text works so well on a slice this small.
A wood burning pen can do similar work at home, though a laser gives cleaner lines.
Keep the design simple and the text short, because tiny letters blur fast.
Drill the hole near the edge before engraving, sand smooth, then add a coat of clear sealer. Thread a metal split ring through the hole.
Pick a thin slice so it doesn’t weigh down a pocket.
10. Wood Slice Base Wreath

A round slice makes a sturdy base for a holiday wreath, and pine, pinecones and red berries sit well on its flat face.
Lay the pieces out dry first, then glue them down from the back layer to the front with a hot glue gun.
Finish with a burlap bow tied separately and tucked in last, so you can fluff the loops where they land. Pine drops needles as it dries, so set this one on a table or mantel instead of hanging it.
A thick slice keeps the whole piece from tipping.
Where to Buy Wood Slices
Craft stores and online shops both sell wood slices, and each suits a different kind of project.
At Hobby Lobby, I can pick up each slice and check its shape and width in person, which helps if a project only works at one diameter. Amazon works well when you want a bulk pack delivered.
Ready-made slices can run expensive, so if you only need a handful, a craft store is the safer buy. Save on Crafts is another place to look, since its slices tend to be decent quality at a lower price.
How to Prepare Wood Slices
Green wood cracks as it dries, so drying comes before any sanding or painting. Letting cut slices air dry takes 3–6 months, which is fine if you plan ahead.
For an afternoon project, start with slices that are already dried, since freshly cut green wood needs months to cure.
You can also cut down on cracking while the log is still whole, by sealing the ends and letting it rest.
Let the branches dry for a few weeks first, then slice them. If you need to cut fresh wood right away, a soak treatment before drying helps hold cracking down.
Sealing Wood Slices
A water-resistant wood sealant is what keeps paint, wood burning and pen work from wearing off. Apply it after the decoration is fully dry, and cover the whole slice, including the edges and the back.
Brush on thin coats rather than one heavy one, and let each dry before the next. Heavy coats pool in the grain and leave a sticky, uneven finish.
Seal only a slice that has dried completely. Trapped moisture can cause cracks under the finish.
Frequently Asked Questions
What to make out of wood slices?
Ornaments are the easiest place to start, since a small slice hides brush wobble and a short phrase like "Merry Christmas" fills it well.
Coasters, a tic tac toe game with painted stones, buttons, keychains, signs and a centerpiece base also work. Pick based on the slice: thin ones suit buttons and keychains, and thick ones suit candle stands and wreath bases.
What is the hottest craft right now for adults?
Wood slice crafts are a strong contender because the bark edge gives a rustic look before any decoration goes on.
They also stretch across many uses, from a house number plaque to table decor to gifts. Most take an afternoon with basic tools.
How do you dry wood slices for crafts?
Air drying is the dependable home method, and it takes 3–6 months, so for a quick project buy slices that are already dried. Air drying works too but takes 3–6 months.






