The projects here run from a birdhouse built from a scrap of softwood to a box with a fitted lid, and the one that suits you depends on which skill you want to practice: scroll saw cuts, sanding, dados, or hand-plane fitting.
Choose a project that leans on one joint and repeat it. Cutting the same cut 4 times drills it in faster than 5 different joints would, and a botched one costs an hour of your time, not a whole weekend.
A simple 4-legged stool with a rectangular top fits that bill. Thick, square legs hide small errors, and you can finish it before dinner.
1. Birdhouses
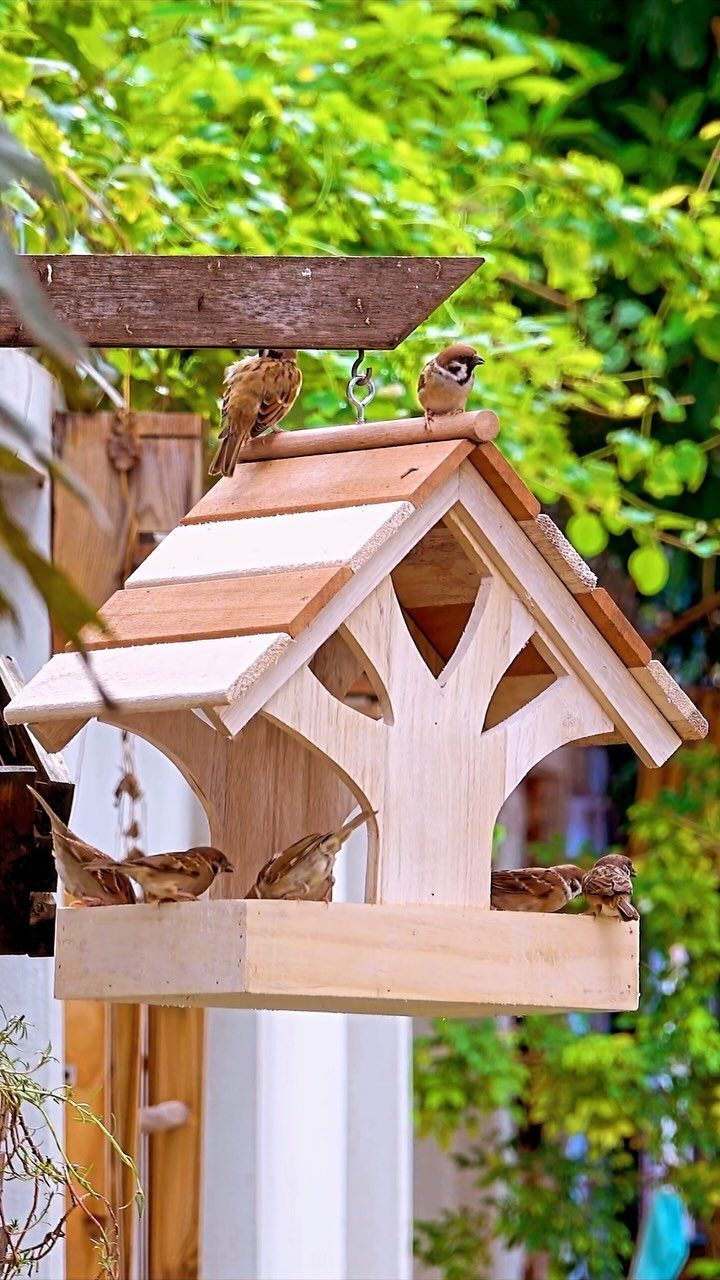
A birdhouse is about as forgiving as a first project gets: a few straight cuts, a roof, and a front panel where you can show off.
The tree-shaped cutout on this one is a good place to practice a scroll saw or coping saw, and a slow, steady cut beats a fast one.
I’d pick a scrap of softwood and finish it with an outdoor-rated sealer so it holds up hanging in the garden. Cost stays low because the pieces are small.
2. Wooden Toy Wagon
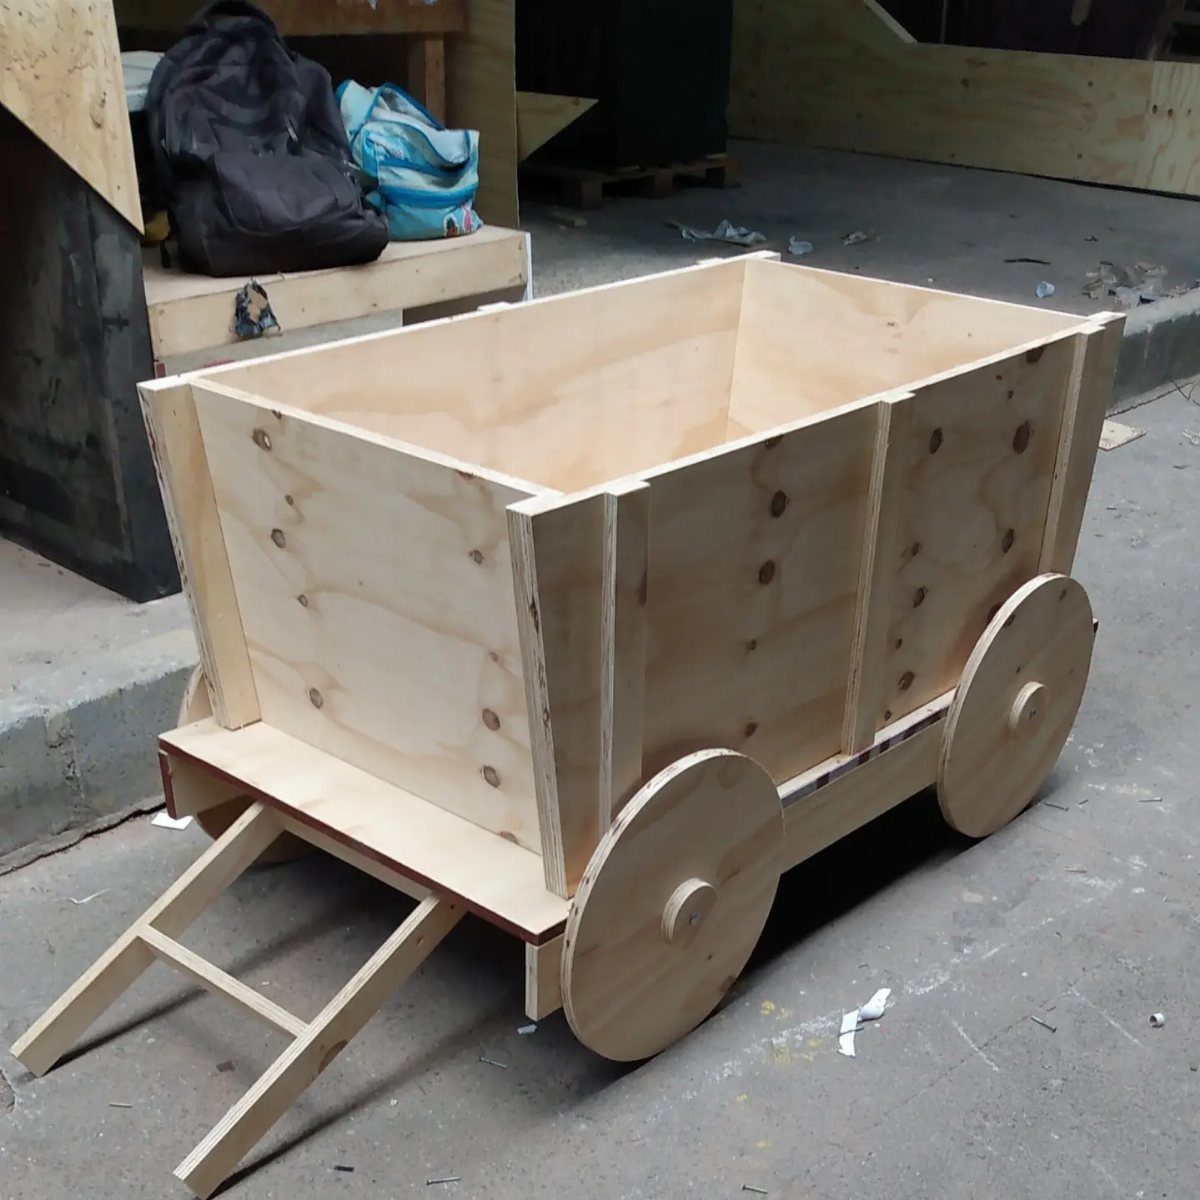
A toy wagon is a small build: a bed, a handle, and 4 wheels or 2 on an axle, and a child will haul blocks, dolls, and rocks in it for years, which makes it a gift people remember.
Round the edges with sandpaper before anything else. Small hands will test every corner, so I’d spend extra time there, and a coat of finish makes it feel like a real keepsake.
3. Wood Serving Tray
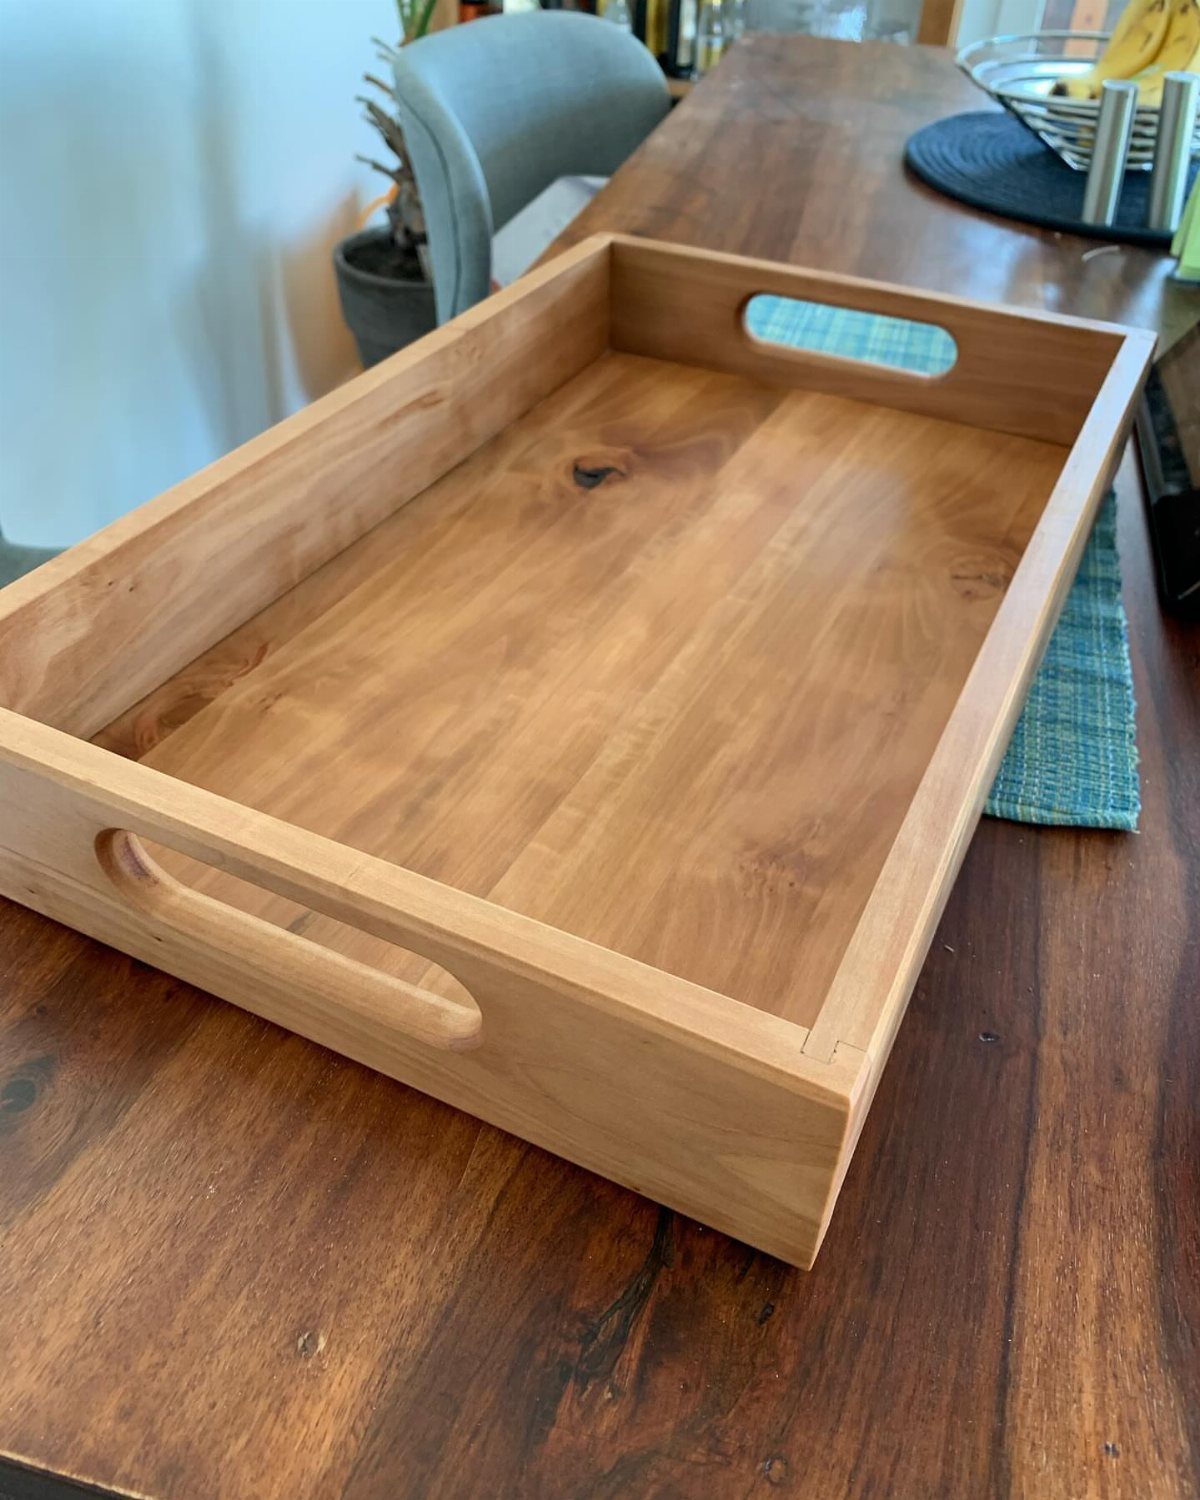
Cutout handles make a serving tray look finished. Drill a 1-inch hole at each end of the slot, then connect them with a jigsaw and sand the edges smooth.
Drill a hole at each end of the handle slot, then connect them with a jigsaw cut, and the corners come out clean.
A rectangle this simple gives you room to practice sanding, which matters most here.
Sand the cutouts smooth, since fingers will touch them every time the tray moves. Food-safe finish is my pick for a piece that carries snacks.
4. Wall Shelf
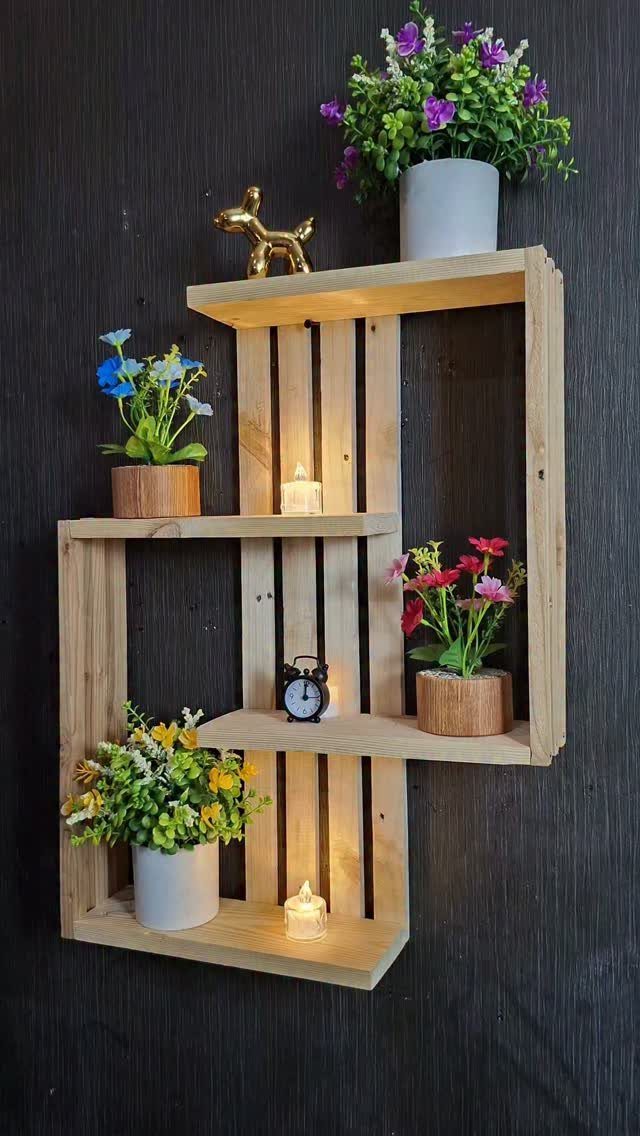
Shelves scale to your skill level.
A basic version uses dados, which are simple grooves that hold each tier in place. Once basic shelf joints feel comfortable, try mitered corners, through tenons, or a small dovetailed box that mounts on the wall.
Three tiers like this one give you a lot of display space from little lumber.
I’d start with dados, because they teach accurate measuring without demanding fancy joinery. Mark twice, cut once.
5. A Stool
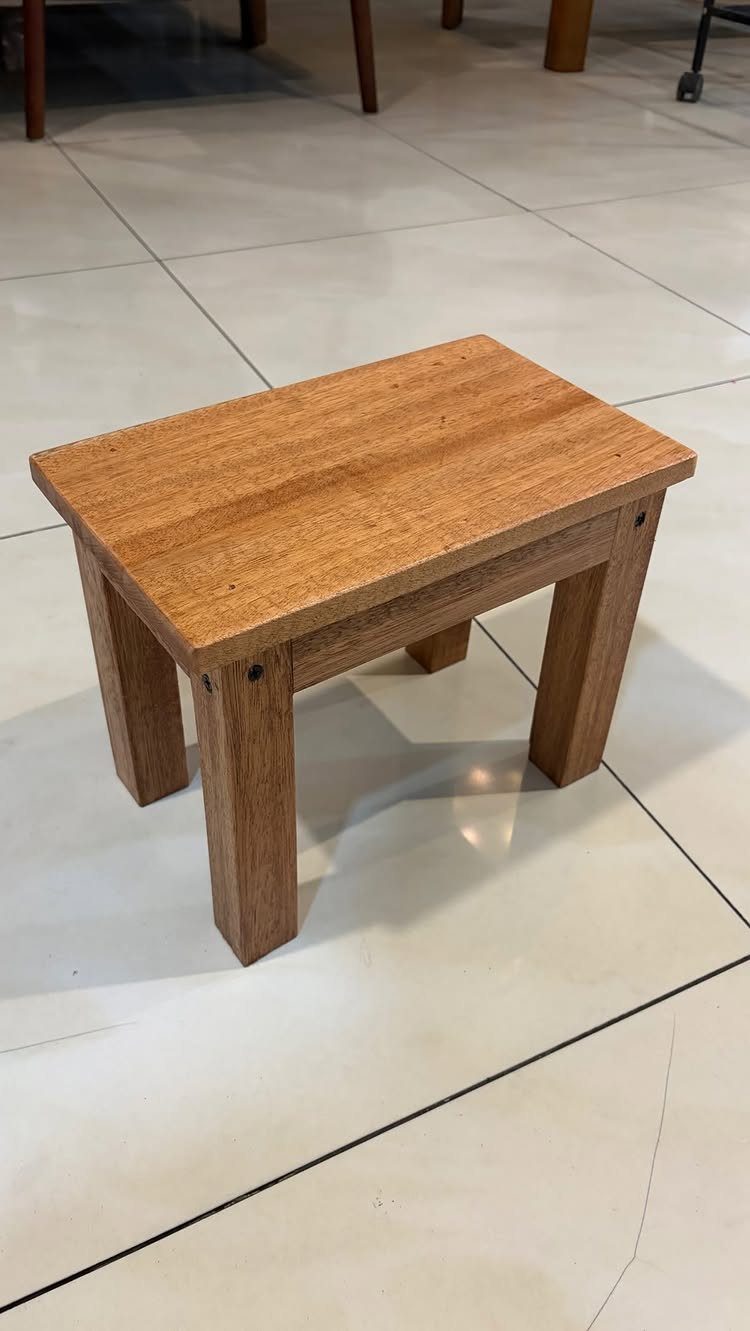
Chairs scare plenty of woodworkers, so build a stool first. 4 square legs and a rectangular top make a sturdy piece with none of the angled joinery a chair demands.
Thick legs forgive small errors, and that is why I like this design for beginners.
Keep the legs the same length, check that the stool sits flat on a level floor, and the rest is sanding and finish. It’s a good afternoon project.
6. Wall Mounted Bottle Opener
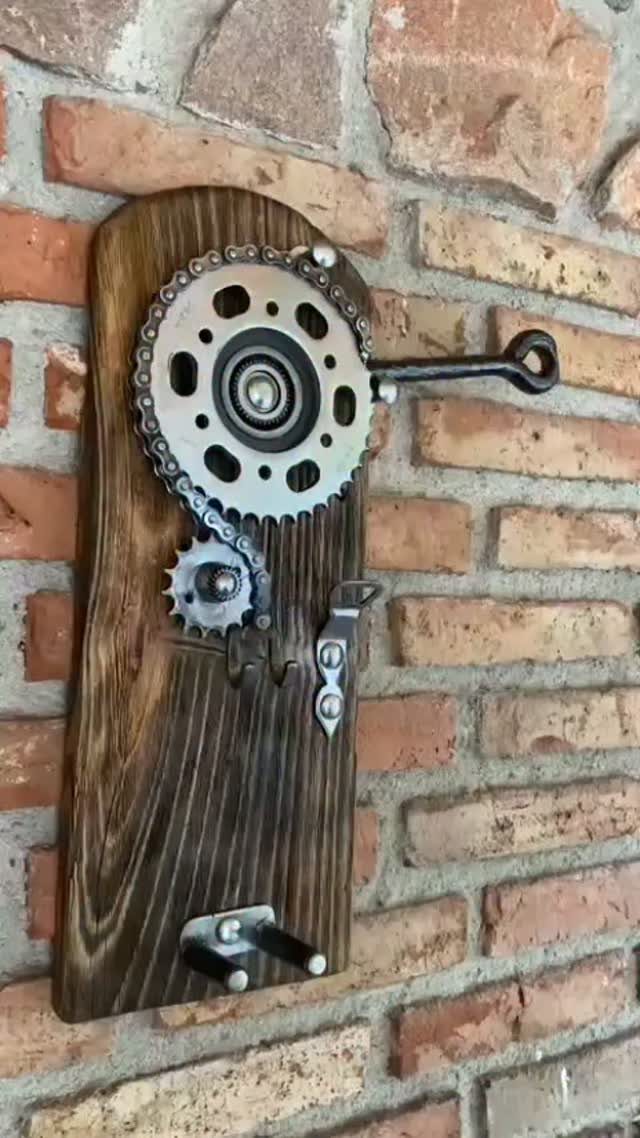
Bicycle gears turn a plain board into a bottle opener with real character, and the build is mostly a matter of mounting hardware.
Used gears are cheap, and a wooden plank gives you a base you can sand and stain in minutes.
I’d choose a sturdy board, since it takes the pull of every cap.
Anchor it into a solid surface; the brick wall here is a good example for a patio or porch. Ordinary tools are enough for the job.
7. Tic-Tac-Toe Game Board
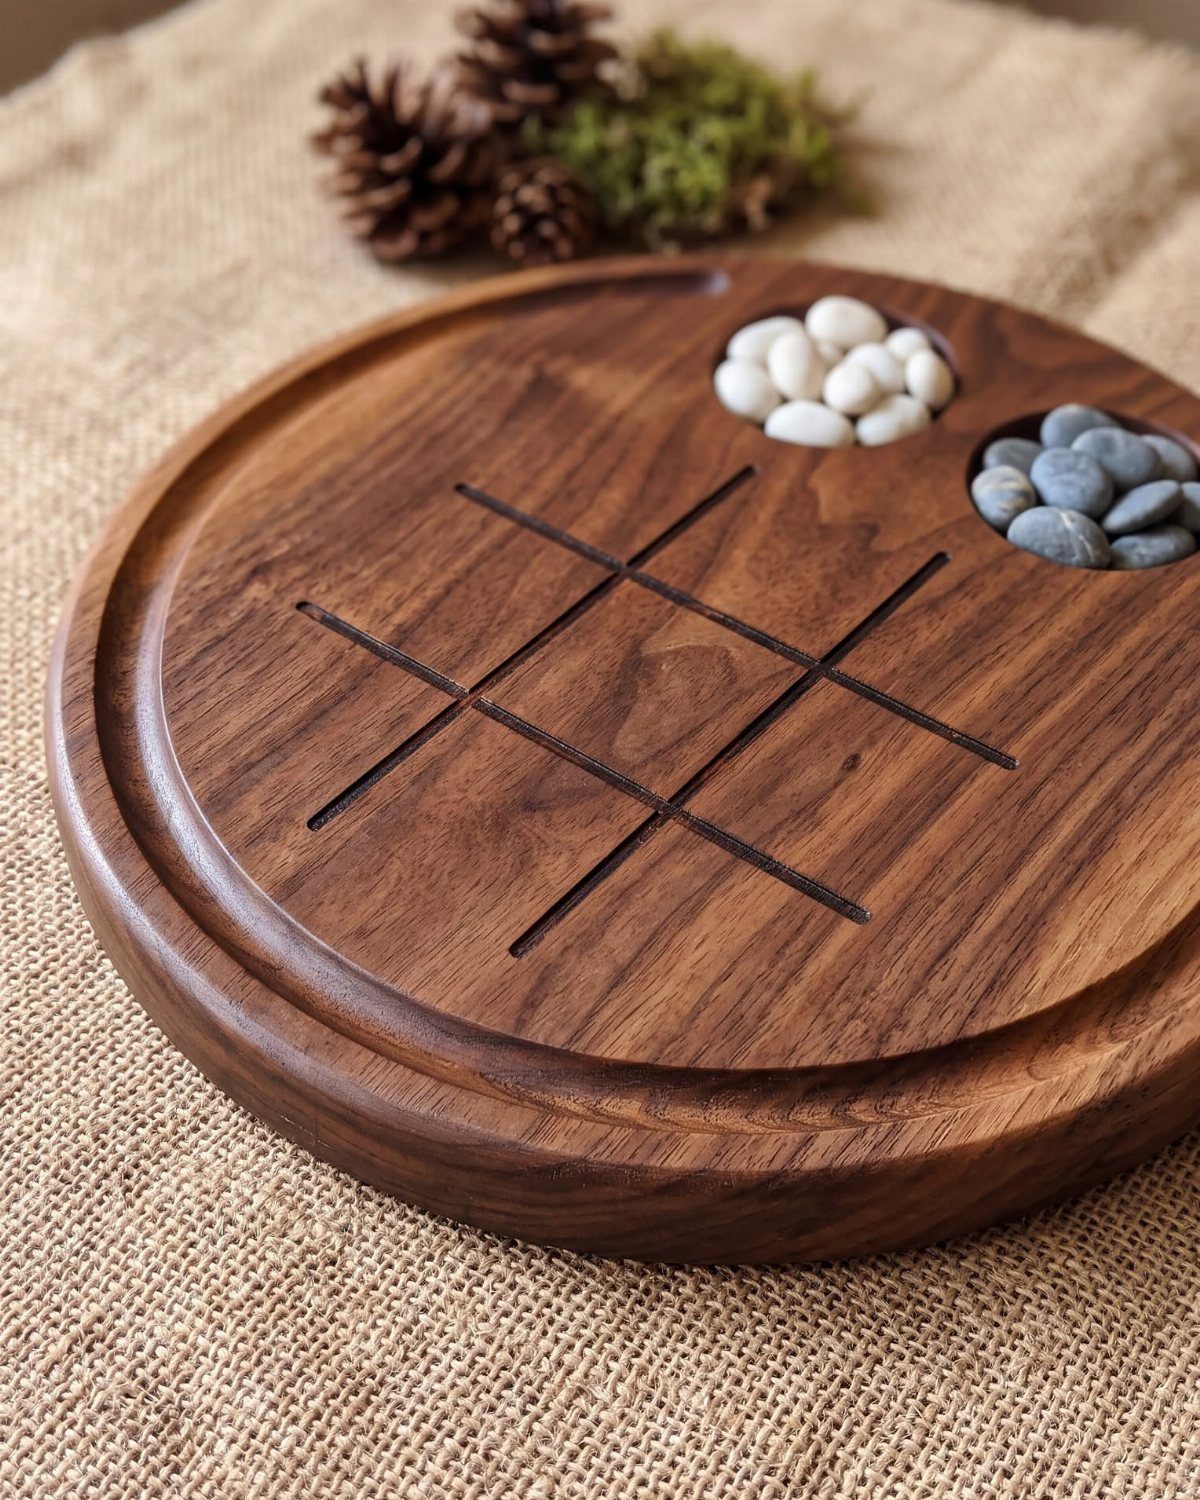
A round board with a carved grid and 2 shallow indentations for stones turns a scrap of hardwood into a game people will actually pick up.
Carve the grid lines evenly spaced, and keep the depth the same all the way across so the board looks deliberate.
Sand last and finish with a food-safe oil if the stones will sit on it. A small project, and a good one for a gift.
8. Simple Box
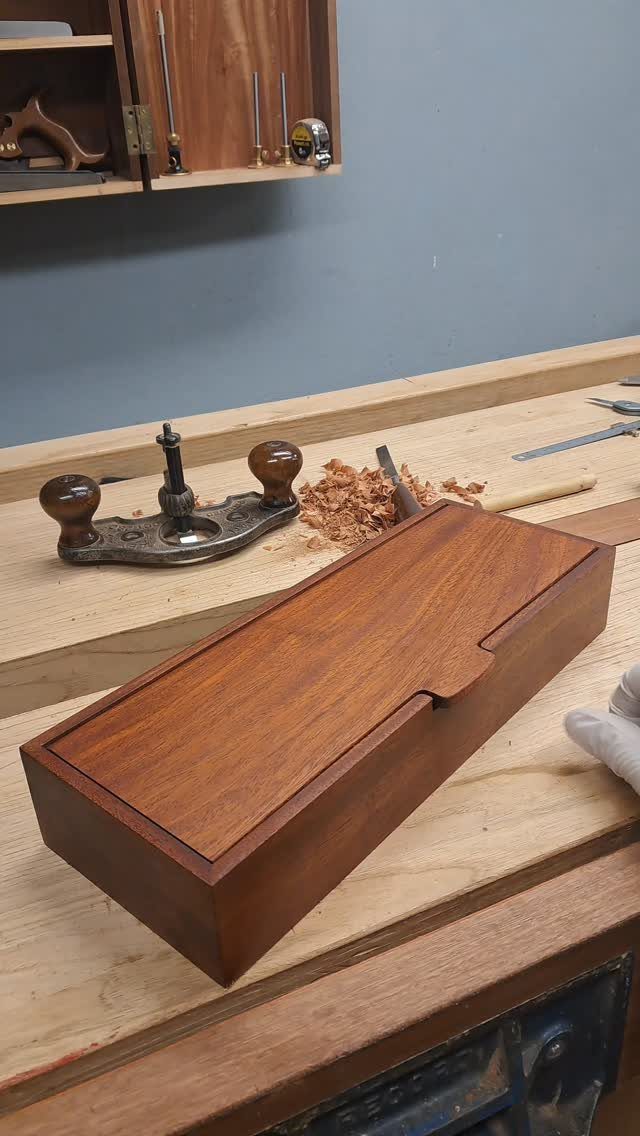
A box with a lid teaches more than its size suggests: square corners, a lid that fits, and a surface that has to be flat. Get those three right and nearly every later project gets easier.
I’d choose a hand plane for fitting the lid, since a few light passes beat a lot of sanding.
Test the fit often, and take off small amounts at a time. Wood can come off but never go back on.
A polished finish shows off the grain, so spend the time on the final sanding.
9. Plant Stand
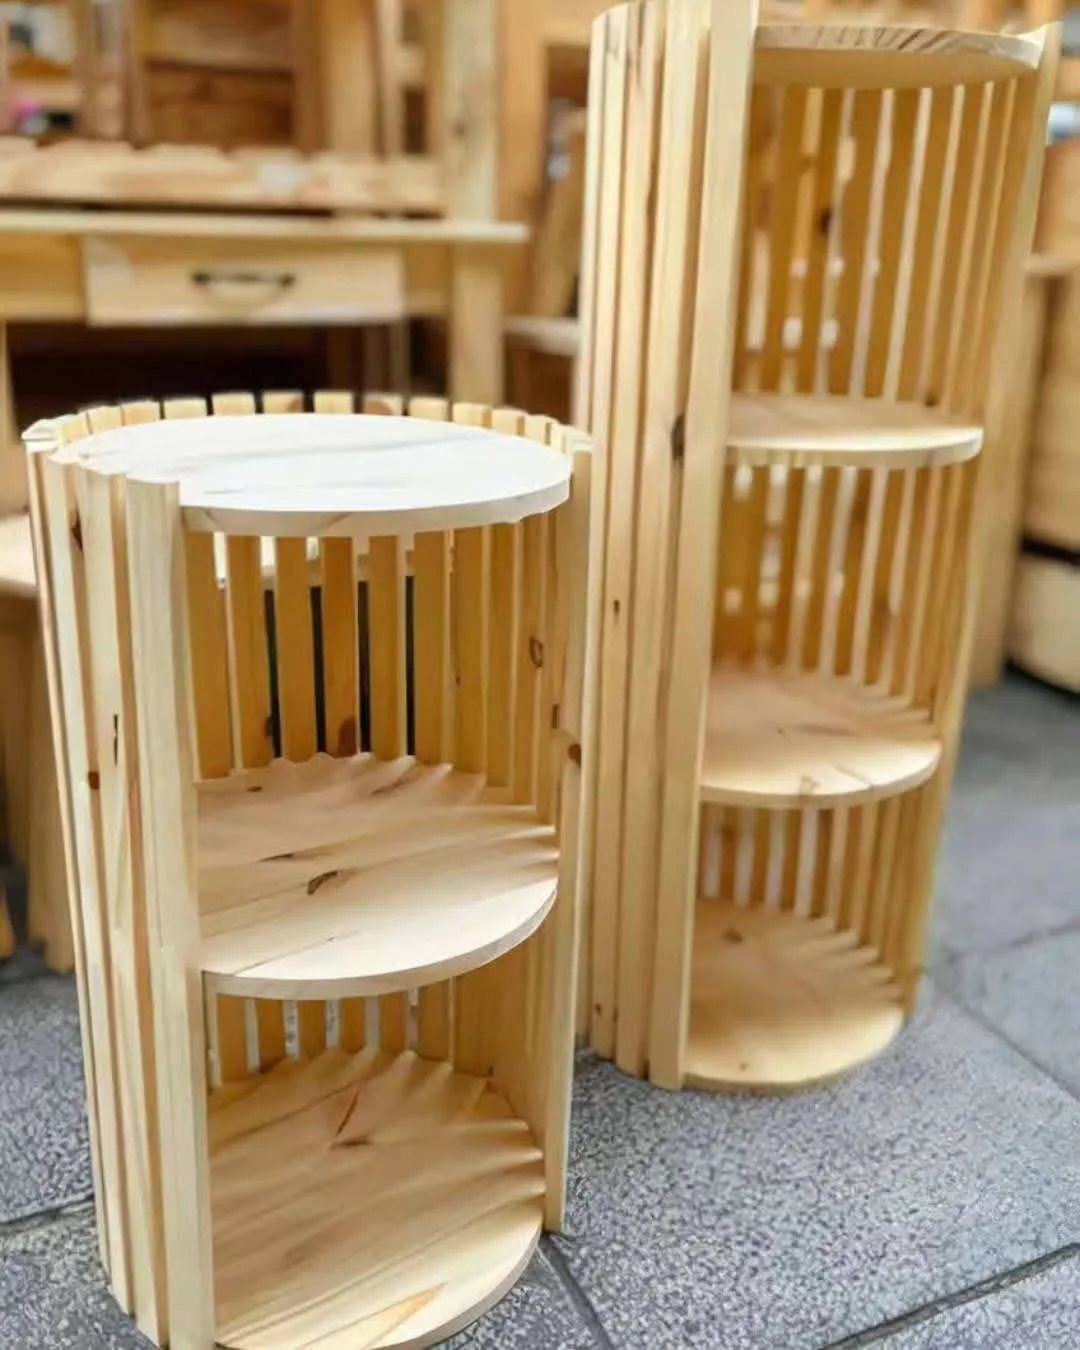
Vertical slats give a plant stand its airy look, and a circular shelf holds a pot from every side.
2 tiers like these keep a few plants off the floor without taking much room, which helps if your shop or apartment is small.
Cut the slats to identical lengths so the tiers stay level, and check each shelf with a level before gluing.
Light wood suits green leaves well. I’d finish it with a clear coat, and remember that watering will reach the wood sooner or later.
10. Wooden Blanket Ladder
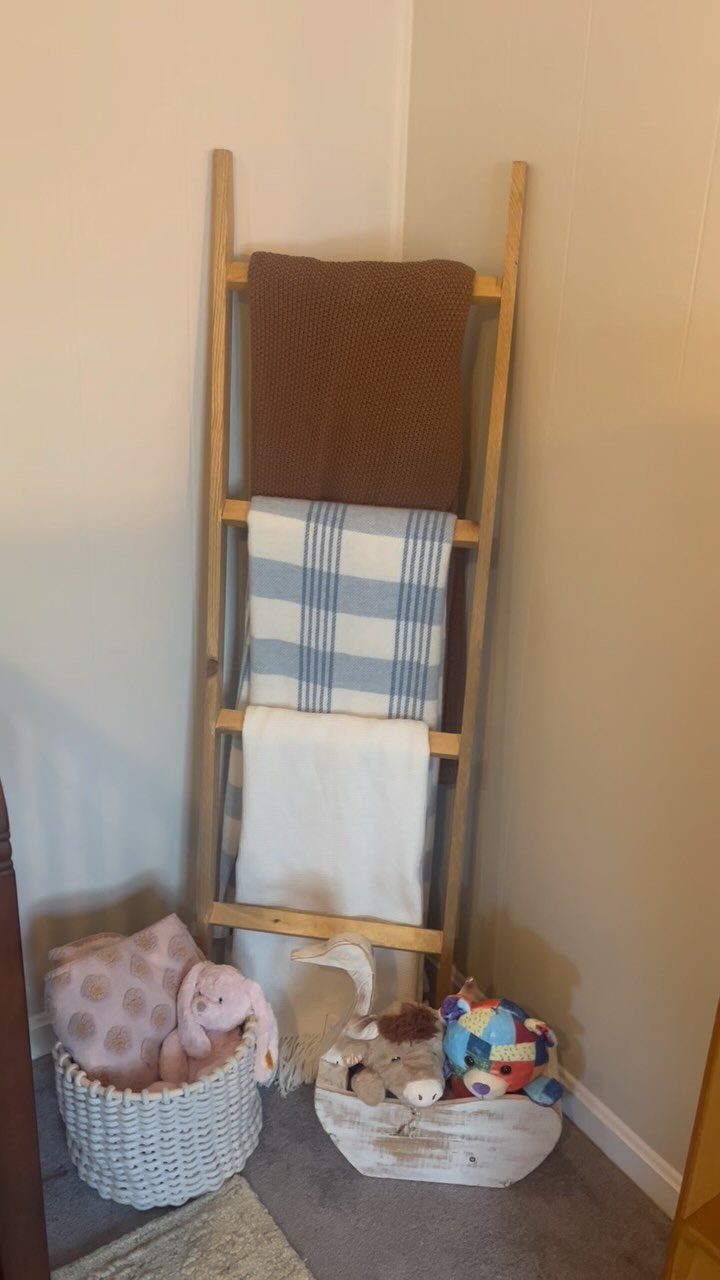
A blanket ladder is nothing more than 2 long rails and a few rungs, and it leans against the wall without any mounting.
A blanket ladder is just 2 rails, a handful of round rungs and a few drilled holes, so it fits easily into an afternoon.
Space the rungs evenly so the blankets drape cleanly, and sand the rungs well, since fabric snags on rough wood. I’d pick a finish that matches the room’s other wood tones.
The ladder is also a handy place for throws that otherwise end up in a pile on the couch.
Choosing the Right First Project
Small projects win for a first build, and the reason is practical as well as mental.
A small piece is easier to clamp, easier to move around the shop, and you can see the steps from start to finish without losing the thread halfway through.
Pick a plan built around a single joint. Practicing one joint over and over teaches more than a project that asks for five different ones, and a mistake costs you an hour instead of a weekend.
Use real wood, not a laminated panel or a pre-made craft board. Grain direction, tear-out, and how a board moves are things you only learn by cutting the real thing.
My preferred route is to buy a single tool, get good with it, and let a few small builds teach you what it can do.
Take a block plane: it shows you how to bring edges flush and how to shave end grain smooth.
If joinery isn’t what you’re after yet, a kit with parts already cut lets you spend your time on assembly and finish.
Importance of Local Woodworking Classes
Nothing speeds up the early learning like standing next to an instructor, and a local class does that better than any video, especially if your hands learn faster than your eyes.
Many Woodcraft stores offer beginner classes where you build a project while an experienced instructor covers shop safety, tool use, and project planning.
Safety is the part I’d least want to pick up alone. Someone watching your hands and your stance catches habits before they stick.
A full shop or a rolling tool chest isn’t required to sign up, since the class supplies the machines and benches.
Back home, a pocket-hole jig like the one Kreg sells gives you tight, repeatable joints, so your attention stays on the build.
Using Scrap Wood Effectively
A scrap pile is the cheapest lumber you will ever own, and small projects use it well. Offcuts from bigger builds are often the right size for a beginner piece, so a mistake costs you nothing you were saving.
Sort the pile by species and thickness before you start. Then match a project to what you actually have, instead of buying new boards to fit a plan.
Small pieces clamp down easily and are simple to move around the bench, which makes them a natural match for scrap. Plenty of them come together in a single afternoon, and almost all fit inside a weekend.
If you later sell what you make, scrap keeps your material costs low, which leaves more of the price as profit. Check each piece for splits, nails, and loose knots first.
Frequently Asked Questions
What are good beginner woodworking projects?
Pick something with one joint or a few straight cuts: a birdhouse, a 4-legged stool, a serving tray, a lidded box, or a wall shelf with dados.
How can I improve my woodworking skills?
Build simple projects and repeat one joint until it feels easy, since that teaches more than a project demanding five different ones.
Use real wood rather than laminated panels, because grain direction and tear-out only show up when you cut the real thing.
What tools do I need to start woodworking?
Start with one tool and learn it well, rather than filling a shop. A block plane earns its spot in a starter kit because it teaches you to flatten an edge and take a clean shaving off end grain.
A pocket-hole jig adds tight, repeatable joints, and a class supplies machines and benches, so you can try things before buying.
Are woodworking classes worth it for beginners?
Yes, especially for safety, since an instructor can correct your grip and stance as you work. Classes supply the benches and tools, so you can walk in with nothing but closed-toe shoes.






