Where the stand will sit and how much floor you can give it decide which design fits, so measure that spot before you pick one.
Corner space calls for the narrow Y-shaped frame, height on a steady base calls for the double ladder or A-frame, and the stacked 2×4 planter belongs outdoors on a hard, level surface.
They all start with the same framing-aisle lumber and end with a finish: wood filler in the screw holes, then 120–150 grit sanding before paint or stain.
1. Inexpensive Construction Lumber 2×4 Plant Stand
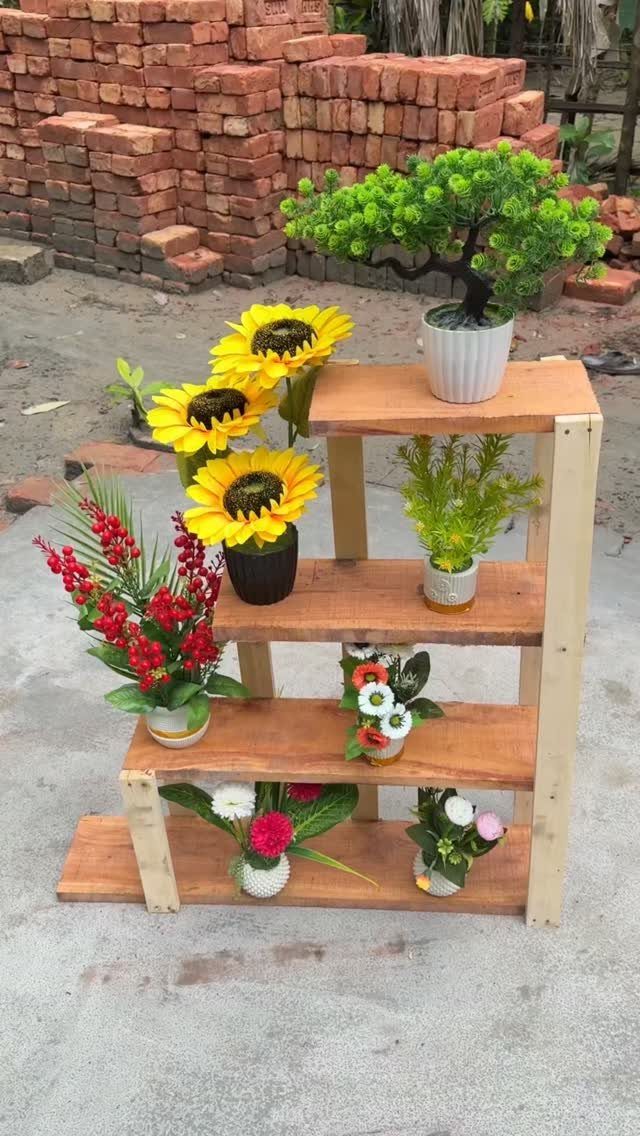
4 tiers of plain construction lumber is about as cheap as a plant stand gets, and I think that is the best reason to build it.
Standard 2x4s from the framing aisle cost little, so a stray bad board stings less.
Sort through the pile and sight down each board for twists before you buy. Sand the edges well, since construction lumber arrives rough, and a coat of exterior paint or sealer suits a stand that lives outdoors.
2. DIY 2×4 Shelves Plant Stand
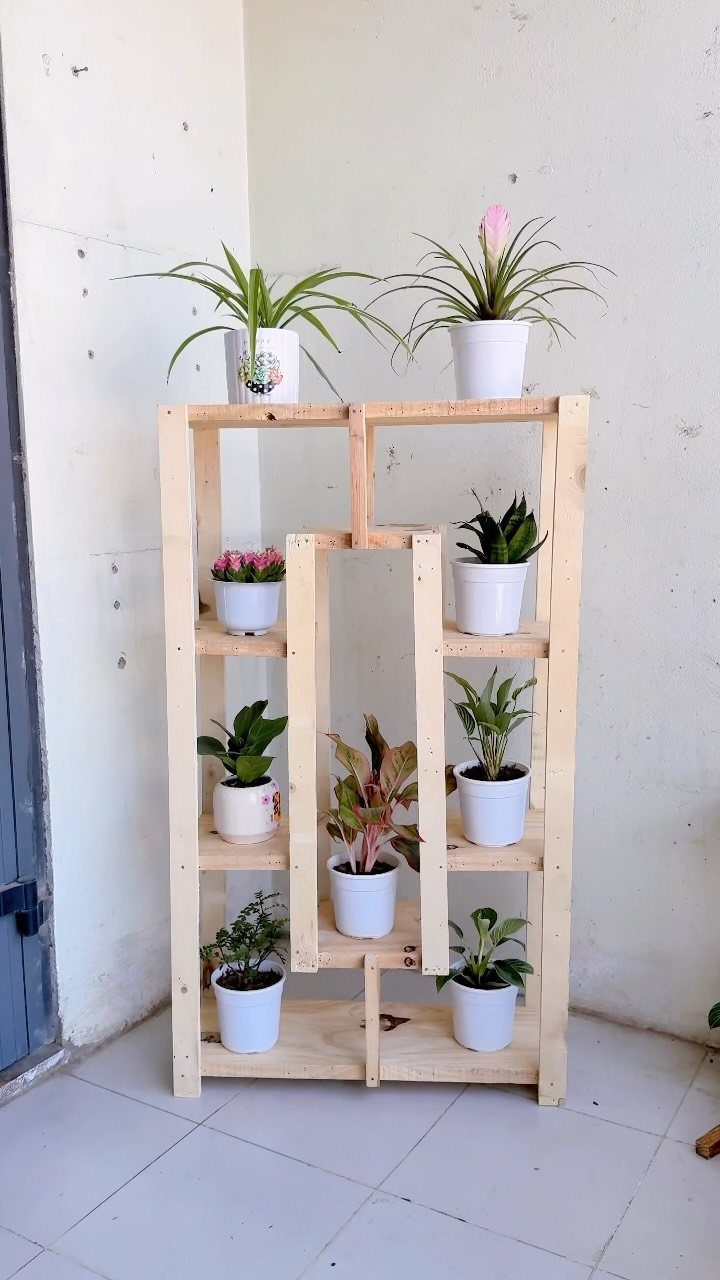
Shelves made from 2x4s give you the simplest version of this project: a frame with flat tiers and nothing fancy.
Because the lumber is the same thickness throughout, cuts repeat easily, so one stop block on your saw handles most of the work.
I would pick this one for a first build. Sand it smooth and a light finish keeps the wood looking pale and clean, as it does here.
3. Double Ladder Plant Stand
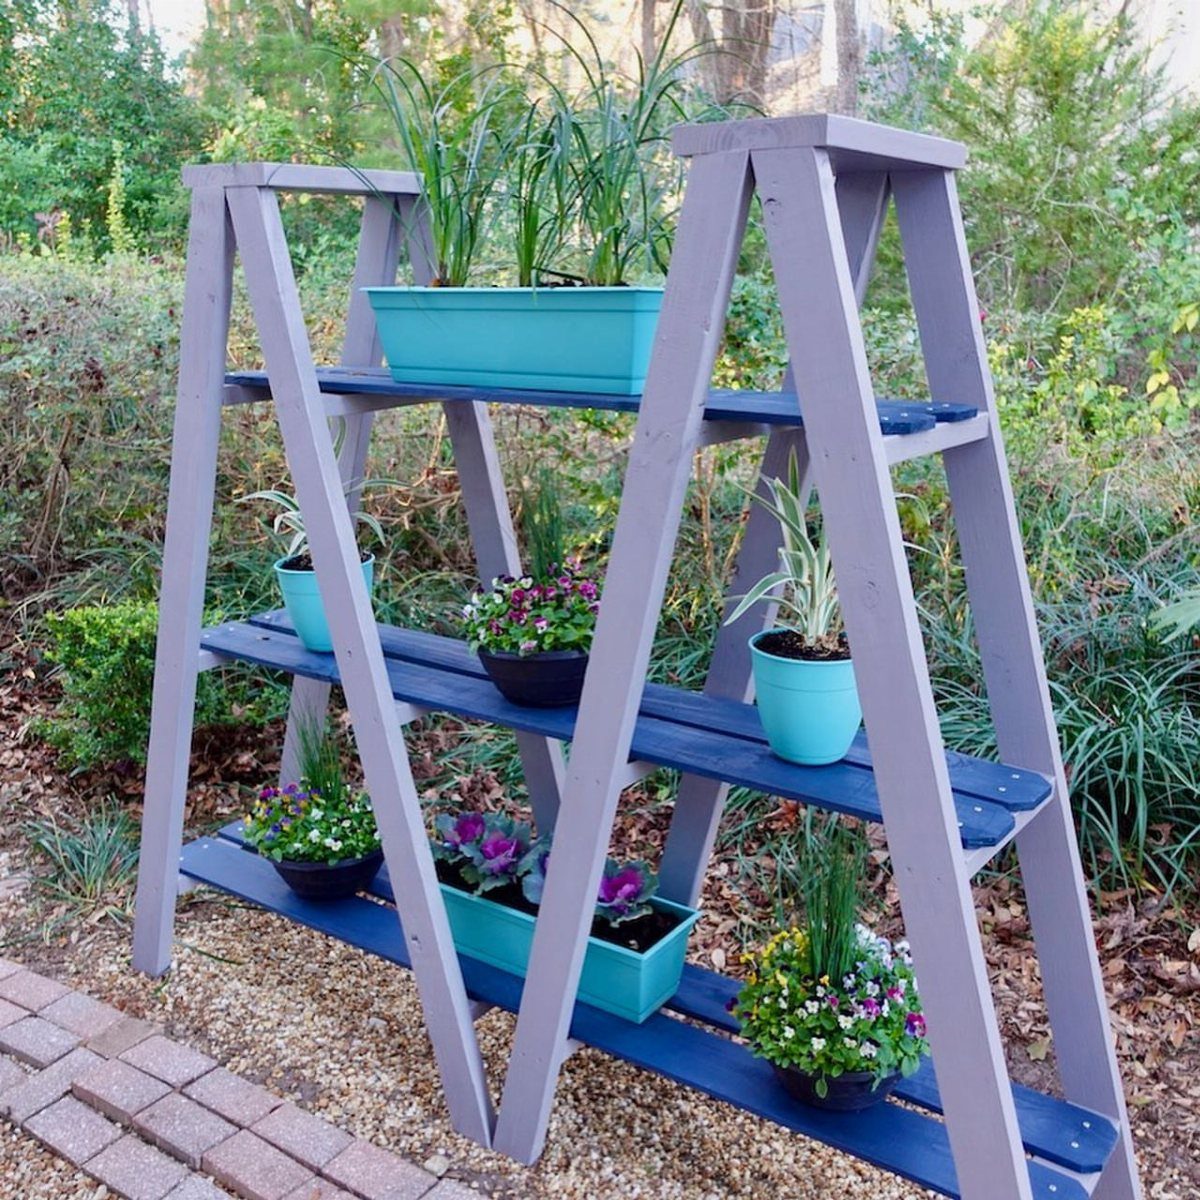
Two ladders leaned together share the load, which makes a double ladder stand the one I would build when I want height without a heavy base.
Each side is a pair of rails with rungs, and the plants sit on the rungs or on boards laid across them.
Paint hides the lumber’s flaws. Grey with a blue accent looks sharp outside, and a coat of exterior paint suits that setting.
4. Stacked 2×4 Planter Stand
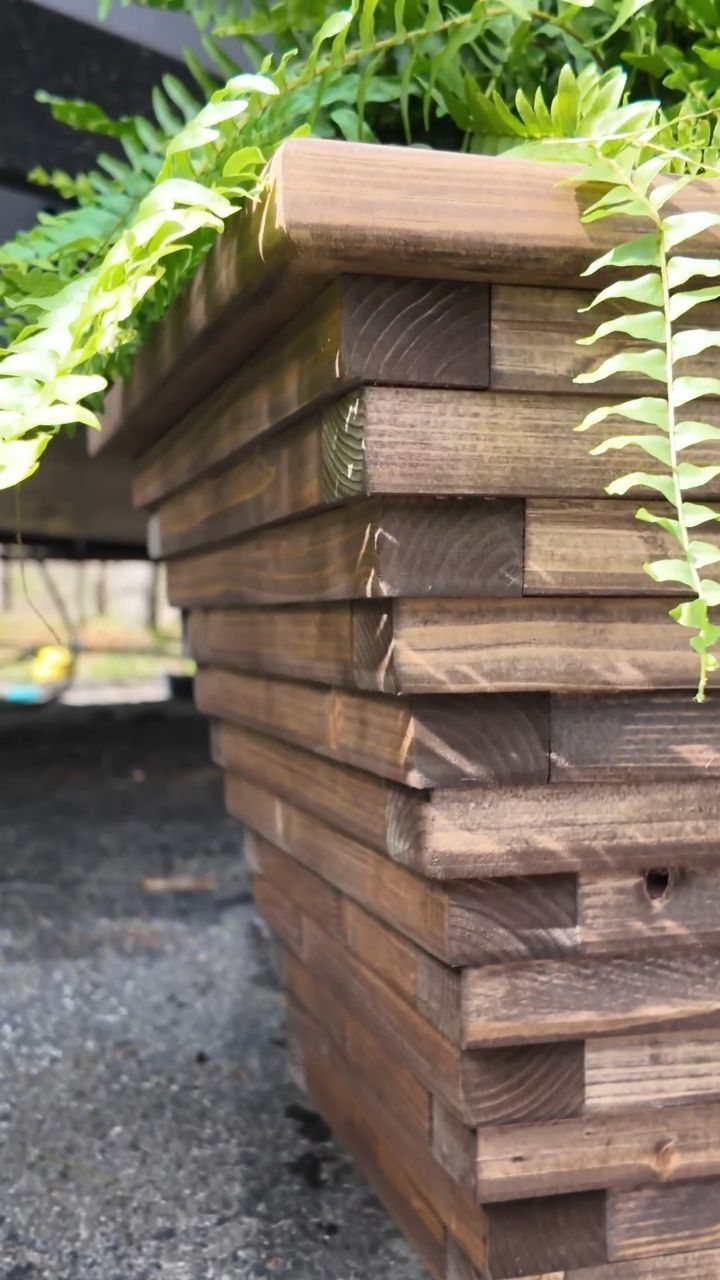
Stack 2x4s log-cabin style, alternating the direction of each layer, and you get a tall, square box with no fancy joinery. Screws or nails at the corners hold each course to the one below.
A dark stain makes ferns look especially green. Set the box on a hard, level surface, and use a stain made for outdoor wood, since this one stays outside.
5. Y-Shaped 2×4 Plant Stand
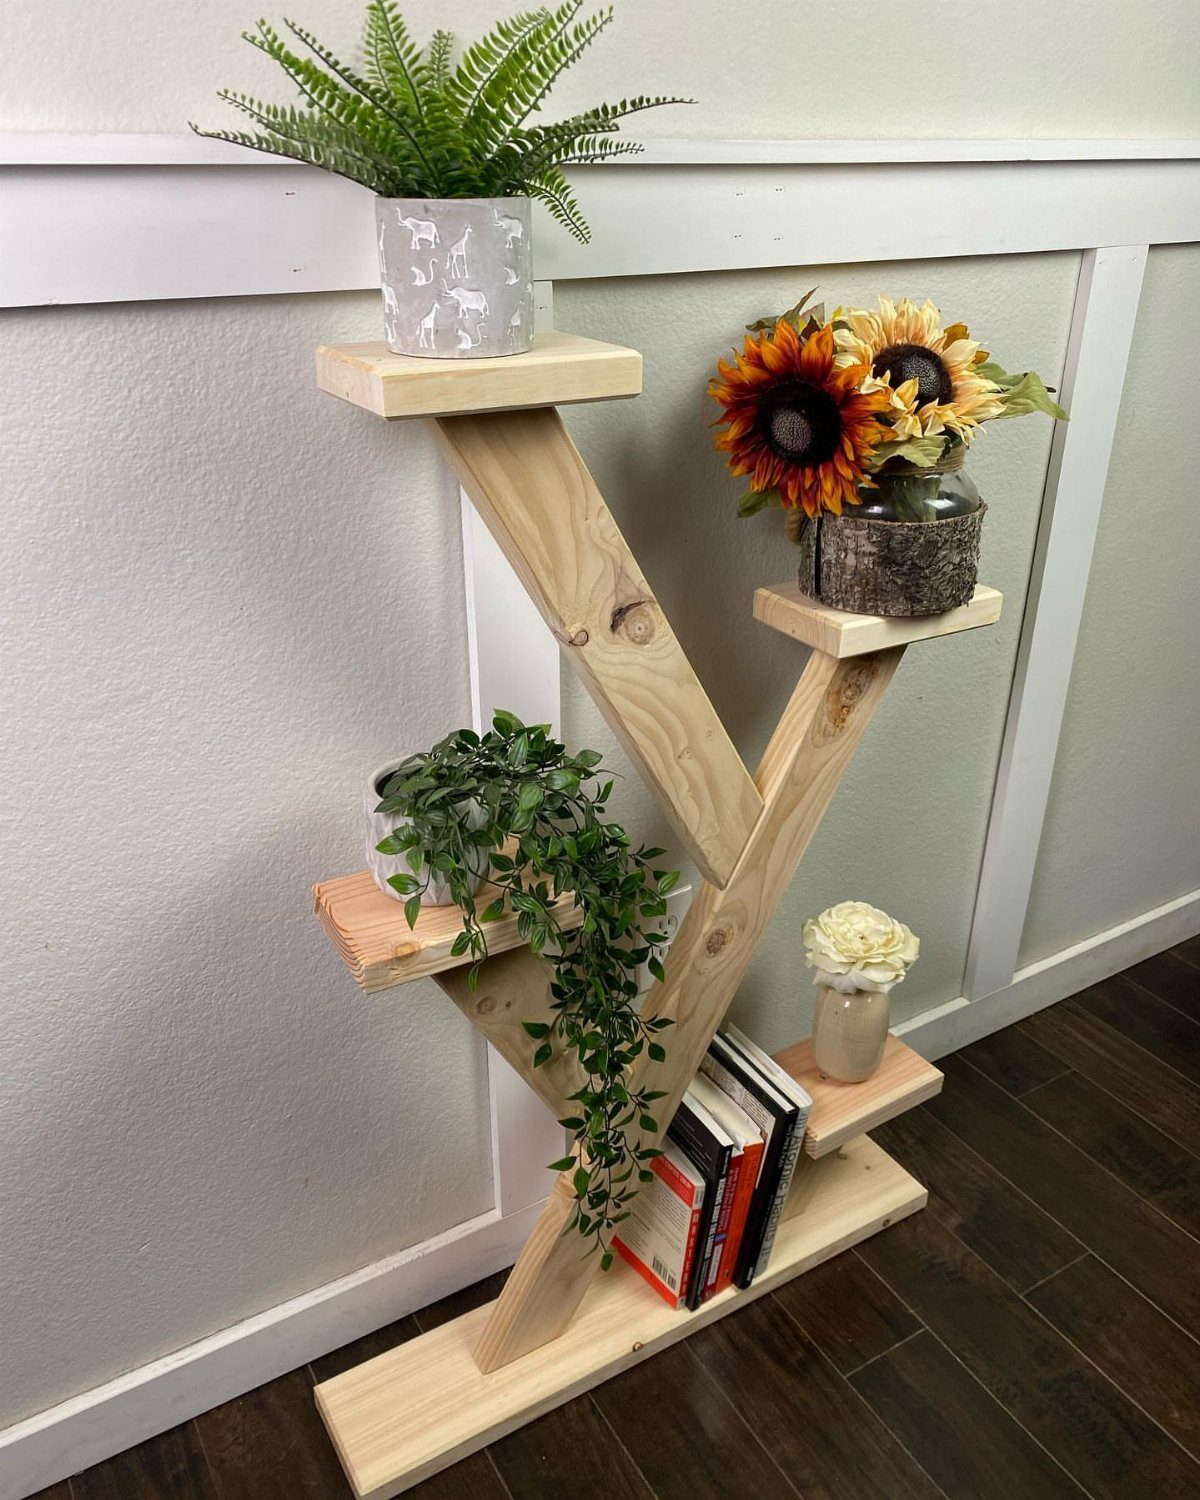
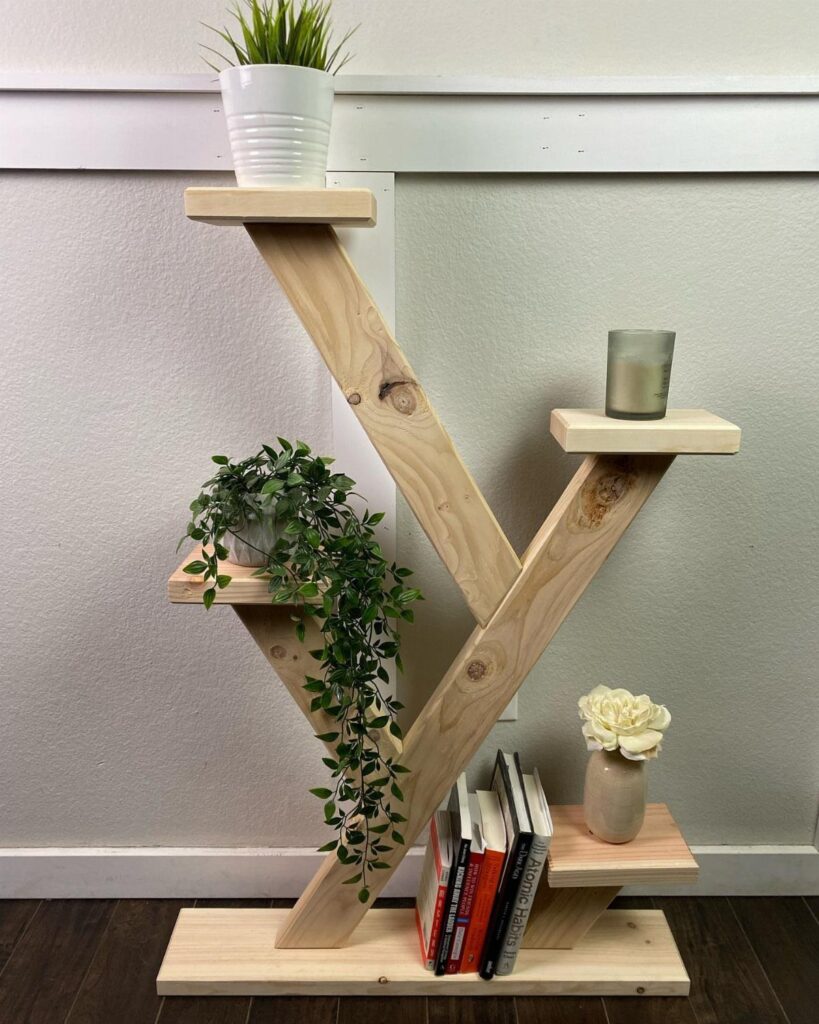
A Y-shaped frame lets one upright 2×4 carry small shelves up top while leaving room for books or extra pots at the base. It takes up little floor, so I like it for a tight corner against a wall.
Cut the angled arms carefully; a miter saw makes that easy, though a hand saw and a marked line will do. Keep the shelves small so the stand stays balanced.
6. A-Frame Tiered Plant Stand
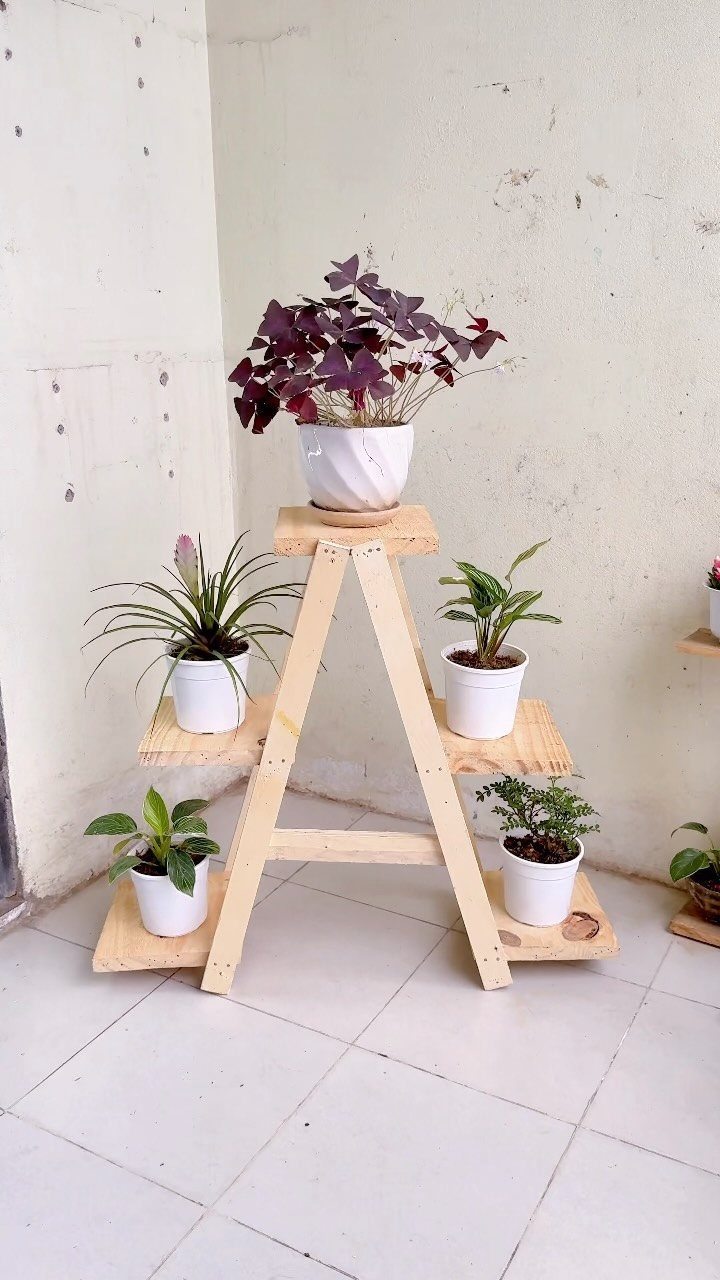
An A-frame tapers toward the top, so the tiers get shorter as they rise and every pot gets room. That shape is stable and leans nicely against a plain wall.
Build two matching side frames, then add the tier boards between them. Cut each tier slightly shorter than the one beneath it, and a pencil and a square will keep the angles consistent across both sides.
Finishing Techniques
Prep decides how a finish looks, and it starts with wood filler. Pack wood filler into each exposed screw hole, mounding it a little above the surface, and give it plenty of time to harden before any sanding.
Go over the entire stand with 120–150 grit paper, and keep your strokes running with the grain so you don’t scratch across it.
Then vacuum off the residue with a soft-bristled brush attachment and wipe the wood with a damp, lint-free cloth. Check for low spots, refill if needed, and sand again once it dries.
My pick for paint is a paint-and-primer in one, though a separate primer coat gets you to the same place.
Between coats, a quick pass with fine paper (220 grit works well) smooths the surface, and a wipe afterward removes the dust.
A stand that will take knocks from vacuums and pets holds up better under a trim or door paint, which cures harder than wall paint.
Assembly Tips
Mark the shelf positions on the legs in pencil before you drill anything. Those lines tell you exactly where the pocket holes go, so set each shelf in the jig and make sure the 2 holes sit between the lines.
Before drilling the first hole, match the jig setting and the drill bit collar to the thickness of your boards. A test cut in scrap saves a ruined shelf.
Once every shelf has its holes, I partially drive the pocket screws. Stop short of letting the screw tip break through the side of the shelf, and back the screw out a turn or two if it gets close.
Starting the screws this way makes the second set of legs far easier to attach.
A right-angle drill attachment helps in the tight spots on that second side. Clamp the pieces while you drive screws, and check that the legs line up before the final tightening.
Frequently Asked Questions
How to make an inexpensive plant stand?
Pick up plain framing-aisle 2x4s; they run only a few dollars apiece, so a warped or split board costs you very little.
Basic tools are enough: a saw, a drill and sandpaper. For a first build, I would go with a straight frame and flat tiers, since it asks for the fewest cuts and the fewest ways to go wrong.
What can I use instead of a plant stand?
Crates, shelves or repurposed furniture all work.
Anything sturdy, level and sized for your pots can hold plants. If you want something made to fit your space, a 2×4 shelf frame is a cheap build you can finish in an afternoon.






