The projects here run from a Cutting Board to a Mobile Workbench, and the number of different skills a build asks for sorts them better than price does.
After a build that needed only a saw and a drill, choose something with straight cuts and screws, like the Small Wooden A-Frame Stand or a Birdhouse, and add a single new skill next time: a hinge, a drawer or a routed edge.
For the simple builds on this list, a miter box under $30 handles most of the cutting.
1. Kid’s Bookshelf
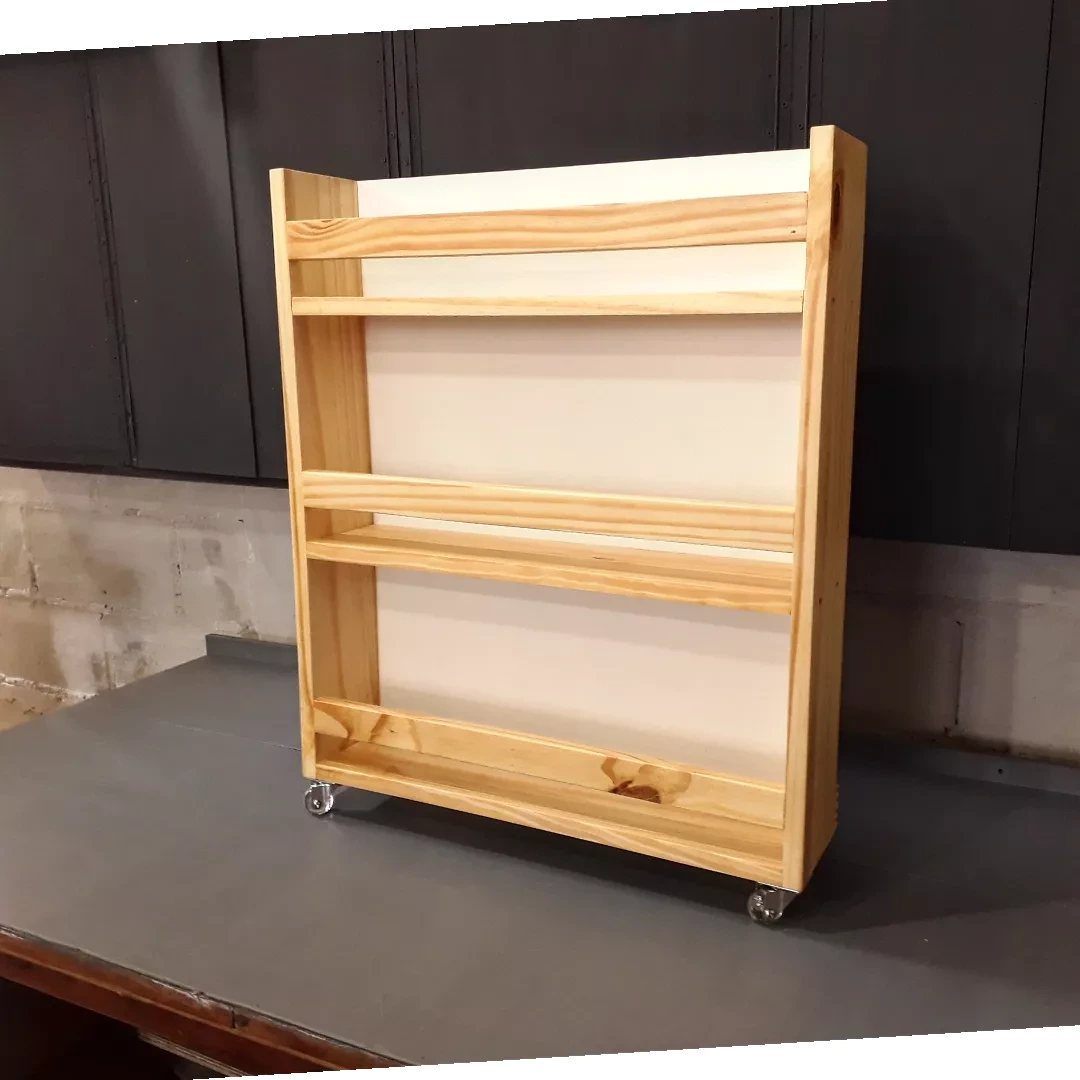
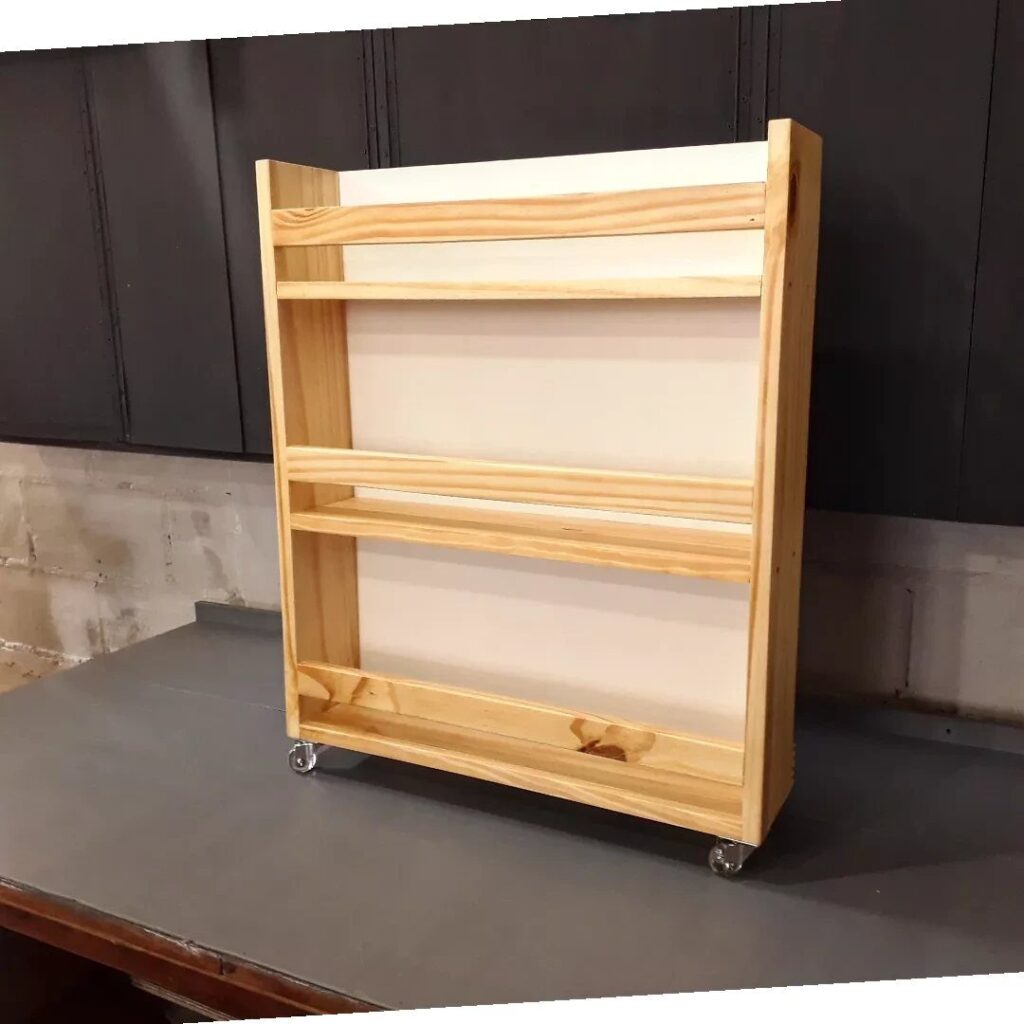
Casters turn a kid’s bookshelf into something a child can roll to the reading corner or push against the wall at cleanup time.
3 shelves is a sensible count for a first build: few cuts, a simple frame, and a height small hands can reach without climbing.
Pick wheels with a lock, since a rolling shelf that drifts while a kid pulls out a book gets annoying fast. Sand every edge round before assembly.
2. Tool Storage Wall Cabinet
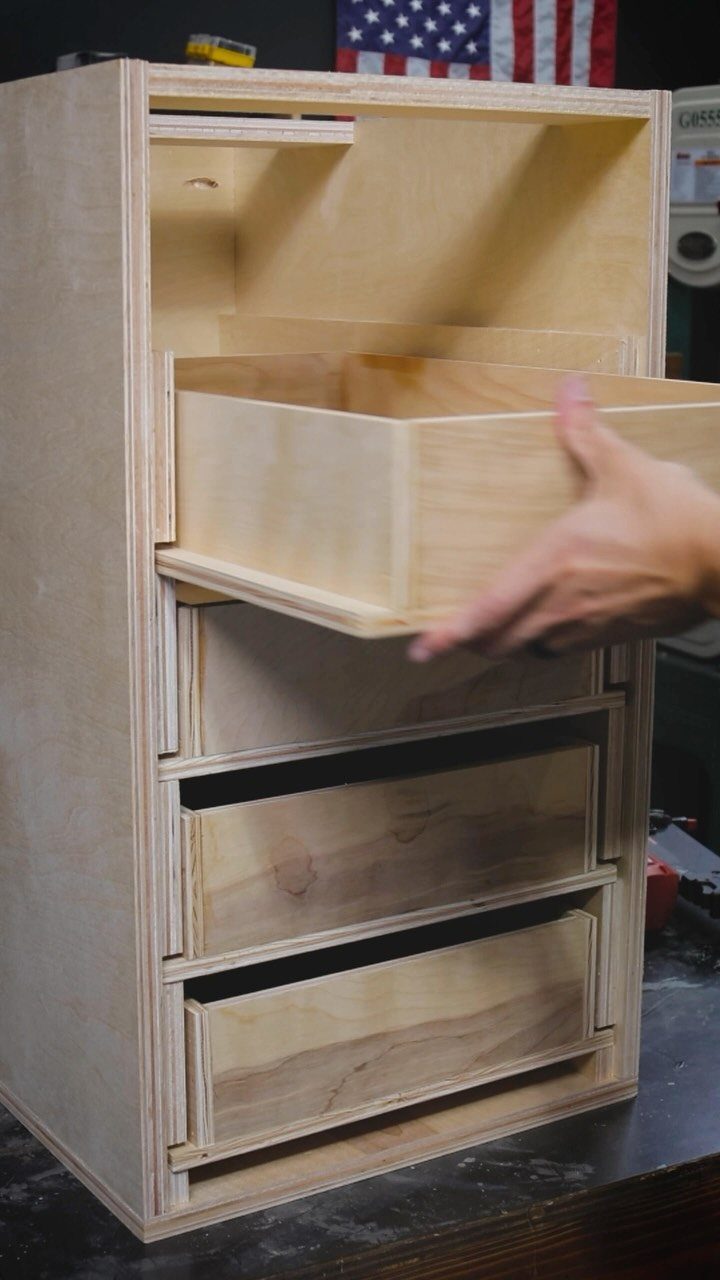
3 drawers in a plywood box make a wall cabinet that a beginner can finish in a weekend with a saw, a drill and clamps.
Plywood keeps the cost low and the parts flat, which makes drawer boxes much easier to square up.
I’d build the drawers first and size the cabinet around them. Sort hand tools by use, so each drawer holds one kind of job.
3. Plant Stands
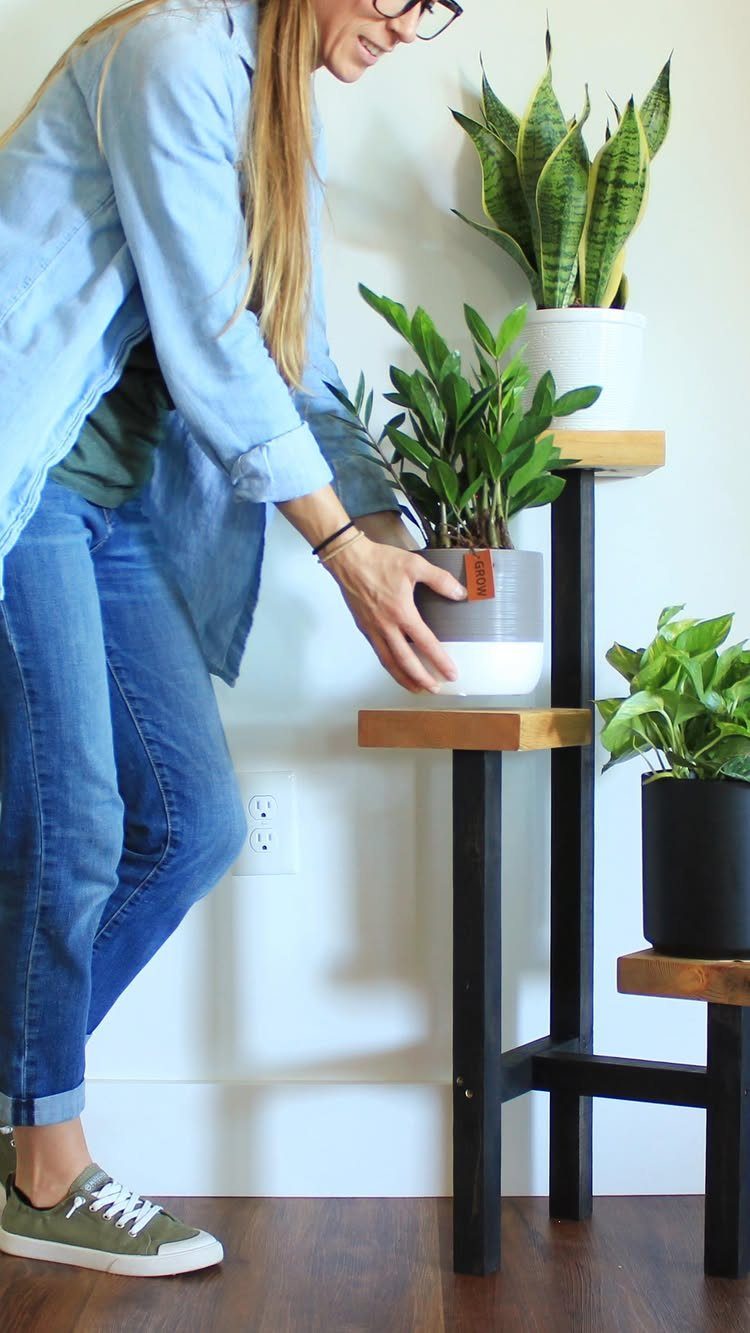
Scrap 2x2s and 2×6 blocks are all a tiered stand needs, and the maker of this one says that’s what theirs was built from. Short offcuts become legs and platforms, so the lumber cost can be close to nothing.
Lifting pots off the floor gives the leaves more air, and tiers let several plants share one corner. Keep the platforms level, and paint or stain the legs and blocks in contrasting tones for a finished look.
4. Cutting Boards
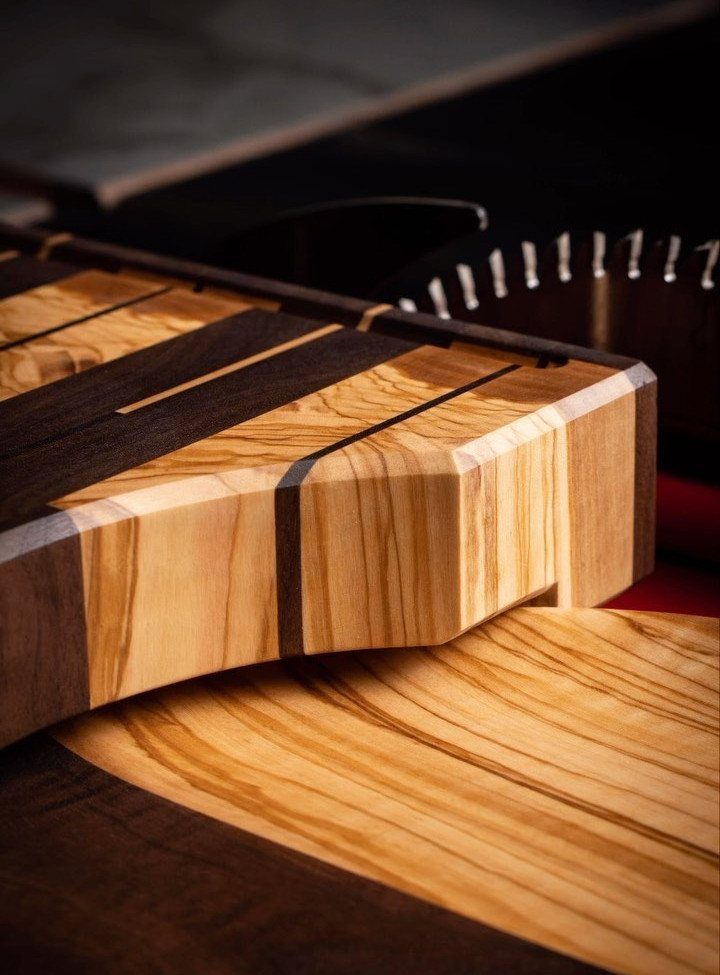
Alternating light and dark strips make the pattern, and the glue-up is where the board is won or lost. Clamp evenly, wipe squeeze-out, and let it cure fully before you touch a plane or sander.
A juice groove routed near the edge catches runoff, though it takes a router and a steady hand. Skip it on a first board if you want a simpler afternoon.
Finish with food-safe oil.
5. Jewelry Boxes
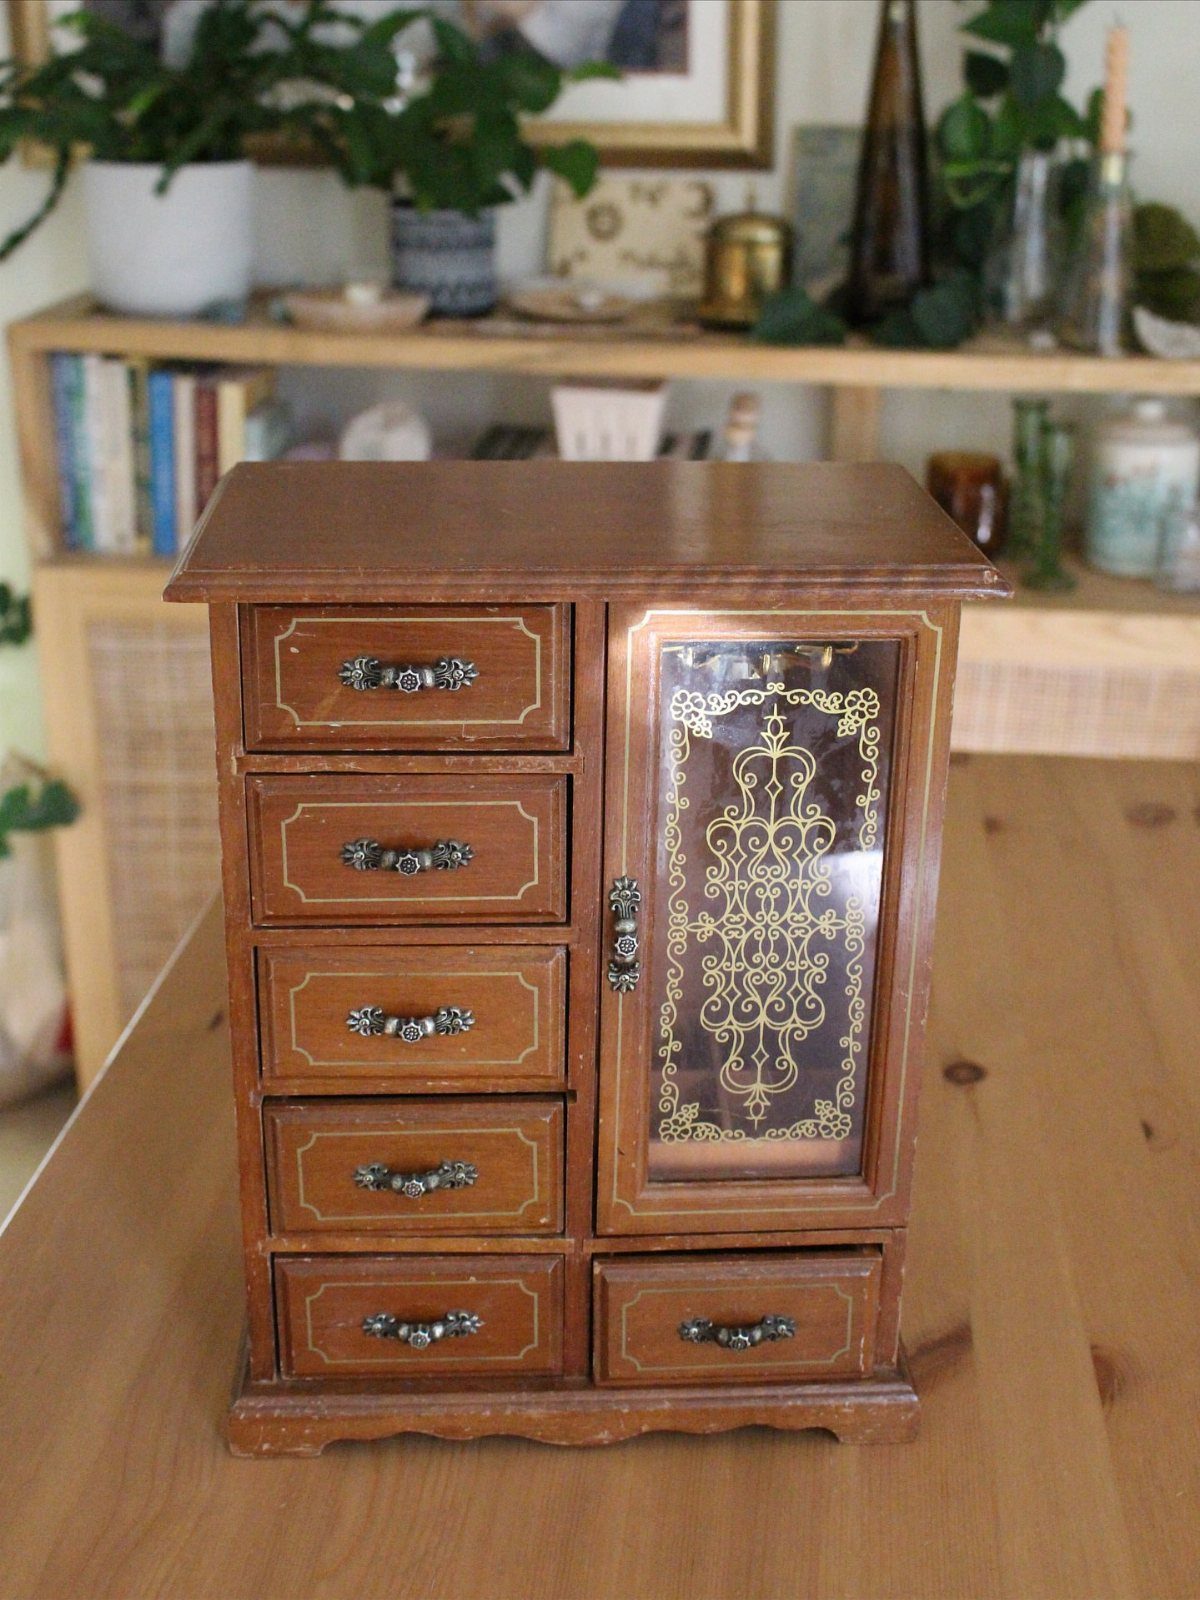
Small drawers and a glass-front cabinet pack a lot of fiddly work into a tiny box, so a jewelry box rewards patience more than speed.
Every drawer needs its own matched set of parts, and consistent measuring matters more than any fancy tool.
For a shop class, I’d build a plain version first: one drawer, a lid, a felt lining.
6. Birdhouses
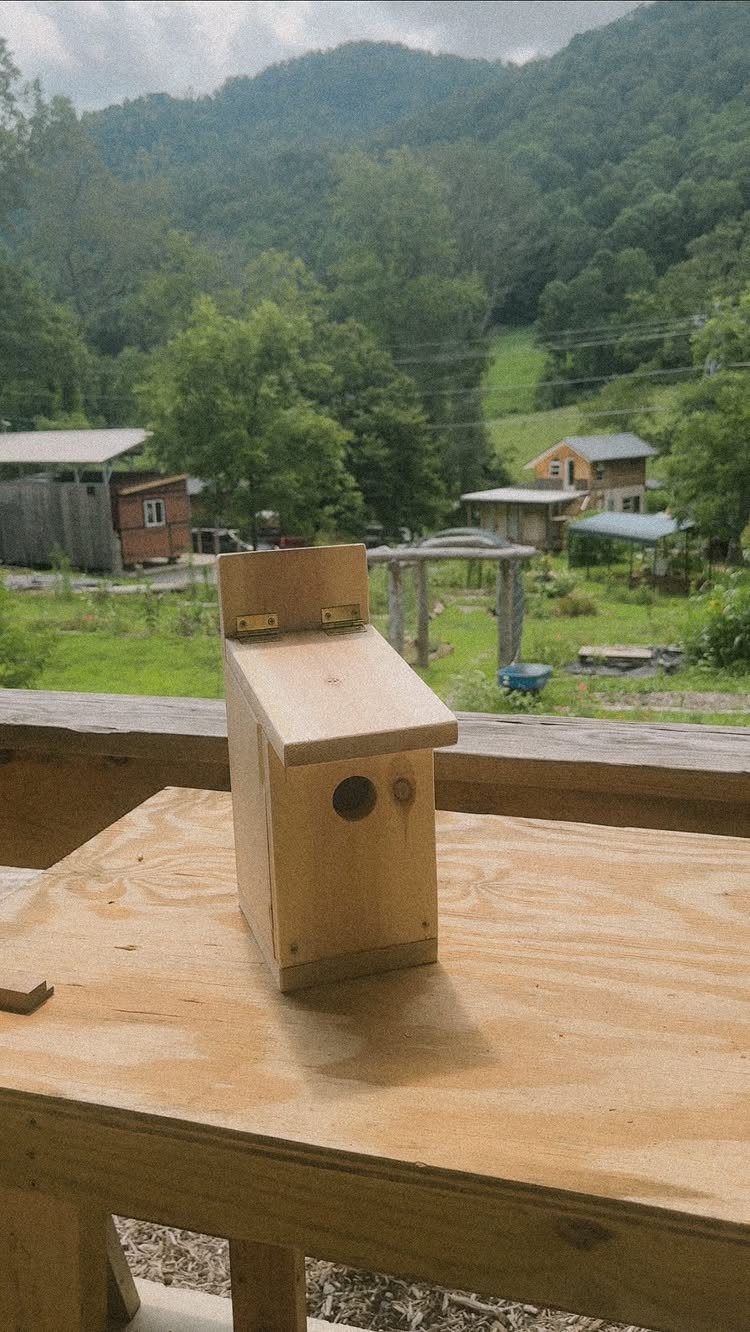
Straight cuts and a slanted roof are about all a birdhouse asks of you, which is why it has stayed a beginner standard.
A hinged roof, like the one here, lets you open it for cleaning, so plan that hinge before gluing anything shut.
Leave the wood unfinished inside. For the outside, a basic exterior paint or stain helps it handle weather, and a few screws will hold up better than glue alone.
7. Wooden Doormat
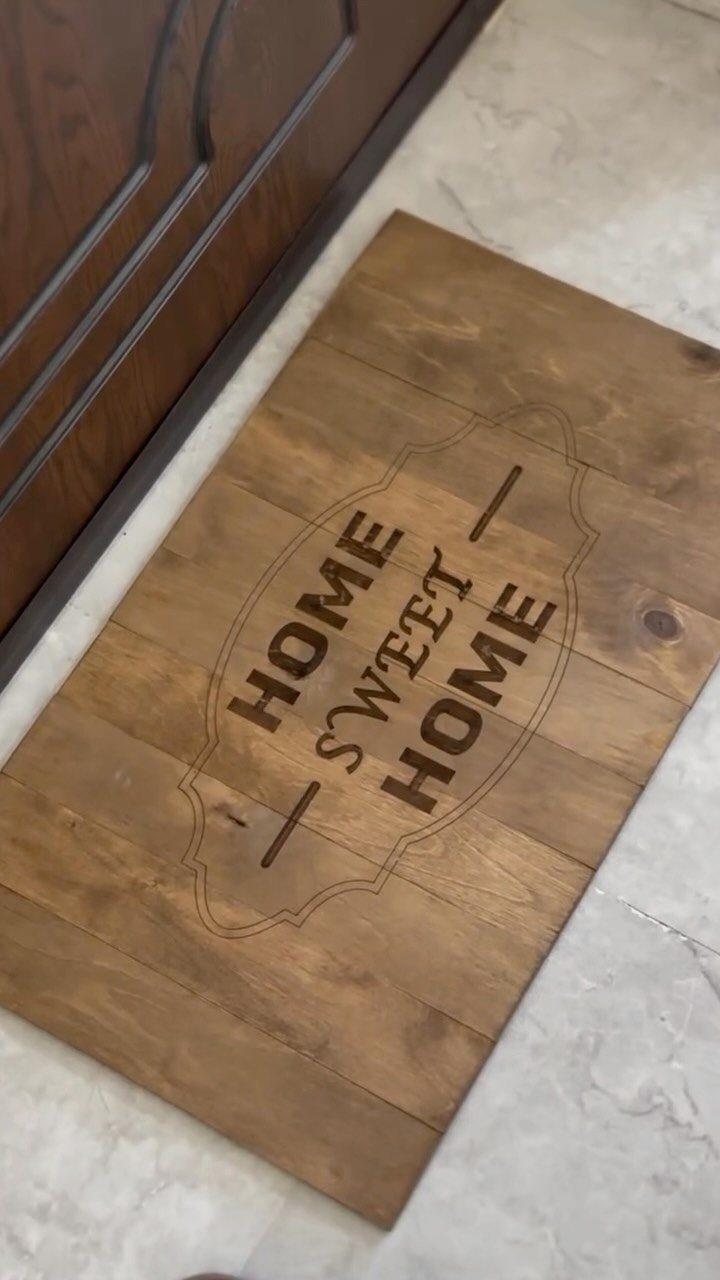
A doormat made of wood is a one-day build, and the engraved lettering does most of the decorating. Pick a short phrase like the one here so the letters stay large and easy to read from the porch.
Sand the top smooth before you add any lettering, since a rough surface makes the edges of the letters ragged. A sealer or exterior finish is worth the extra coat if the mat will sit outside.
8. Cordless Drill Charging Center
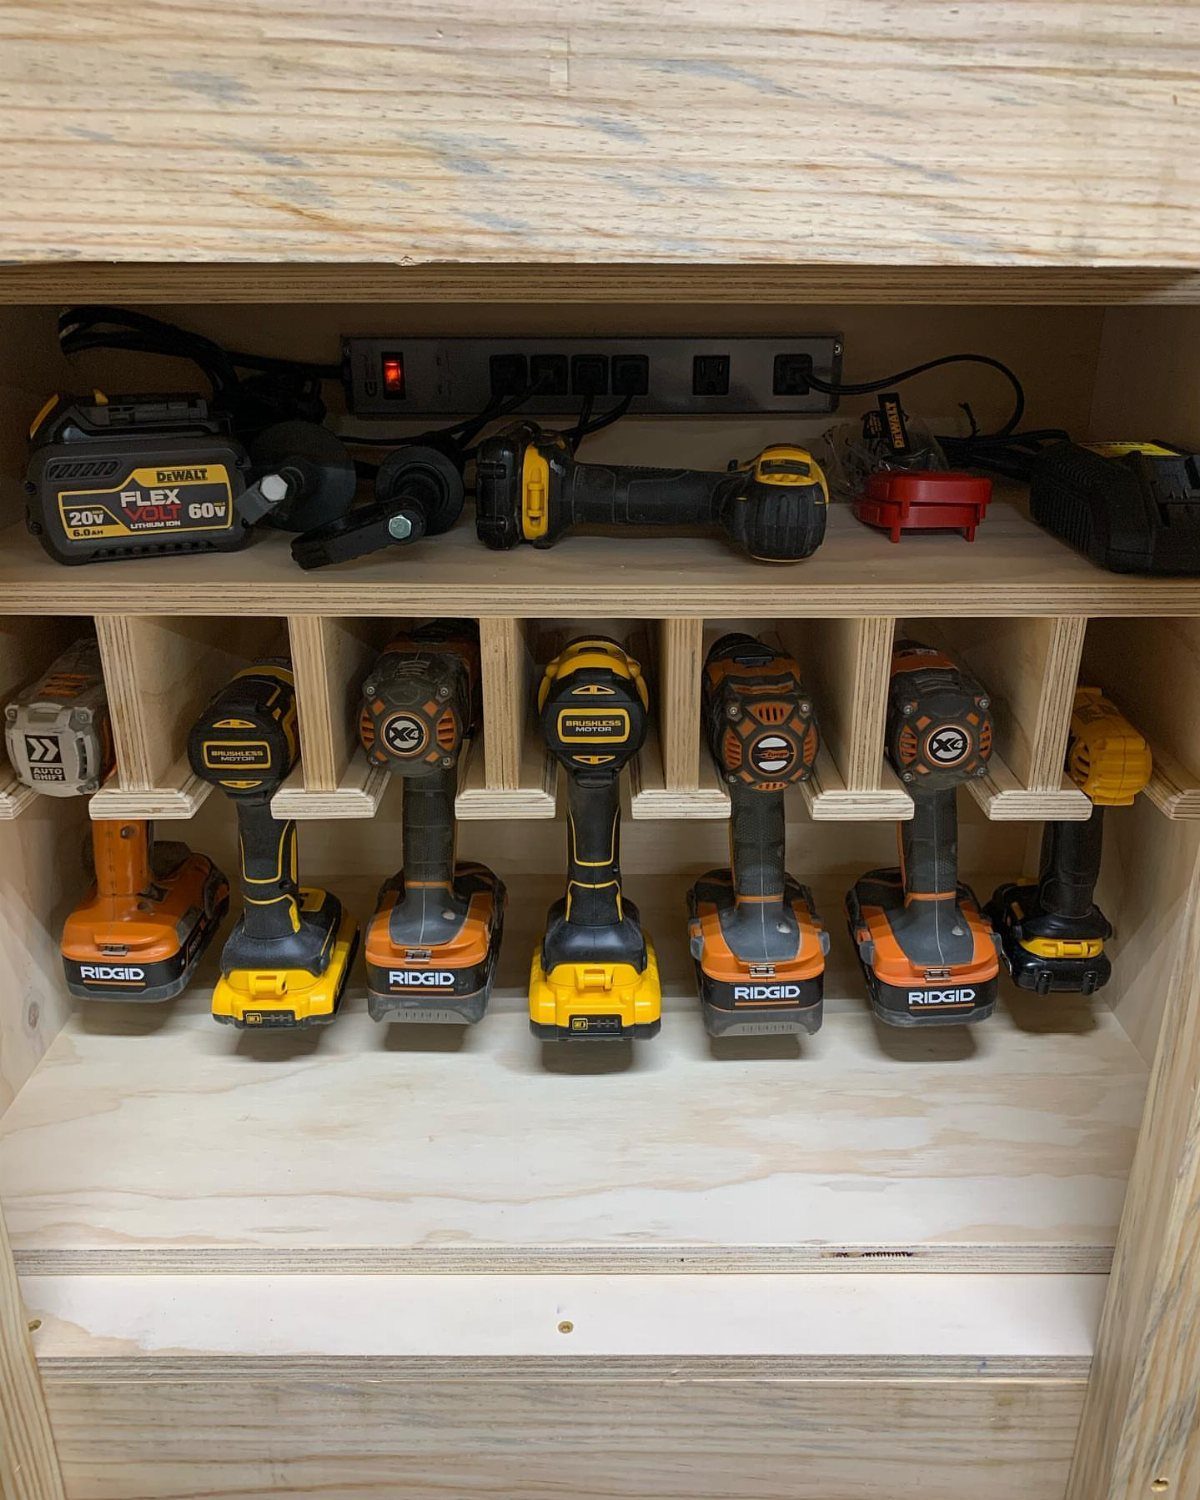
Drills, batteries and a charger tend to scatter across a bench, and a single wooden shelf gathers them in one spot. A power strip mounted above the shelf means every charger plugs in without a cord crossing your work area.
Size each slot to your biggest drill, because brands differ in shape. Mixed brands, like the DeWalt and Ridgid tools here, are fine if the shelf is deep enough for both.
I’d mount the strip first, then fit the shelf below it.
9. Sandpaper Disc Storage Rack
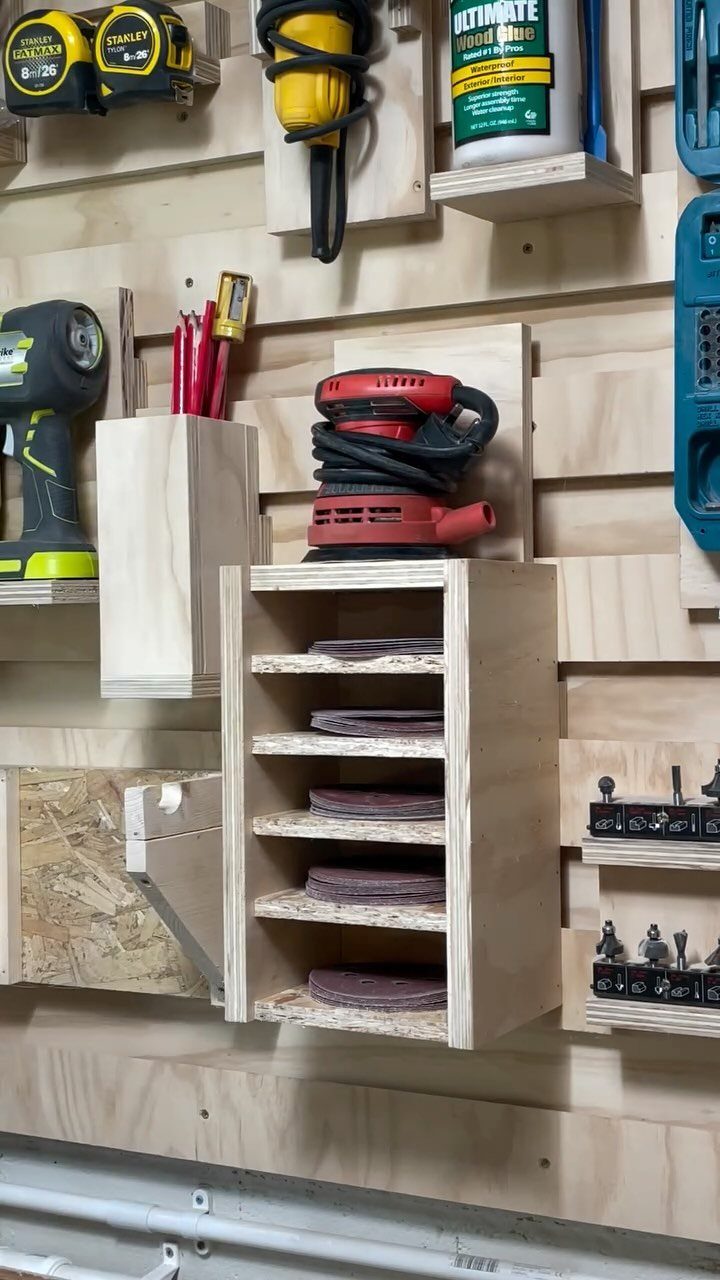
Sandpaper discs curl and get lost in drawers, so a wall rack that sorts them by grit saves real time.
Give each grit its own slot or peg and label it, so you can grab the right disc without checking the back of it.
Hang the rack near your sander, as in this shop, where it sits beside the tools you use with it. It is a small build that suits scrap wood.
10. Small Wooden A-Frame Stand
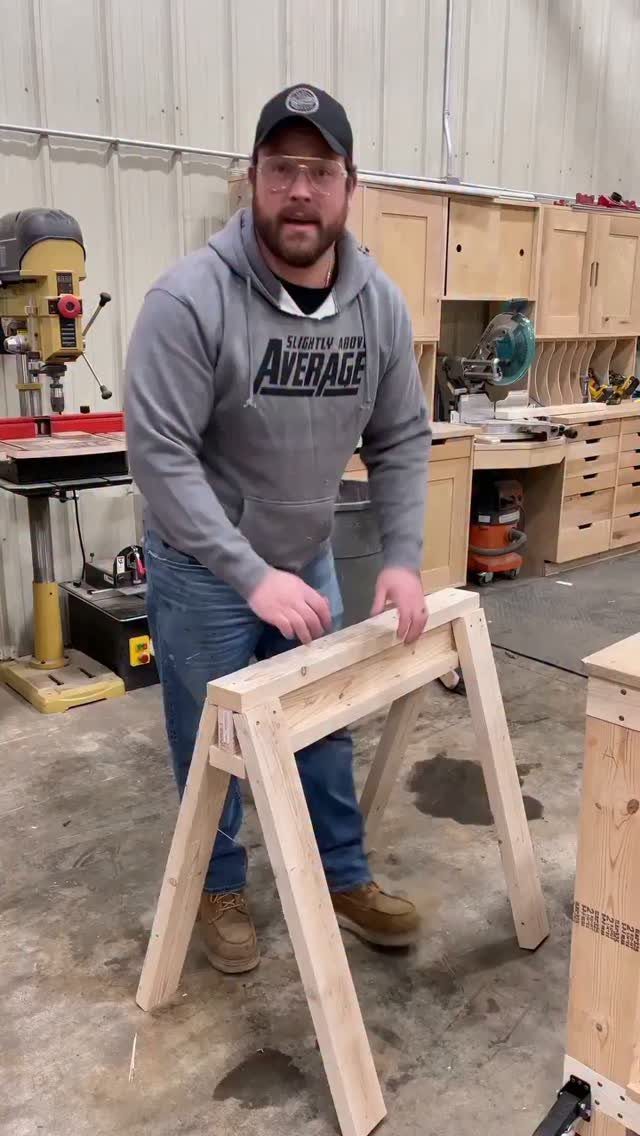
A small A-frame stand is about as simple as a shop project gets: 2 matching sides leaning together, joined at the top. Pine boards keep the cost low and cut easily with a basic saw.
Cut both sides identically, since any mismatch shows right away in an A-shape. Clamp the pair before you drill, and pre-drill the screw holes to keep pine from splitting.
Leave it unfinished while you test the fit, then sand and finish it once it stands level.
11. Mobile Workbench
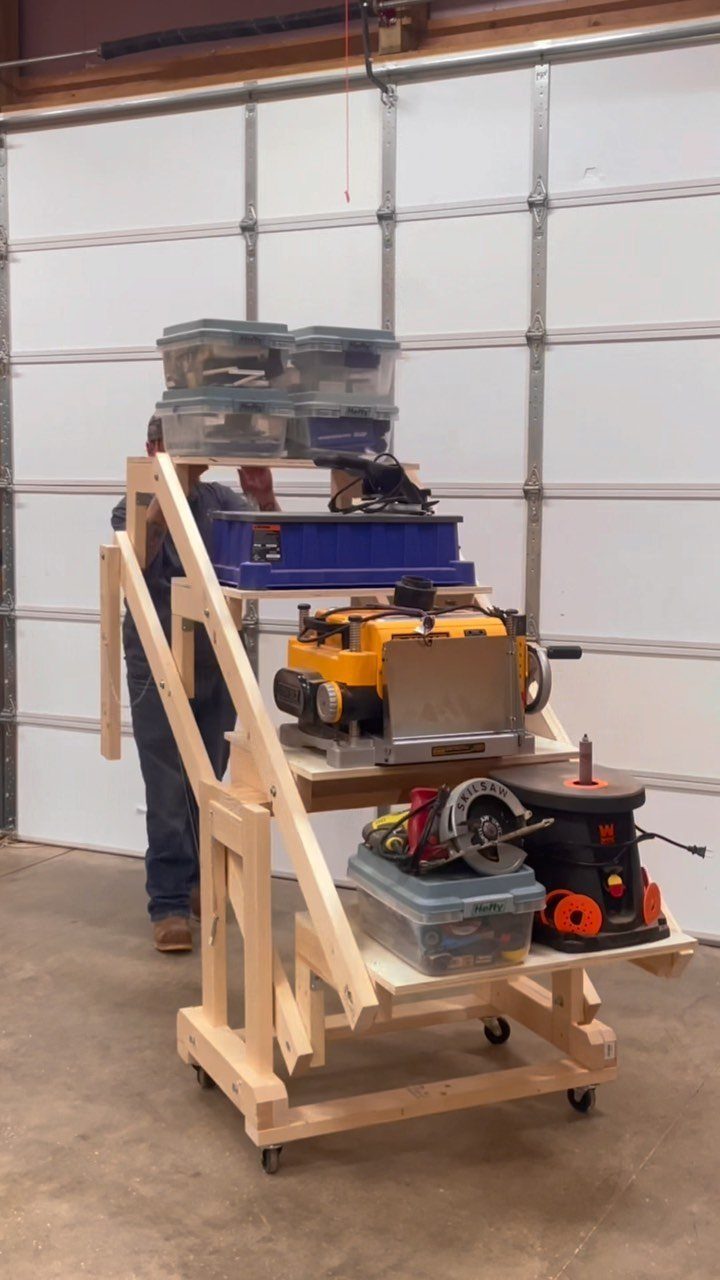
Casters make a workbench useful in a garage, where you need floor space back after each session.
Multiple tiers give power tools and plastic bins their own levels instead of piling everything on one top, and the heavy items sit lower, which keeps the cart steadier when you roll it.
Build the frame sturdy, because a loaded rolling bench takes abuse. I’d choose locking casters so it stays put under a saw.
Put the heaviest tool on the lowest tier to keep it steady.
12. Sheet Goods or Plywood Cart
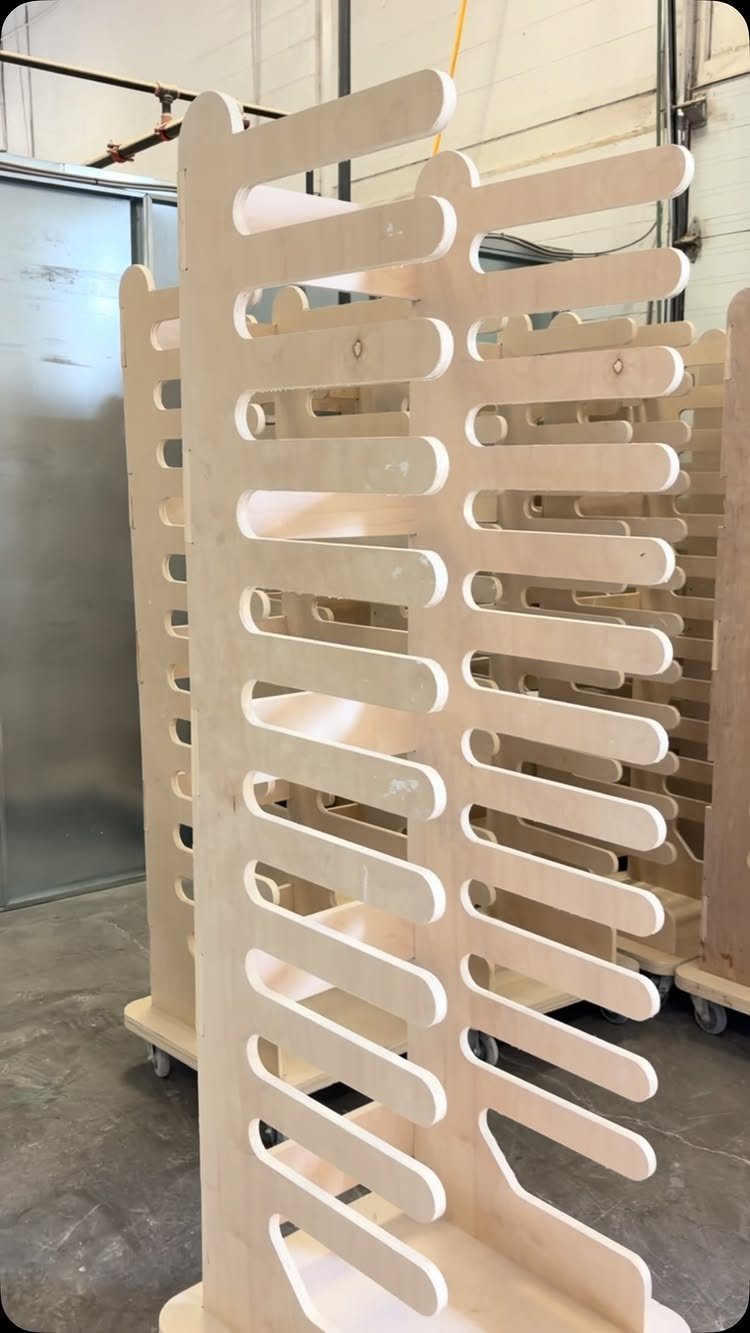
Plywood sheets are awkward to store flat and risky to lean against a wall. A cart with vertical slots holds them upright and rolls to wherever you need to cut.
Rounded slot edges, as on these carts, are gentler on sheet corners and easier to slide into. Cut the curves with a jigsaw and sand them smooth.
Fit locking casters so the cart stays still while you pull a sheet out. Plywood is heavy, so a stable base matters.
13. Sandpaper Roll Dispenser Organizer
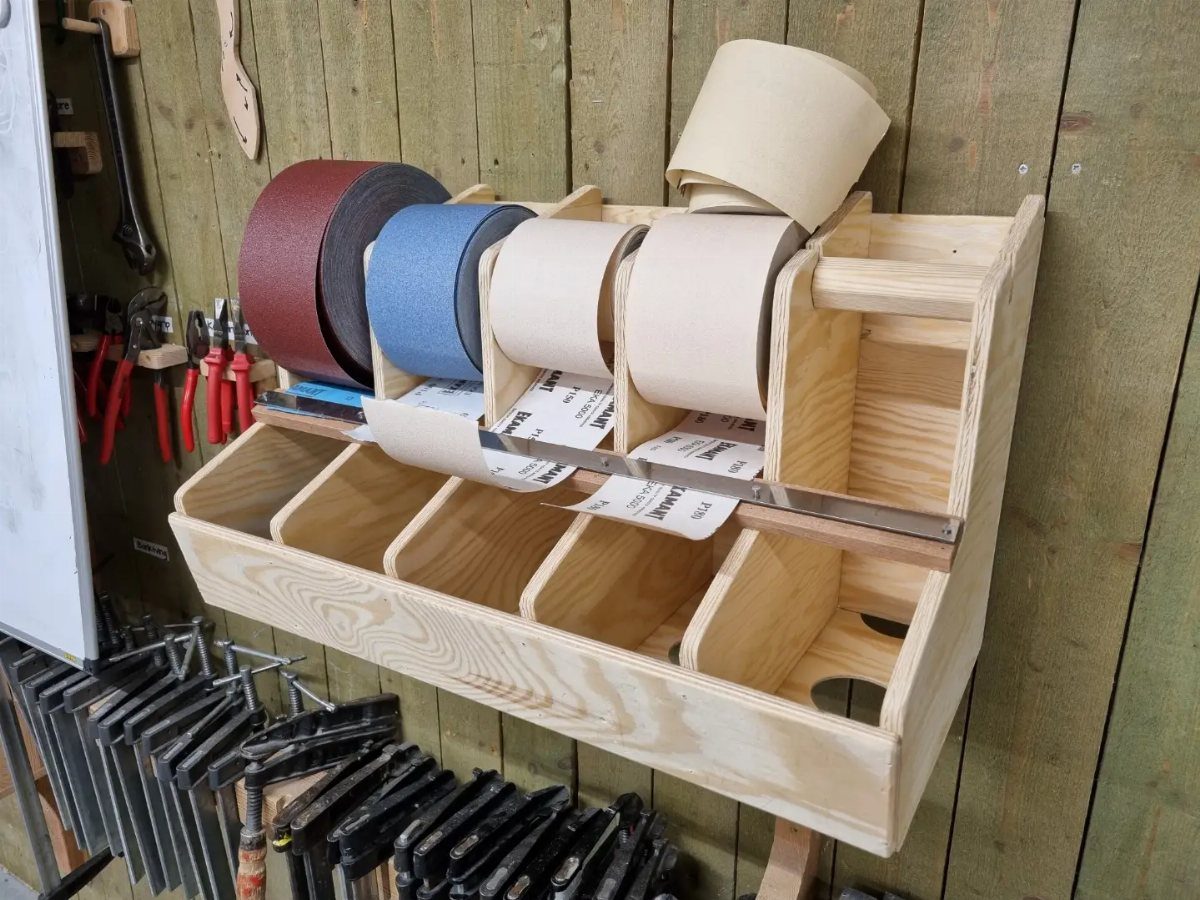
Rolls of sandpaper hang side by side on this rack, each ready to pull and tear, with a spot left over for small hand tools. Cutting from a roll beats digging through a drawer of crumpled sheets.
Space the rolls so each one spins freely, and mount the rack where your hand reaches it without crossing the bench. Sorting the rolls by grit from left to right means you never check the back of the paper.
Screw it into a stud or use proper wall anchors, since a few rolls and tools add up.
14. Multi-Slot Organizer with Drawers
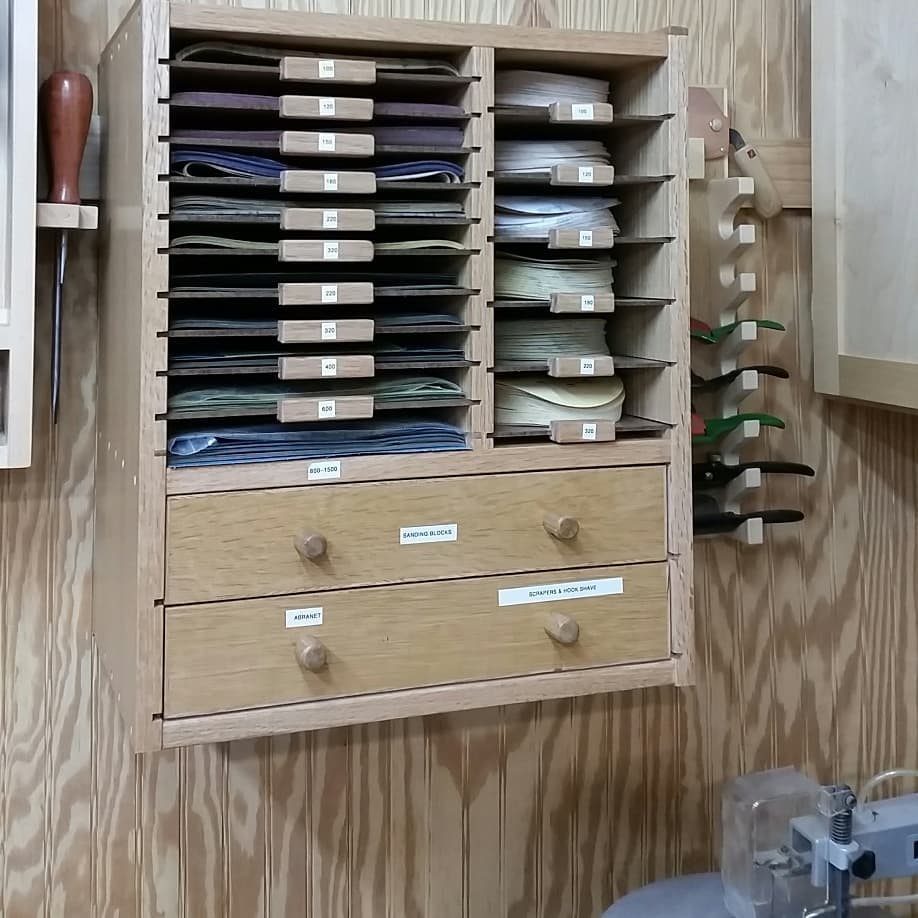
Narrow slots above two small drawers give flat sandpaper and bulky tools separate homes in one wall unit. Sheets stand upright in the slots, and the drawers hold the odds and ends that would otherwise rattle around a bench.
Label the drawers, as these are, with what goes inside, such as sanding blocks or scrapers. A label settles the argument at cleanup time.
I’d build the drawers first and cut the slots to fit your paper, then hang the unit near where you sand.
Tools for Beginners
A miter box runs under $30 at a hardware store, and a miter saw works in its place if you already own one.
Pair it with a drill and a few inexpensive hand tools, and that covers a surprising number of builds.
Buy the miter box first. It teaches you to cut square and to hold a board steady, and both habits carry over to every saw you pick up later.
Skip the big purchases until a project demands them. A router or a table saw can wait, and you will know when you need one because a plan will say so.
Start with one 8 foot 1×8 board if you want a low-cost first build. A single board keeps mistakes cheap and the cutting list short.
Project Complexity
Sort projects by how many different skills each one asks for. A build with straight cuts and screws sits at the easy end; one that adds drawers, curves, or hinges sits further along.
Move up one step at a time. If your last build used only a saw and drill, add one new skill to the next, such as a routed edge or a hinge, rather than three at once.
Read the full plan before you buy lumber.
Count the cuts, check the tools listed, and ask whether you could finish it in an afternoon. If the answer is no, save it for a weekend.
Repeating a simple project is also real progress. A second build goes faster and comes out cleaner.
Gift Ideas
Handmade gifts land best when the piece fits the person. A cutting board suits a cook, and a ring box suits someone getting engaged or marking an anniversary.
Plans for cutting boards, ring boxes, custom signs, and even a wireless speaker kit are all published free, so you can match the build to your skill level.
Start early. Glue needs time to cure and finish needs time to dry, so a gift made the night before looks rushed.
Sand the last pass by hand, and wipe off dust before finishing. That small step is what makes a gift feel finished instead of homemade in the worse sense.
If you plan to sell pieces later, the same small, simple builds are the ones that suit craft fairs and online shops.
Frequently Asked Questions
What should I make in shop class?
A cutting board, birdhouse, or tiered plant stand is a good first pick. Each one needs only a few cuts, and a plant stand can be built from scrap 2x2s and 2×6 blocks for almost no money.
Choose something you can finish, since a completed small build teaches more than a big one left half done.
What is the easiest woodworking project?
For a first build, a small A-frame stand is hard to beat: cut 2 identical pine panels, lean them together, and fasten the peak.
A cutting board and a birdhouse are close behind, since they need only straight cuts and basic joining. Pine cuts easily with a basic saw and keeps the cost low.
What are some cool woodworking project ideas?
A rolling kid’s bookshelf, a wall cabinet with 3 drawers, and a jewelry box with a felt lining are all fun to build.
A mobile workbench on locking casters is a good pick if you want something useful in the garage. Each one adds a skill like drawers, hinges, or casters without getting out of reach for a beginner.
What tools do I need for beginner shop projects?
A basic miter box (under $30 at most hardware stores), a drill, and a handful of cheap hand tools will get you through more projects than you’d expect.
If a miter saw already lives in your garage, use it and skip the box. Hold off on a router or table saw until a plan calls for one.
What woodworking projects make good gifts?
Think about the person first: a cutting board for the cook in your life, a ring box for an engagement or an anniversary.
Custom signs are another option. Give yourself extra days before the handoff, since glue has to cure and finish has to dry before anyone can use the piece.






