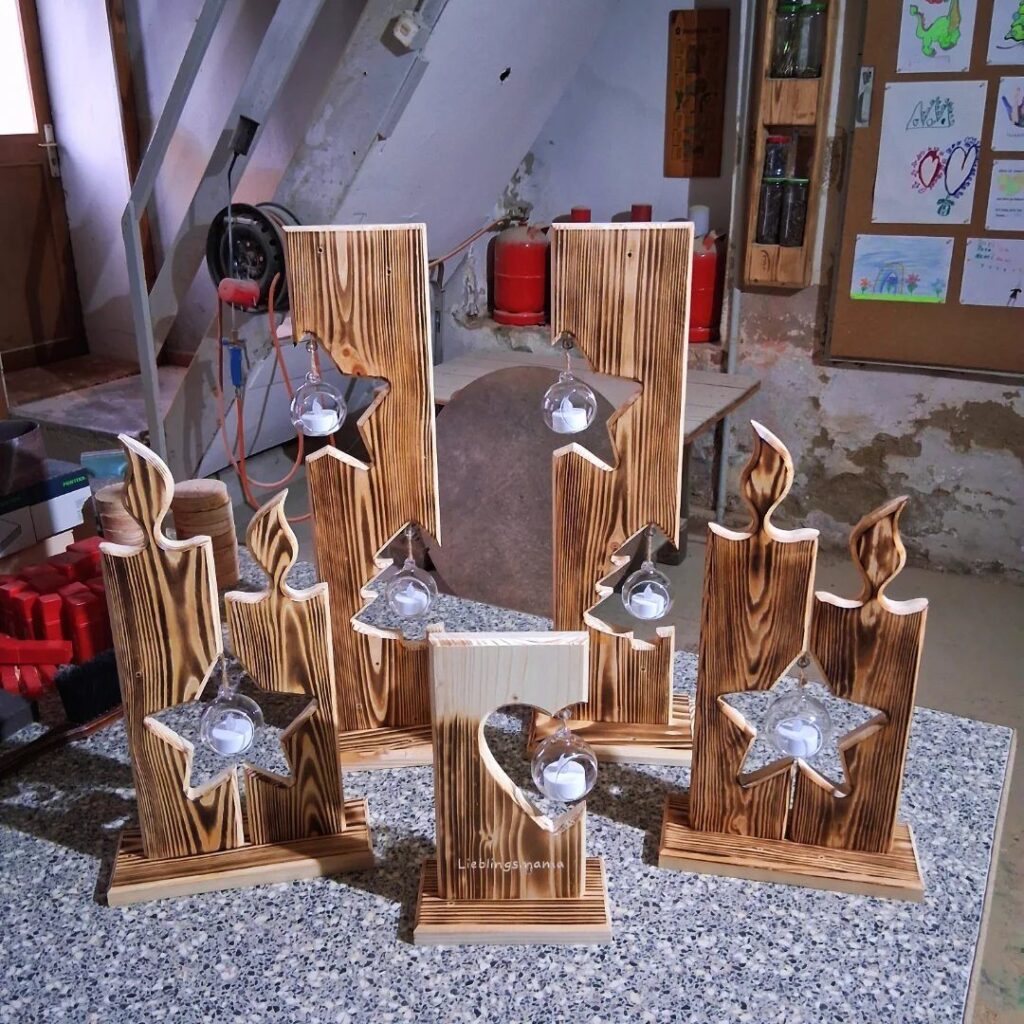
Time decides which of these projects is yours.
Folded paper trees, button trees and mini pinecone candle holders come together in an afternoon on a few scraps and supplies you likely own, while the present stockings, the wood block nativity and the fabric bag advent calendar can take several evenings.
Match the project to the hours you actually have, then check your supply closet before you buy anything.
1. Christmas Wreath
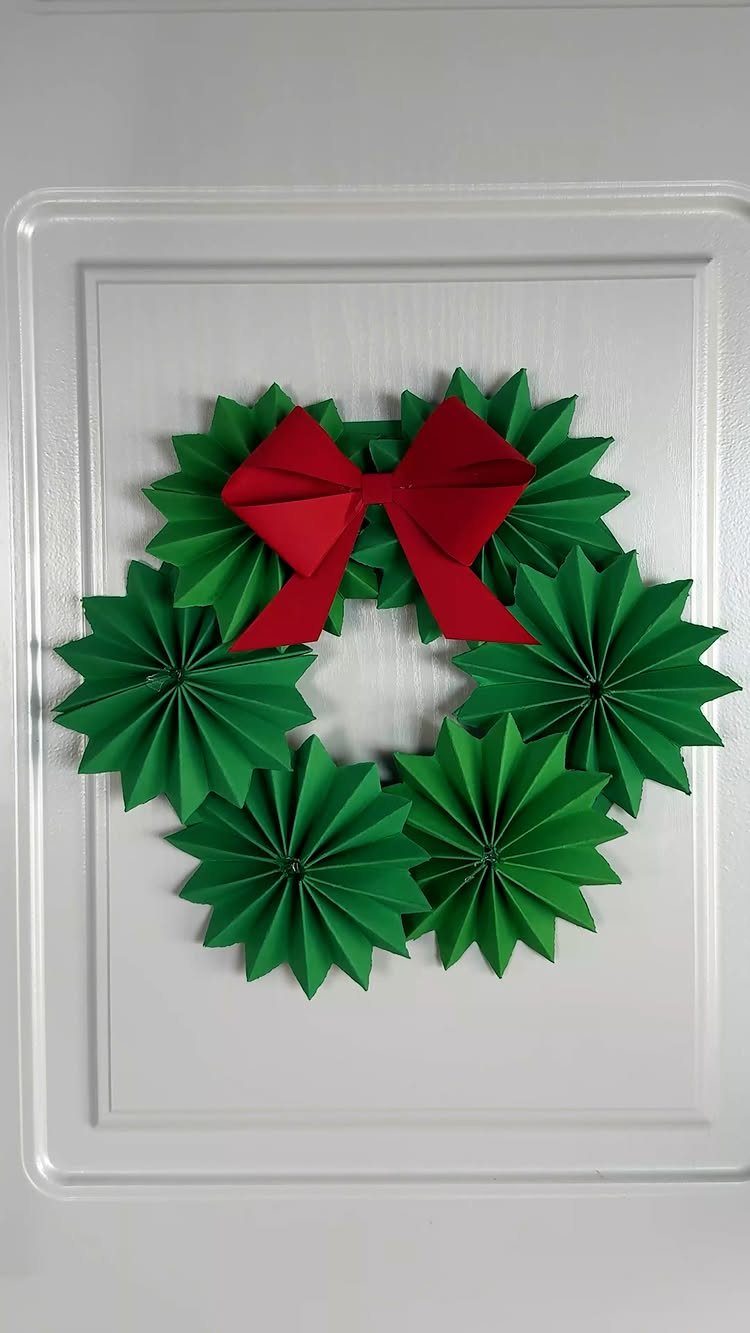
Pleated paper stars glued edge to edge make a wreath that fills a door for the price of a few sheets of cardstock.
Green paper keeps the cost low, and a single red bow gives it the classic wreath look against a white paneled door.
Paper suits a covered porch or an inside door better than a spot that gets rain. Fold the pleats evenly, since uneven ones show most on a circular shape.
2. DIY Rustic Wood Candle Holders
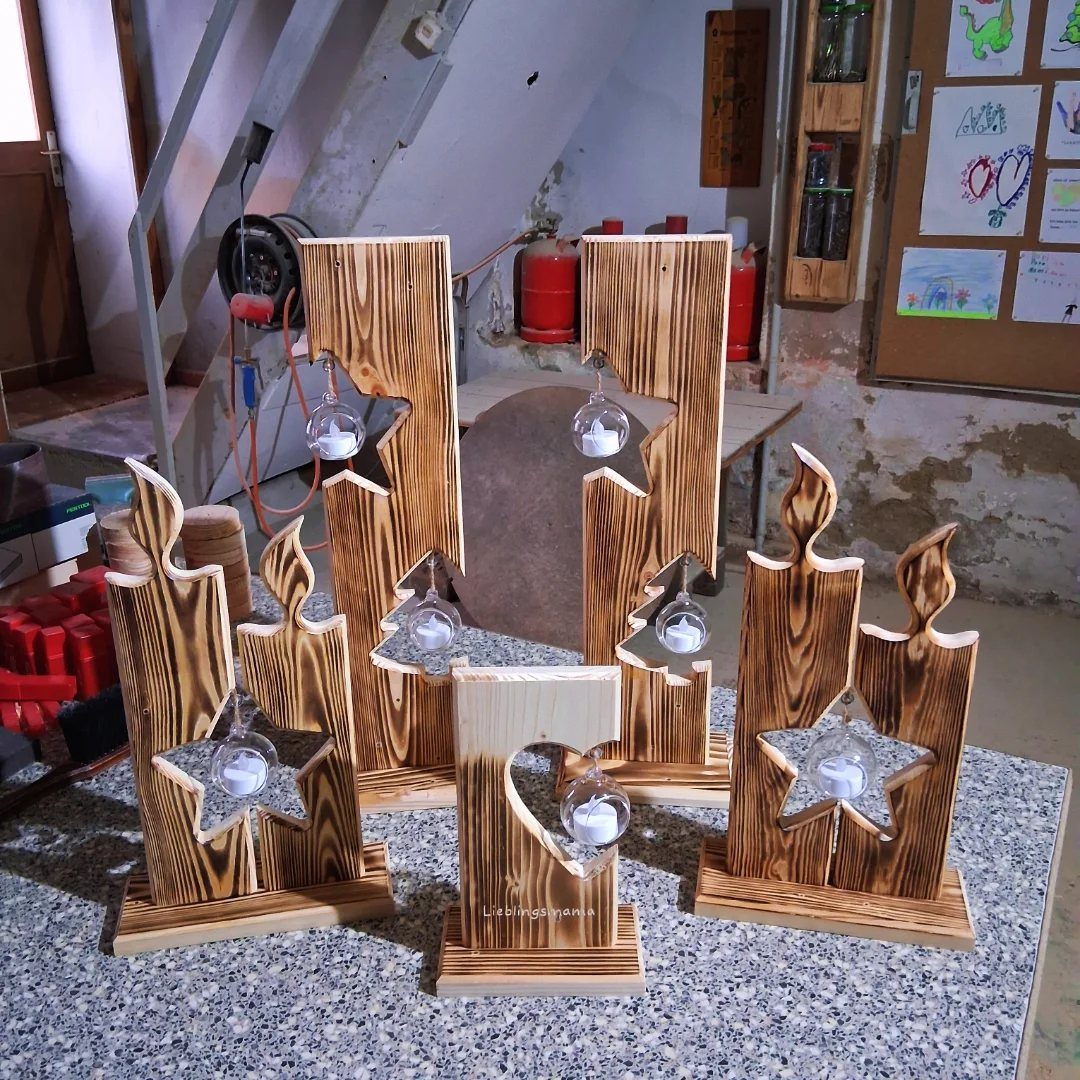
Wood with a visible grain needs very little help, and that is why these candle holders work. A glass tea light insert keeps the flame away from the wood, so the design can stay plain.
Sand the surface smooth and finish it with a clear oil or wax rather than a heavy stain. I would make a set of 3 in different heights for a countertop or mantel.
3. DIY Vintage Wooden Thread Spool Ornament
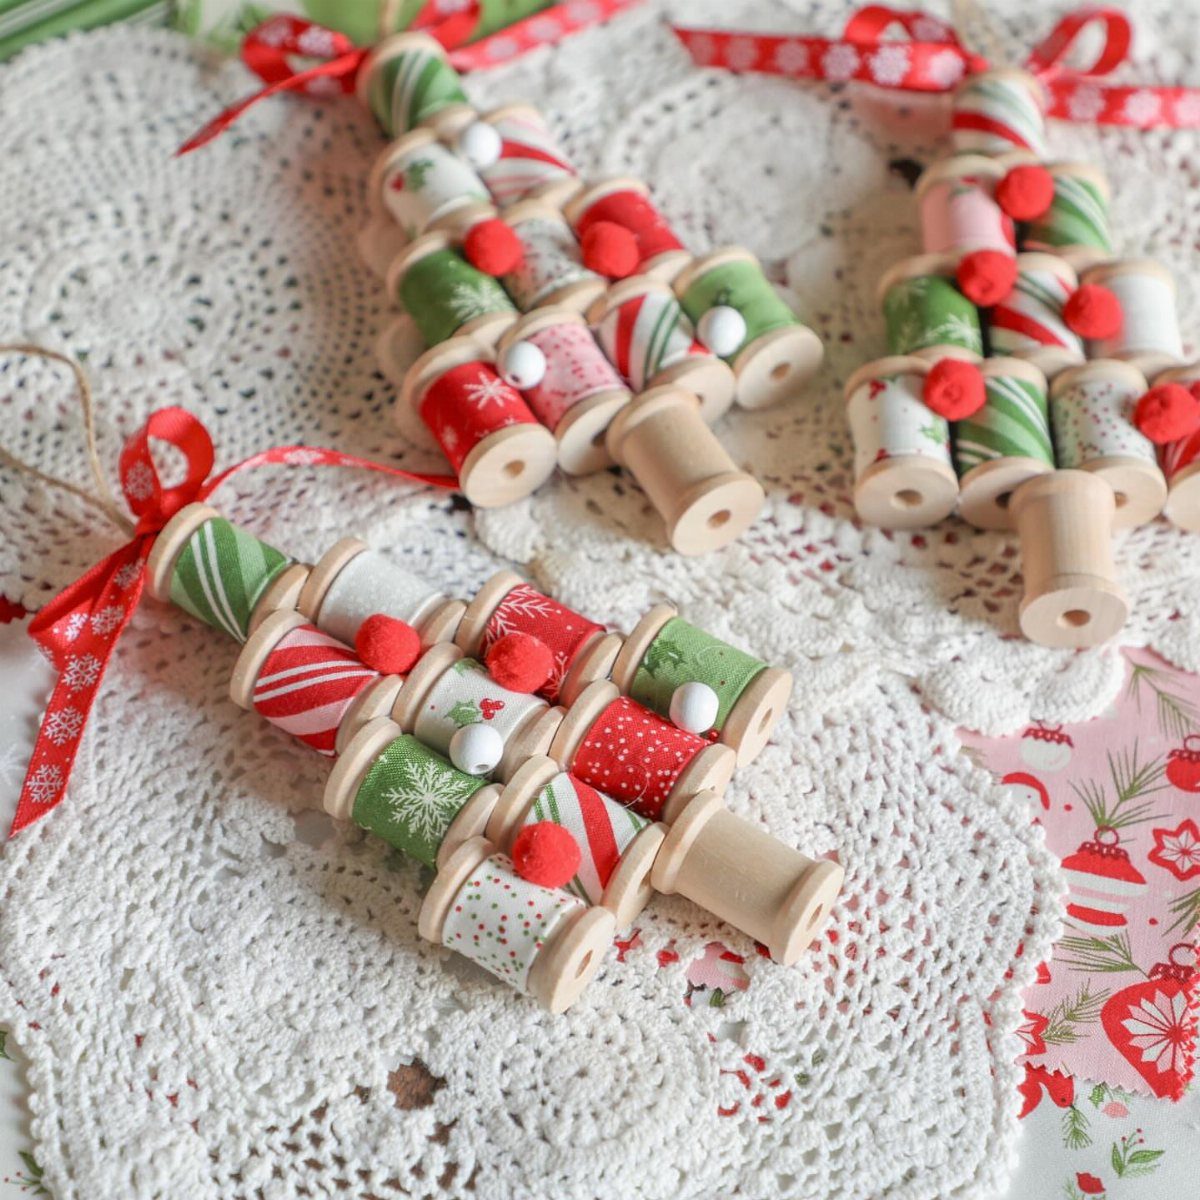
Old-style thread spools already have the right proportions for a tiny tree. Wind red and green yarn around the spool, glue each end down so it stays put, and finish the top with a small pom-pom.
Wrap tightly and keep each row snug against the last so no wood peeks through. Craft stores sell spools cheaply, and a hot glue gun is the only specialty tool you need.
4. Christmas Present Stockings
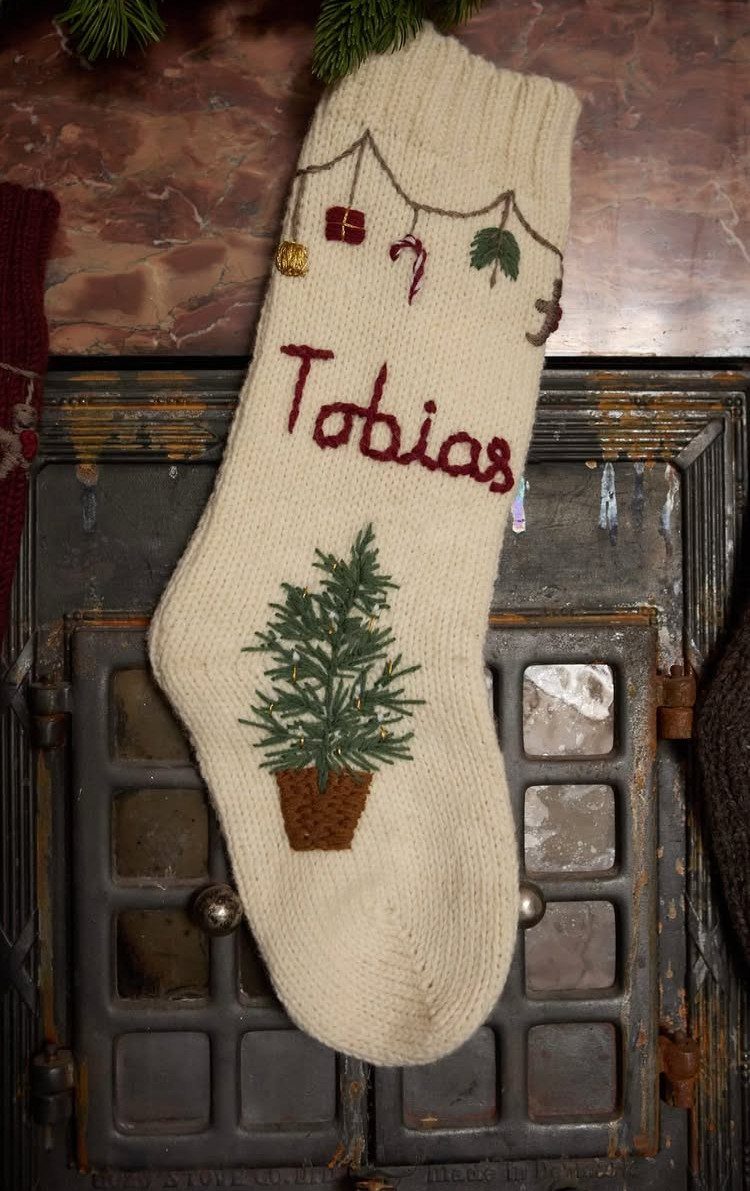
Knitted stockings carry a name and a small tree in the pattern, which makes each one a keepsake instead of a store-bought item. According to its maker, it is meant to hang year after year.
Cream yarn shows off a contrasting name well.
I would chart the letters on graph paper before casting on, so the spacing is right. This is a project for several evenings, not one afternoon.
5. Clay Star Garland
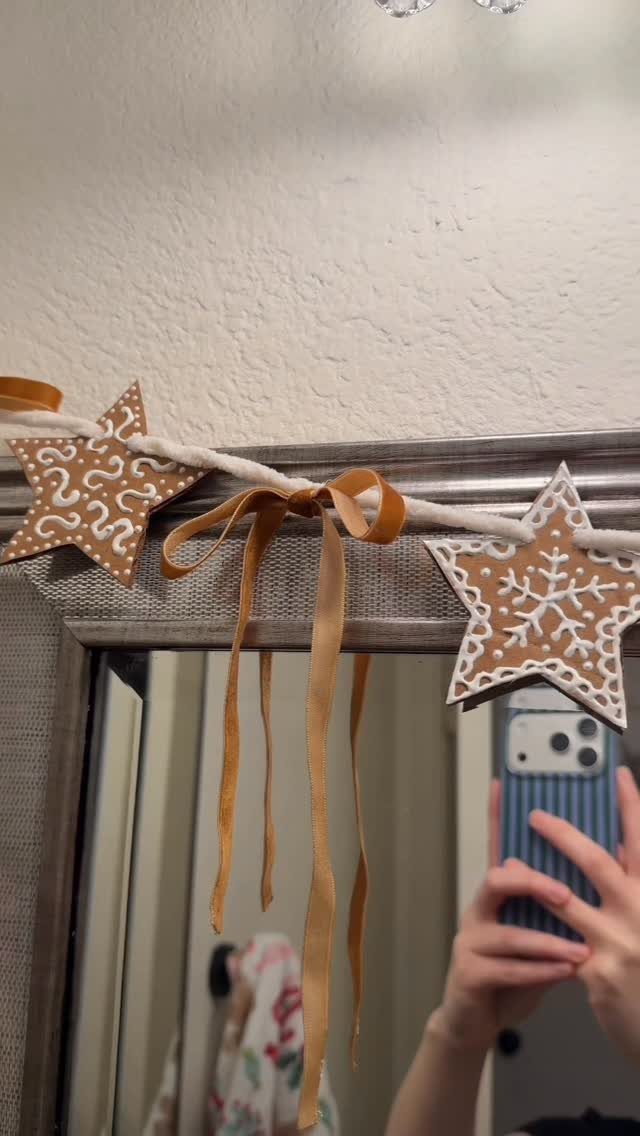
Stars cut from clay, pressed with a white pattern, hang well from a plain rope. Roll the clay to an even thickness, cut with a star cutter, and poke a hole in each before drying.
Brown clay with white detail looks warm and a little handmade. Space the stars evenly along the rope, and drape it over a mirror frame or mantel.
6. DIY Snowy Mason Jars
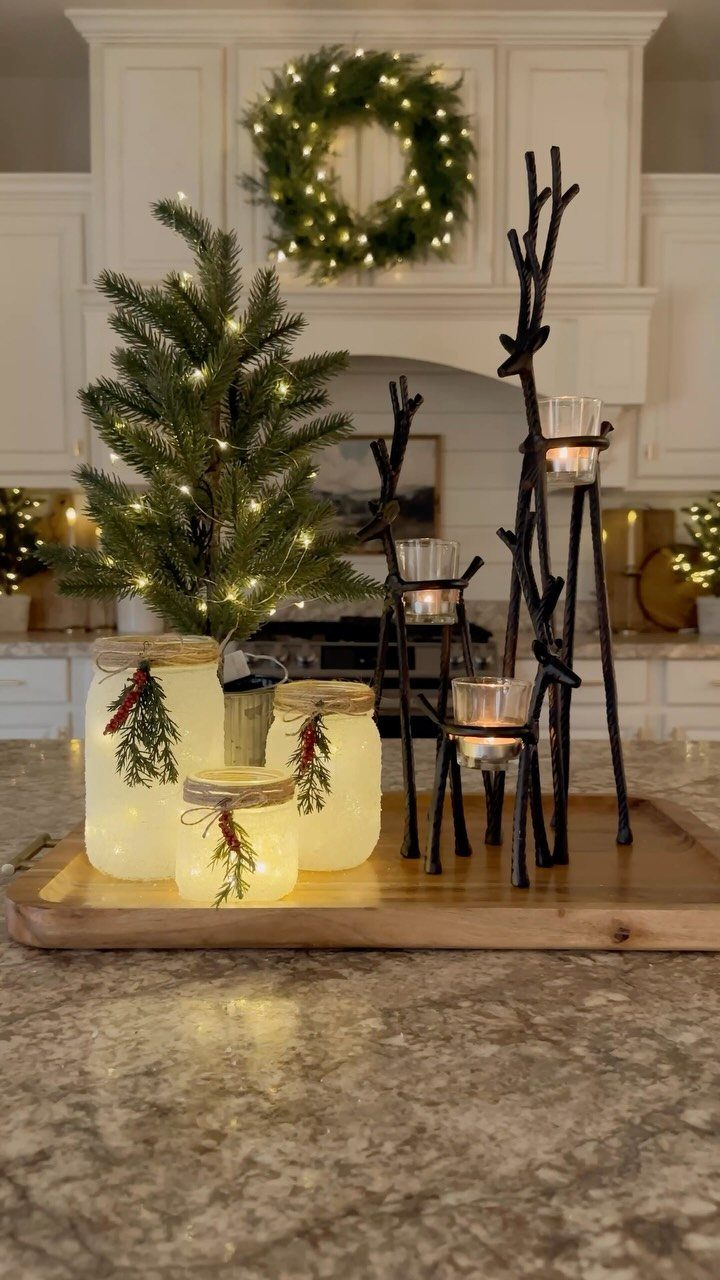
Frosted mason jars glow best with a tea light inside.
Brush on a coat of white paint or dab it on with a sponge for a snowy, uneven finish, then tie twine around the neck and tuck in a sprig of greenery.
Dab lightly: heavy coats block the light.
A wooden tray keeps the jars grouped and easy to move, and a small tree beside them rounds out the display. Jars are cheap, and you may already own several.
7. DIY Christmas Gift Tags
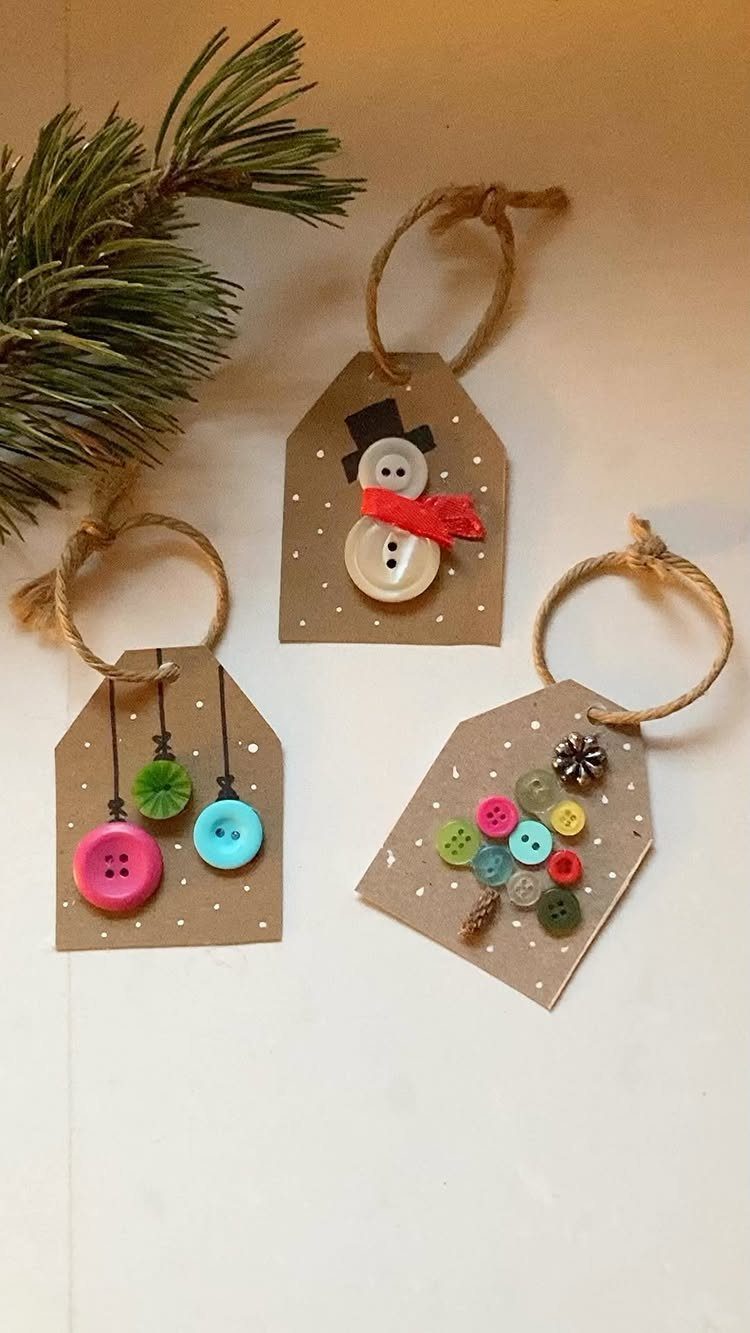
Buttons glued onto a plain brown cardstock tag can become a small snowman or a string of ornaments, and a dab of white craft glue holds them better than tape.
Glue them down in a stack, add a bit of ribbon for a scarf, and loop twine through the hole at the top.
Kraft brown cardstock costs little, and a tag that already looks like a decoration means the gift needs no extra trim. Write the name on the back so the front stays clean.
8. Fabric Bag Advent Calendar
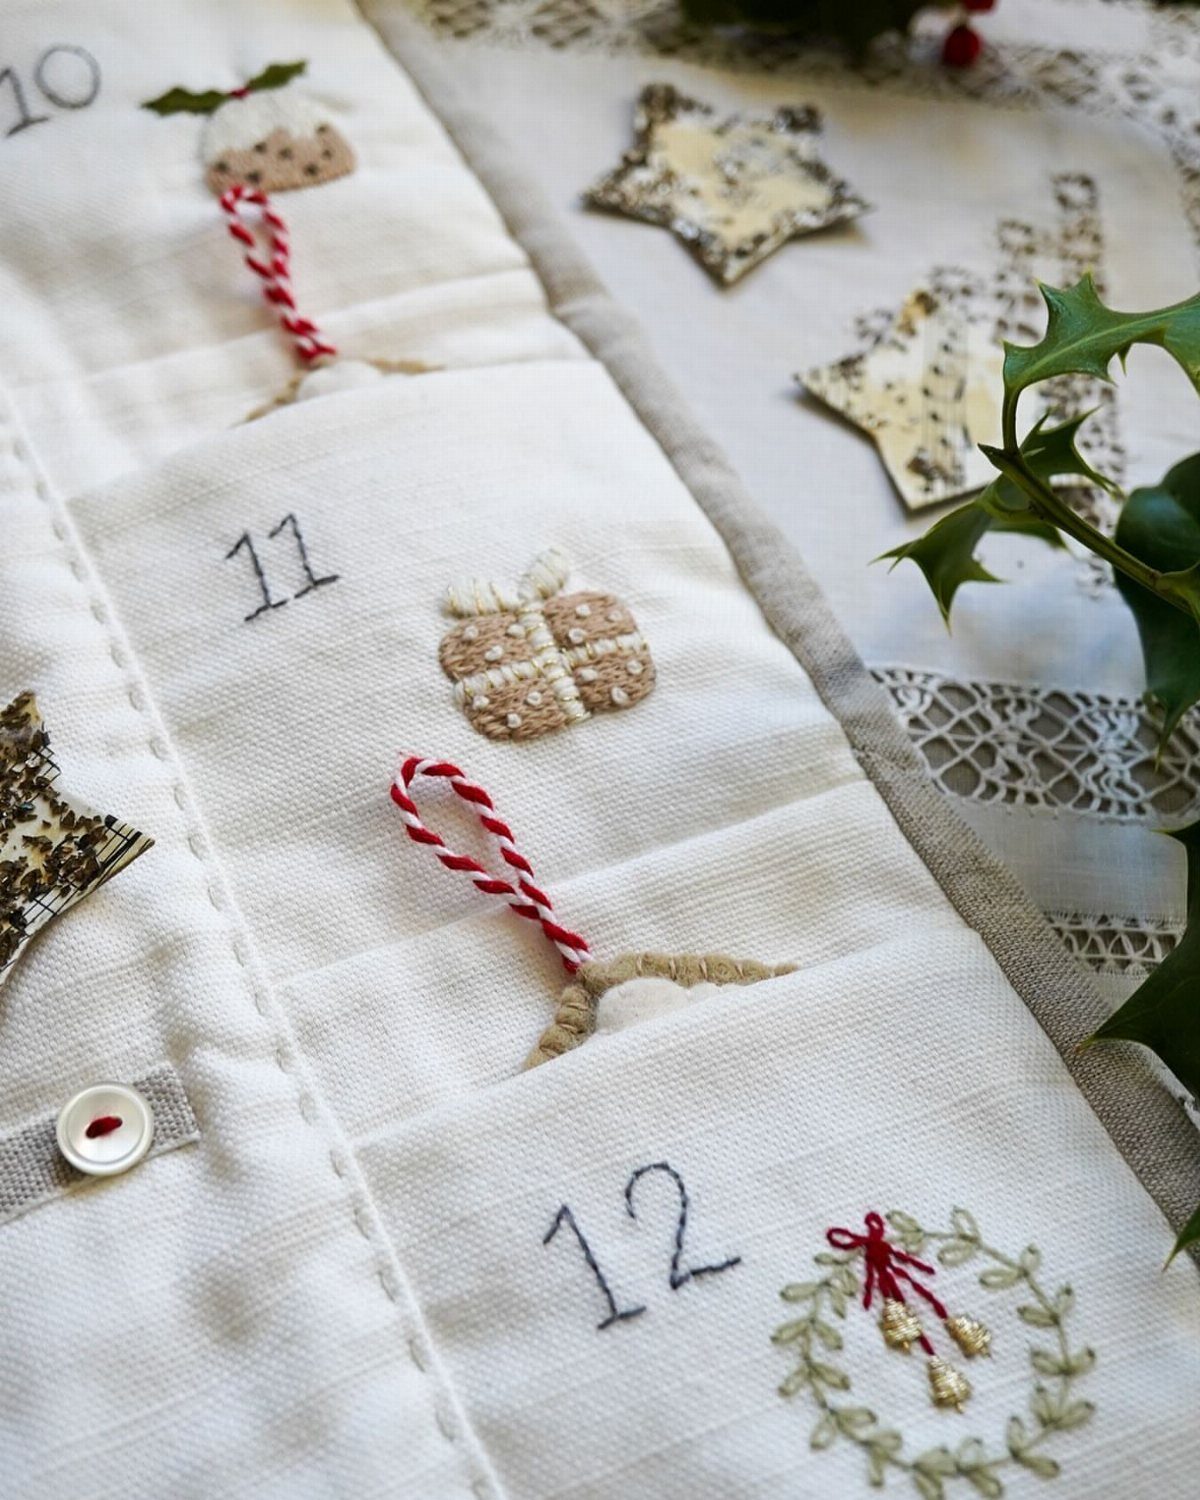
Numbered pockets are what make this advent calendar work: 24 small spaces for treats or notes, one per day. White fabric with simple stitched motifs, like a gift or a wreath, keeps the look quiet enough for a lace-covered table.
Number each pocket before you sew it on, since lettering on finished fabric is harder to keep straight. Hand embroidery adds evenings to the project, so I would stitch a few motifs and leave the rest plain.
9. Wood Block Nativity
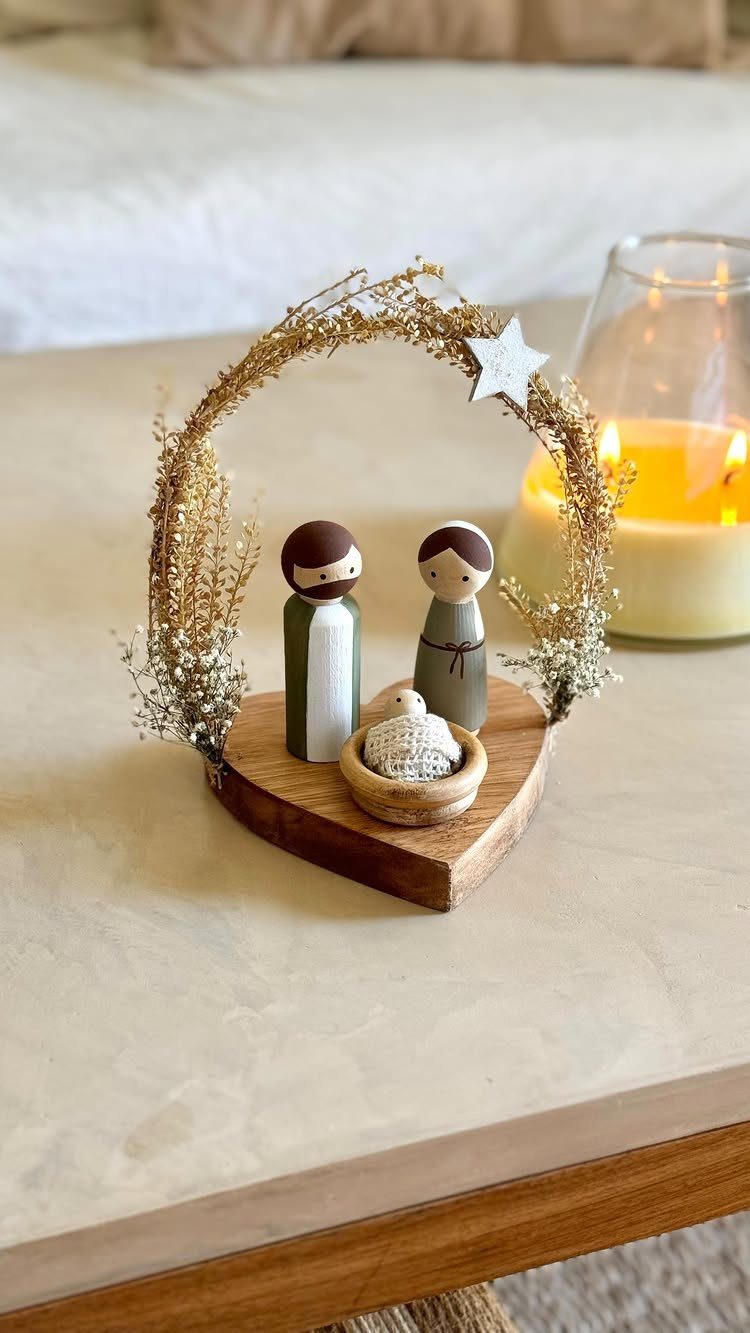
A nativity of peg-shaped wood figures, with felt for the clothing and a small bowl for the manger, takes more time than most projects here, so plan on more than one afternoon. Plan on more than one afternoon.
Sand every piece first so the felt glues down flat.
A wire arch with a star over the top frames the scene, and I would add dried flowers to it as an optional touch. Keep the shapes simple, since plain figures look better than fussy ones.
10. DIY Christmas Ornaments
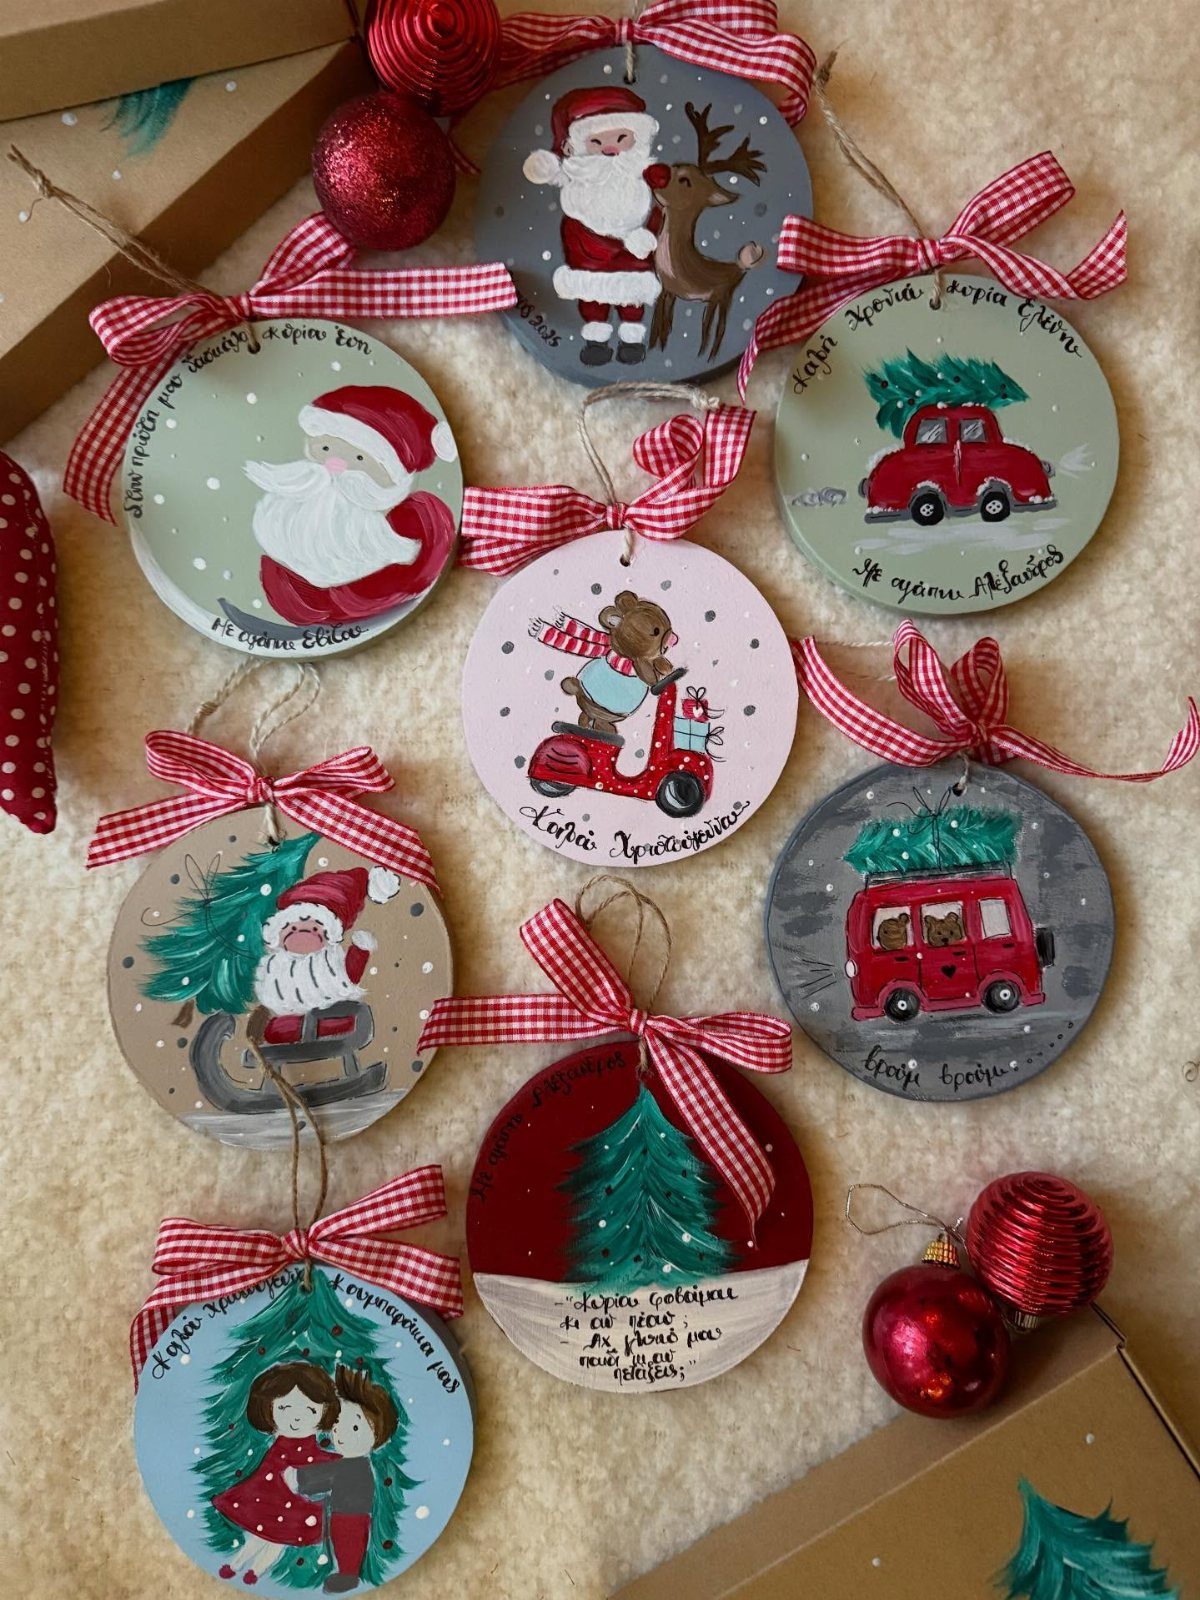
Round wooden discs make ideal ornament blanks, with plenty of flat space for a Santa, a reindeer or a snowy scene. Paint the background first, let it dry, then add the details with a fine brush.
Paint a few extra for gifting, since small hand-painted pieces are easy to hand out.
11. DIY Felt Christmas Trees
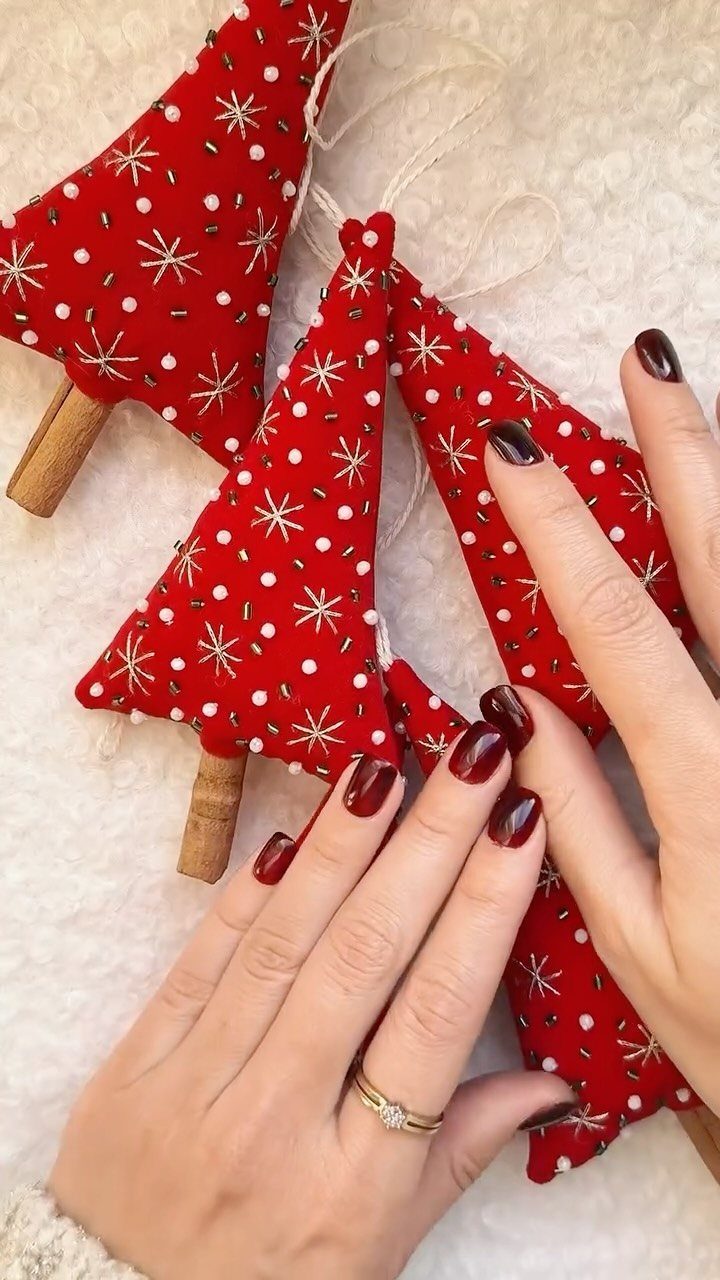
Felt holds its shape, takes embroidery well and never frays, which makes it a forgiving material for a small tree. Cut 2 matching triangles, stitch white and gold details onto the front, and join the pieces.
Red felt looks rich against the pale thread.
A small wooden base keeps each tree upright on a shelf. Make them in different sizes, and change the stitch pattern on each so the set feels personal.
12. DIY Button Christmas Trees
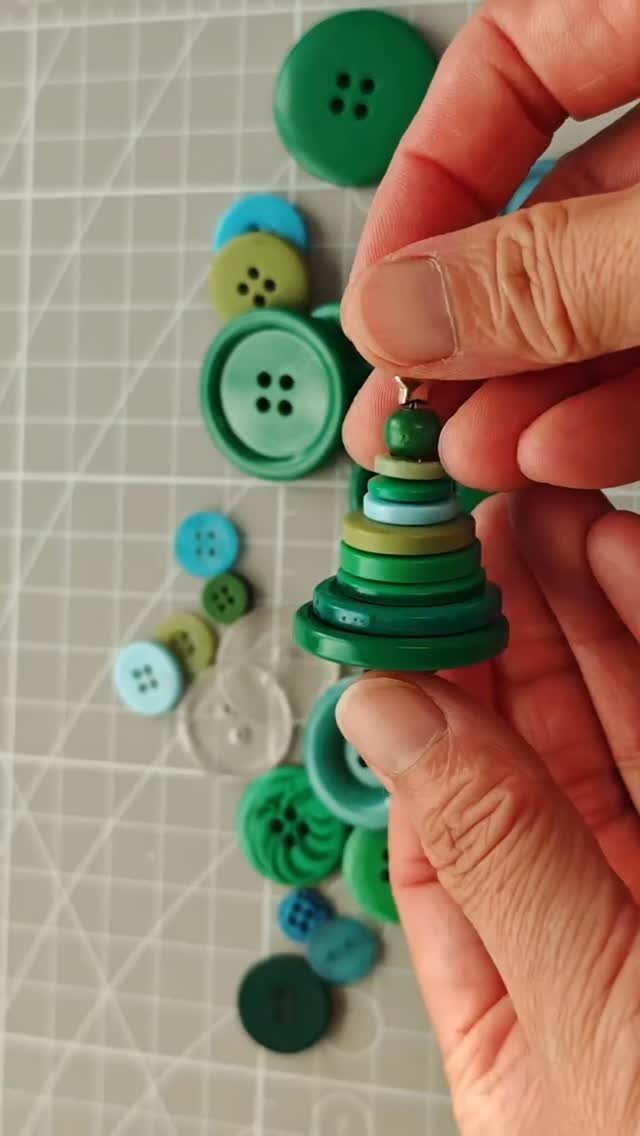
Stacked buttons form a tree in minutes: thread them on a wire or string from largest to smallest, and the shape builds itself. Mixing greens and blues gives it color without any paint.
Sort the buttons by size on a flat mat before you start so you can see the taper. This is cheap, quick work, and a jar of old buttons will cover several trees.
13. Decorated Holiday Wine Bottles
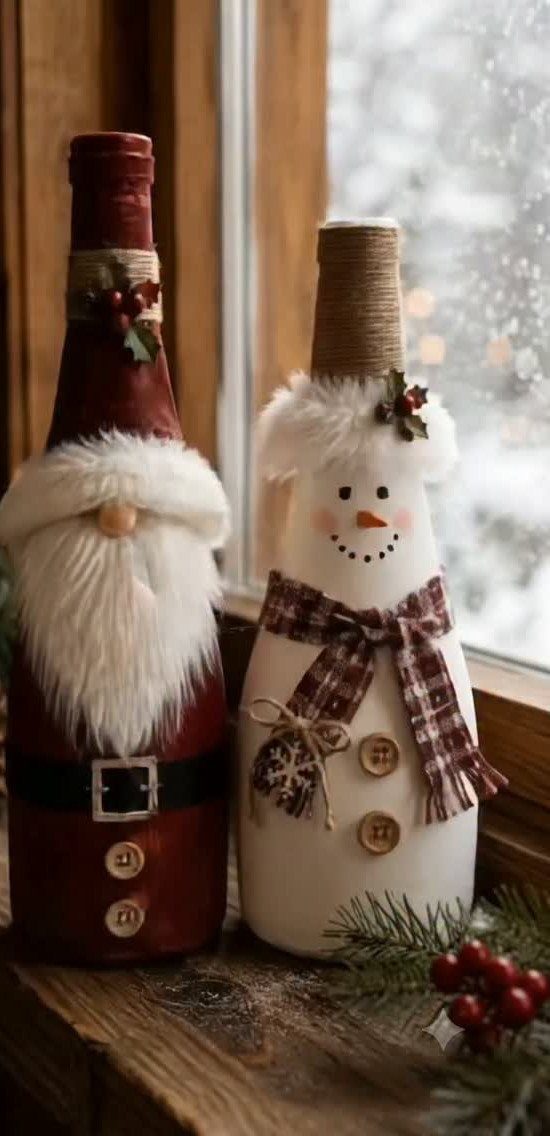
A wine bottle already has a head, a neck and a body, so it turns into a snowman or Santa with paint and a few scraps.
Paint the glass white for the snowman and red for Santa, then add faces and a hat on top.
Acrylic craft paint covers glass well if you lay on thin coats and let each dry before the next. Bottles cost almost nothing, and a pair on a windowsill makes a good afternoon project.
14. Mini Pinecone Candle Holder
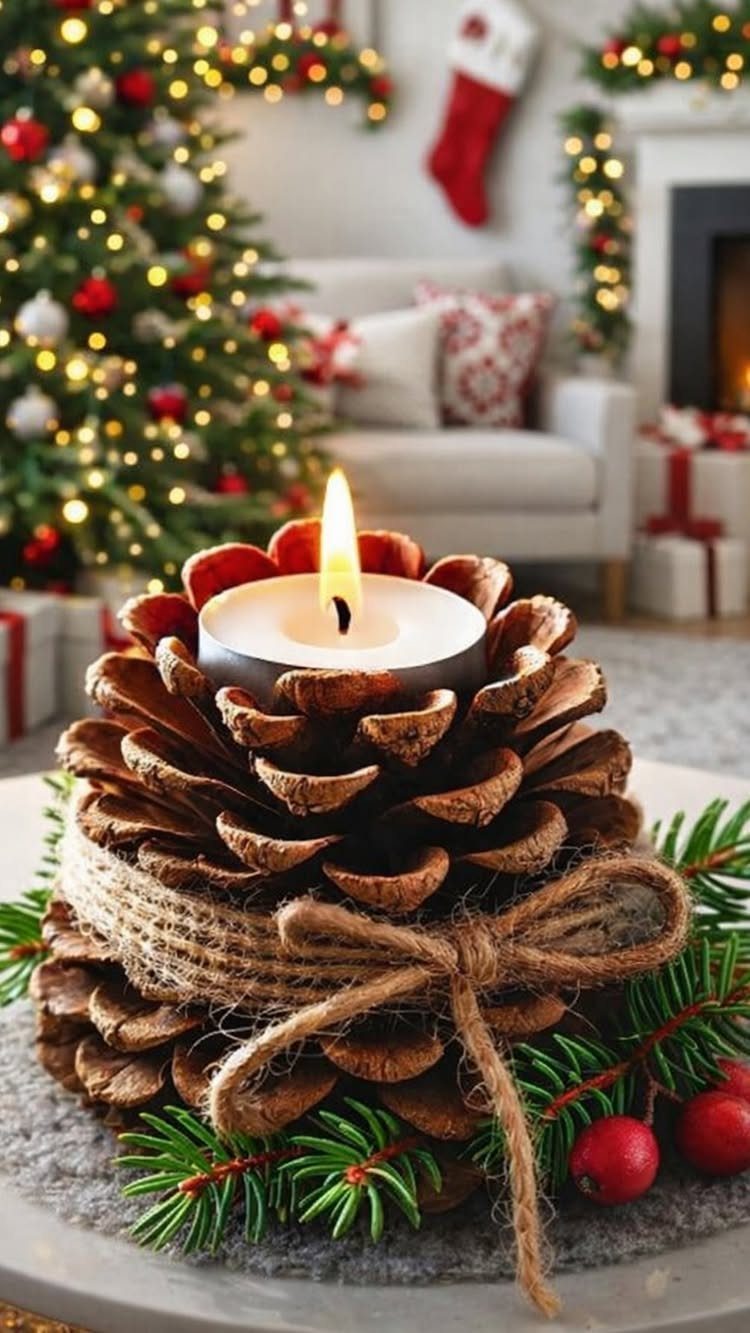
Pinecones already have a flat-bottomed, layered shape that cradles a tea light, so very little crafting is needed. Wrap twine around the middle and finish it with a small bow.
A pinecone sits steadier if you pick one with a wide base. Set a few along a mantel on a bed of greenery, and use flameless tea lights if the cones will sit near dry branches.
15. Crochet Christmas Figurines
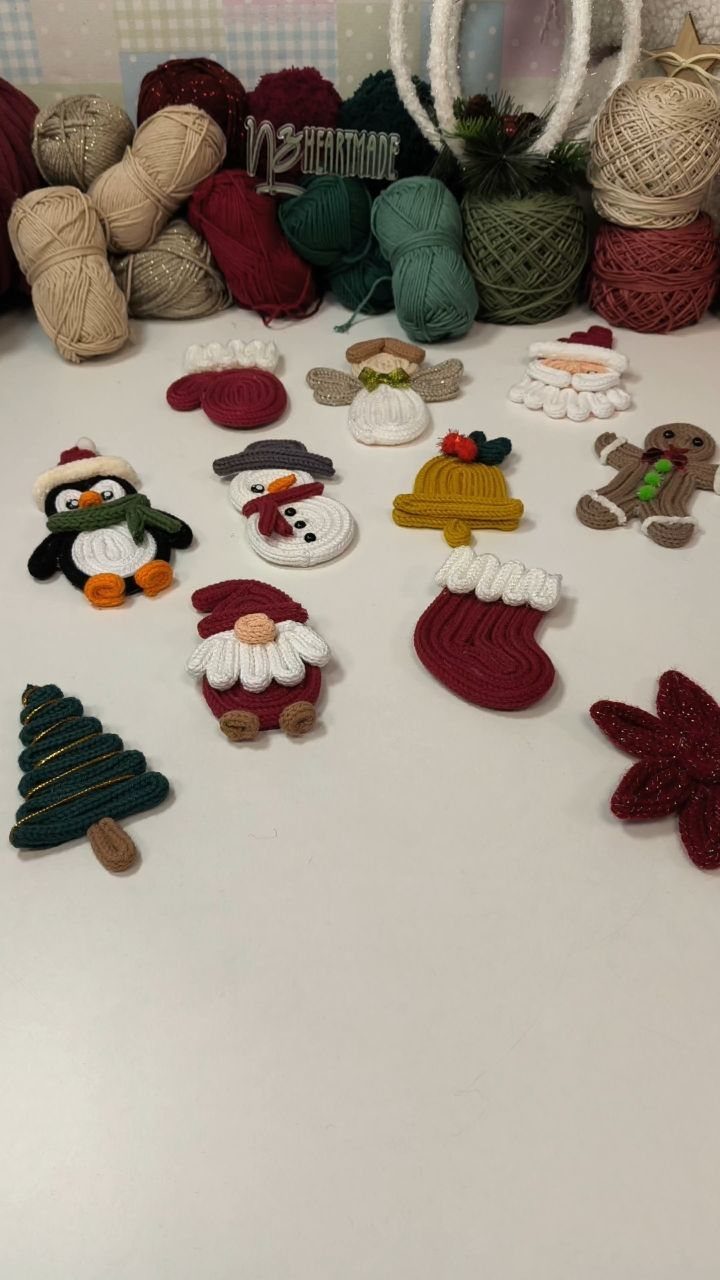
Crochet is slow work, but small figures like a penguin, a snowman and a gnome finish far faster than a blanket.
Each one is a few shapes stitched together and stuffed, so a single ball of yarn goes a long way.
Pick one figure first and see how long it takes you. Tight stitches keep the stuffing from showing, and I would make the gnome first, since its hat hides any uneven seams.
16. Candy Cane Striped Lamp Post
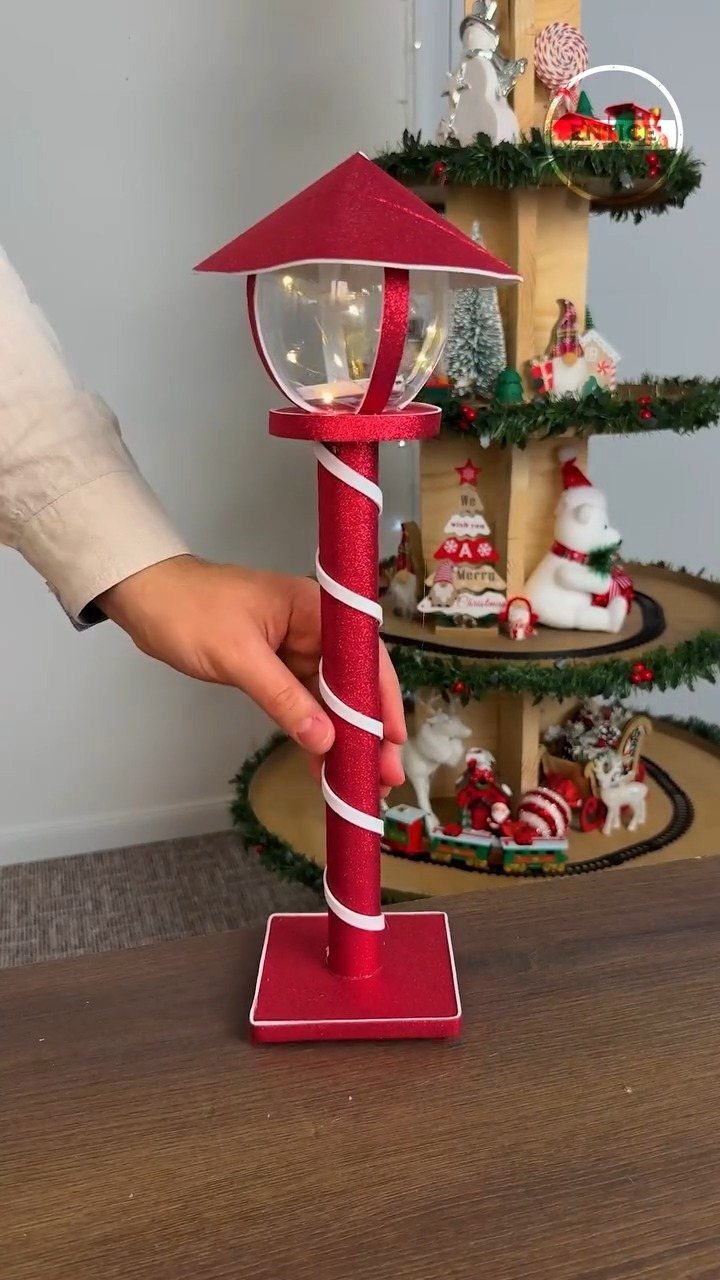
Red glitter and white stripes give a plain lamp post the look of a giant candy cane, and the small light on top makes it a night-time piece.
Paint the post red, wrap or paint white diagonal stripes, then brush on glue and sprinkle glitter over the red.
Keep the stripes evenly spaced so the pattern reads as candy cane. This is a good miniature for a tiered display, and it is an afternoon job.
17. Paper Doily Christmas Trees
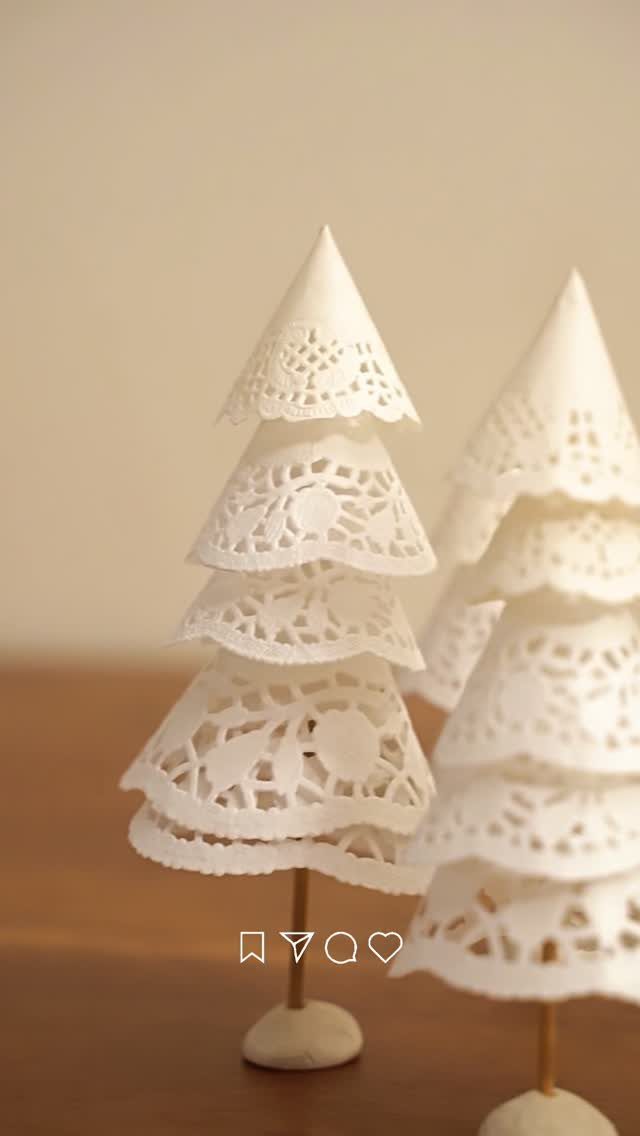
Graduated paper doilies, stacked from large to small, build a lacy white cone without any cutting. Glue each doily slightly above the last onto a cone, then mount the tree on a short wooden dowel stand.
White on white looks delicate, so keep your glue sparing; it shows through the cutouts. Paper doilies are cheap, and a pair of trees in 2 sizes would look best on a shelf.
18. Folded Paper Christmas Trees
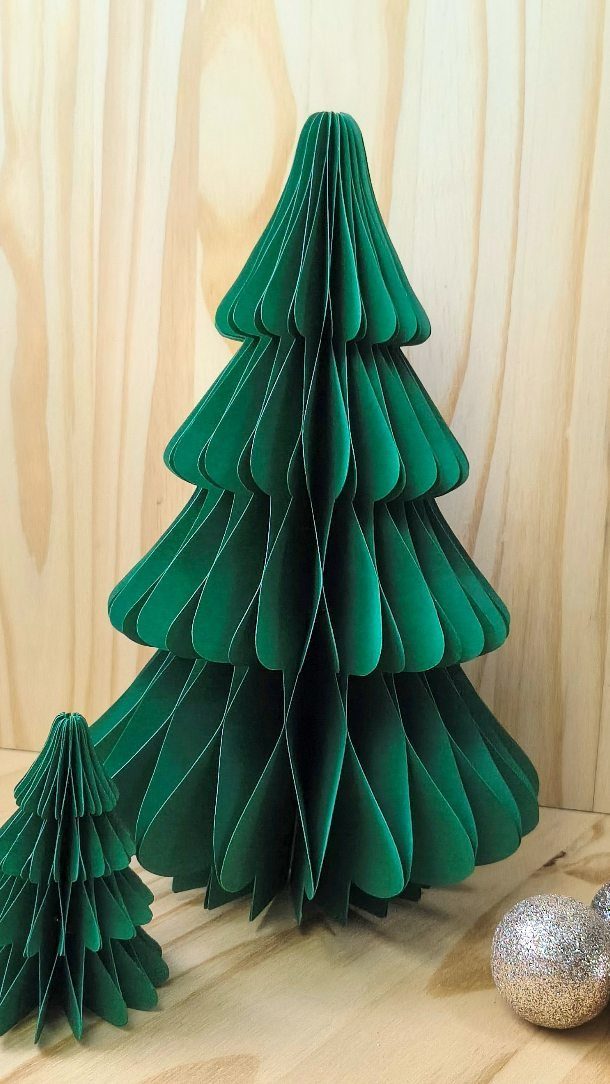
Accordion folds make flat green cardstock stand up as a tree. Fold the sheet back and forth in even pleats, then shape the folded strip into a cone and glue the edges together.
Score each fold with a ruler first so the pleats come out crisp.
Cut sheets to different lengths so you can make a tall tree and a short one; a grouping of 2 or 3 sizes looks better than a single tree. Cardstock is cheap, so a whole grove costs very little.
Budget-friendly Crafting
Paper, acrylic paint, scrap fabric, wood and a glue gun cover most adult Christmas crafts.
Mod Podge belongs on that short list too. Skip the cutting machines; a pair of scissors and a ruler do the work for these projects.
Dollar stores sell many of these supplies for a small amount, and a closet of leftover fabric or an old frame can stand in for new materials. Check what you already own before you buy anything.
A short list of tools keeps the cost down and lets you try several kinds of crafts without committing to one. If a material turns out to be a poor fit, you have lost very little.
Crafting for Christmas Parties
Decide first how guests will take part, because that choice shapes the craft you pick. A guided craft hour works because everyone starts together at a set time, and I can call out each step while the guests follow along.
A casual station stays open all evening, and guests drop by when they feel like it.
For a station, pick a craft simple enough that people can work it out by looking at it. Sort and label the materials, and leave a card with written instructions so you are not tied to the table.
The same prep helps a planned session too.
Either way, make a finished sample and set it where everyone can see it. Guests copy what they can see.
However, there’s one tradition that could encapsulate all those beloved activities if you wanted it to: a Christmas crafting party.
Personalization in Crafts
A name, a favorite color or a place that matters to someone turns a decoration into a keepsake. Pick one personal detail per piece and let it carry the idea; two or three compete.
Embroidery suits this well. A stitched map of a meaningful place makes a keepsake ornament that also works as a gift.
Wood veneer is another option for cards. Thin veneer cut into snowflake patterns looks more expensive than paper, and a family photo or greeting printed right on the wood lets the grain show through the ink.
That needs a laser cutter and a UV printer, so it suits makers who already have the gear.
Wood veneer this thin still holds its shape, so a card like this can sit on a shelf or mantel long after the party.
Frequently Asked Questions
What are some unique and easy Christmas crafts for adults?
Personalized pieces are a strong pick, such as a wreath of pleated paper stars or a felt tree with stitched white and gold details.
Both are cheap and need only basic tools. A name, a date or a favorite color painted or burned onto the piece is what makes it feel like a gift instead of a decoration.
What basic supplies do I need for adult Christmas crafts?
Most of these projects come down to paper, acrylic paint, scrap fabric, a few boards and a glue gun, plus a jar of Mod Podge for sealing and sticking.
Keeping the kit small holds the cost down, and it lets you test a few crafts before settling on a favorite.






